Welcome to Docpad on Netlify
``` Save the file as `/PATH/TO/docpad/src/render/index.html`. This will function as your homepage. Because `docpad run` is still running, you can browse your site as you work on it by visiting [http://localhost:9778](http://localhost:9778/). Like what you see? Great. Let’s move on! ## **Preparing for Deployment** If you are satisfied with your site, it’s time to get it ready to deploy. First, let’s make sure that Docpad and GitHub will play nicely together. Docpad generates your website to the `out` directory. We want to make sure that the `out` directory is not version controlled by Git, so we’ll create a `.gitignore` file in the root directory and add `out` to it: ``` $ echo "/out" >> .gitignore ``` Okay, you’re ready to go! Now it’s time to push it to your repo of choice. Directions for GitHub follow here. ## **Creating your Git Repo** Create a new repository on GitHub. To avoid errors, do not initialize the new repository with README, license, or gitignore files. You can add these files after your project has been pushed to GitHub. Open Terminal (for Mac users) or the command prompt (for Windows and Linux users). For our purposes, let’s call your new repo “docpad”. Make sure your current directory is that of your local Docpad project. ``` $ cd ~/PATH/TO/docpad/ ``` Initialize the local directory as a Git repository. ``` $ git init ``` Add the files in your new local repository. This stages them for the first commit. ``` $ git add . ``` Commit the files that you’ve staged in your local repository. ``` $ git commit -m 'First commit' ``` At the top of your GitHub repository’s Quick Setup page, click the clipboard icon to copy the remote repository URL. In Terminal, add the URL for the remote repository where your local repository will be pushed. ``` git remote add origin Git_Repository_URL ``` Verify your URL ``` git remote -v ``` Now, it’s time to push the changes in your local repository to GitHub. ``` git push origin master ``` Now that your assets are up and running on GitHub, let’s connect them to Netlify. ## **Connecting to Netlify** ### Step 1: Add Your New Site  Creating a new site on Netlify is simple. Once you’ve logged in, you’ll be taken to [https://app.netlify.com/sites](https://app.netlify.com/sites). If you’re just starting out, there’s only one option. ### Step 2: Link to Your GitHub Clicking “New Site” brings you to this screen:  When you push to GitHub, Netlify does all the work. No more manual deploying of updates or changes! Since your assets are hosted on GitHub, we’ll need to link Netlify to GitHub. Click “Link to GitHub”. ### Step 3: Authorize Netlify  It’s time to allow Netlify and GitHub to talk to each other. Clicking the “Authorize Application” button will do just that. Like it says in the image below, Netlify doesn’t store your GitHub access token on our servers. If you’d like to know more about the permissions Netlify requests and why we need them, you can visit our [documentation on Git provider permissions](https://docs.netlify.com/configure-builds/repo-permissions-linking/). ### Step 4: Choose Your Repo 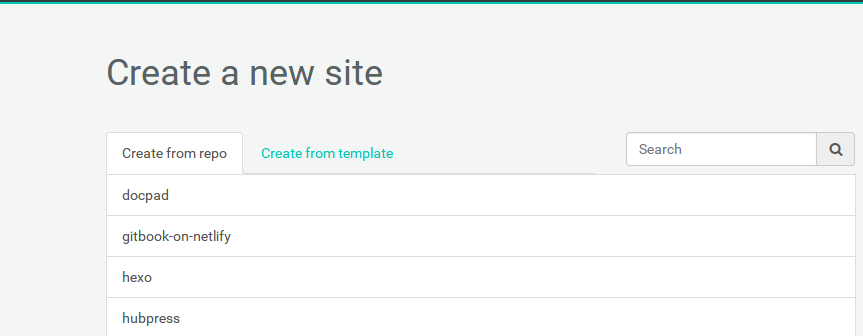 Now that you’ve connected Netlify and GitHub, you can see a list of your Git repos. There’s the “docpad” repo we just pushed to GitHub. Let’s select it. ### Step 5: Configure Your Settings 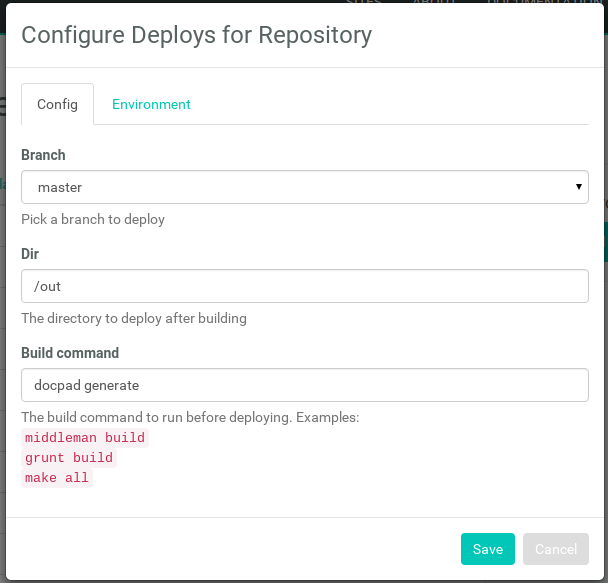 Here you can configure your options. Netlify has already propagated the settings for you. Simple, huh? For the purposes of this tutorial, there’s nothing you need to change, so just click “Save”. ### Step 6: Build Your Site  Now it’s time to sit back and relax. Go grab something cold to drink, scratch the dog behind the ears, or just get up and walk around (you’ve probably been in front of the computer for too long today, right?). Netlify will do the rest, and you can watch the progress. ### Step 7: Done 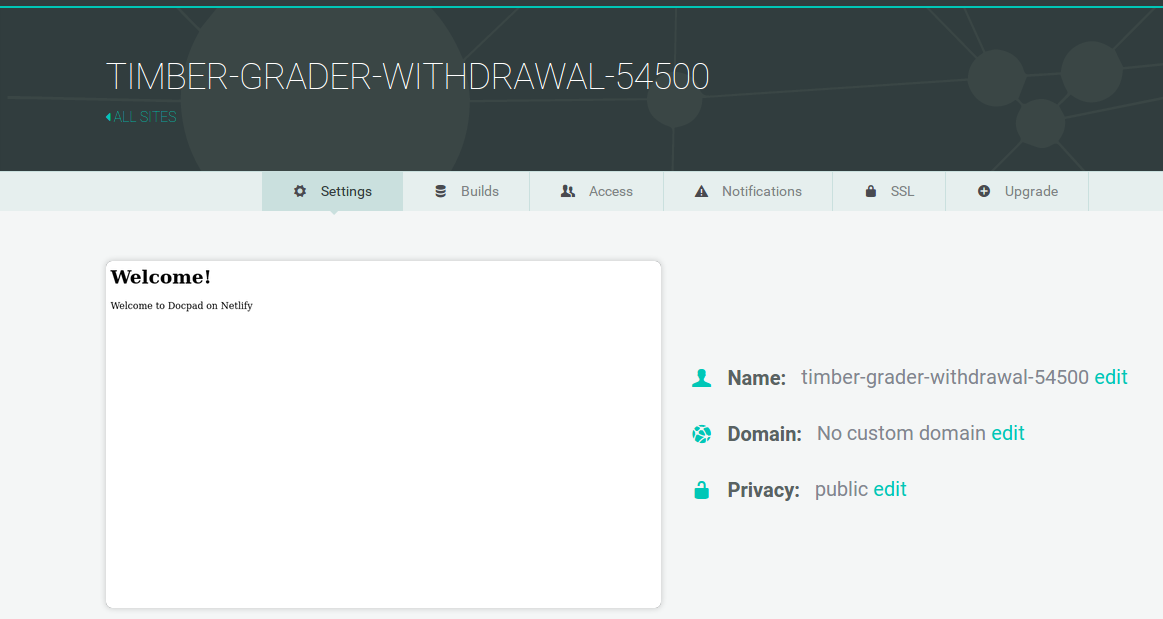 Wait, you thought there was going to be more? Nope! Netlify has done it all for you, including giving your site a temporary name. Let’s make it look a little prettier: 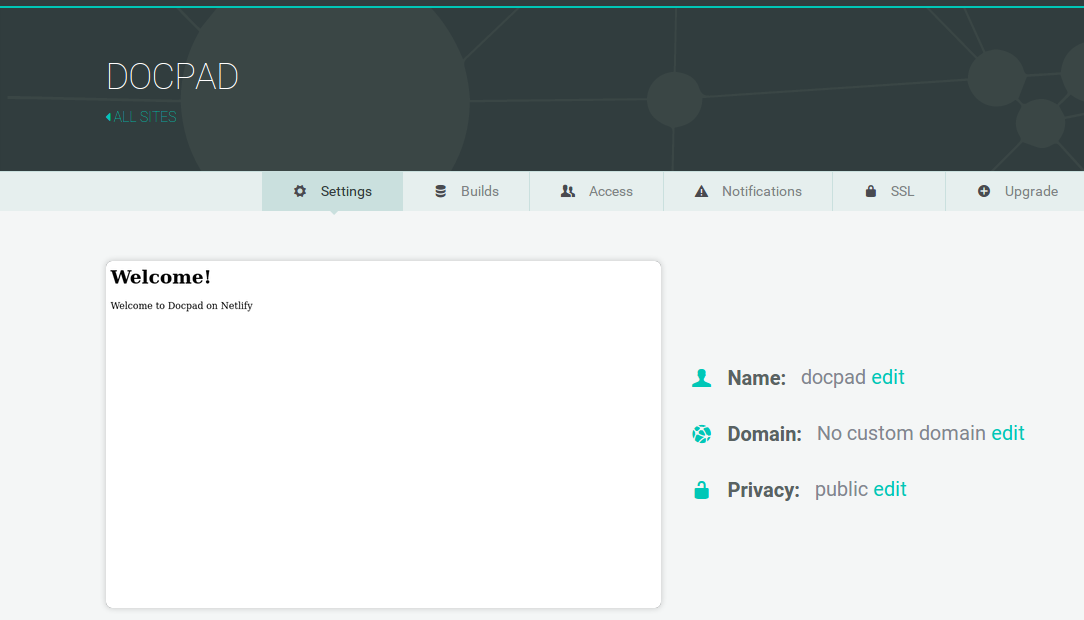 There, that’s better. Now you can add your custom domain, and your site will be live for your adoring public to view. Congratulations, and thanks for using Netlify! ### Share - [X (fka Twitter)](https://twitter.com/intent/tweet?text=A Step-by-Step Guide: Docpad on Netlify&url=https://www.netlify.com/blog/2015/12/08/a-step-by-step-guide-docpad-on-netlify//) - [LinkedIn](https://www.linkedin.com/shareArticle?mini=true&url=https%3A%2F%2Fwww.netlify.com%2Fblog%2F2015%2F12%2F08%2Fa-step-by-step-guide-docpad-on-netlify%2F%2F) - [Facebook](https://www.facebook.com/sharer.php?u=https://www.netlify.com/blog/2015/12/08/a-step-by-step-guide-docpad-on-netlify//) - [Bluesky](https://bsky.app/intent/compose?text=A Step-by-Step Guide: Docpad on Netlify+https://www.netlify.com/blog/2015/12/08/a-step-by-step-guide-docpad-on-netlify//) * * * ### Tags - [docpad](/blog/tags/docpad/) - [NodeJS](/blog/tags/nodejs/) - [Tutorial](/blog/tags/tutorial/) ## Keep reading  Guides & Tutorials May 15, 2026 [ ### How to build a real-time AI chatbot in minutes with Netlify Agent Runners (no backend) ](/blog/how-to-build-a-real-time-ai-chatbot-in-minutes-with-netlify-agent-runners-no-backend) -  Nahrin Jalal  Guides & Tutorials May 15, 2026 [ ### Tracking AI search traffic: how to use Netlify Log Drains to maximize AEO ](/blog/tracking-ai-search-traffic) -  Nahrin Jalal ## Recent posts News & Announcements June 25, 2026 [ ### Netlify Functions, designed for Agent Experience ](/blog/netlify-functions-designed-for-agent-experience) -  Eduardo Bouças News & Announcements June 24, 2026 [ ### How we measure Netlify’s Agent Experience ](/blog/how-we-measure-netlify-agent-experience) -  Sean Roberts Guides & Tutorials May 15, 2026 [ ### How to build a real-time AI chatbot in minutes with Netlify Agent Runners (no backend) ](/blog/how-to-build-a-real-time-ai-chatbot-in-minutes-with-netlify-agent-runners-no-backend) -  Nahrin Jalal  ### How do the best dev and marketing teams work together? [Access the report](https://www.netlify.com/reports/2024-leadership-trend-report/access/)