Guides & Tutorials
Coding Modern Websites with the JAMstack: Part 2
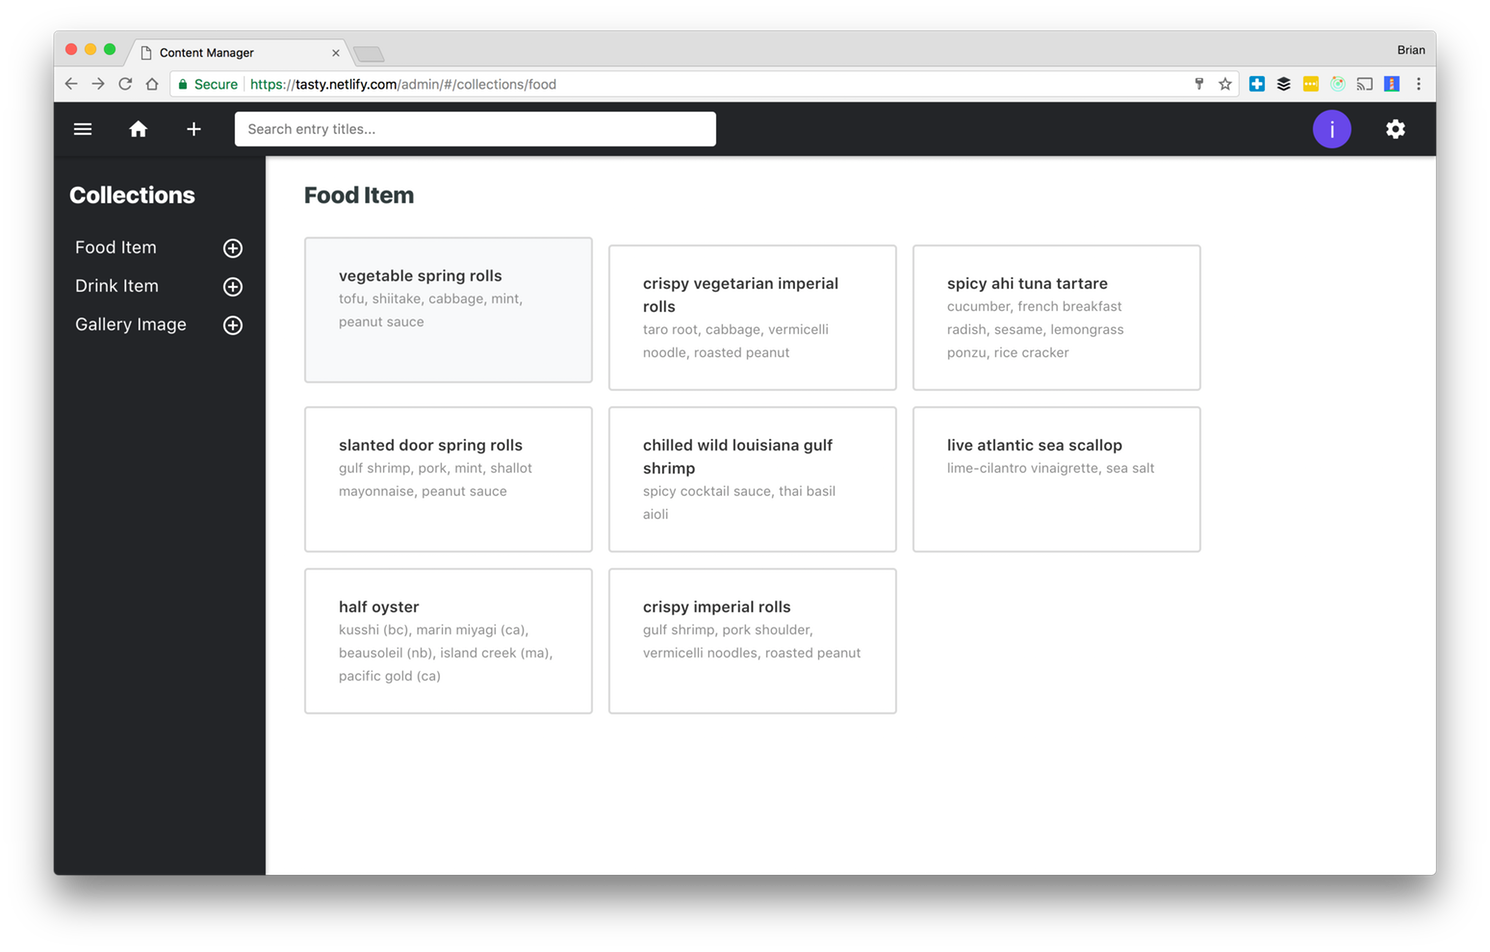
In Part 1 of this tutorial, we built a functional restaurant site with a menu. Adding the food menu was straightforward, but making continual updates to the menu will be tedious, as you might have discovered first hand.
Think of the Head Chef of Tasty Licks or anyone else managing the menu needing to make updates. With the current state of the project all changes have to go through a web developer which is not ideal unless you happen to already be the restaurant manager — if that is the case, can I get the family and friends discount?
Adding a CMS
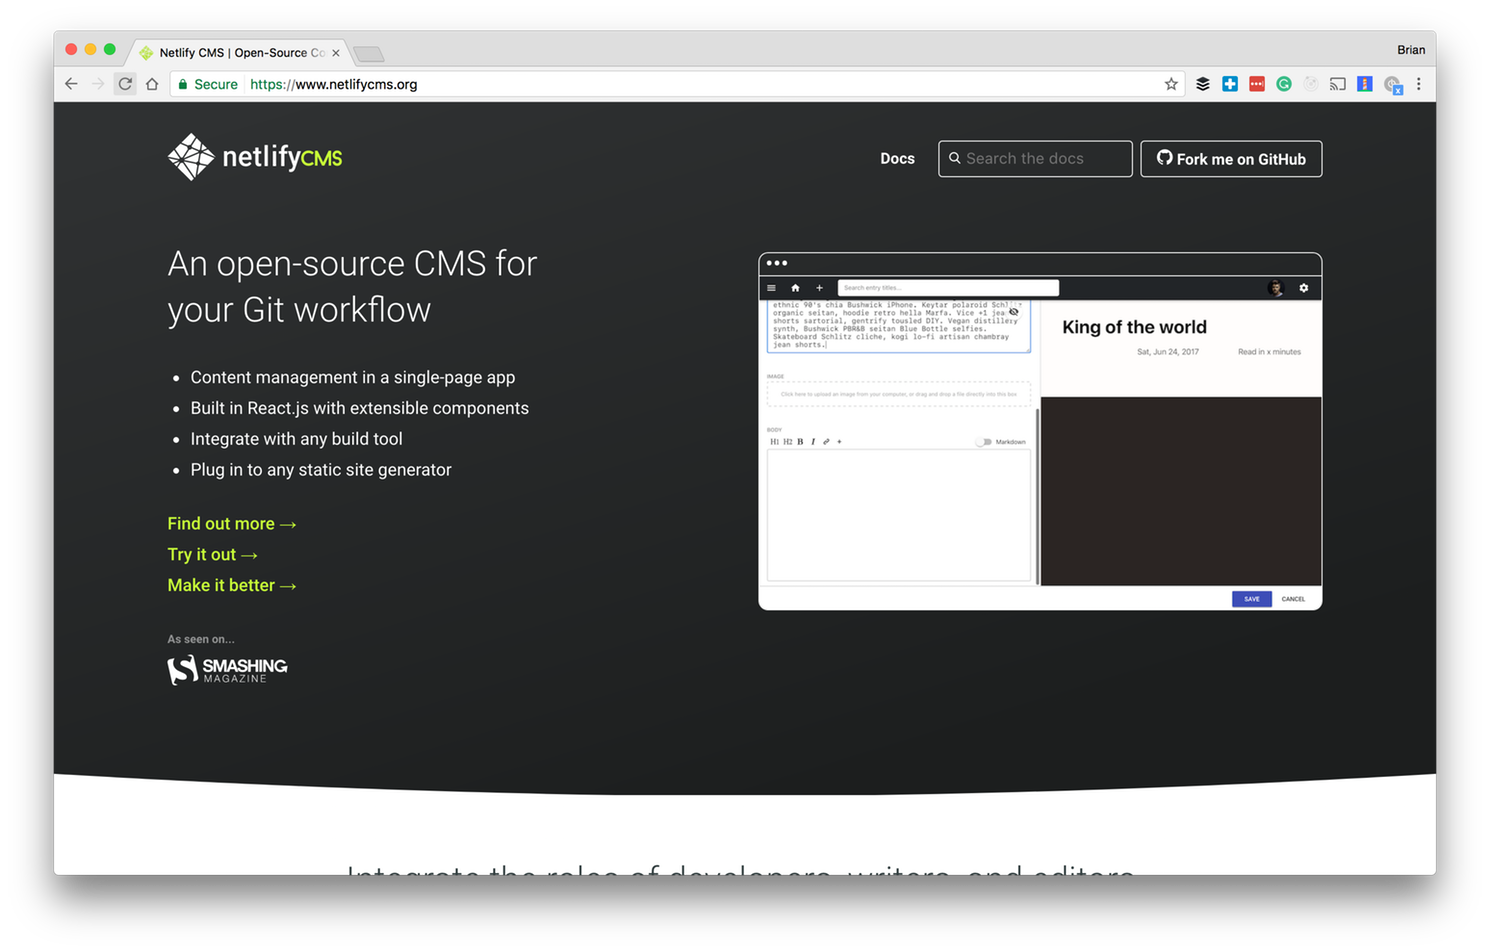
There are a lot of solutions to handling content management. Since we’re already on the working with Netlify, I am going to use the open source project, Netlify CMS, a headless CMS that will help any content contributor easily manage menu updates.
The entirety of the Netlify CMS lives in the static folder of our repository holding the files necessary to host the admin UI. The admin interface is a single-page app with the entry point stored in a static /admin folder you will need to add to the root of your static site. Go ahead and create the admin folder in your site/static folder. The static folder gets included in your Hugo build and placed in your dist folder. Within that structure, you will need to add an index.html with the content below.
<!doctype html>
<html>
<head>
  <meta charset="utf-8" />
  <meta name="viewport" content="width=device-width, initial-scale=1.0" />
  <title>Content Manager</title>

  <link rel="stylesheet" href="https://unpkg.com/netlify-cms@~0.5.0/dist/cms.css" />

</head>
<body>
  <script src="https://unpkg.com/netlify-cms@~0.5.0/dist/cms.js"></script>
</body>
</html>
All configuration is handled in a single config.yml file, also stored in the /admin folder. A simple version might look like this:
backend:
  name: git-gateway

media_folder: "img/uploads" # Folder where user uploaded files should go

collections: # A list of collections the CMS should be able to edit
  - name: "post" # Used in routes, ie.: /admin/collections/:slug/edit
    label: "Post" # Used in the UI, ie.: "New Post"
    folder: "_posts" # The path to the folder where the documents are stored
    create: true # Allow users to create new documents in this collection
    fields: # The fields each document in this collection have
      - {label: "Title", name: "title", widget: "string", tagname: "h1"}
      - {label: "Body", name: "body", widget: "markdown"}
      - {label: "Foo", name: "foo", widget: "foo"}
      - {label: "Publish Date", name: "date", widget: "datetime"}
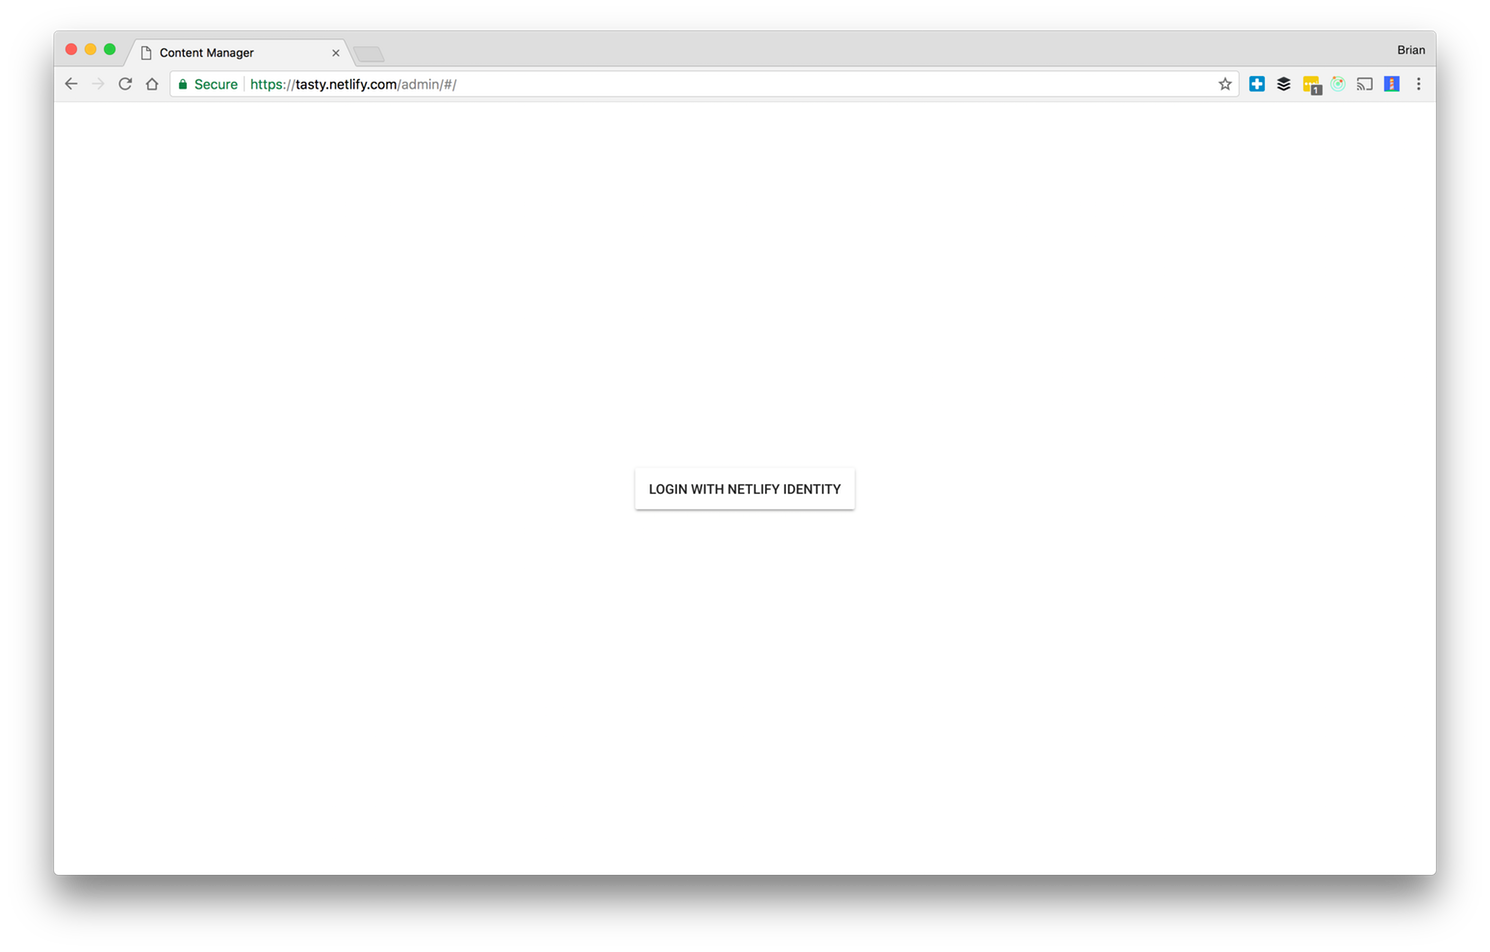
Commit and push your changes to your GitHub repo to trigger a deploy on Netlify. You should now be able to see the CMS login on your live restaurant site when you visit your-site.netlify.com/admin.
If you attempt to log in you will be presented with an error. In the next paragraph, we will set up the basic authentication needed to make the CMS work.
Authentication with the CMS
The Netlify CMS will rely on the GitHub or GitLab API for managing files, so you’ll need to have your site stored in a GitHub or GitLab repo. (If you’re interested in using a different backend, you can file a feature request, or help us add it.)
To connect to the repo and make changes, the app needs to authenticate with the GitHub API. You can roll your own service for doing this, but we’re going to use Netlify’s Identity service in this example.
Our template already includes the identity service turned on and you can confirm that by visiting your site dashboard and the identity tab. We now need to include it in our template, which we can do by adding the script to your HTML head.
<script src="https://identity.netlify.com/v1/netlify-identity-widget.js"></script>
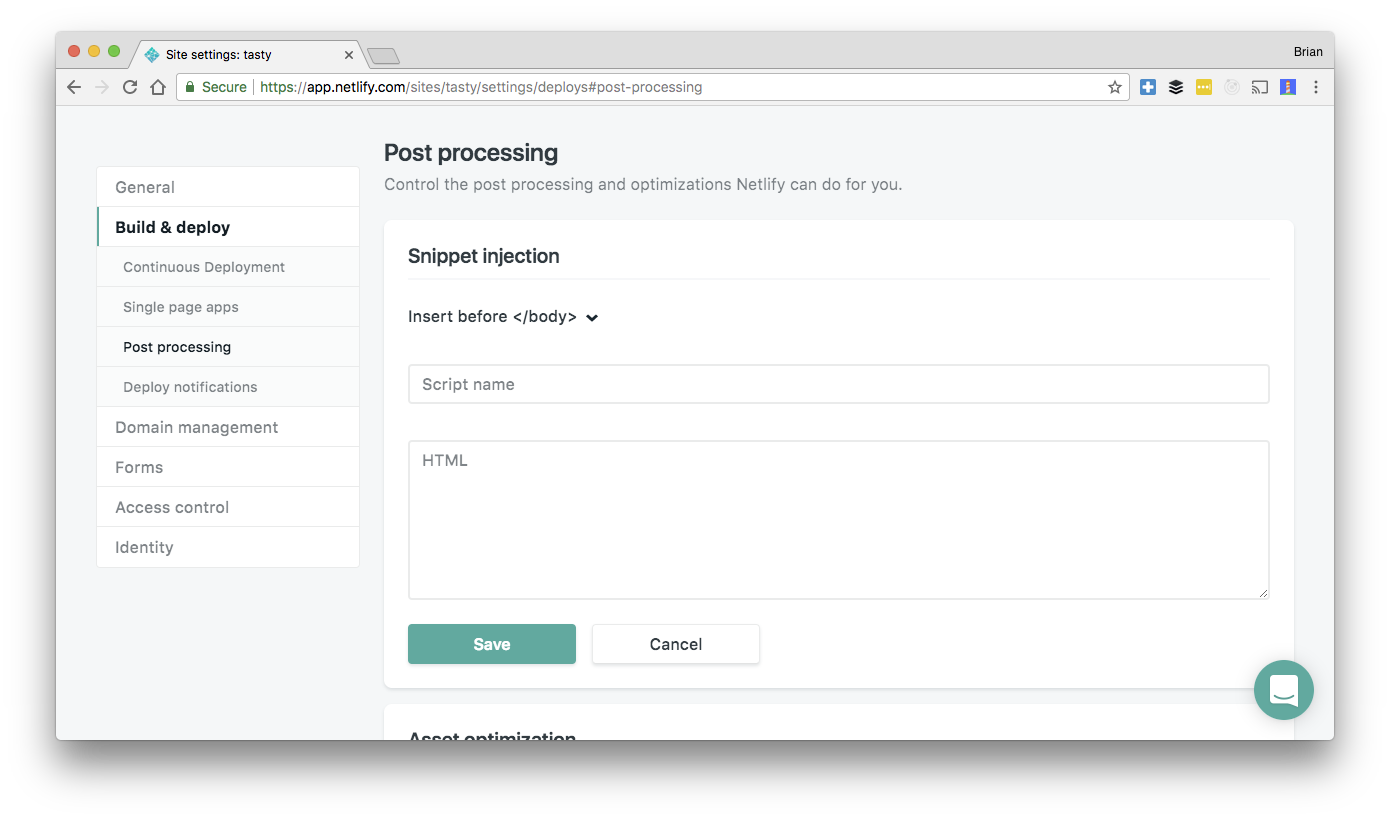
You can add this to your sites index.html, but my recommendation is to add it to the site dashboard, using Netlify feature to add snippet injection. You find the snippet injection form in your site settings under the build & deploys menu.
Once that script is populated and connected you will need to trigger a new deploy to update your live Netlify site with the Identity widget added.
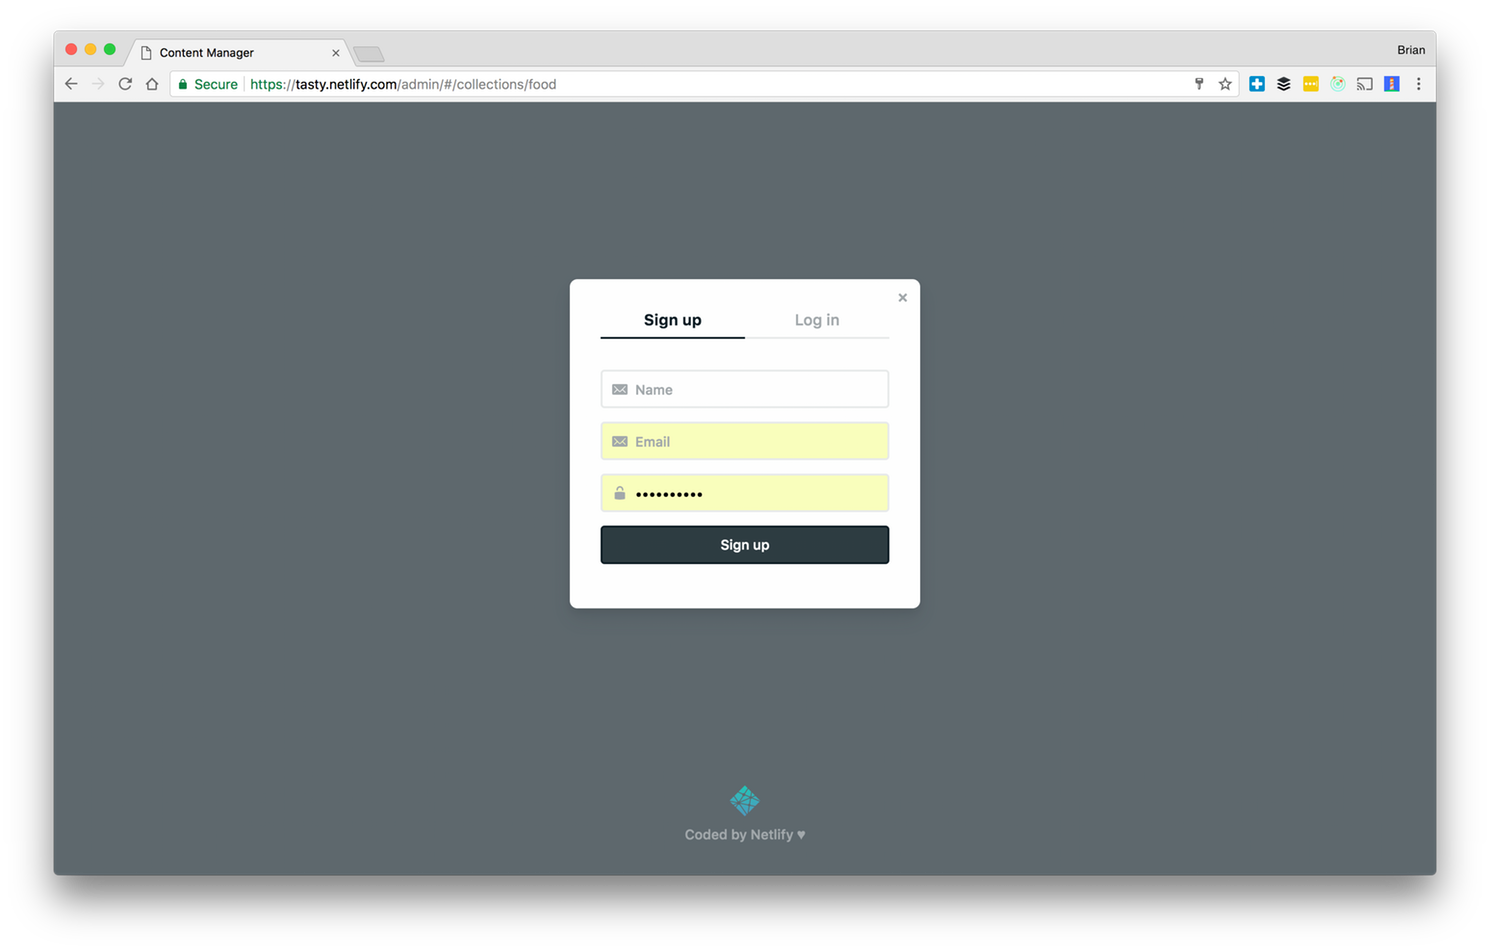
The Identity widget will be available in preview and production versions of your site when you click login. Within the widget, you can sign up for an account and you can leverage the Identity dashboard we saw above to manage users and send invites.
Please go ahead and create an account to login with, be sure to confirm your account using the email that is sent after sign up.
You will now have the ability view your existing data as well as add new items to your restaurant menu when you log in.
The connection to GitHub is made through Netlify’s open source Git Gateway feature, which grants access to only authenticated users through Netlify Identity service. Now that is a powerful combo!
Add a drink menu
Having the CMS in place now gives us the ability save content while in the production admin interface. All changes through the CMS still create commits to the repository, it just abstracts them through the use of a headless CMS. So now our Head Chef can focus more on brewing flavors and less on upgrading Homebrew.
We are now going to add a Drink menu to our site using the same steps as our Food menu, but this time, we’ll avoid manually creating the content files.
Like we did before, we will need to add a new route to our config.toml to expose that route.
<!-- config.toml -->
[[menu.main]]
   name = "Drinks"
   url  = "/drinks"
   weight = 3
You can go to the admin’s config.yml add a new collection called Drinks.
backend:
  name: git-gateway

media_folder: "src/img/gallery" # Folder where user uploaded files should go

collections:
  - name: food
    label: "Food Item" # Used in the UI, ie.: "New Post"
    folder: "site/content/food" # The path to the folder where the documents are stored
    create: true # Allow users to create new documents in this collection
    fields: # The fields each document in this collection have
      - {label: "Name of Item", name: "title", widget: "string"}
      - {label: "Supported Meals", name: "categories", widget: "list", default: ["lunch", "dinner"]}
      - {label: "Ingredients/Description", name: "description", widget: "text"}
      - {label: "Type of Food", name: "type", widget: "string", default: "raw bar"}
      - {label: "Price", name: "price", widget: "string"}
  - name: drinks
    label: "Drink Item" # Used in the UI, ie.: "New Post"
    folder: "site/content/drinks" # The path to the folder where the documents are stored
    create: true # Allow users to create new documents in this collection
    fields: # The fields each document in this collection have
      - {label: "Name of Drink", name: "title", widget: "string"}
      - {label: "Drink Marker", name: "categories", widget: "hidden", default: ["drinks"]}
      - {label: "Ingredients/Description", name: "description", widget: "text"}
      - {label: "Type of Drink", name: "type", widget: "string", default: "beer"}
      - {label: "Price", name: "price", widget: "string"}
Once you have done the above commit these changes push to GitHub so can you can now add the drinks to your menu.
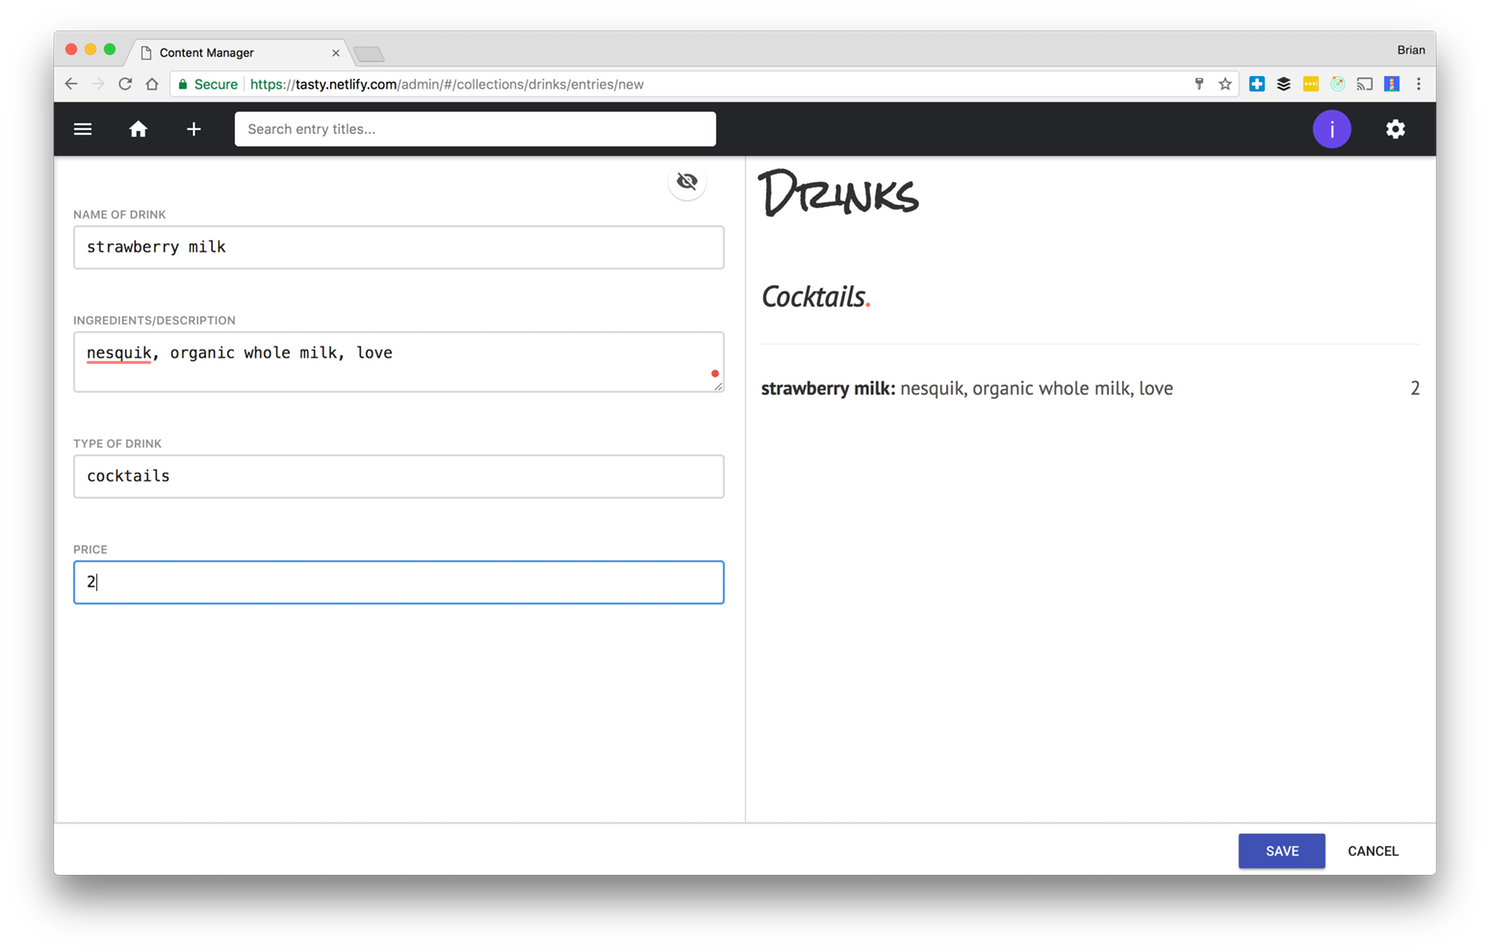
Go ahead and add a few more drinks to your menu, but please use moderation.
Adding an image gallery
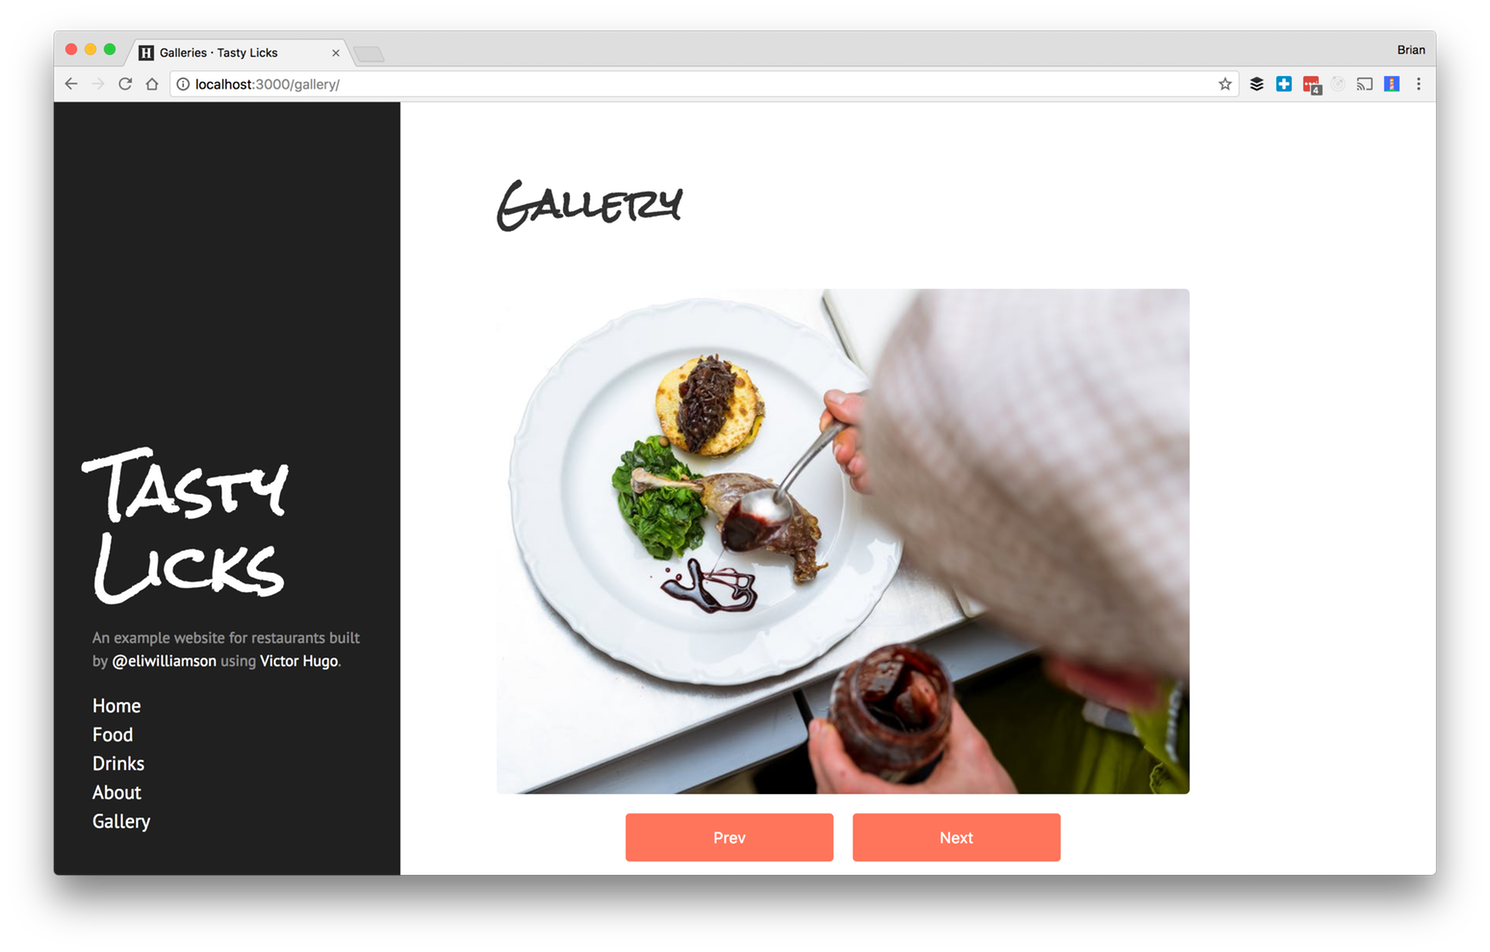
When looking for a restaurant, it is nice to see pictures of the food as well as what the place looks like to get a sense of quality. Having images somewhere on the page is a good idea for business.
Adding images can be just as simple with an integrated CMS, let’s start by reading some code.
Within the layout section’s list.html, we already have the HTML to display our image gallery.
<!-- Image Gallery -->
...
  {{ else if eq .Section "gallery" }}
    <div class="gallery-carousel">
      {{ range where .Pages "Section" "gallery" }}
        <div><img src="{{ .Params.image }}"/></div>
      {{ end }}
    </div>
    <div class="buttons">
      <button class="prev half-button">Prev</button>
      <button class="next half-button">Next</button>
    </div>
  {{ end }}
Similar to Food and Drinks, we will need to add an image's type to our content section as well as the config.toml.
<!-- config.toml -->
[[menu.main]]
    name = "Gallery"
    url  = "/gallery"
    weight = 4
Note: The carousel is powered by a light-weight open-source Carousel, called Siema. Detailed in the src/js/app.js.
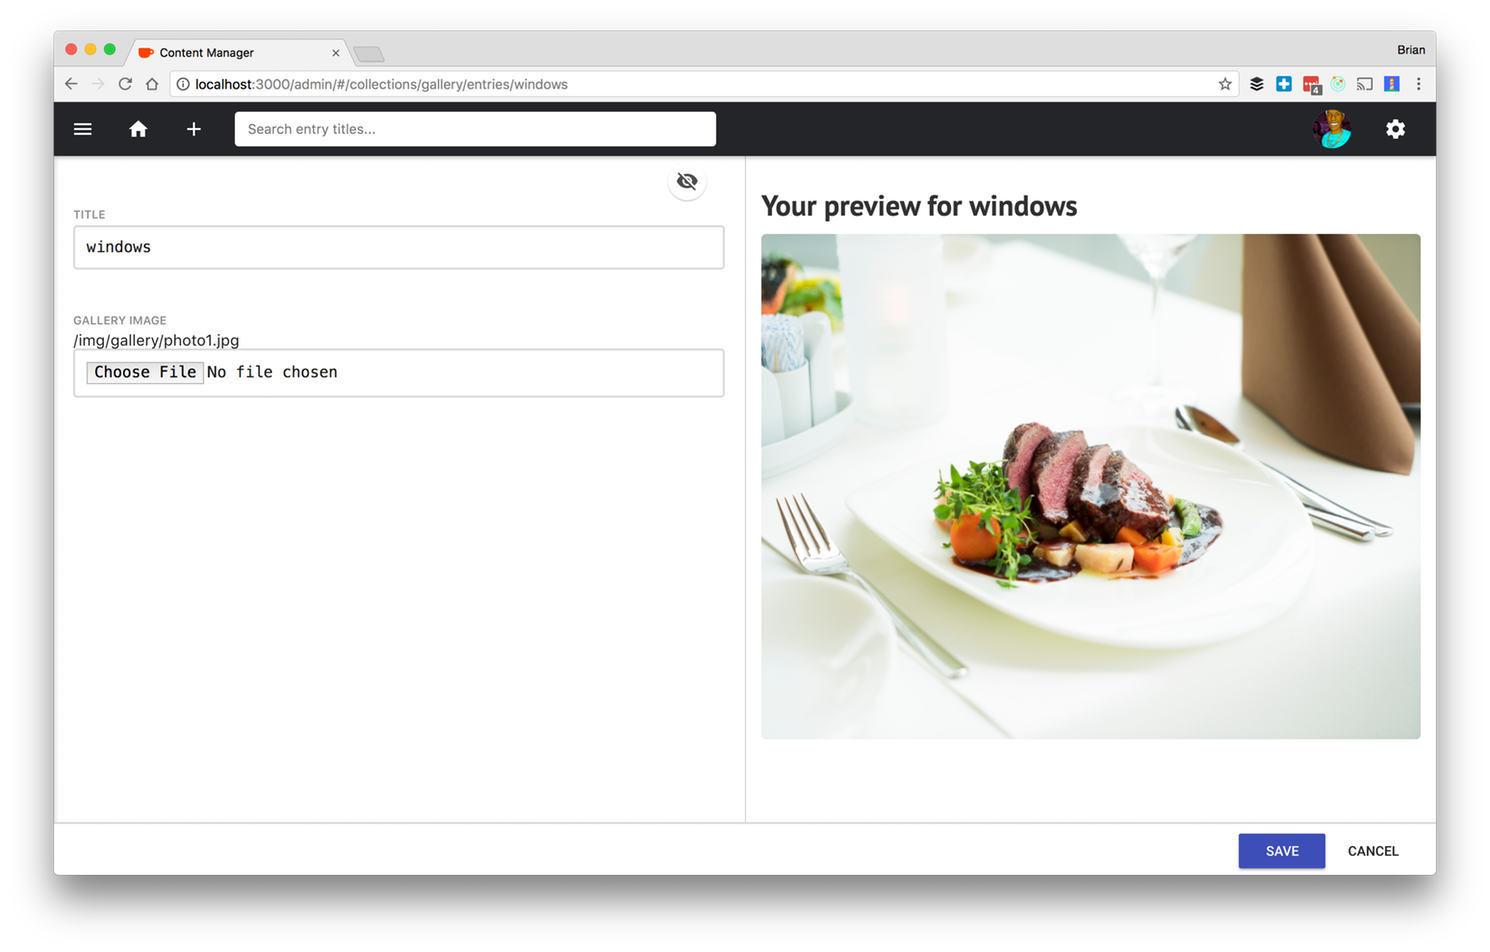
Add the following fields to the CMS to make the gallery content available.
<--! site/static/admin/config.yml -->
media_folder: "src/img/gallery" # Folder where user uploaded files should go
...
  - name: gallery
    label: "Gallery Image" # Used in the UI, ie.: "New Post"
    folder: "site/content/gallery" # The path to the folder where the documents are stored
    create: true # Allow users to create new documents in this collection
    fields: # The fields each document in this collection have
      - {label: "Title", name: "title", widget: "string"}
      - {label: "Gallery Image", name: "image", widget: "image"}
You can change the widget types for CMS fields, which we are doing with the gallery. We are using the image widget type, which enables us to add images of course, but it also looks for the media folder you identified in your CMS config and places any uploaded images there.
There are a number of other widgets that exist in the CMS and there are options to create your own as well. You can find out more about developing your own widget type in the Netlify CMS documentation.
Now that the CMS is connected you can freely upload images using the CMS. Remember each time you save the CMS, it will trigger a new deploy through Netlify and take a few moments to update live.
Our site is not done, we have one more feature to add and that is allowing visitors to submit reservations. See you in Part 3.


