---
title: "Use a Custom Strapi Backend to Build a Jamstack App"
description: "Have a custom backend or API? You can build a Jamstack app with that! Learn how it works in this step-by-step tutorial."
source: "https://www.netlify.com/blog/2020/06/24/use-a-custom-strapi-back-end-to-build-a-jamstack-app/"
last_updated: "2026-07-10T16:01:21.000Z"
---
Can Jamstack apps use custom backends to create dynamic app experiences? Absolutely!
This is the conclusion of a [two-part tutorial series](https://www.netlify.com/blog/tags/custom-strapi-back-end/?utm_source=blog&utm_medium=strapi-custom-backend-jl&utm_campaign=devex) teaching you how to build a complete custom backend to house our custom data, then create a Jamstack app to both read and write to that backend.
In [part 1](/blog/2020/06/23/create-a-custom-back-end-for-jamstack-apps-with-strapi/?utm_source=blog&utm_medium=strapi-custom-backend-jl&utm_campaign=devex), you used [Strapi](https://strapi.io/) to build a custom API to store corgi data, pets, and boops.
In part 2 (this article), you’ll build a Jamstack app that uses the custom backend to:
- asynchronously load data from the backend
- update the backend when users click a button
**By the end of this series, you’ll create a fully functional frontend and backend for a Jamstack app deployed to production!**
## tl;dr
In this part of the tutorial, you will:
- write [serverless functions with Netlify Functions](/products/functions/?utm_source=blog&utm_medium=strapi-custom-backend-jl&utm_campaign=devex) to read and write data to Strapi
- build a frontend with HTML and vanilla JavaScript to call the serverless functions and display data from the backend
- deploy the frontend to production with [Netlify](/products/build/?utm_source=blog&utm_medium=strapi-custom-backend-jl&utm_campaign=devex)
**If you’d like to skip straight to the code, you can [see the app demo](https://strapi-corgi-pets.netlify.app/) or [review the source code on GitHub](https://github.com/learnwithjason/strapi-corgi-pets).**
## Create a Jamstack frontend From a GitHub Template
Now that we have a backend ready, we can build out our front-end! To give the frontend a ready-made layout so you have a nice-looking app without having to write the boilerplate, this tutorial will [use the _Learn With Jason_ demo starter](https://github.com/learnwithjason/demo-base) as a base.
### Create a new frontend repository.
Visit [https://github.com/learnwithjason/demo-base](https://github.com/learnwithjason/demo-base) and click the “Use This Template” button at the top-right of the page, then choose a name for your new repo and click “Create repository from template”.
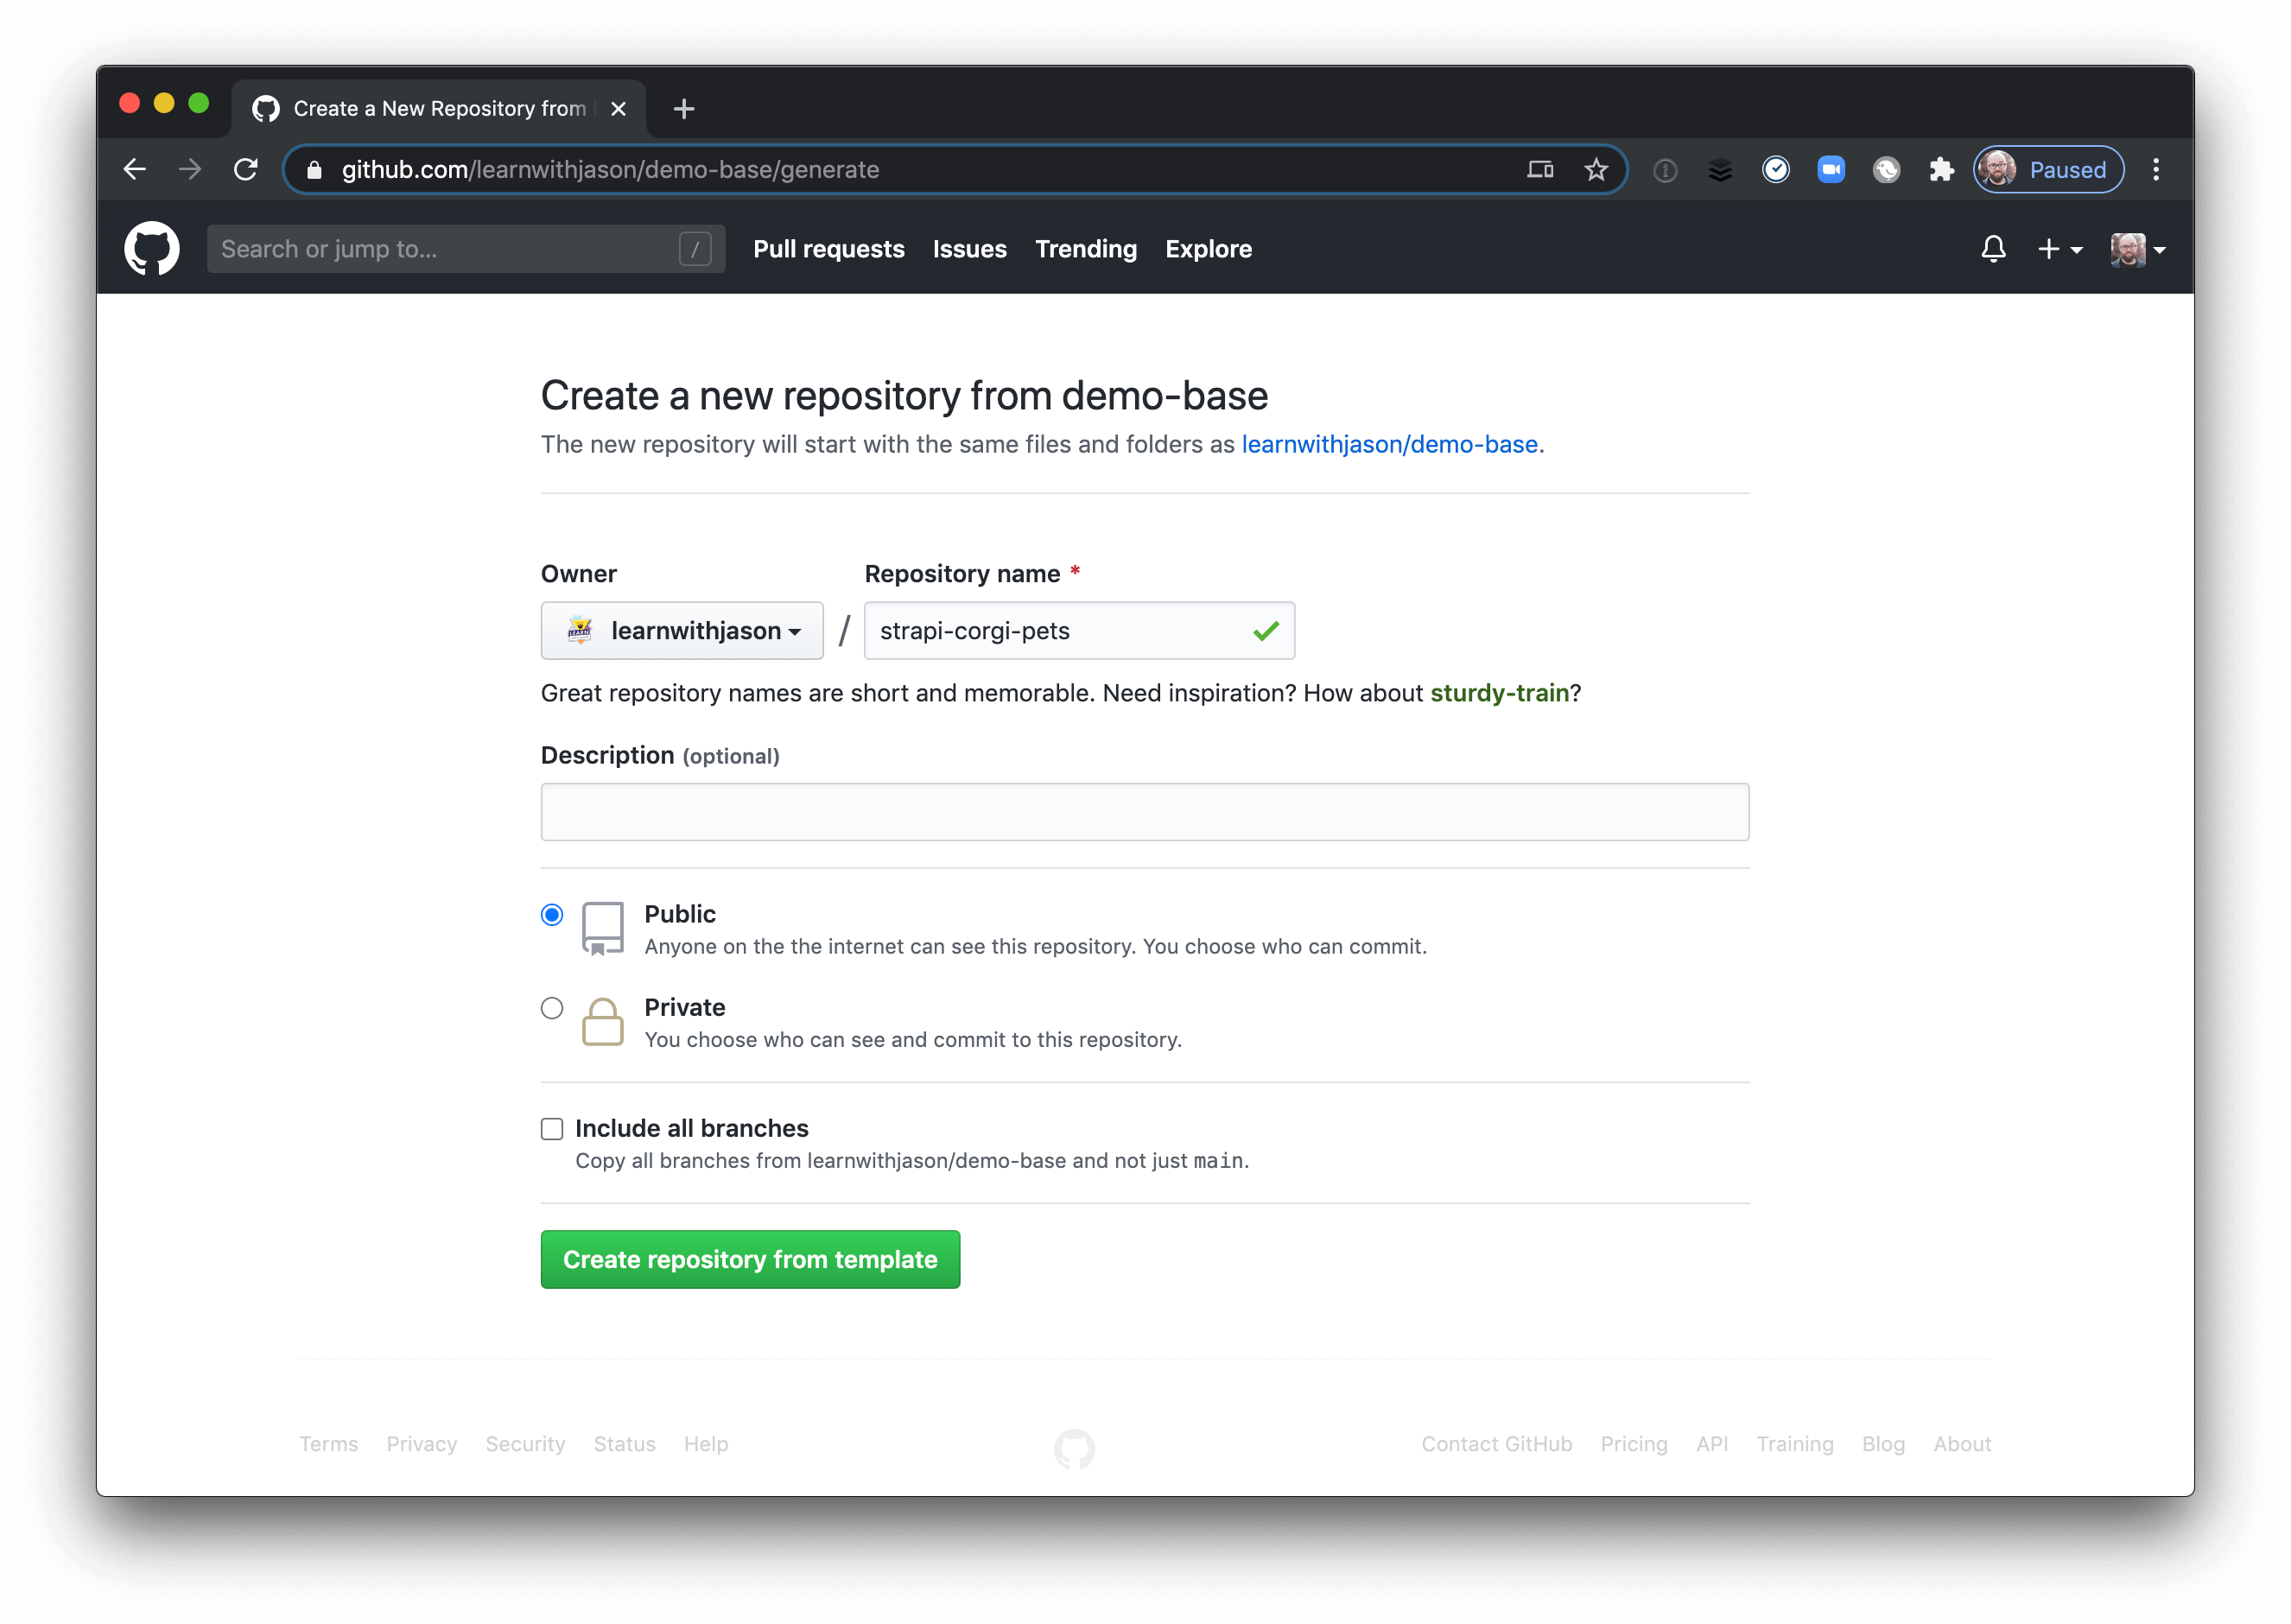
> **Heads up!** If you don’t want to use the starter, that’s totally fine! The demo code will be unchanged — it just won’t look as freakin’ sweet as the demo base does. 😎
### Clone the new repo to your computer.
To start writing code, click the “clone or download” button and copy the URL to your clipboard.
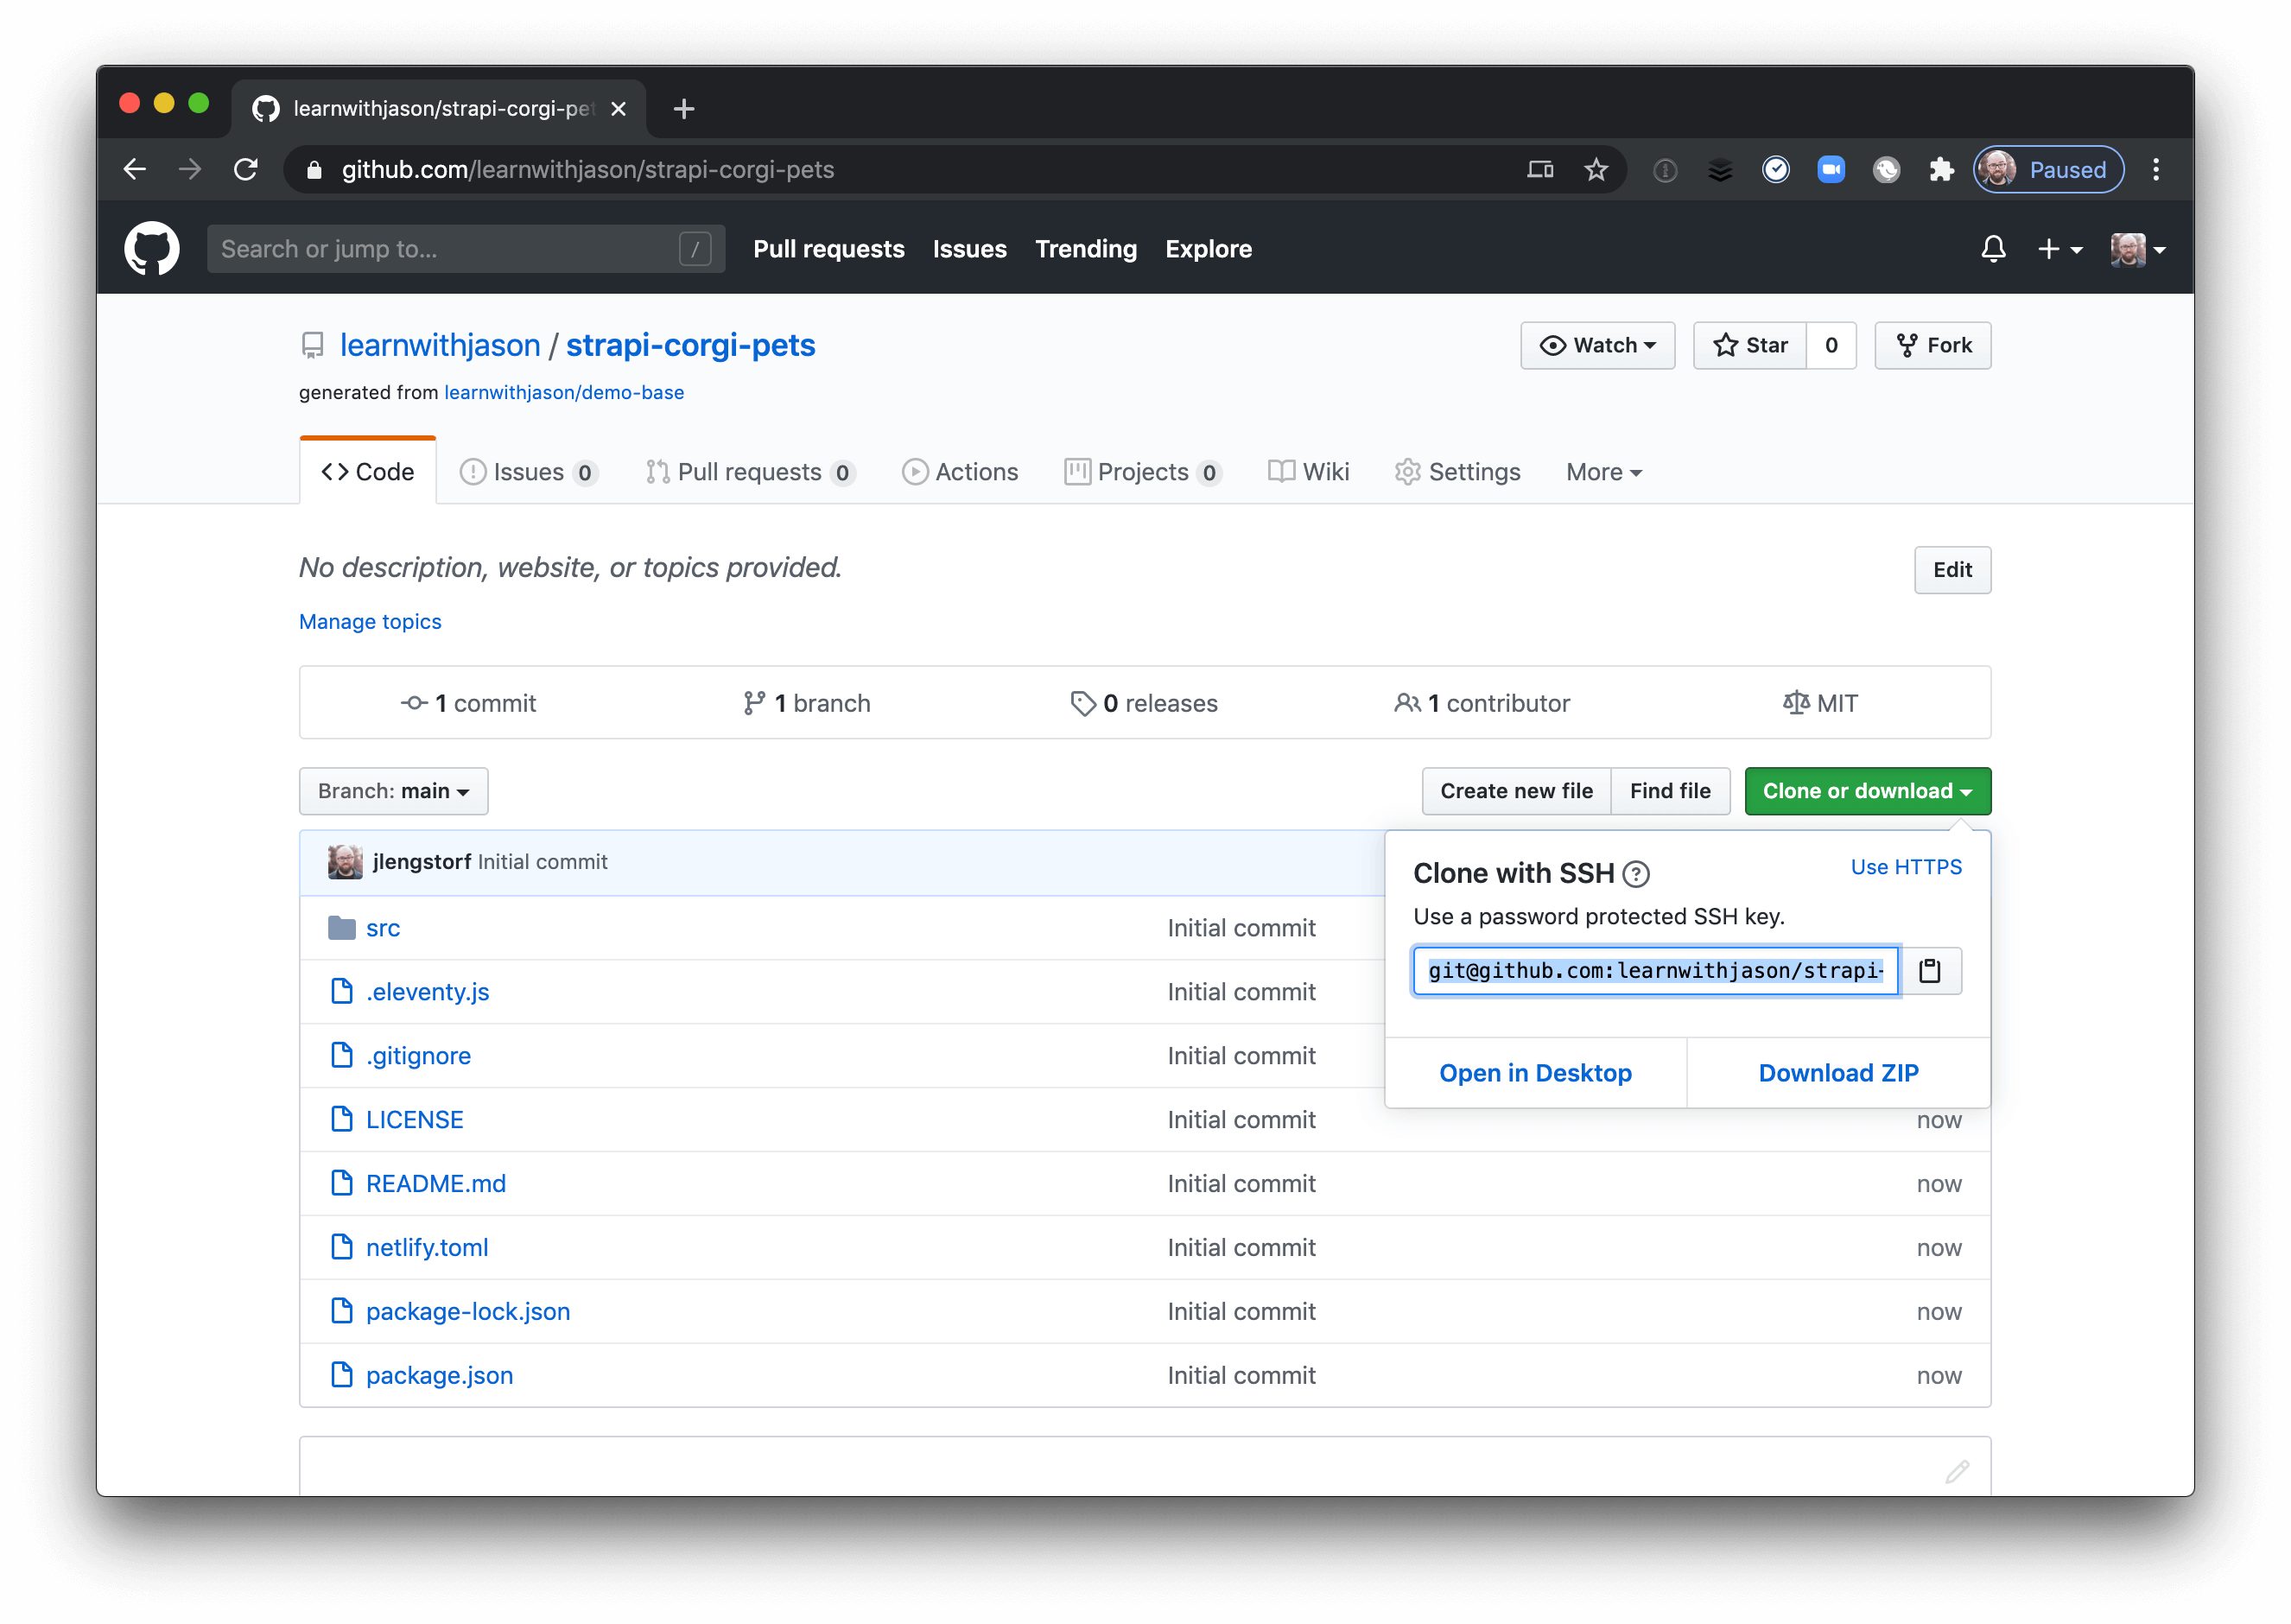
In your terminal, run the following commands to clone the repo, move into the new project folder, and install dependencies:
```
# clone the repositorygit clone git@github.com:YOUR_USER_OR_ORG_NAME/YOUR_REPO_NAME.git
# move into the new projectcd strapi-corgi-pets/
# install dependenciesnpm install
```
### Get set up to write code.
Open `src/index.liquid` — this is where you’ll write all of the frontend code for this tutorial. Remove the contents and start with this:
```
---layout: defaulttitle: Strapi on Digital Ocean + Netlify Functions---
TODO: build an app!
```
If you don’t already have the [Netlify CLI](https://docs.netlify.com/cli/get-started/?utm_source=blog&utm_medium=strapi-custom-backend-jl&utm_campaign=devex) installed, run `npm i -g netlify-cli`, then start the app with `ntl dev`, then visit `http://localhost:8888` in your browser.
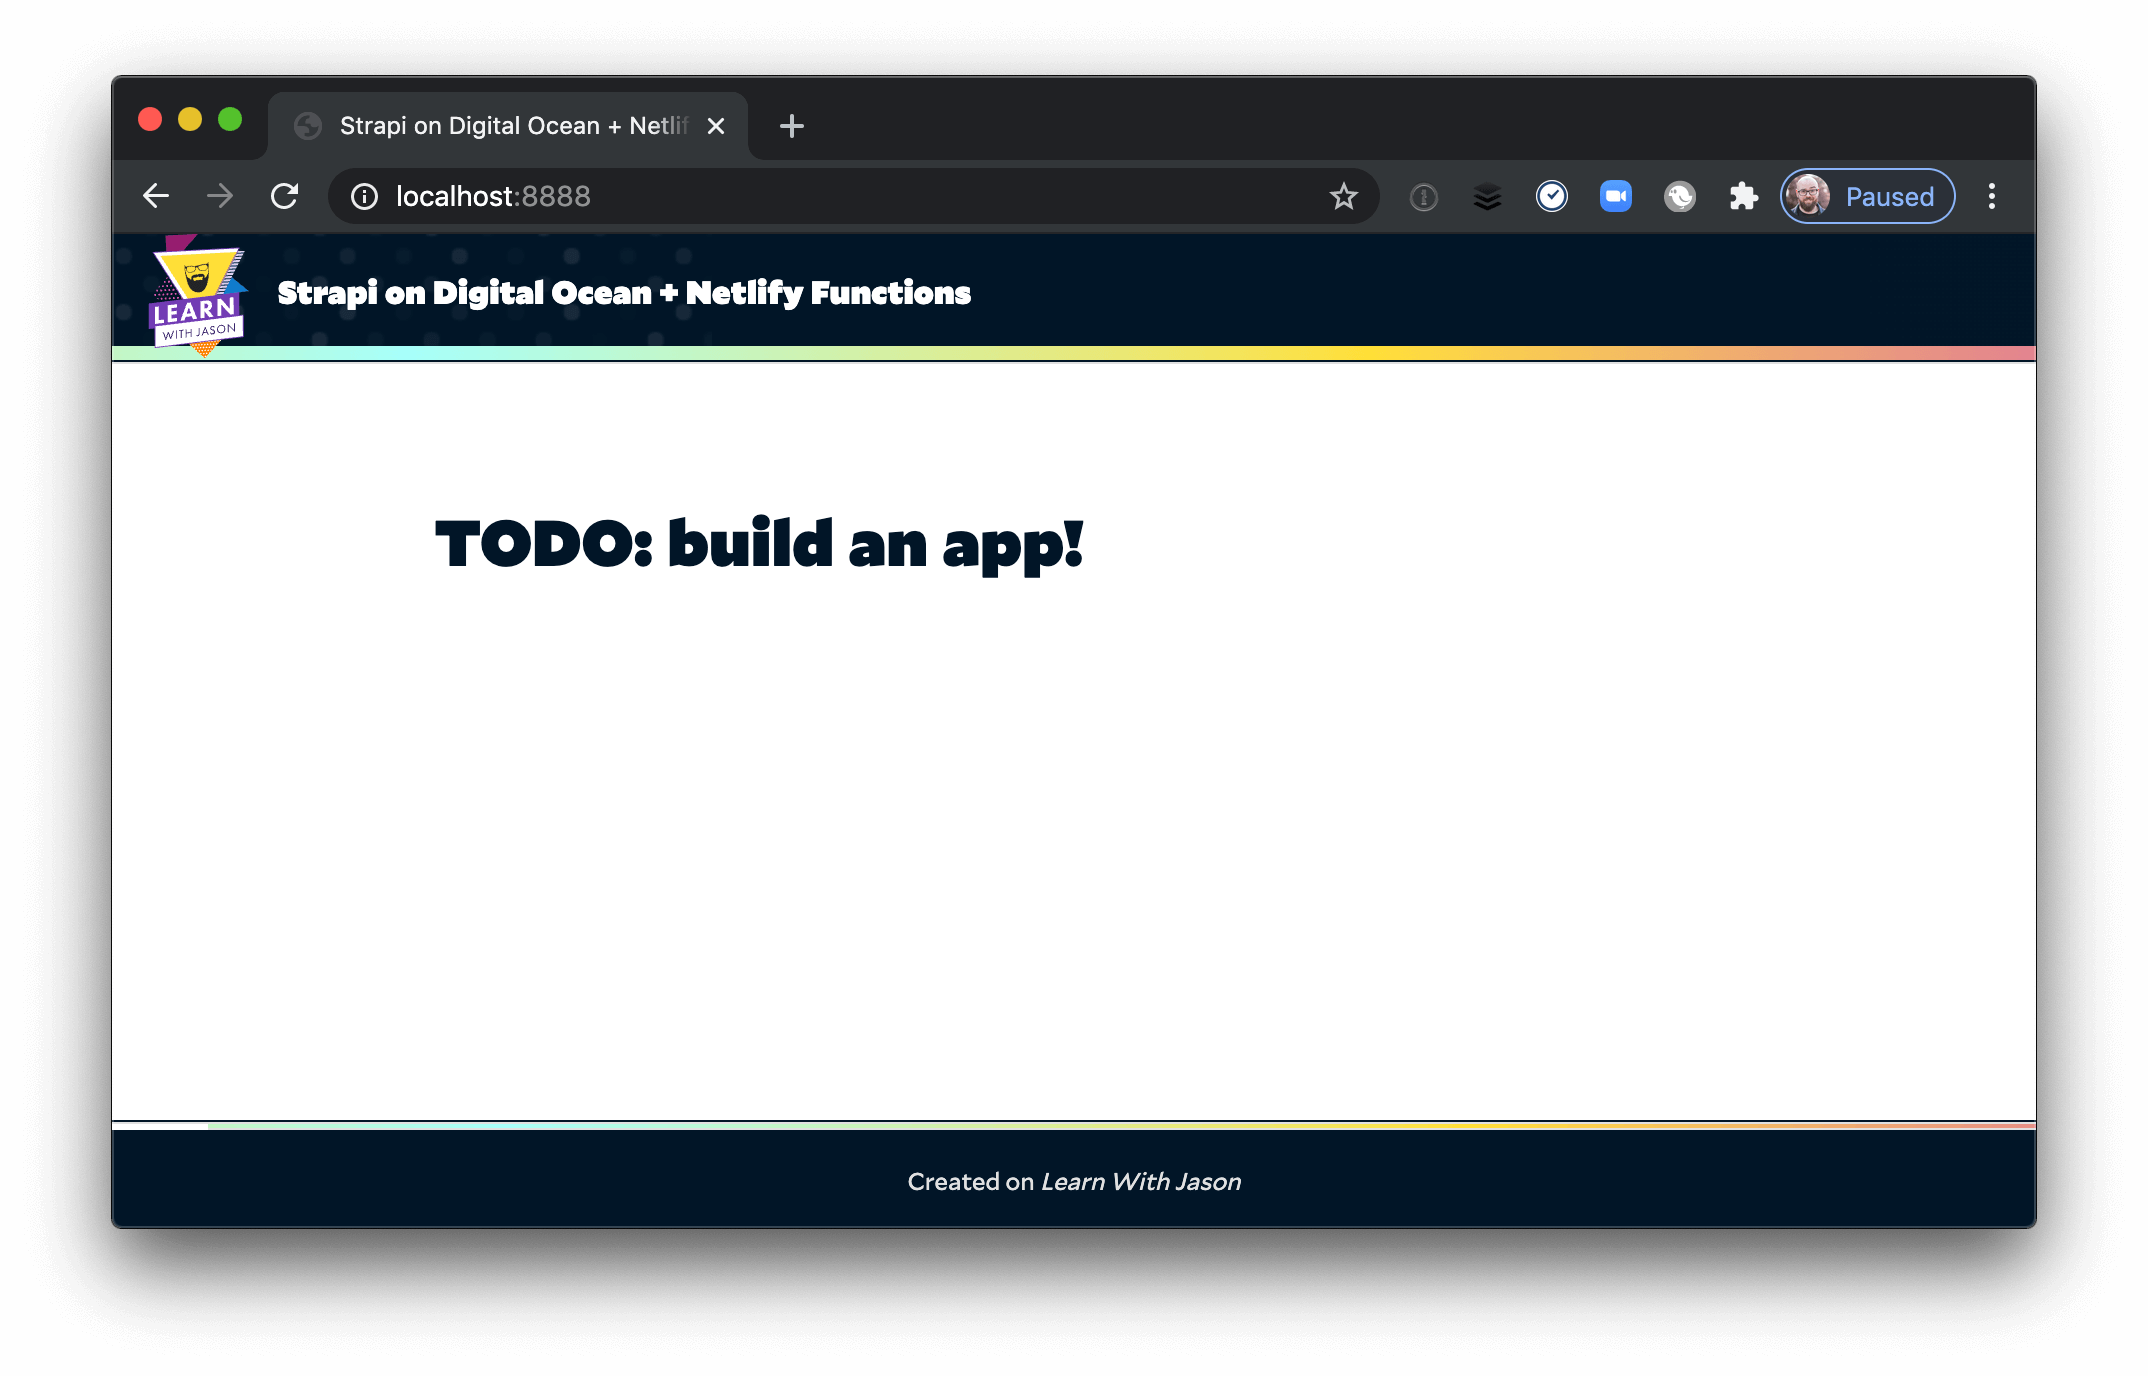
> **Heads up!** This tutorial uses [Netlify Dev](https://www.netlify.com/products/cli/?utm_source=blog&utm_medium=strapi-custom-backend-jl&utm_campaign=devex) to make it easy to test serverless functions locally. If you don’t want to use the Netlify CLI, you can also deploy the site to test the functions.
## Create the Custom frontend to Display Data from Strapi
Now that the frontend repo is created and set up for coding, it’s time to write some code!
### Add styles for the app (optional).
If you want to make your frontend look snazzy, add these styles to `src/index.liquid`:
```
--- layout: default title: Strapi on Digital Ocean + Netlify Functions ---
+ +
TODO: build an app!
```
These styles set up each corgi photo in a grid on the page and styles the reaction buttons and counts to line up below the photo. The CSS variables are set in the demo base, so you can leave them out or set new values if you decided not to use the demo base for your frontend.
### Add HTML markup for the frontend.
Now that we have styles ready, we can write the markup for our frontend.
```
-
TODO: build an app!
+
Look at These Good Doggos
++ ++ +
+ + +
+
+ + +
+
+ + +
+
+
+
```
This code has three components:
1. A heading
2. A div to contain the corgi images
3. An HTML template to provide the markup for a corgi image and reaction buttons, which we’ll use to add each corgi image from our backend to the page
### Create a serverless function that loads the corgi entries.
To get data from the backend into the front-end, you _could_ just directly hit your Strapi API endpoints. However, this would create a handful of issues:
1. You don’t necessarily want the whole world to know how to find the Strapi instance
2. If you set an API token to restrict access, you can’t send that from the frontend without exposing it
3. It means dealing with [Cross-Origin Resource Sharing (CORS)](https://developer.mozilla.org/en-US/docs/Web/HTTP/CORS), which can be a headache
To avoid these issues, we’re going to use a serverless function to proxy the request, which gives you advantages over directly hitting Strapi endpoints:
1. The source of data is hidden from the browser — snoopers can only see that a serverless function exists, not where it sources content from
2. API keys can be used securely in a serverless function by setting environment variables
3. The serverless function can make requests to other APIs without CORS issues, and the function itself lives on your site’s domain, eliminating CORS problems altogether
Because of these advantages — and since [Netlify Functions](/products/functions/?utm_source=blog&utm_medium=strapi-custom-backend-jl&utm_campaign=devex) are quick to set up — this tutorial will use a serverless function to access your Strapi instance.
To start, install `node-fetch`, which allows you to use the Fetch API in the Node environment.
```
# install the dependency for Netlify Functionsnpm install node-fetch
```
Inside `functions/load-corgis.js`, add the following code:
```
const fetch = require('node-fetch');
exports.handler = async () => { const response = await fetch('http://167.172.202.57/corgis') .then((res) => res.json()) .catch((err) => console.error(err));
return { statusCode: 200, body: JSON.stringify(response), };};
```
> **Heads up!** Don’t forget to use your own Strapi Droplet IP address in the fetch call!
This function exports a `handler`, which sends off a `GET` request using the Fetch API to your Strapi server. The serverless function acts as a proxy between your app and the actual Strapi server, which gives you extra control over how people access the data.
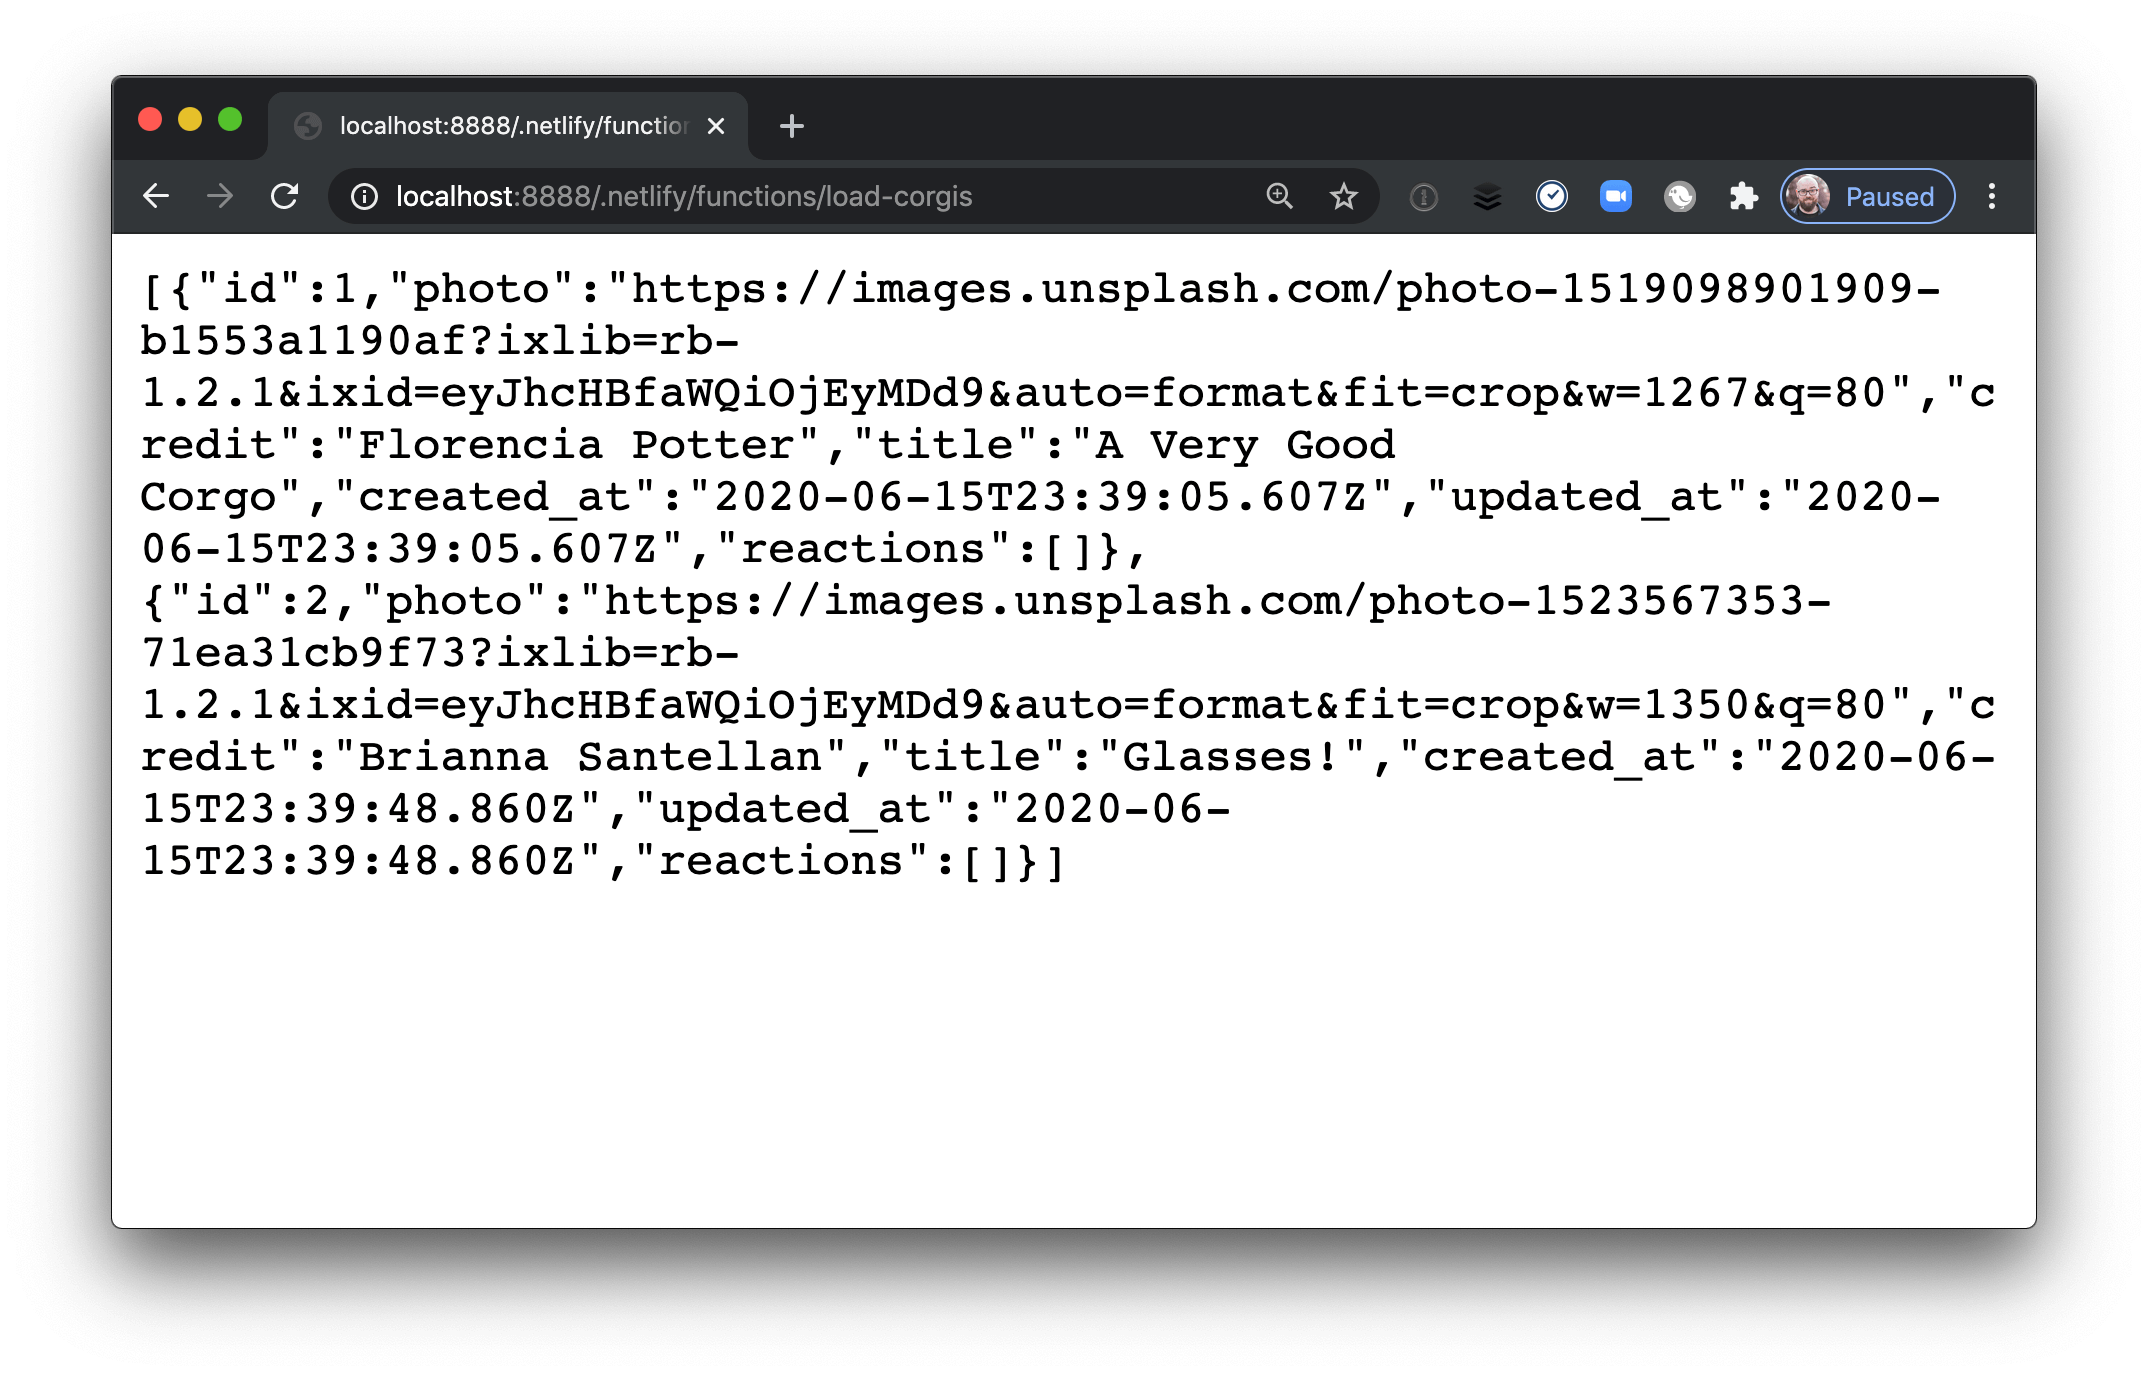
Once you’ve saved this, run `ntl dev` again, then visit [`http://localhost:8888/.netlify/functions/load-corgis`](http://localhost:8888/.netlify/functions/load-corgis) to see your corgi data loaded!
### Call the serverless function to load corgi data into the frontend.
All the way at the bottom of `src/index.liquid`, below the template, let’s add JavaScript to load our corgis from the serverless function:
```
++
```
This code creates a function that loads corgis using our serverless function, then loops through each corgi and — for now, at least — logs it to the console.
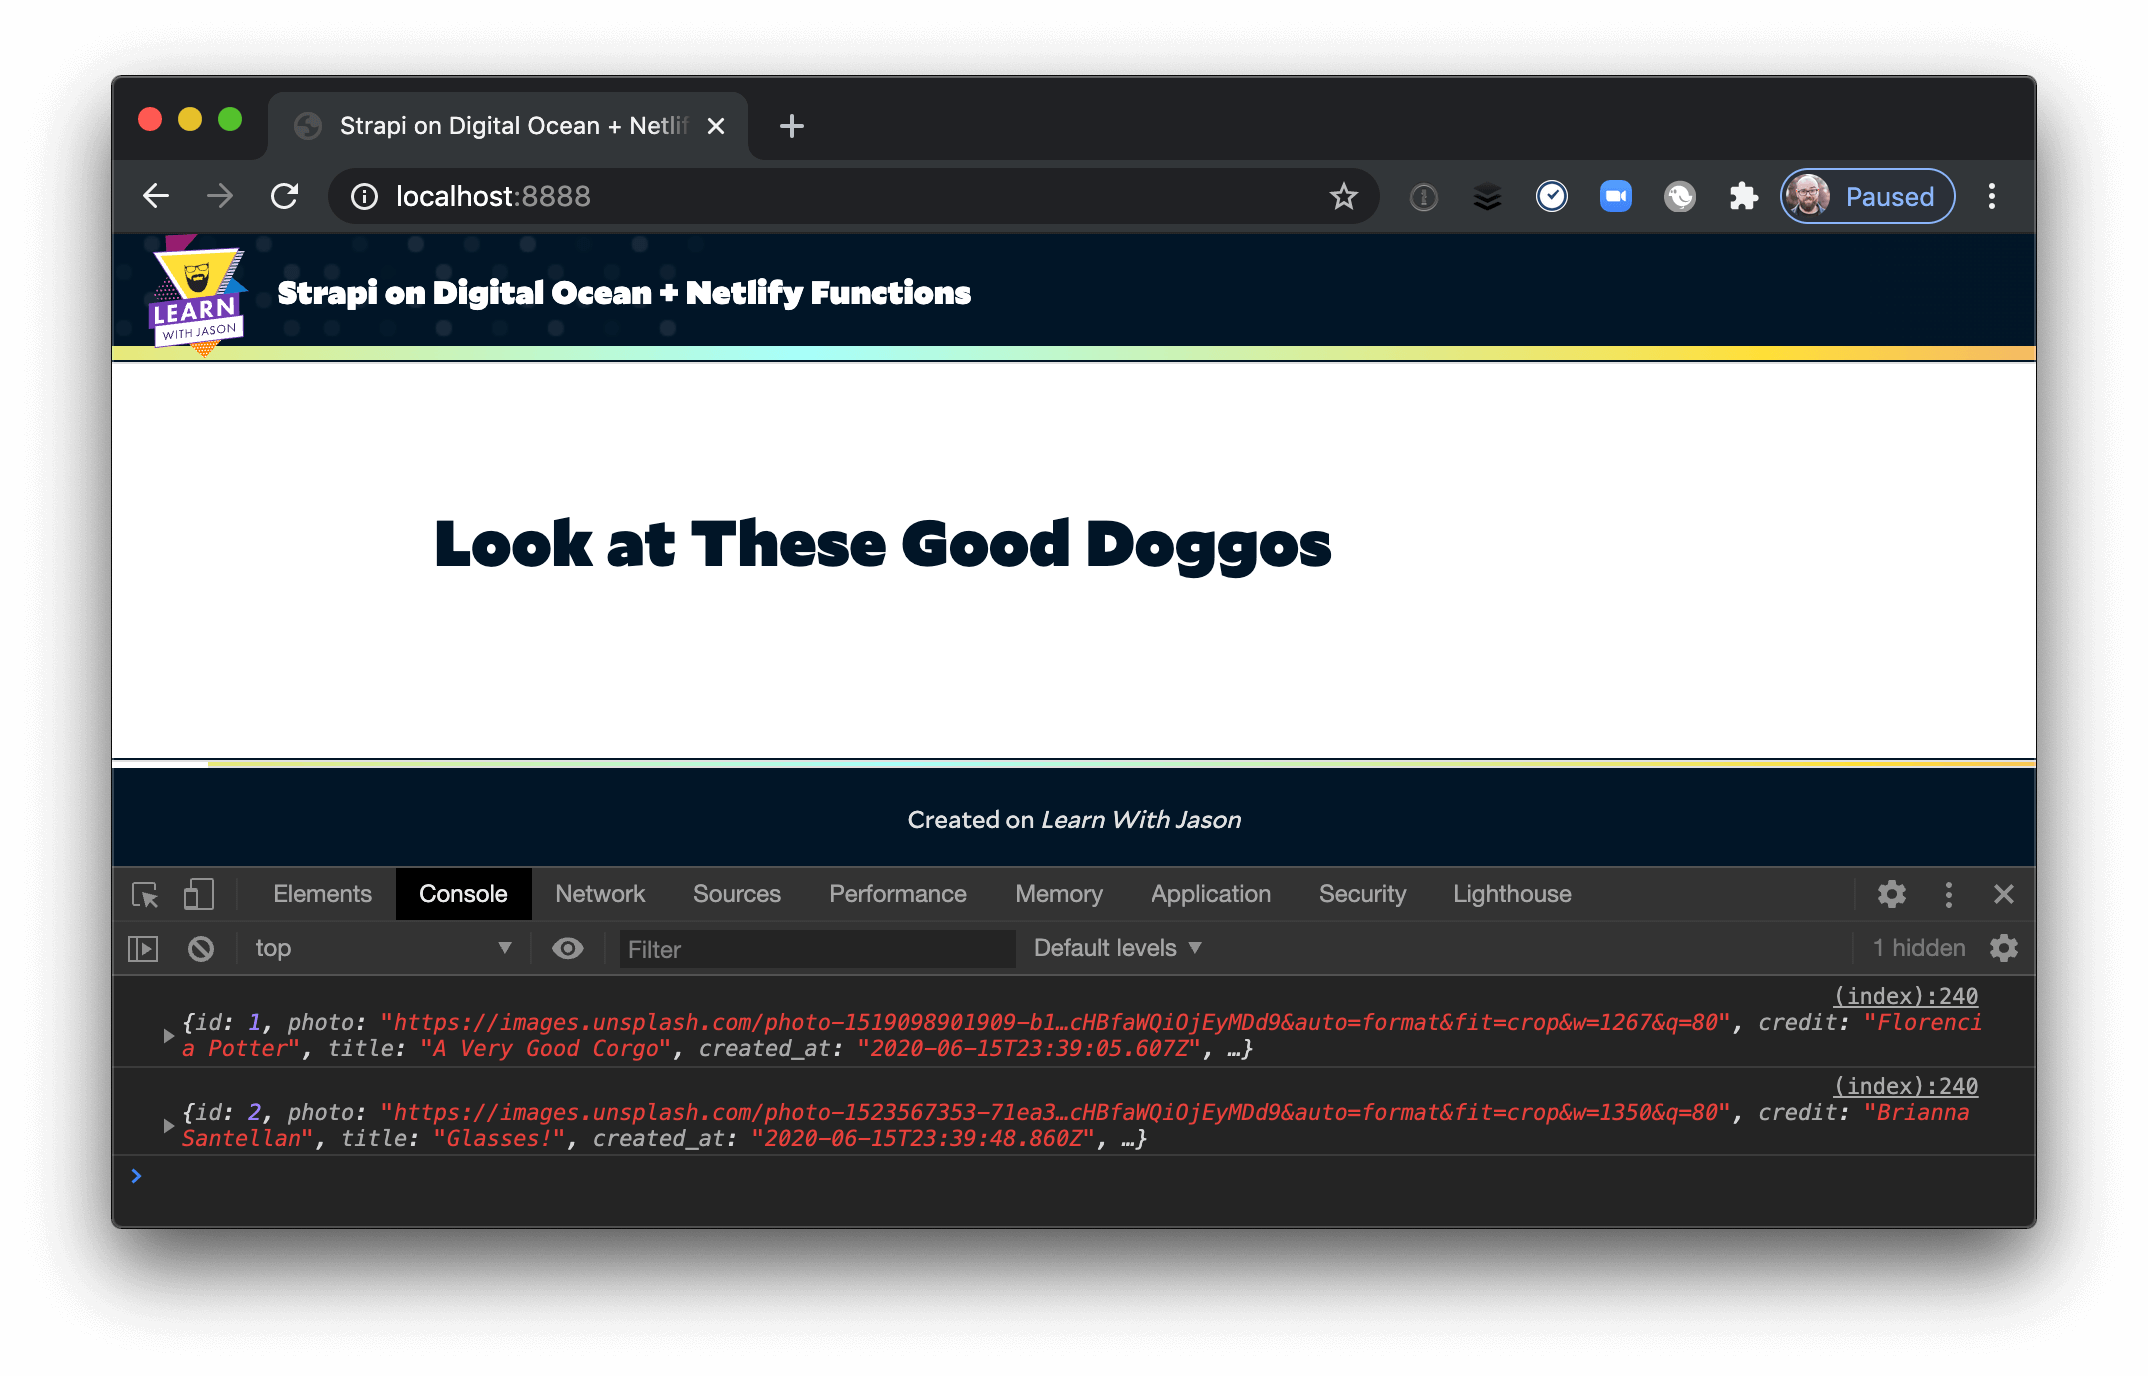
### Use the HTML template to display corgi data on screen.
Next, let’s write the JavaScript that takes that data and combines it with our template to actually show the corgis in our app.
```
```
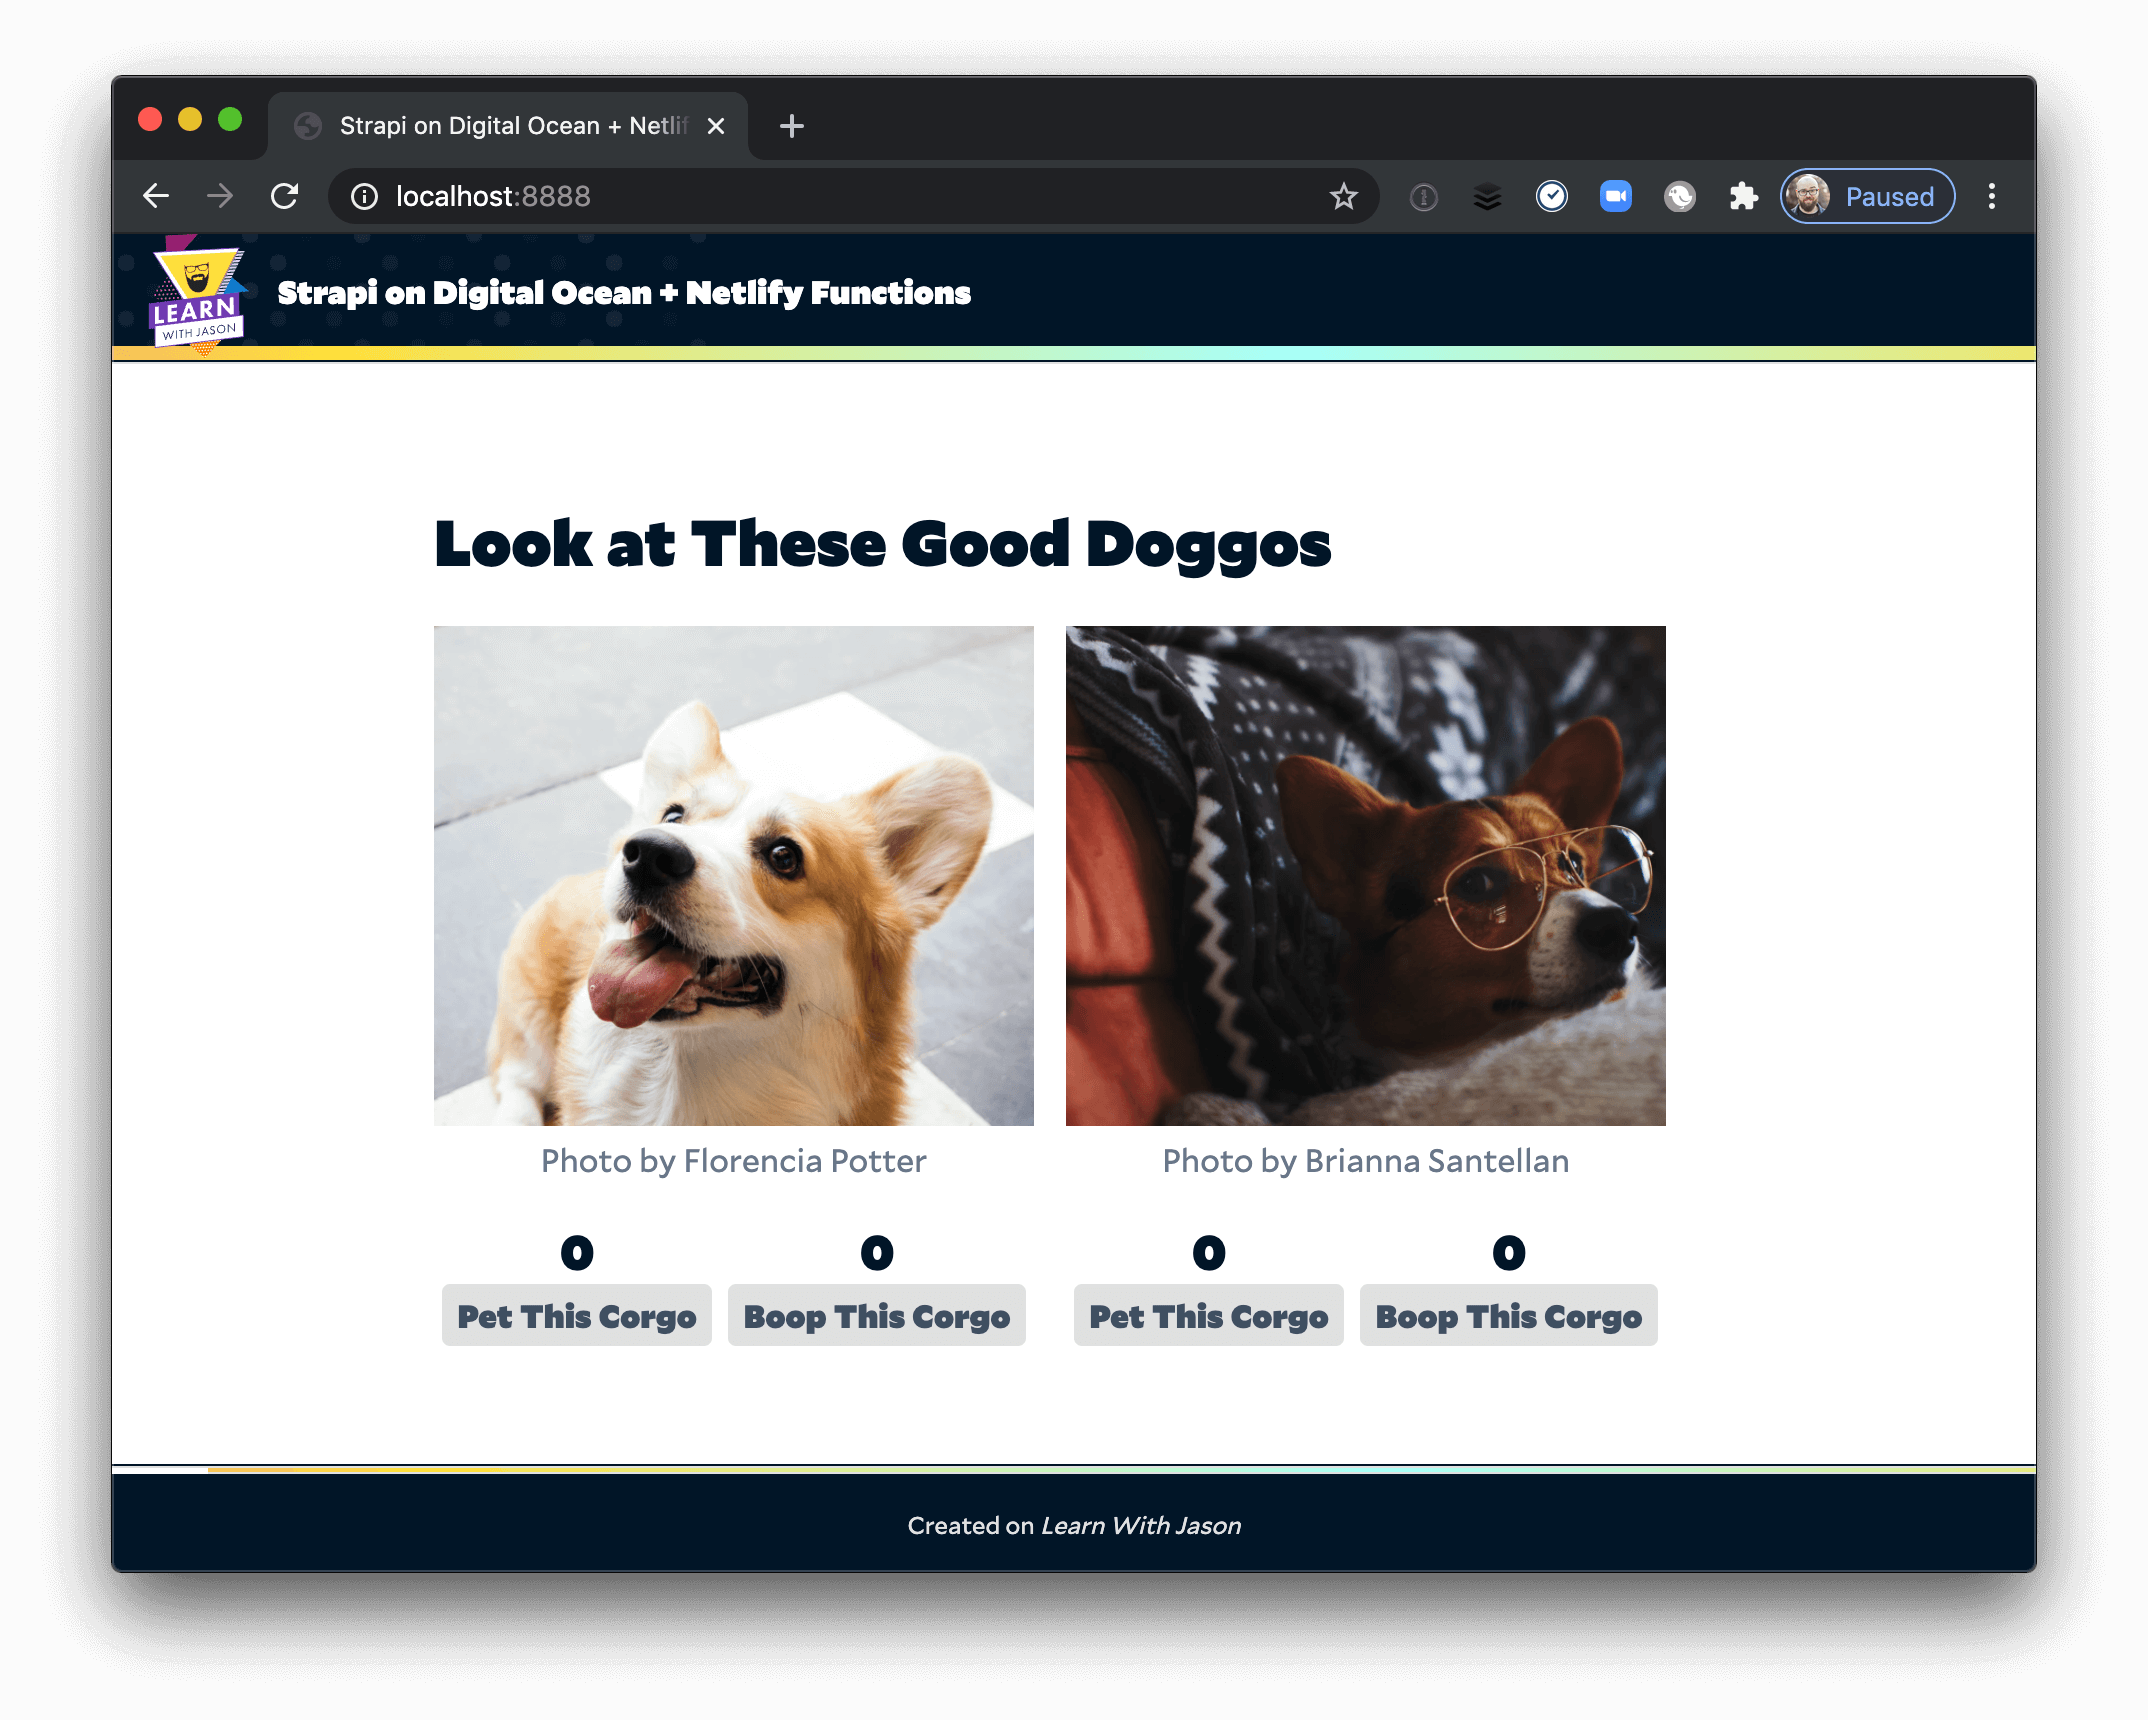
This code selects the template node and the corgi container div node, then creates a new DOM node for each corgi and inserts the corgi data into the template before appending it to the container.
Finally! Save this file, then look in your browser to see the corgi content we all came for!
## Write to a Custom Strapi backend Using Serverless Functions
Next, let’s make those “pet” and “boop” buttons work!
### Create a serverless function to add reactions
To save reactions to Strapi, we need another serverless functions. Create `functions/add-reaction.js` and place the following code inside:
```
const fetch = require('node-fetch');
exports.handler = async (event) => { const { corgi, type } = JSON.parse(event.body); const response = await fetch('http://167.172.202.57/reactions', { method: 'POST', headers: { 'Content-Type': 'application/json', }, body: JSON.stringify({ type, corgi, }), }) .then((res) => res.json()) .catch((err) => console.error(err));
return { statusCode: 200, body: JSON.stringify(response), };};
```
> **Heads up!** Don’t forget to use your own Strapi Droplet IP address in the fetch call!
This sends a `POST` request to Strapi telling it which reaction type to add for which corgi — now we need to write the frontend code to send over the right data to create reactions.
### Add the client-side JavaScript to handle user interactions
When someone clicks a button, you want to make sure to save their reaction and increment the counter in their browser.
To do this, add the following JavaScript to the script section of `src/index.liquid`:
```
```
This creates a click handler that will send off a request to the serverless function and increment the appropriate reaction count for both the “pet” and “boop” buttons.
Save this, reload the browser, then click the reaction buttons to pet and boop these corgis!
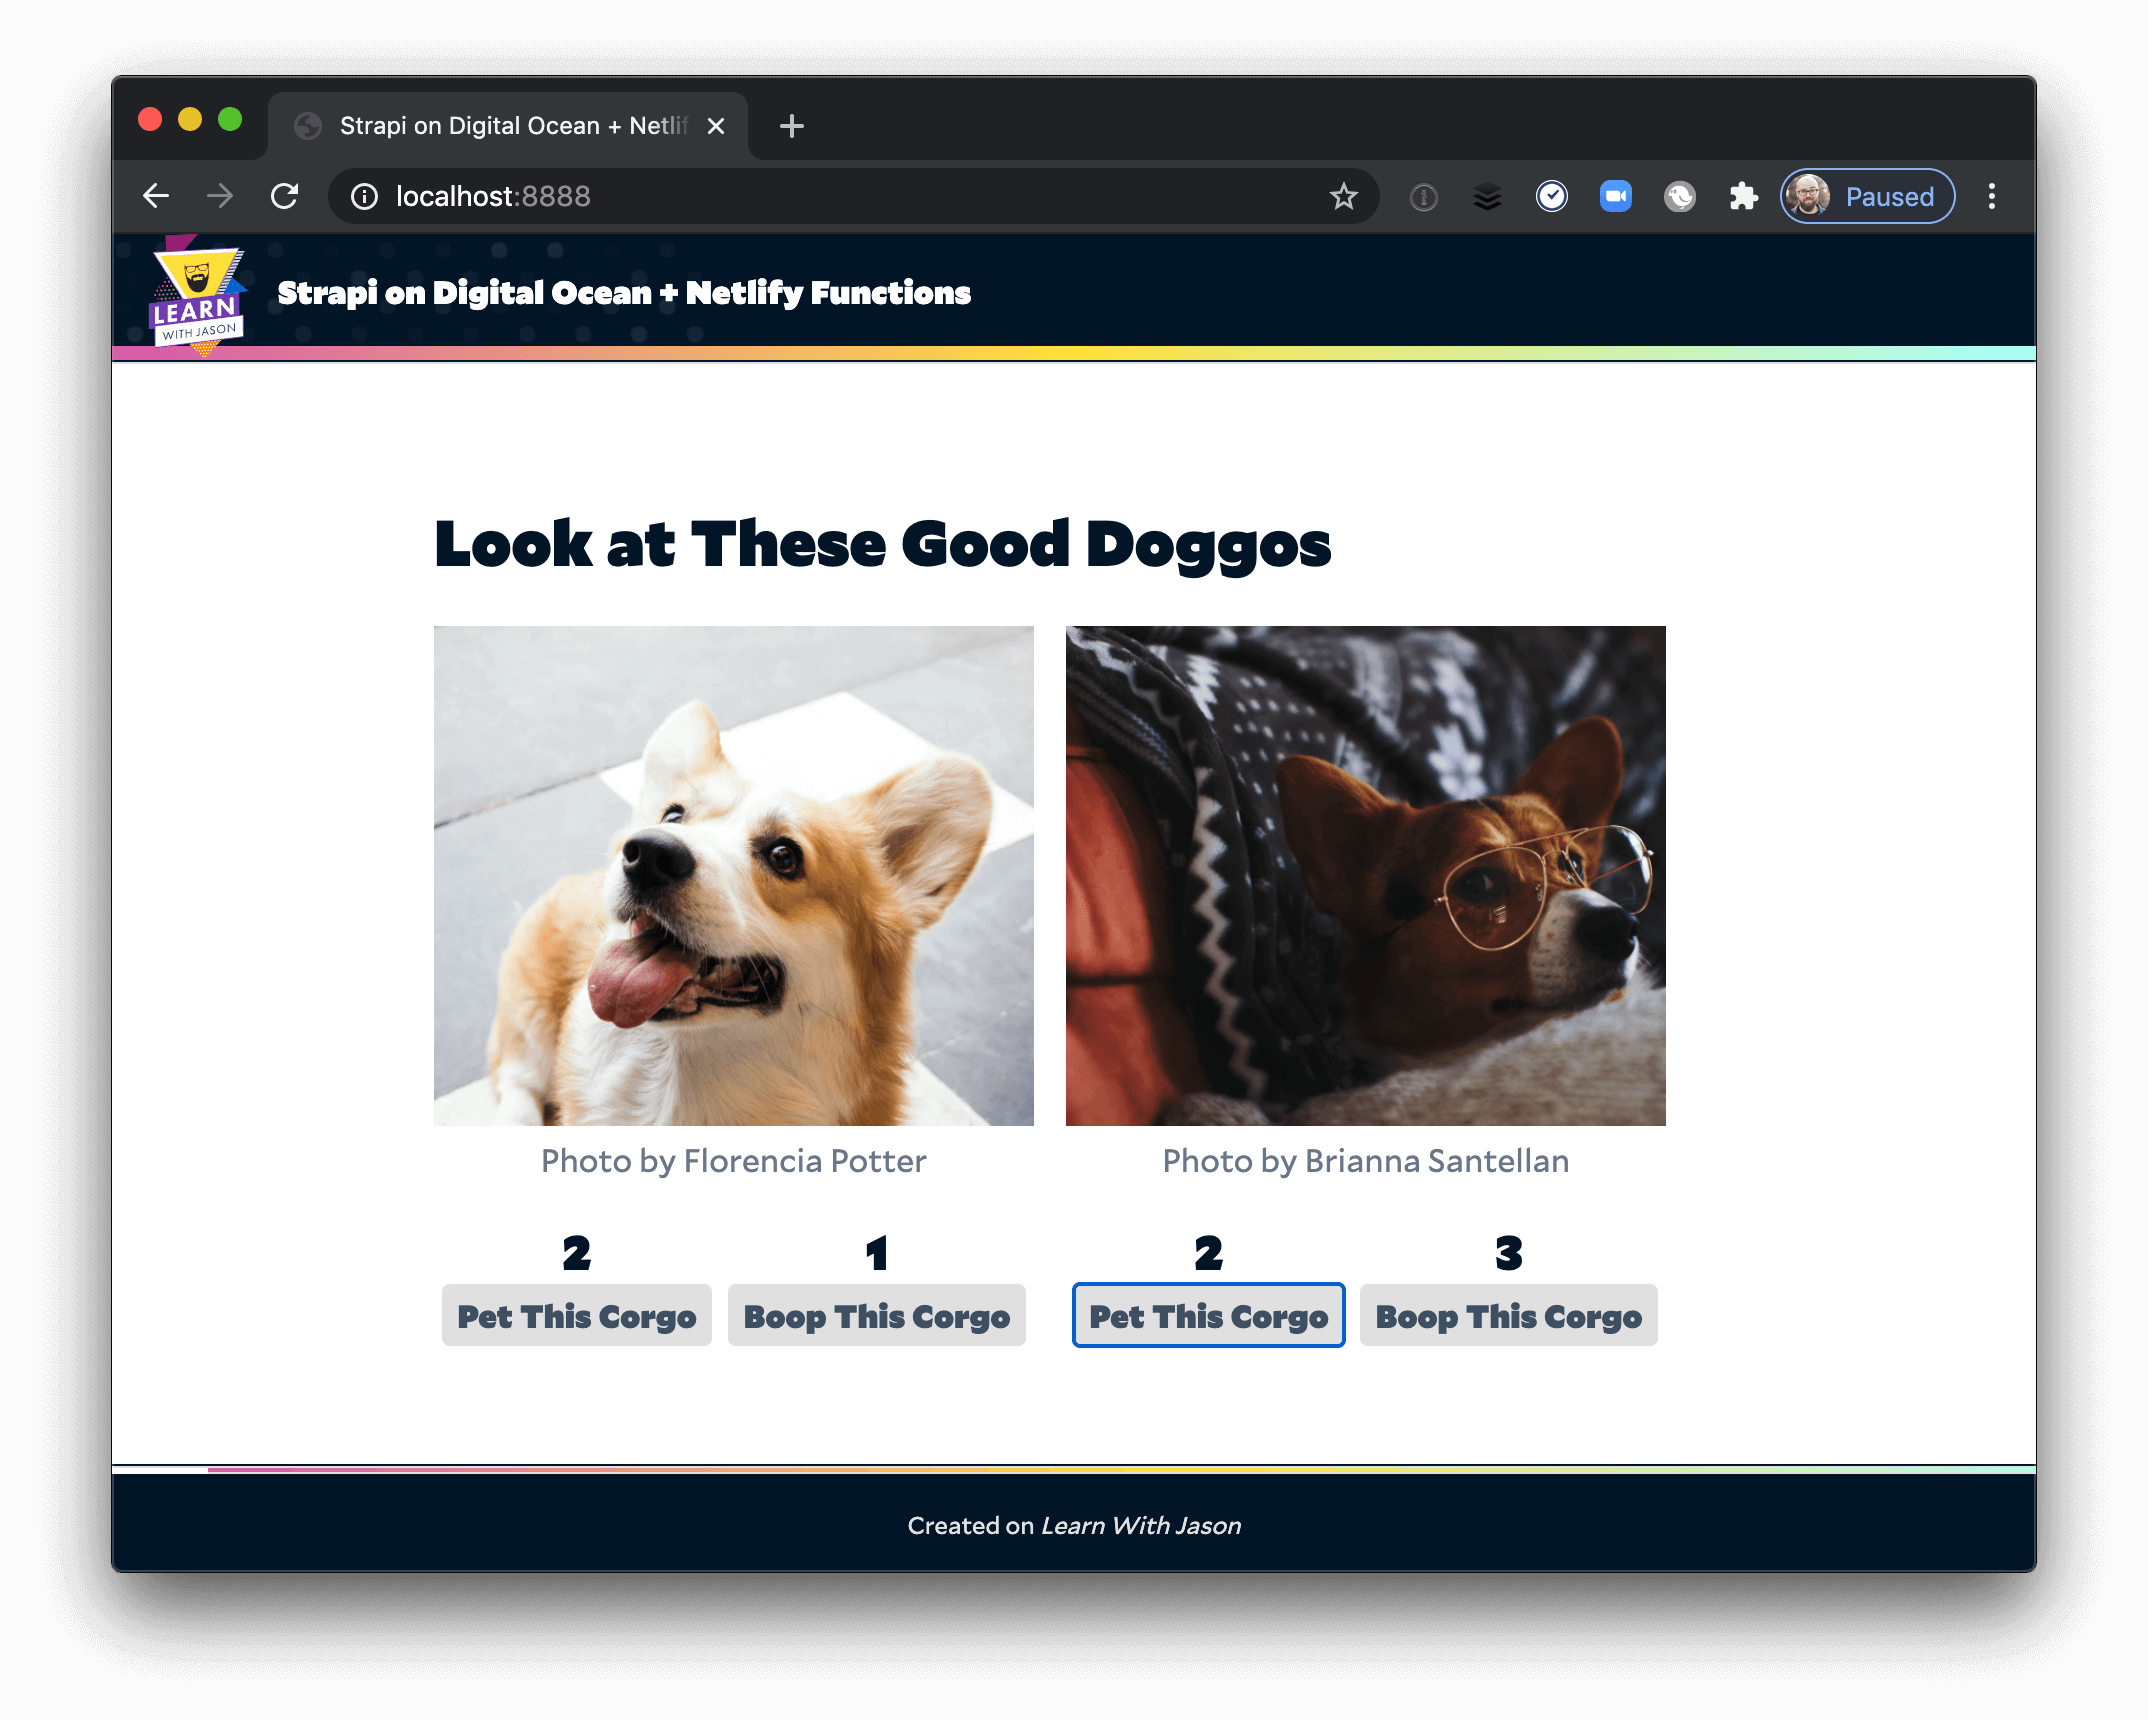
Refresh the page and/or load this in another browser to see that your reactions persist between page loads!
## Summary
**Hot dog! You just build and deployed a full-blown Jamstack app _and_ a custom backend for it!**
In [part 1 of this series](/blog/2020/06/23/create-a-custom-back-end-for-jamstack-apps-with-strapi/?utm_source=blog&utm_medium=strapi-custom-backend-jl&utm_campaign=devex), you:
1. Created a new Strapi instance using on a DigitalOcean Droplet
2. Defined custom types (corgis and reactions) and set permissions for accessing them
Then, in this part, you:
3. Created serverless functions to read from your backend using Netlify Functions
4. Wrote an app frontend using HTML, JavaScript, and CSS to load data from your backend asynchronously, then display your corgis
5. Wrote JavaScript to save reactions to your backend and update the frontend
That’s a significant amount of work! Great job!
**This also shows the power of the Jamstack: in total, you were able to configure your entire backend with no code at all; your whole frontend is fewer than 150 lines of code.** Holy buckets!
## What to Do Next
To go further, check out these resources for more information:
- [Check out the live demo](https://strapi-corgi-pets.netlify.app/)
- [Look at the frontend source code](https://github.com/learnwithjason/strapi-corgi-pets)
- [Learn more about Netlify Functions](/products/functions/?utm_source=blog&utm_medium=strapi-custom-backend-jl&utm_campaign=devex)
- [Set up Strapi as a CMS for Gatsby](https://www.learnwithjason.dev/set-up-strapi-as-a-cms-for-gatsby)
- [Learn more about Strapi](https://strapi.io/)
What will you build with Strapi and Netlify? [Hit me up on Twitter and let me know!](https://twitter.com/compose/tweet?text=Learn%20how%20to%20create%20a%20custom%20@strapi%20back-end%20for%20Jamstack%20sites%20using%20@Netlify%20Functions,%20by%20@jlengstorf&url=https://www.netlify.com/blog/2020/06/22/create-a-custom-back-end-for-jamstack-apps-with-strapi/?utm_source=twitter%26utm_medium=strapi-custom-backend-jl%26utm_campaign=devex)
### Share
- [X (fka Twitter)](https://twitter.com/intent/tweet?text=Use a Custom Strapi Backend to Build a Jamstack App&url=https://www.netlify.com/blog/2020/06/24/use-a-custom-strapi-back-end-to-build-a-jamstack-app//)
- [LinkedIn](https://www.linkedin.com/shareArticle?mini=true&url=https%3A%2F%2Fwww.netlify.com%2Fblog%2F2020%2F06%2F24%2Fuse-a-custom-strapi-back-end-to-build-a-jamstack-app%2F%2F)
- [Facebook](https://www.facebook.com/sharer.php?u=https://www.netlify.com/blog/2020/06/24/use-a-custom-strapi-back-end-to-build-a-jamstack-app//)
- [Bluesky](https://bsky.app/intent/compose?text=Use a Custom Strapi Backend to Build a Jamstack App+https://www.netlify.com/blog/2020/06/24/use-a-custom-strapi-back-end-to-build-a-jamstack-app//)
* * *
### Tags
- [custom-strapi-back-end](/blog/tags/custom-strapi-back-end/)
- [APIs](/blog/tags/apis/)
- [how-to](/blog/tags/how-to/)
- [Serverless](/blog/tags/serverless/)
- [strapi](/blog/tags/strapi/)
- [Tutorial](/blog/tags/tutorial/)
## Keep reading

Guides & Tutorials April 13, 2020
[
### Learn How to Accept Money on Jamstack Sites in 38 Minutes
](/blog/2020/04/13/learn-how-to-accept-money-on-jamstack-sites-in-38-minutes)
- 
Jason Lengstorf
- 
Thor 雷神

Opinions & Insights June 16, 2020
[
### Building Large Sites on Netlify
](/blog/2020/06/16/building-large-sites-on-netlify)
- 
Bhavana Srinivas
## Recent posts
News & Announcements June 25, 2026
[
### Netlify Functions, designed for Agent Experience
](/blog/netlify-functions-designed-for-agent-experience)
- 
Eduardo Bouças
News & Announcements June 24, 2026
[
### How we measure Netlify’s Agent Experience
](/blog/how-we-measure-netlify-agent-experience)
- 
Sean Roberts
Guides & Tutorials May 15, 2026
[
### How to build a real-time AI chatbot in minutes with Netlify Agent Runners (no backend)
](/blog/how-to-build-a-real-time-ai-chatbot-in-minutes-with-netlify-agent-runners-no-backend)
- 
Nahrin Jalal

### How do the best dev and marketing teams work together?
[Access the report](https://www.netlify.com/reports/2024-leadership-trend-report/access/)