Angular Netlify Identity Demo
```
### Enabling Netlify Identity
The final step is enabling Netlify Identity on our project’s Netlify dashboard.
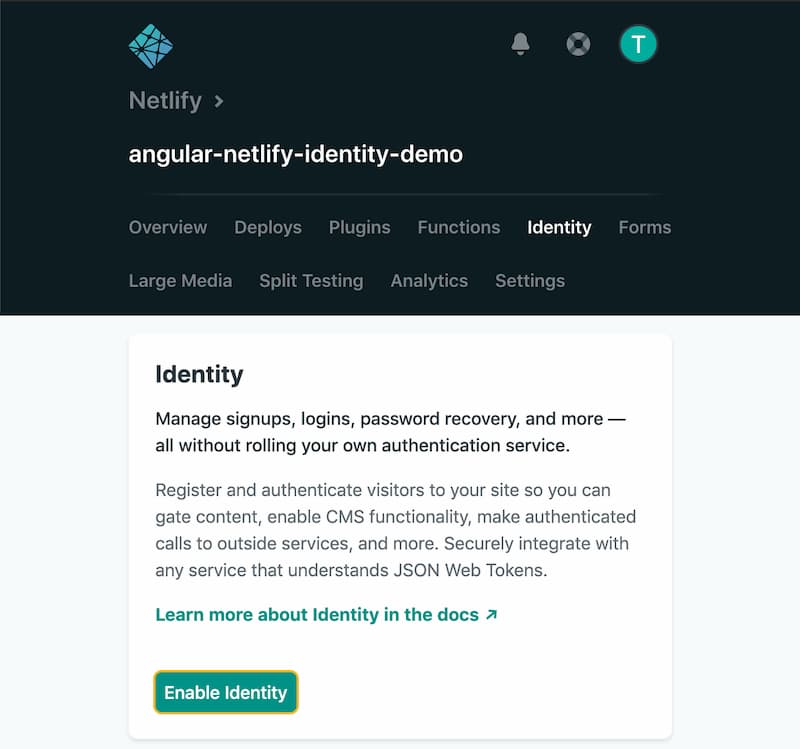
I could write more, but we just need to click the ‘Enable Identity’ button. So, that’s all I’ll say. Nothing more, nothing less. Anything else I write would just be more to read…oh, sorry. The video below shows how our empty button gets populated with ‘Login’ once Netlify Identity is enabled.
## Adding External Providers
Now that we have Netlify Identity enabled, users have the ability to sign up and login with their emails. Creating new logins for every site you use can be cumbersome, so many developers are turning to external authentication providers for a faster and easier authentication process. Netlify Identity gives us the option to add GitHub, GitLab, Google, and Bitbucket external OAuth integrations.
> 📖 You can read more about external provider authentication in [our docs](https://docs.netlify.com/visitor-access/identity/registration-login/?utm_source=blog&utm_medium=angular-identity-tzm&utm_campaign=devex#external-provider-authentication).
Going back to the Identity section of our Netlify site’s dashboard, we’ll need to click on the ‘Settings and usage’ button. Scrolling down to the ‘Registration’ section there is a box labeled ‘External providers’. Click the ‘Add provider’ dropdown to select an external provider.
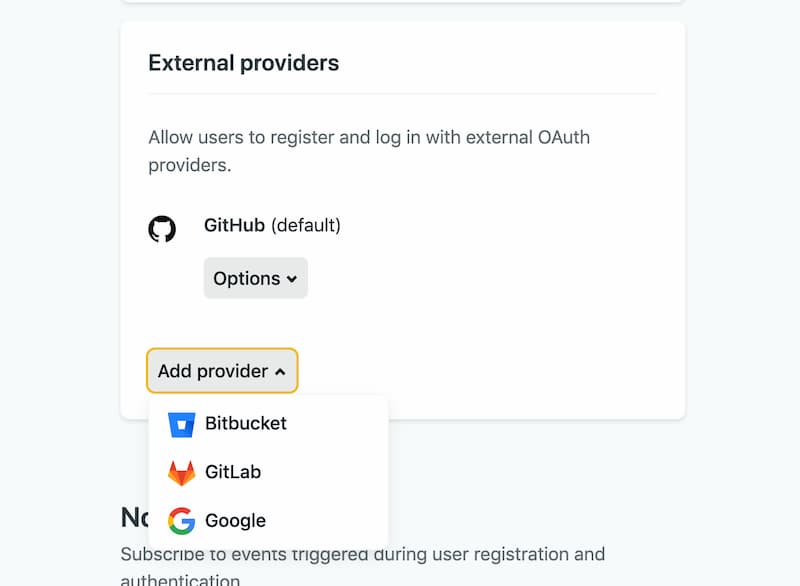
When selected a pop-up window will open up and allow us to either use the default configurations or use our own credentials.
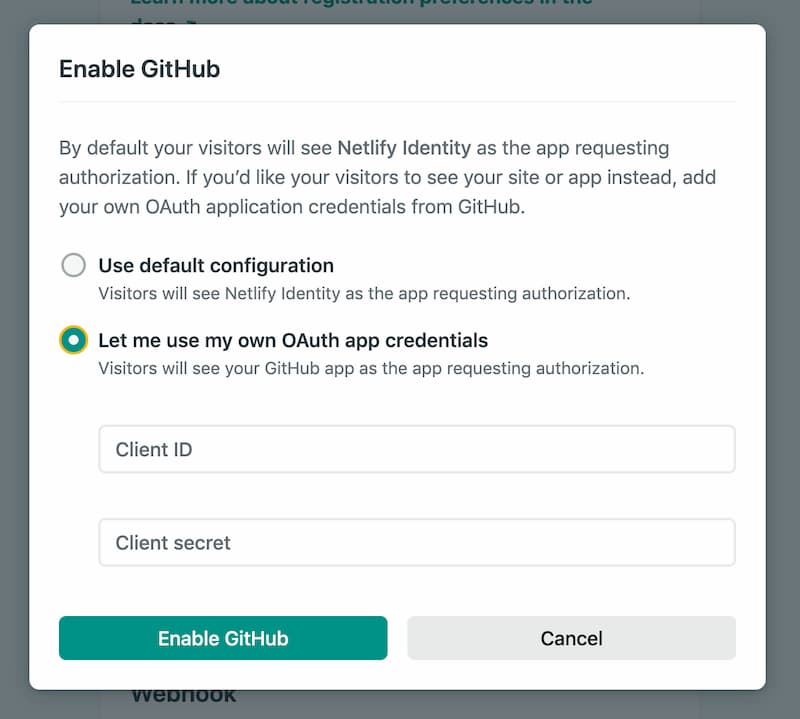
Using the default means that our visitors will see ‘Netlify Identity’ as the app requesting authorization. If we use our credentials they will see our GitHub, Google, etc. app or site instead. Once we choose either option and provide our info, if not using the defaults, we can refresh the page and see our new authorization options.
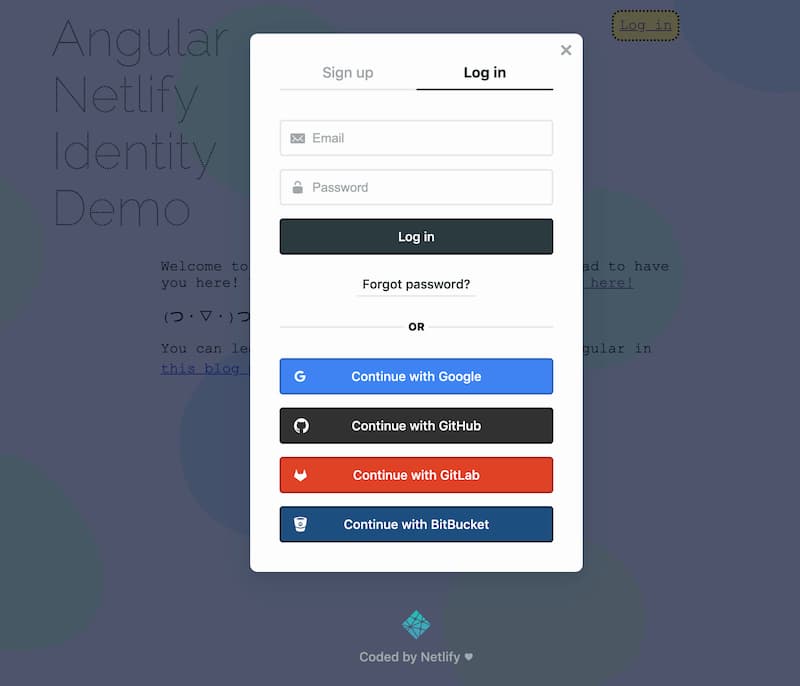
Here’s a video walking through the whole process.
## Assigning Roles
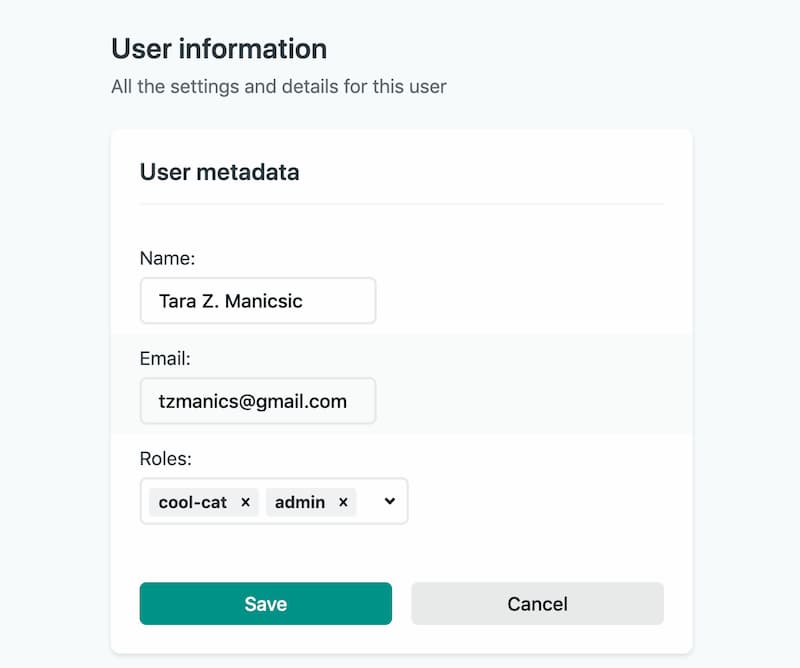
We now have a way for users to sign in. When they sign in we have their information and can easily assign them roles. We do this through another form on our site’s Identity dashboard. When users login or sign up they will show up on the main page of the dashboard. We can click the user to go the the ‘User Information’ page to see their information and assign or remove roles. When we click the ‘Edit settings’ button all the user’s information becomes editable. ‘Roles’ allows us to choose from a dropdown of roles (if any exist) or type in new roles. If we need to remove roles we can click the ‘x’ next to that role to remove it.
Words are hard, so here’s a video instead!
## What Just Happened?
Netlify is doing all the work behind the scenes with serverless functions. We just had to write two lines of code and press some buttons. That’s good because we have lots of other work today. I mean, _have_ you watched Hamilton on Disney+ yet? Seriously though, spend less time and stress on authentication and use it to give your users the features they’re requesting.
In this post we:
- added Netlify Identity to our Angular application
- included external authorization providers to make sign up and login faster
- edited and added roles to our app’s users
This is skimming the surface of what Netlify Identity can do. I highly recommend checking out the [Netlify Identity documentation](https://docs.netlify.com/visitor-access/identity/registration-login/?utm_source=blog&utm_medium=angular-identity-tzm&utm_campaign=devex#external-provider-authentication) to learn more. In the meantime, I hope you have a great time _saving_ time by skipping complicated authorization for your site. Happy coding 👩🏻💻!
## Resources for the Road
- [Netlify Identity](https://www.netlify.com/products/?utm_source=blog&utm_medium=angular-identity-tzm&utm_campaign=devex#identity)
- [Building an Angular Jamstack App with Scully](https://www.netlify.com/blog/2019/12/17/building-an-angular-jamstack-app-with-scully/?utm_source=blog&utm_medium=angular-identity-tzm&utm_campaign=devex)
- [GoTrue JS – bringing authentication to static sites with just 3kb of JS](https://www.netlify.com/blog/2018/12/07/gotrue-js-bringing-authentication-to-static-sites-with-just-3kb-of-js/?utm_source=blog&utm_medium=angular-identity-tzm&utm_campaign=devex)
- [Netlify Identity Docs](https://docs.netlify.com/visitor-access/identity/registration-login/?utm_source=blog&utm_medium=angular-identity-tzm&utm_campaign=devex#external-provider-authentication)
### Share
- [X (fka Twitter)](https://twitter.com/intent/tweet?text=Authenticating Users with Angular and Netlify Identity&url=https://www.netlify.com/blog/2020/07/07/authenticating-users-with-angular-and-netlify-identity//)
- [LinkedIn](https://www.linkedin.com/shareArticle?mini=true&url=https%3A%2F%2Fwww.netlify.com%2Fblog%2F2020%2F07%2F07%2Fauthenticating-users-with-angular-and-netlify-identity%2F%2F)
- [Facebook](https://www.facebook.com/sharer.php?u=https://www.netlify.com/blog/2020/07/07/authenticating-users-with-angular-and-netlify-identity//)
- [Bluesky](https://bsky.app/intent/compose?text=Authenticating Users with Angular and Netlify Identity+https://www.netlify.com/blog/2020/07/07/authenticating-users-with-angular-and-netlify-identity//)
* * *
### Tags
- [Identity](/blog/tags/identity/)
- [Angular](/blog/tags/angular/)
## Keep reading

Guides & Tutorials May 15, 2026
[
### How to build a real-time AI chatbot in minutes with Netlify Agent Runners (no backend)
](/blog/how-to-build-a-real-time-ai-chatbot-in-minutes-with-netlify-agent-runners-no-backend)
- 
Nahrin Jalal

Guides & Tutorials May 15, 2026
[
### Tracking AI search traffic: how to use Netlify Log Drains to maximize AEO
](/blog/tracking-ai-search-traffic)
- 
Nahrin Jalal
## Recent posts
News & Announcements June 25, 2026
[
### Netlify Functions, designed for Agent Experience
](/blog/netlify-functions-designed-for-agent-experience)
- 
Eduardo Bouças
News & Announcements June 24, 2026
[
### How we measure Netlify’s Agent Experience
](/blog/how-we-measure-netlify-agent-experience)
- 
Sean Roberts
Guides & Tutorials May 15, 2026
[
### How to build a real-time AI chatbot in minutes with Netlify Agent Runners (no backend)
](/blog/how-to-build-a-real-time-ai-chatbot-in-minutes-with-netlify-agent-runners-no-backend)
- 
Nahrin Jalal

### How do the best dev and marketing teams work together?
[Access the report](https://www.netlify.com/reports/2024-leadership-trend-report/access/)