---
title: "Next.js + Contentful CMS Tutorial"
description: "Part one in a Next.js series exploring CMS options and integration into Next.js. Learn how to setup Contentful and Next, deployed on Netlify."
source: "https://www.netlify.com/blog/2020/08/17/integrate-next.js-and-contentful/"
last_updated: "2026-07-10T23:59:52.000Z"
---
Helllooo!
This is the first post in a Next.js series in which I explore the world of CMS options, and how they work with Next.js! This first one is using [Contentful](https://www.contentful.com/)!
TL;DR: We will be building a simple demo site [like this one](https://next-contentful-starter.netlify.app/), and you can clone the repo for it [here](https://github.com/cassidoo/next-contentful-starter). You’ll need to do the **Set up Contentful** and **Set up Netlify** steps to make it work for you!
## Set up Contentful
Go ahead and sign up for [Contentful](https://www.contentful.com/), and start a project. Create a content model (in this case I’ll just do a simple Post with `title`, `date`, and `image`), save it, and then navigate over to get your API keys.
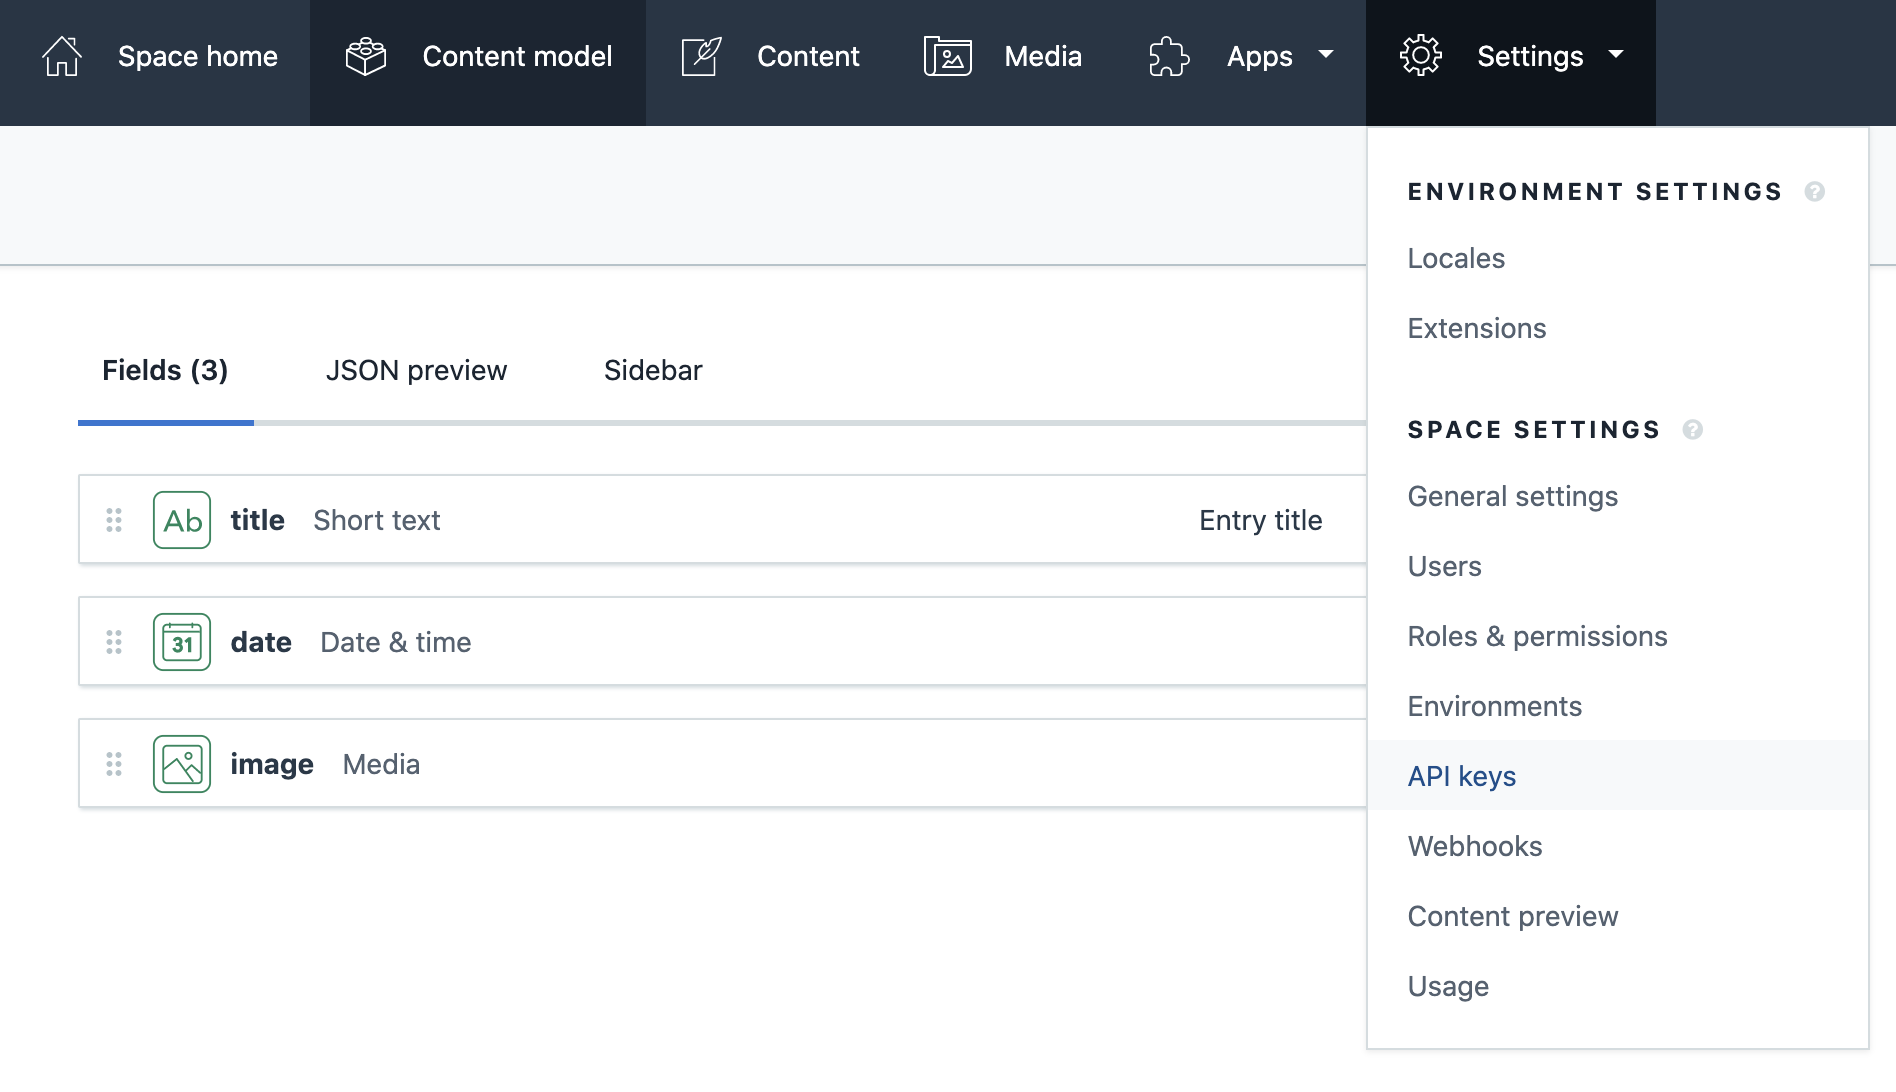
Once you’ve gotten your keys, save them somewhere handy, we’re going to use them!
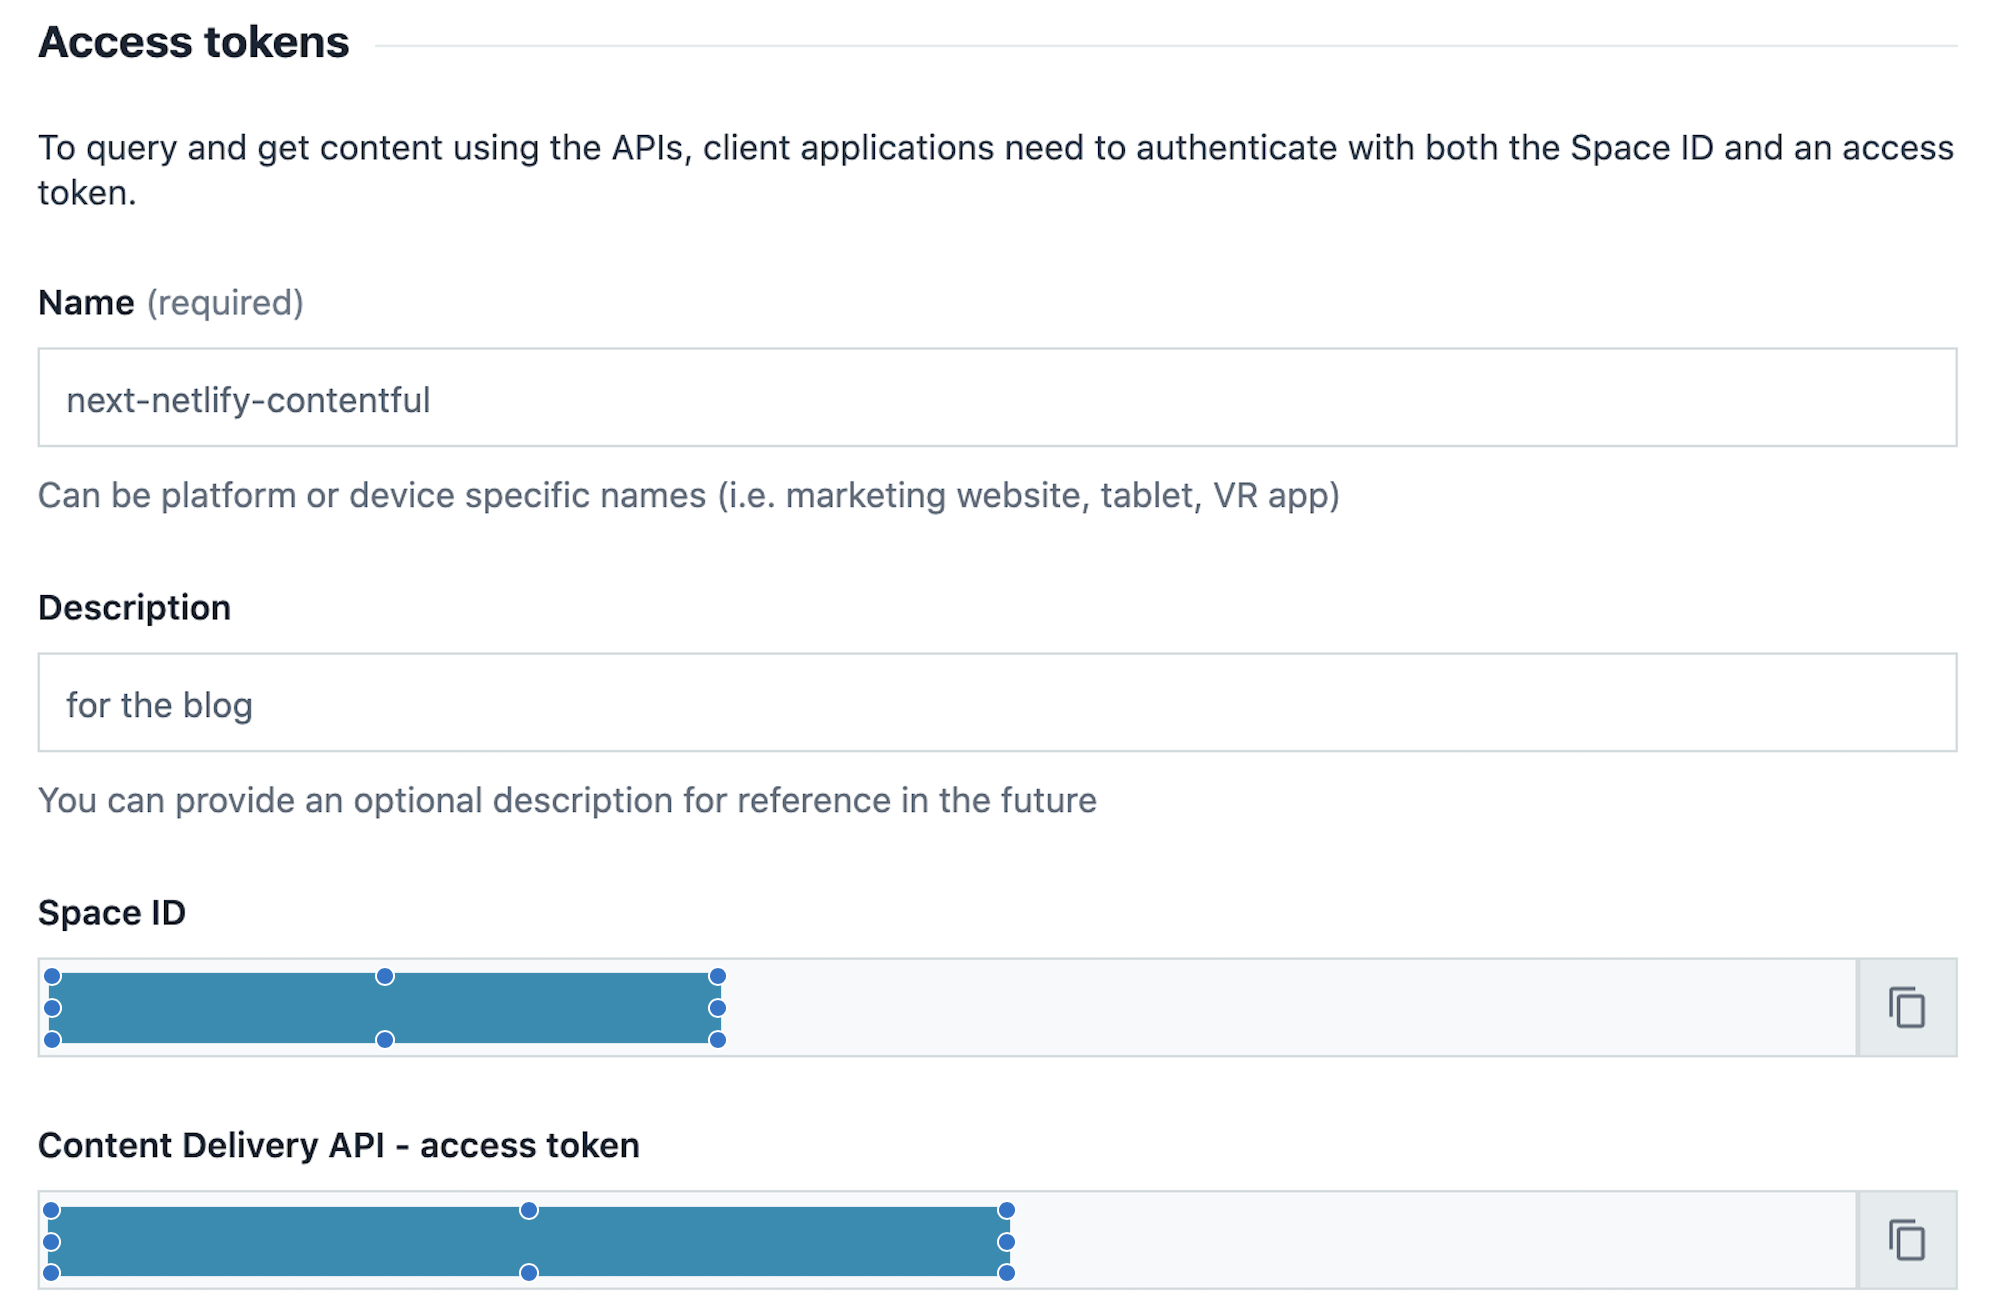
From here, make a couple of Posts now so that you have something to populate your project with.
## Set up Netlify
Next (heh), we’re going to set up your project on Netlify. You can start a brand new Next.js project now, or you can use your own. Here’s a lil one-click starter if you’d like to start with that:
[](https://app.netlify.com/start/deploy?repository=https://github.com/netlify-templates/next-netlify-starter&utm_source=github&utm_medium=nextstarter-cs&utm_campaign=devex)
**This is a fresh, new Next.js project! If you want to use an existing basic Contentful starter, use the project linked at the bottom of this blog post (or [right here](https://github.com/cassidoo/next-contentful-starter)). You will still need to do the rest of the steps in this section to connect Netlify to Contentful!**
Now that you have a Netlify project, go to your Build & Deploy settings and stick in your API keys! Make sure you name them something starting with `NEXT_PUBLIC_` so the variables will be accessible in the browser (this is [a Next.js thing](https://nextjs.org/docs/basic-features/environment-variables#exposing-environment-variables-to-the-browser)).
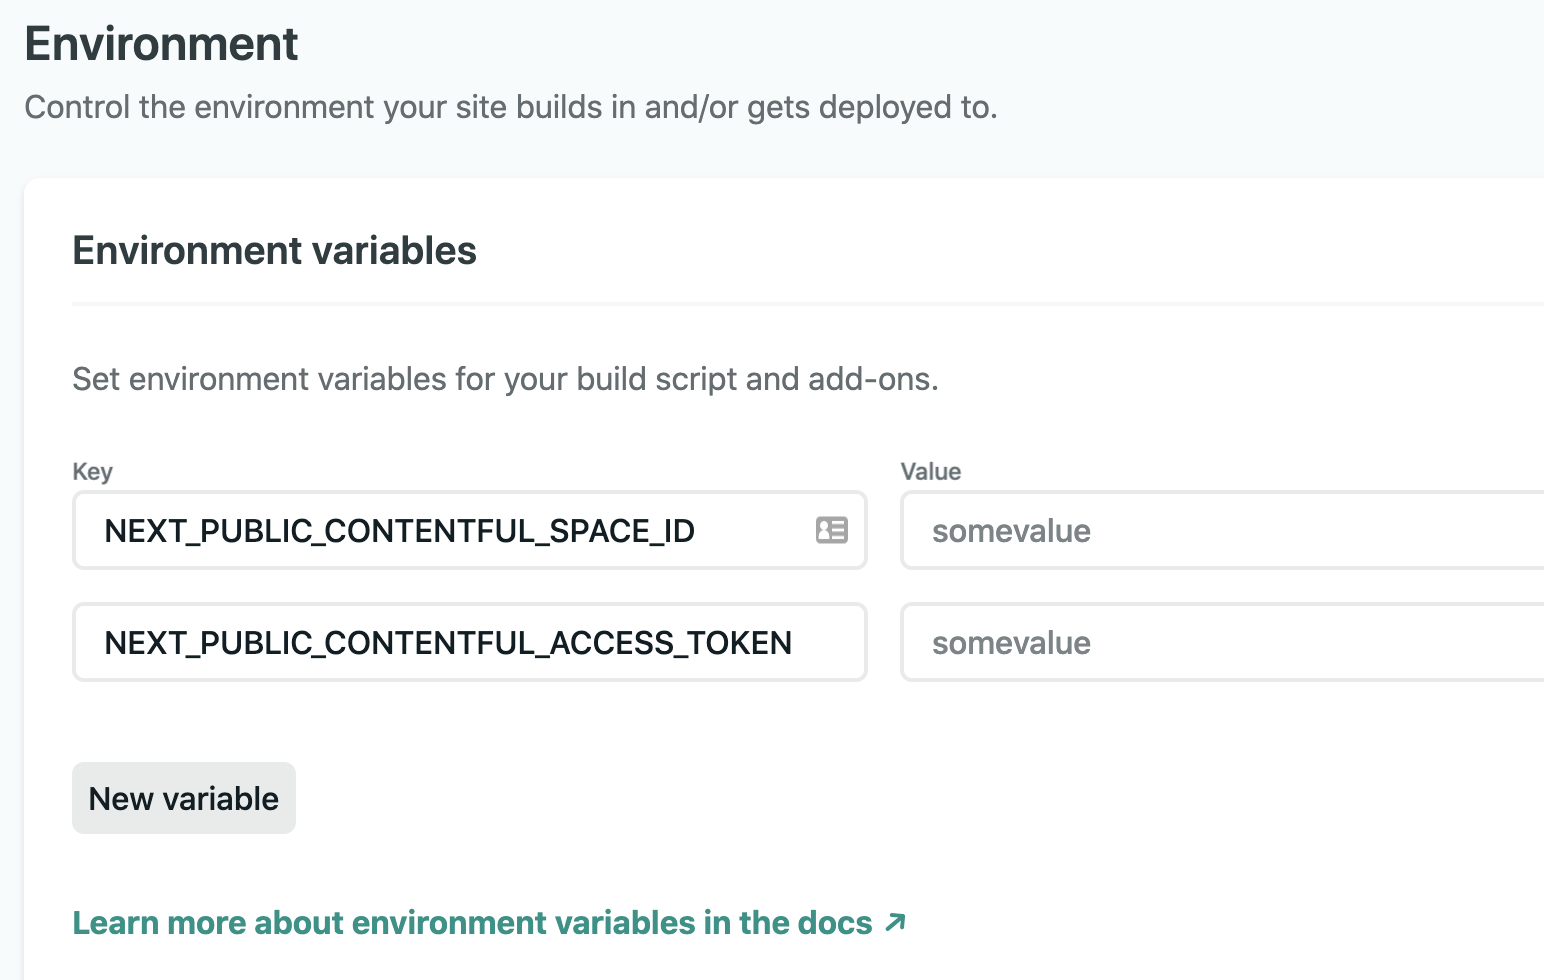
There’s one last connection to put in there, [a webhook](https://docs.netlify.com/configure-builds/build-hooks/?utm_source=blog&utm_medium=contentfulnext-cs&utm_campaign=devex)!
Scroll to the “Build hooks” section here and make a new Contentful hook.
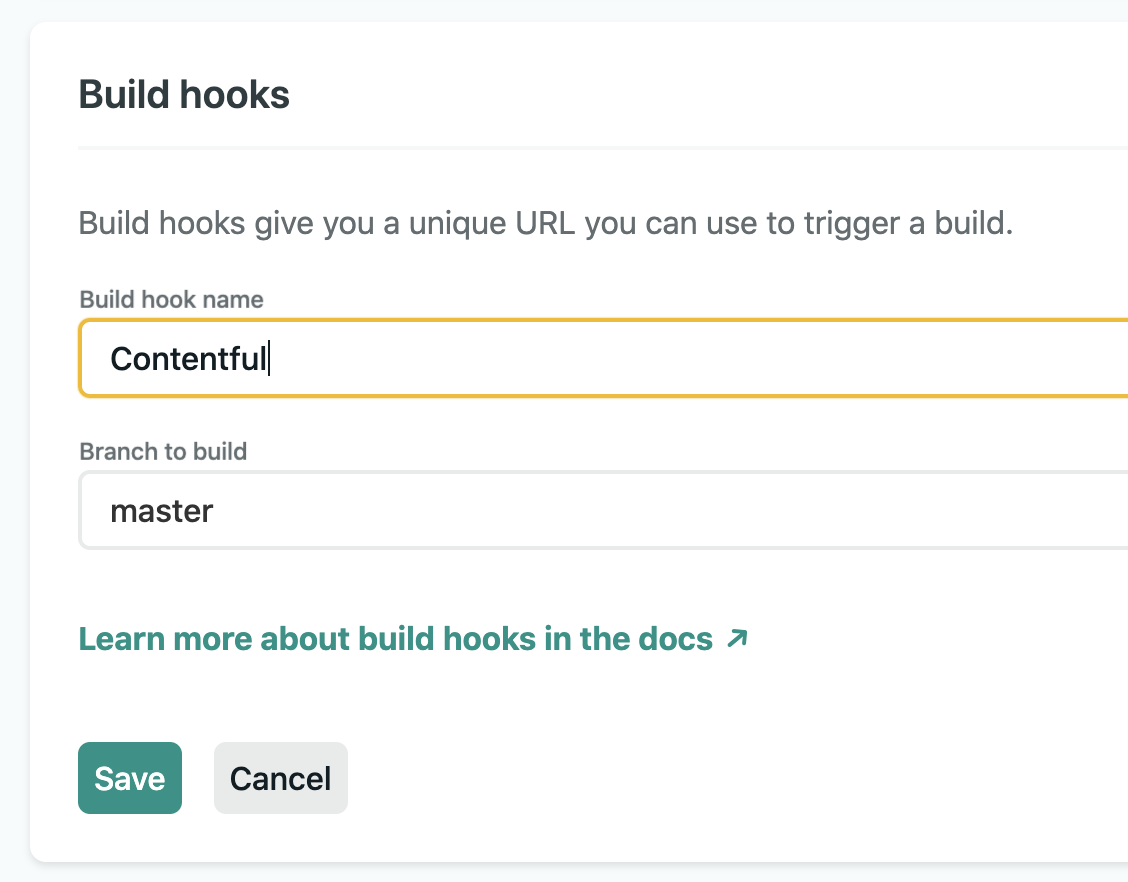
Once you’ve done this, copy the URL the UI gives you.
Go back to Contentful, head over to the Webhooks Settings and you can click the handy “Add” next to Netlify on the side to make one for your project.
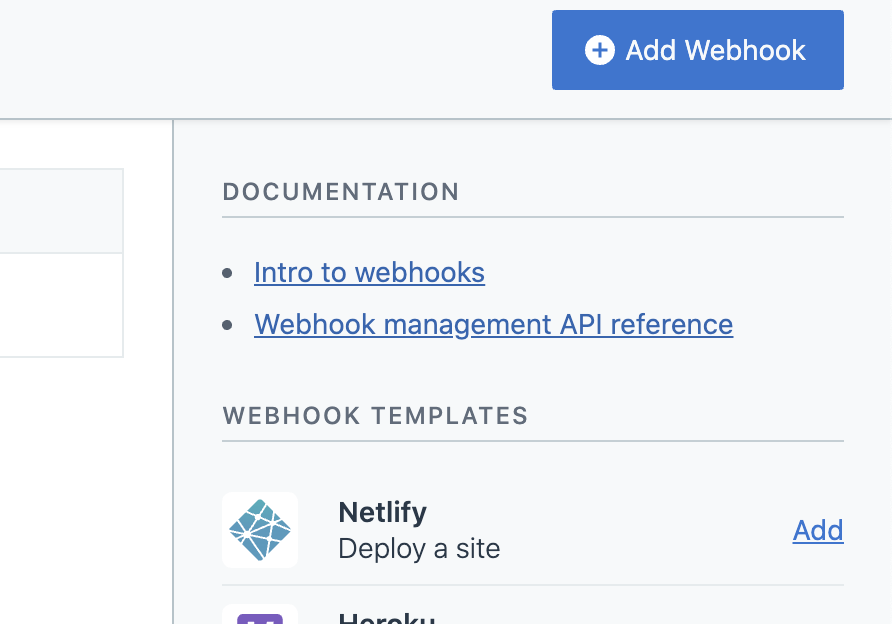
Paste in the webhook URL here, and you’re all set up! Let’s get coding.
## Set up Next.js
TL;DR: If you don’t feel like going through this, you can copy [my existing project at this repo](https://github.com/cassidoo/next-contentful-starter), or use this one-click install:
[](https://app.netlify.com/start/deploy?repository=https://github.com/cassidoo/next-contentful-starter&utm_source=github&utm_medium=nextcontentful-cs&utm_campaign=devex)
Assuming you didn’t do the above, let’s build this all from the ground up. First off, make sure you install `contentful` into your project:
```
npm install contentful
```
Now remember your Contentful API keys? We’re going to need those to develop locally!
Make a `.env.local` file at the top level of your project, and populate it with your keys:
```
NEXT_PUBLIC_CONTENTFUL_SPACE_ID=somethingNEXT_PUBLIC_CONTENTFUL_ACCESS_TOKEN=somethingelse
```
Now let’s use them! Make a new file called `contentfulPosts.js` (I put this in a `util/` folder, but you can put it wherever you’d like), and stick this code into it:
```
const space = process.env.NEXT_PUBLIC_CONTENTFUL_SPACE_IDconst accessToken = process.env.NEXT_PUBLIC_CONTENTFUL_ACCESS_TOKEN
const client = require('contentful').createClient({ space: space, accessToken: accessToken,})
export async function fetchEntries() { const entries = await client.getEntries() if (entries.items) return entries.items console.log(`Error getting Entries for ${contentType.name}.`)}
export default { fetchEntries }
```
What’s happening here? From top to bottom:
- We’re pulling in our API keys, and making a Contentful `client` that we can use to pull in entries
- We’re making a `fetchEntries` function that calls `client.getEntries()` from Contentful (again, make sure you have some Posts to query!)
- We’re exporting this function to use in a `getStaticProps` function (keep reading, you’ll see how!)
Let’s make a `Post.js` component in the `components/` directory that will use the data we pass to it.
```
function Post({ date, image, title }) { let { file, description } = image
return (
{description}
{title}
{date.substring(0, 10)}
)}
export default Post
```
All this does is pull in data via props, so that we can put it on the page. Style it however you’d like!
Now, to use this `Post` component, go ahead and go to `index.js` (or any other page where you want to use it), import `fetchEntries` and `Post`, and combine their powers like so:
```
// at the top of your component file
import { fetchEntries } from '@utils/contentfulPosts'import Post from '@components/Post'
// inside your component markup, pull `posts` from props
{posts.map((p) => { return })}
// at the bottom of your component file
export async function getStaticProps() { const res = await fetchEntries() const posts = await res.map((p) => { return p.fields })
return { props: { posts, }, }}
```
If you’re having trouble, check out [this code sample](https://github.com/cassidoo/next-contentful-starter/blob/master/pages/index.js) to confirm you have the code in the right spot.
Notice how we’re using `getStaticProps` to fetch our API! That means that the data is pulled at build time, and so your users don’t have to wait for posts to load. How neat is that?? Also, because you set up the webhook earlier, every new post will trigger a build for you without you having to rebuild the site yourself manually.
And with that, voilà! You have a Contentful-populated Next.js application. Now go forth and make it your own!
## Can I see how it should be?
Want to see an example as you work on your own project? Go and clone mine here (don’t forget to set up your API keys and everything before testing it out):
[](https://app.netlify.com/start/deploy?repository=https://github.com/cassidoo/next-contentful-starter&utm_source=github&utm_medium=nextcontentful-cs&utm_campaign=devex)
Or, if you’d like to see a live version, check out [this deployed site](https://next-contentful-starter.netlify.app/).
### Share
- [X (fka Twitter)](https://twitter.com/intent/tweet?text=Integrate Next.js & Contentful&url=https://www.netlify.com/blog/2020/08/17/integrate-next.js-and-contentful/)
- [LinkedIn](https://www.linkedin.com/shareArticle?mini=true&url=https%3A%2F%2Fwww.netlify.com%2Fblog%2F2020%2F08%2F17%2Fintegrate-next.js-and-contentful%2F)
- [Facebook](https://www.facebook.com/sharer.php?u=https://www.netlify.com/blog/2020/08/17/integrate-next.js-and-contentful/)
- [Bluesky](https://bsky.app/intent/compose?text=Integrate Next.js & Contentful+https://www.netlify.com/blog/2020/08/17/integrate-next.js-and-contentful/)
## Keep reading

Guides & Tutorials June 18, 2020
[
### Next.js 101: What you should know
](/blog/2020/06/18/next.js-101-what-you-should-know/)
- 
Cassidy Williams

Guides & Tutorials August 28, 2020
[
### Integrate Next.js & Prismic
](/blog/2020/08/28/integrate-next.js-prismic/)
- 
Cassidy Williams
## Recent posts
News & Announcements June 25, 2026
[
### Netlify Functions, designed for Agent Experience
](/blog/netlify-functions-designed-for-agent-experience)
- 
Eduardo Bouças
News & Announcements June 24, 2026
[
### How we measure Netlify’s Agent Experience
](/blog/how-we-measure-netlify-agent-experience)
- 
Sean Roberts
Guides & Tutorials May 15, 2026
[
### How to build a real-time AI chatbot in minutes with Netlify Agent Runners (no backend)
](/blog/how-to-build-a-real-time-ai-chatbot-in-minutes-with-netlify-agent-runners-no-backend)
- 
Nahrin Jalal
### How do the best dev and marketing teams work together?
[Access the report](https://www.netlify.com/reports/2024-leadership-trend-report/access/)