---
title: "How to Create Nuxt App with GraphQL and Hasura"
description: "In this tutorial, we"
source: "https://www.netlify.com/blog/2020/10/26/graphql-with-hasura-and-nuxt/"
last_updated: "2026-07-10T18:34:59.000Z"
---
Working with Hasura and Nuxt is one of the most straightforward ways I’ve personally found to create a Jamstack app with GraphQL, and I couldn’t be more excited about the developer experience.
Here’s what we’ll be building:
[hasura-nuxt-demo.netlify.app](https://hasura-nuxt-demo.netlify.app/)
Here’s the repo:
[github.com/sdras/favegame](https://github.com/sdras/favegame)
We’ll be scoping it to just the basic functionality for the purposes of clarity, but you can build far richer experiences from here with a lot of ease. Let’s dive in!
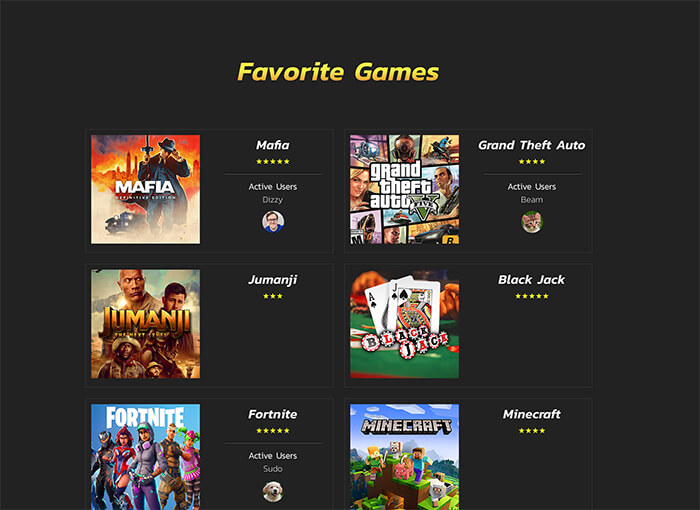
## Setting up
First, create a free [Hasura account](https://hasura.io/)\- it will prompt you if you would like to bring your own Postgres database (or what I like to call BYOP) or link a new or existing Heroku account to create a new database. Choose whichever option suits you (I linked my Heroku account).
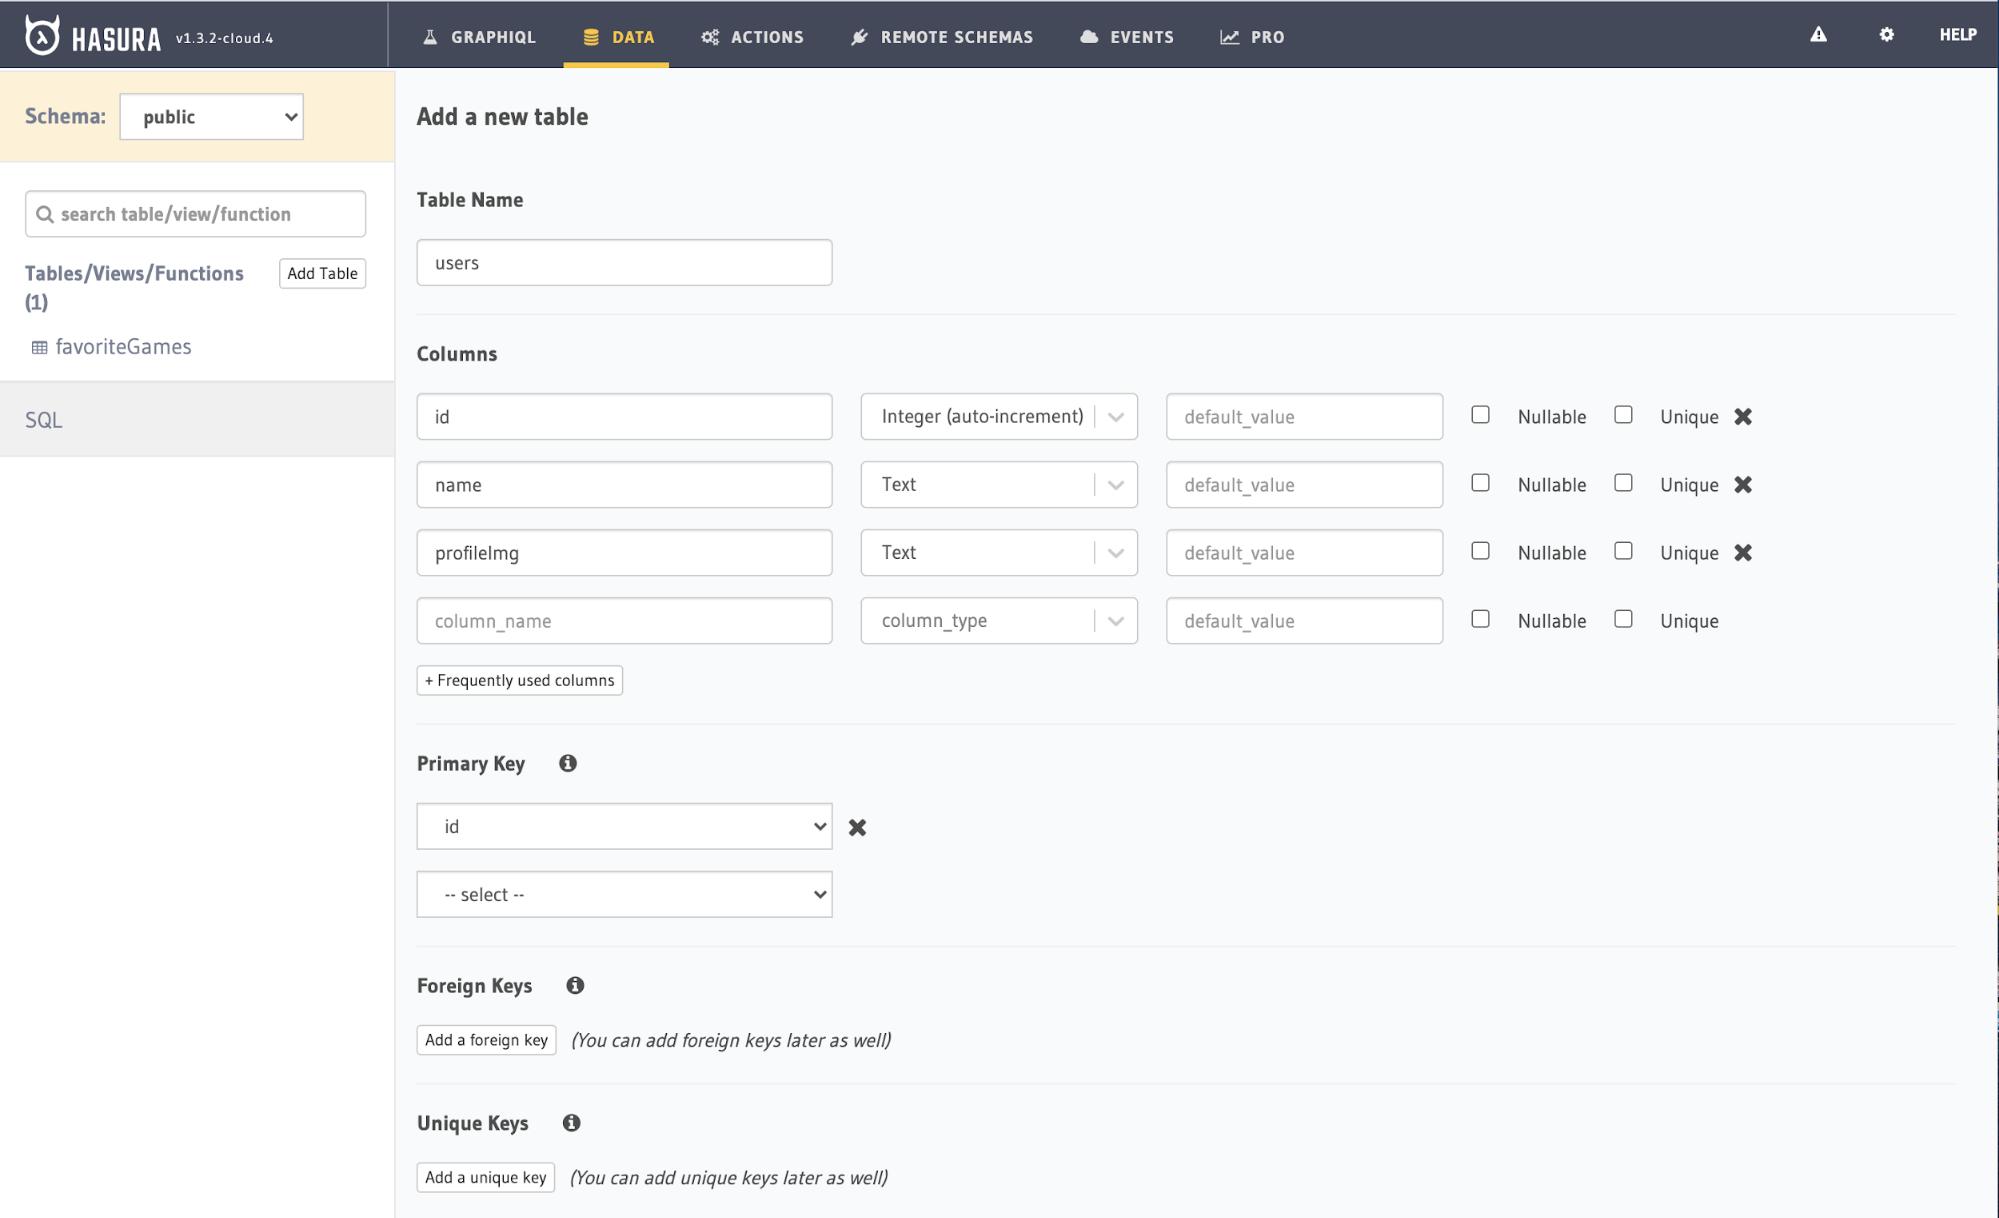
From there, create a new project. In that project, you’ll create a table and add the fields you’ll need. Our first table is `users` I needed an `id`, of type `Integer` (auto-incrementing), name, of type `Text` (another name for `String` :) ), and `profileImg`, which will be of type `Text` as well.
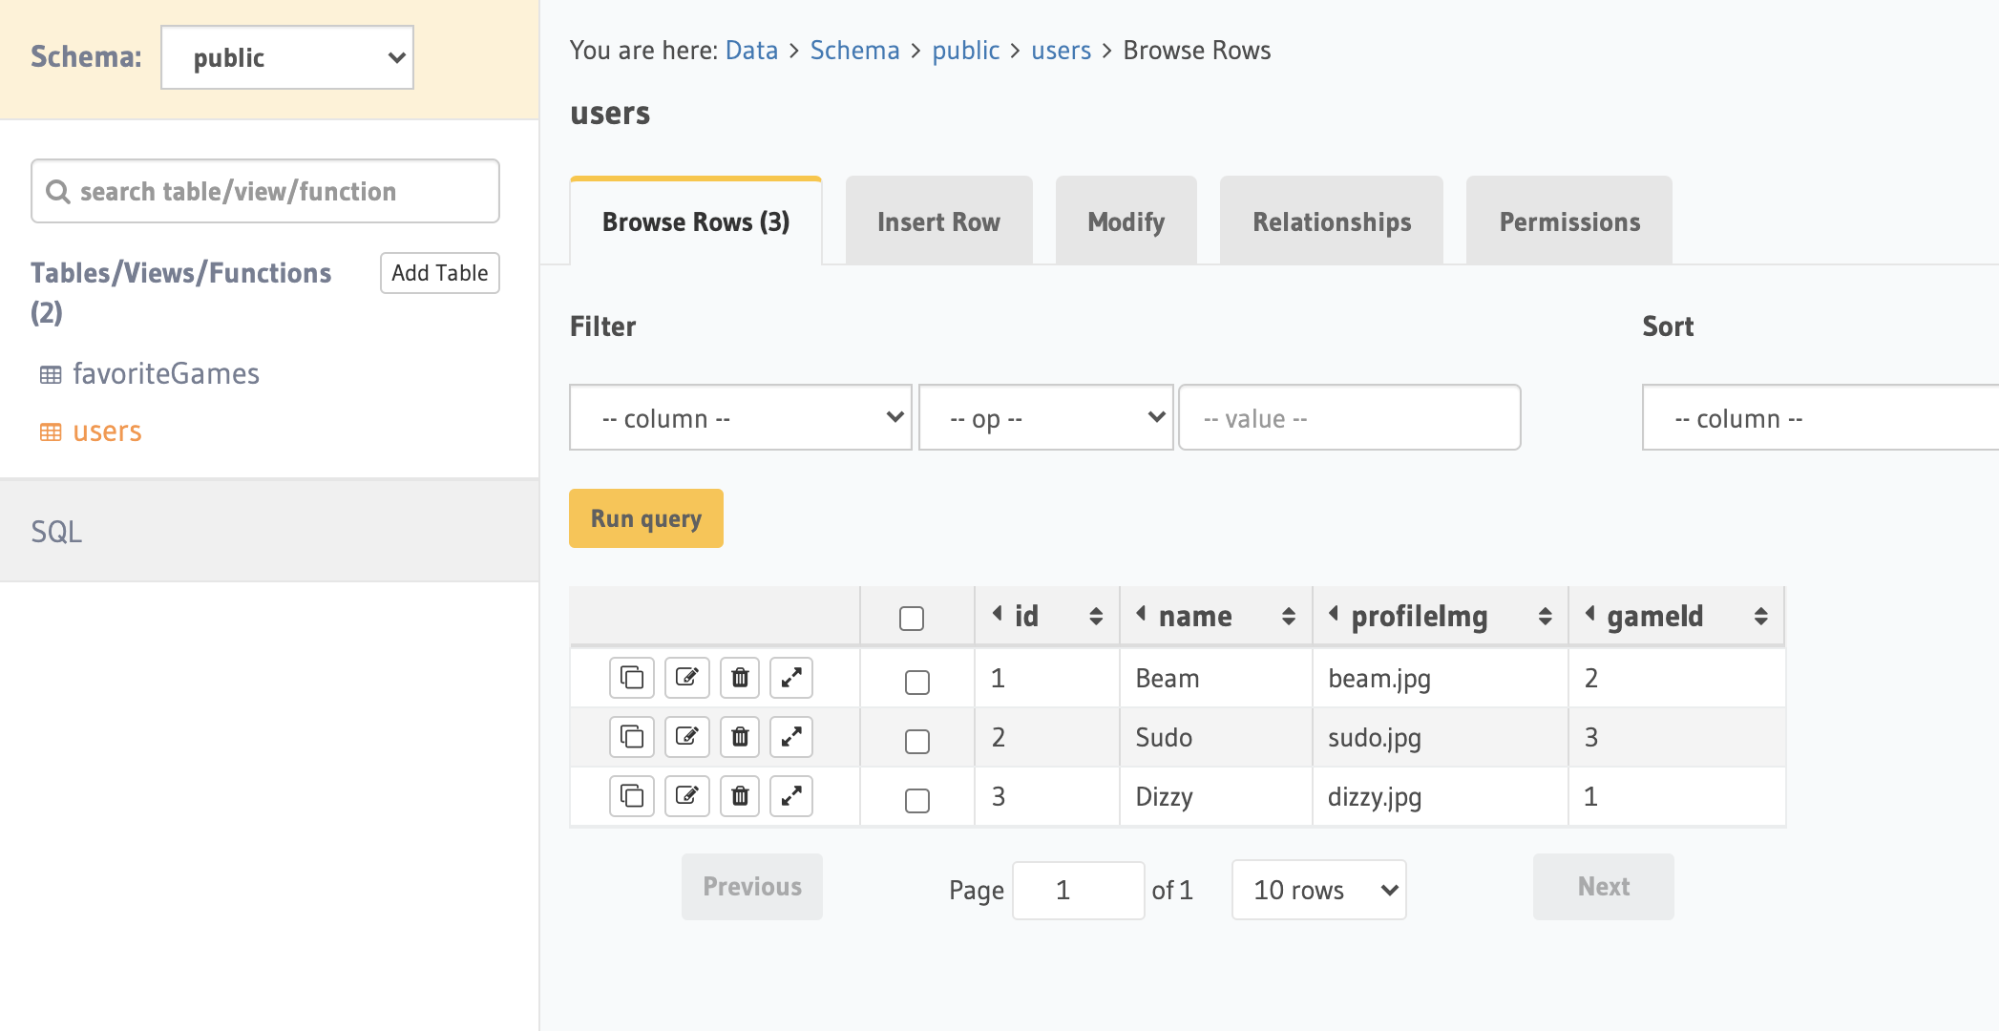
From there, insert some rows of dummy data in the **Insert Row** tab as well. If you switch to the **Browse Rows** tabs, you should see your dummy data populated.
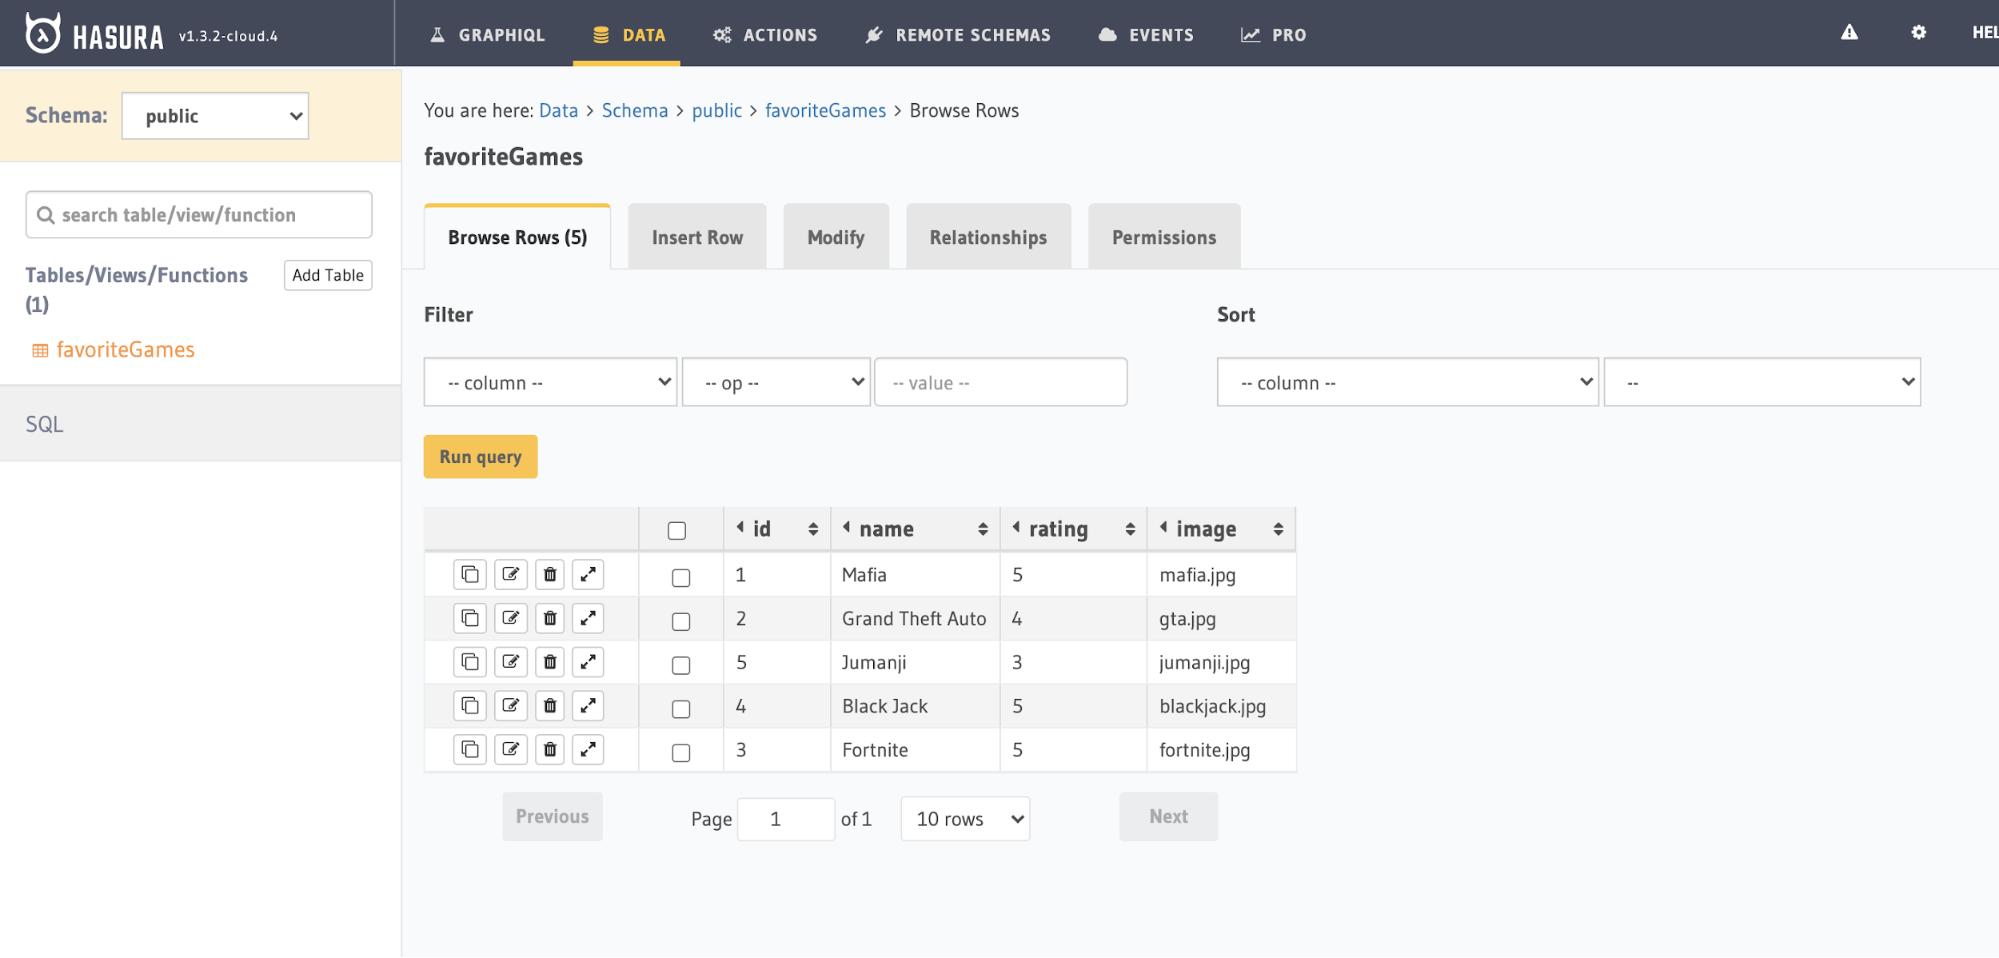
Now, let’s create another table called `favoriteGames` and do the same. This time we’ll use the same id, and name, but also add `rating` (Integer), and `image` (Text):
Now, we should be able to go to the GraphiQL tab at the very top, test our first query, and see how it goes:
```
query getGames { favoriteGames { id image name rating }}
```
returns:
```
{ "data": { "favoriteGames": [ { "id": 1, "image": "mafia.jpg", "name": "Mafia", "rating": 5 }, { "id": 2, "image": "gta.jpg", "name": "Grand Theft Auto", "rating": 4 }, { "id": 5, "image": "jumanji.jpg", "name": "Jumanji", "rating": 3 }, { "id": 4, "image": "blackjack.jpg", "name": "Black Jack", "rating": 5 }, { "id": 3, "image": "fortnite.jpg", "name": "Fortnite", "rating": 5 }, { "id": 6, "image": "minecraft.jpg", "name": "Minecraft", "rating": 4 } ] }}
```
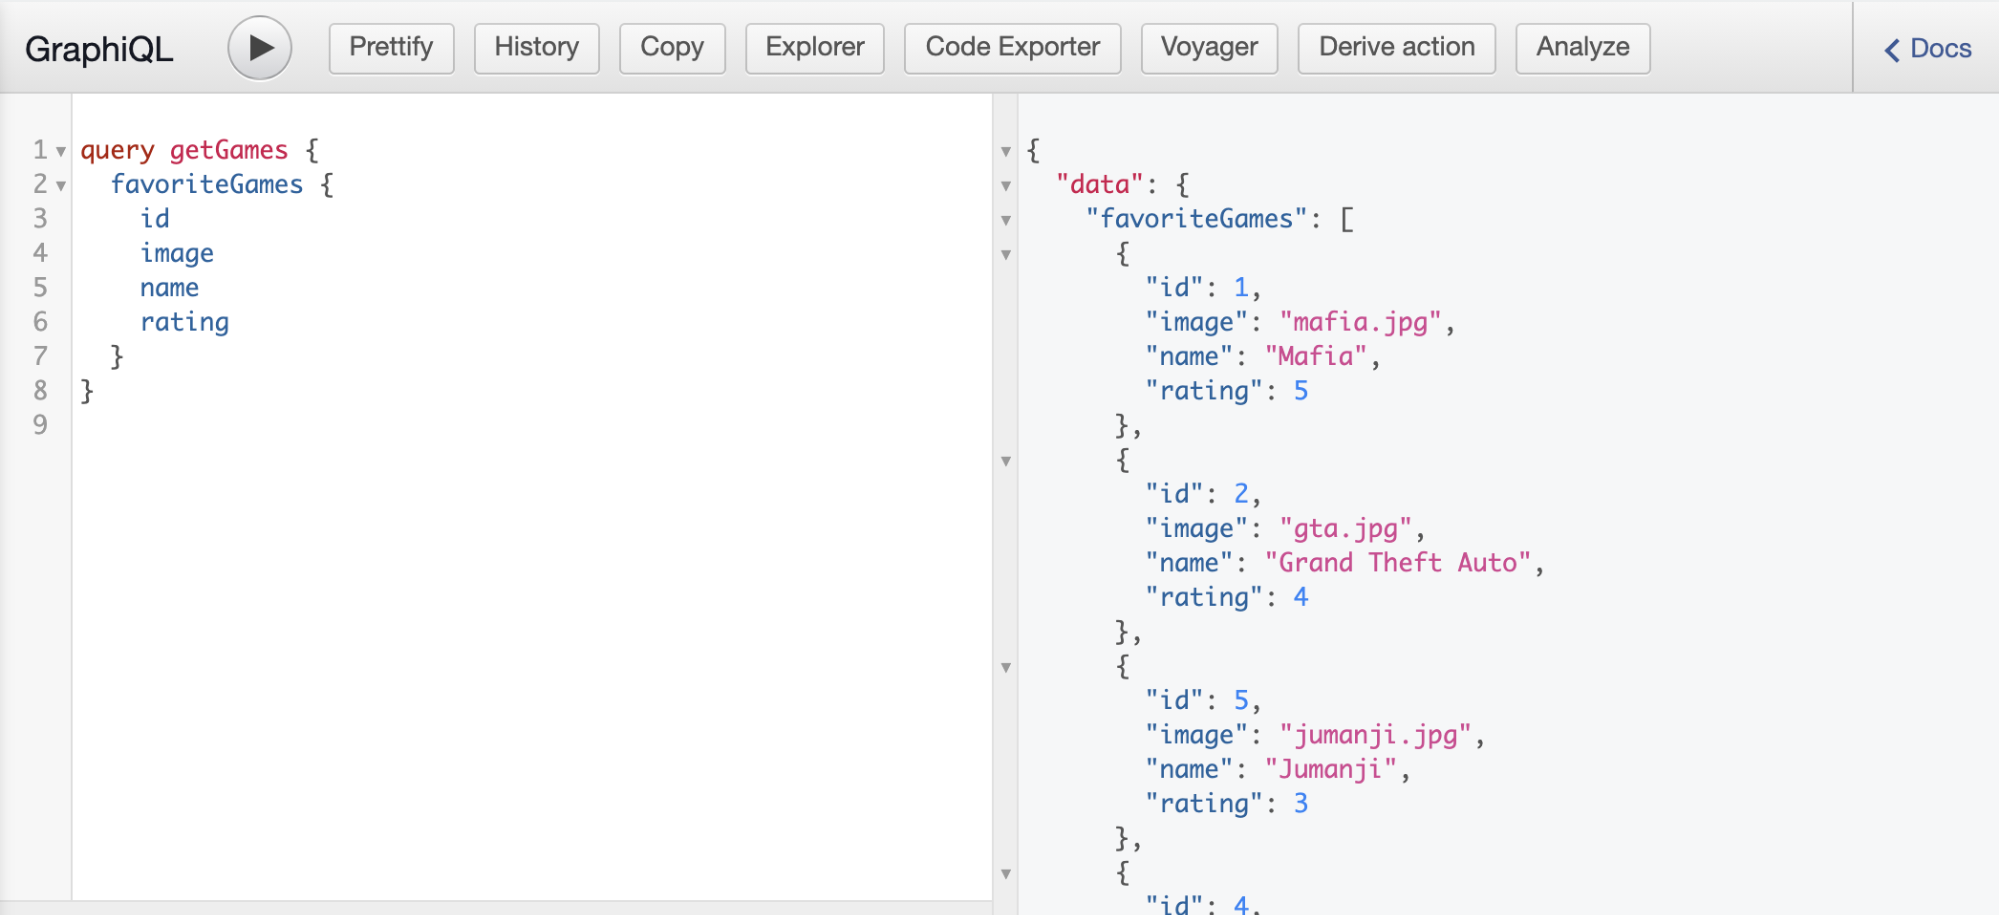
Great! But what we really want is a list of all of the games along with the relevant active users associated with each game. In order to create that association between the two tables, we need to create a relationship.
## Relationships
Let’s go back to our `users` table, and click on the `modify` tab. Here, we’ll create one more field, called `gameId`. This will give us the ability to pick an associative id from the `favoriteGames` table. Let’s go back to our `browse rows` tab and add id numbers of some games as well.
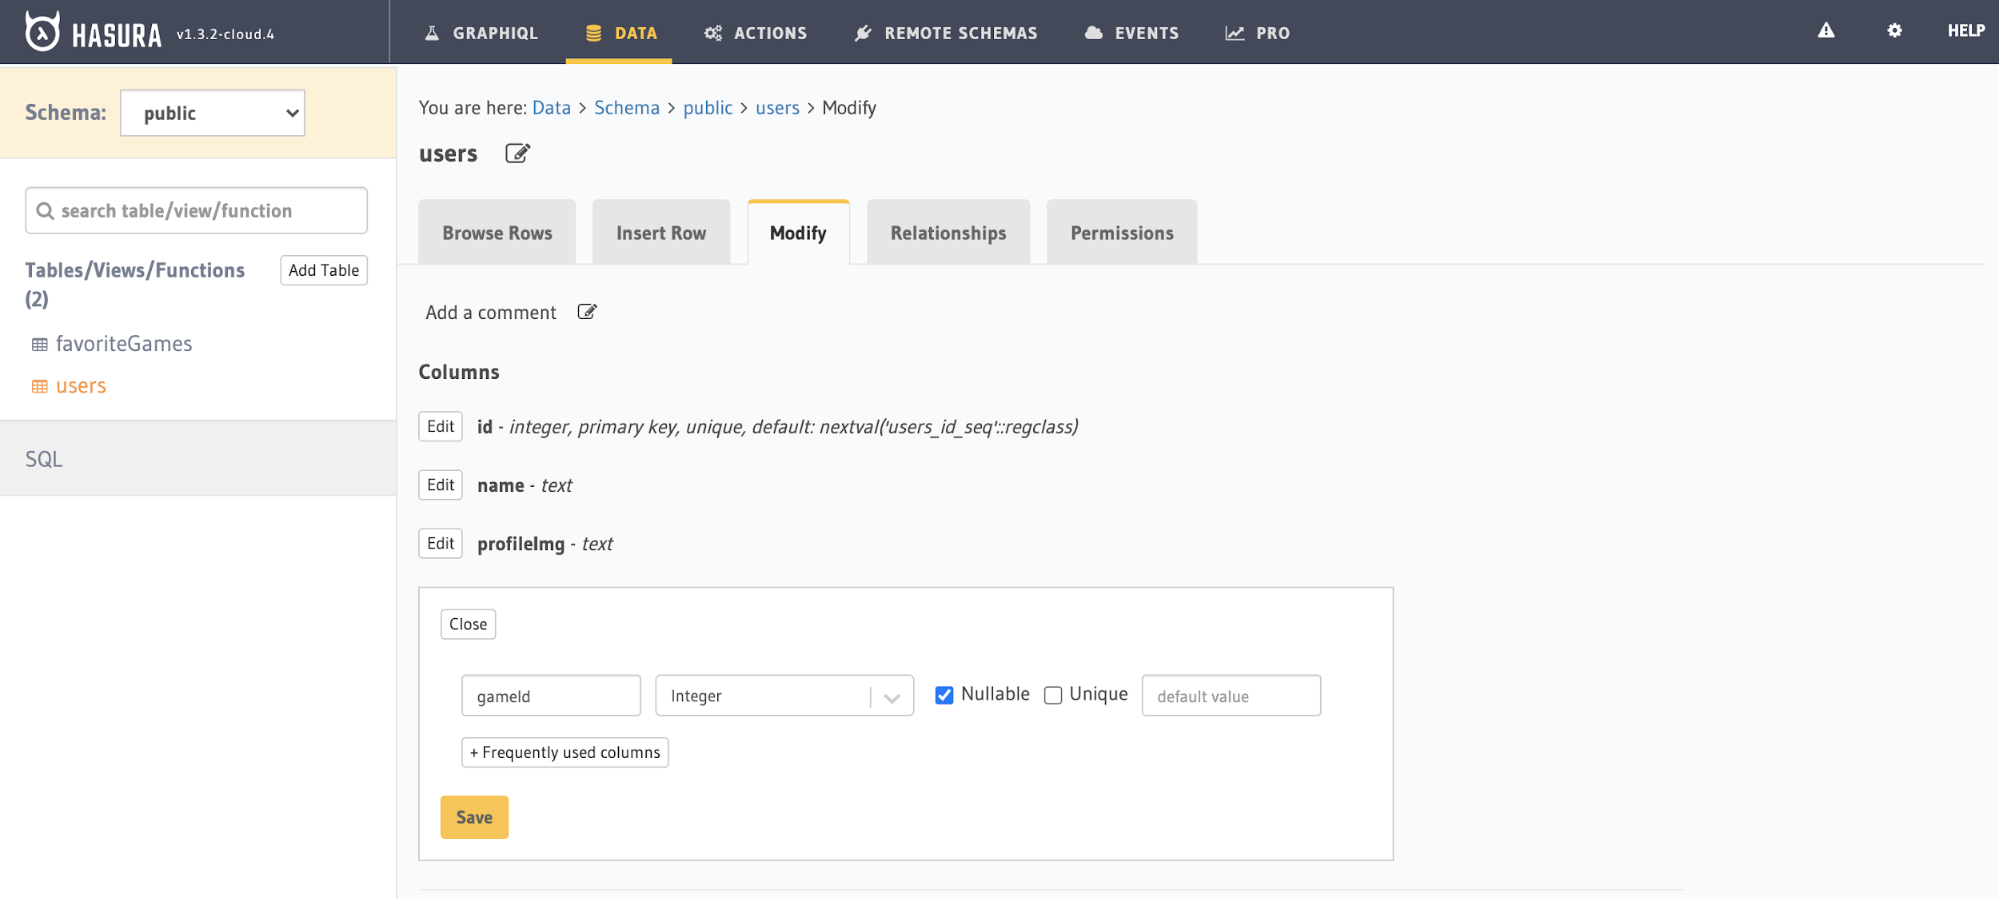
Now, go back to favoriteGames and click the relationships tab. In the table, specify an Array Relationship, name it gameUser, and reference the users table.
The id of this table should have a relationship with the gameId you just created in the other users table.
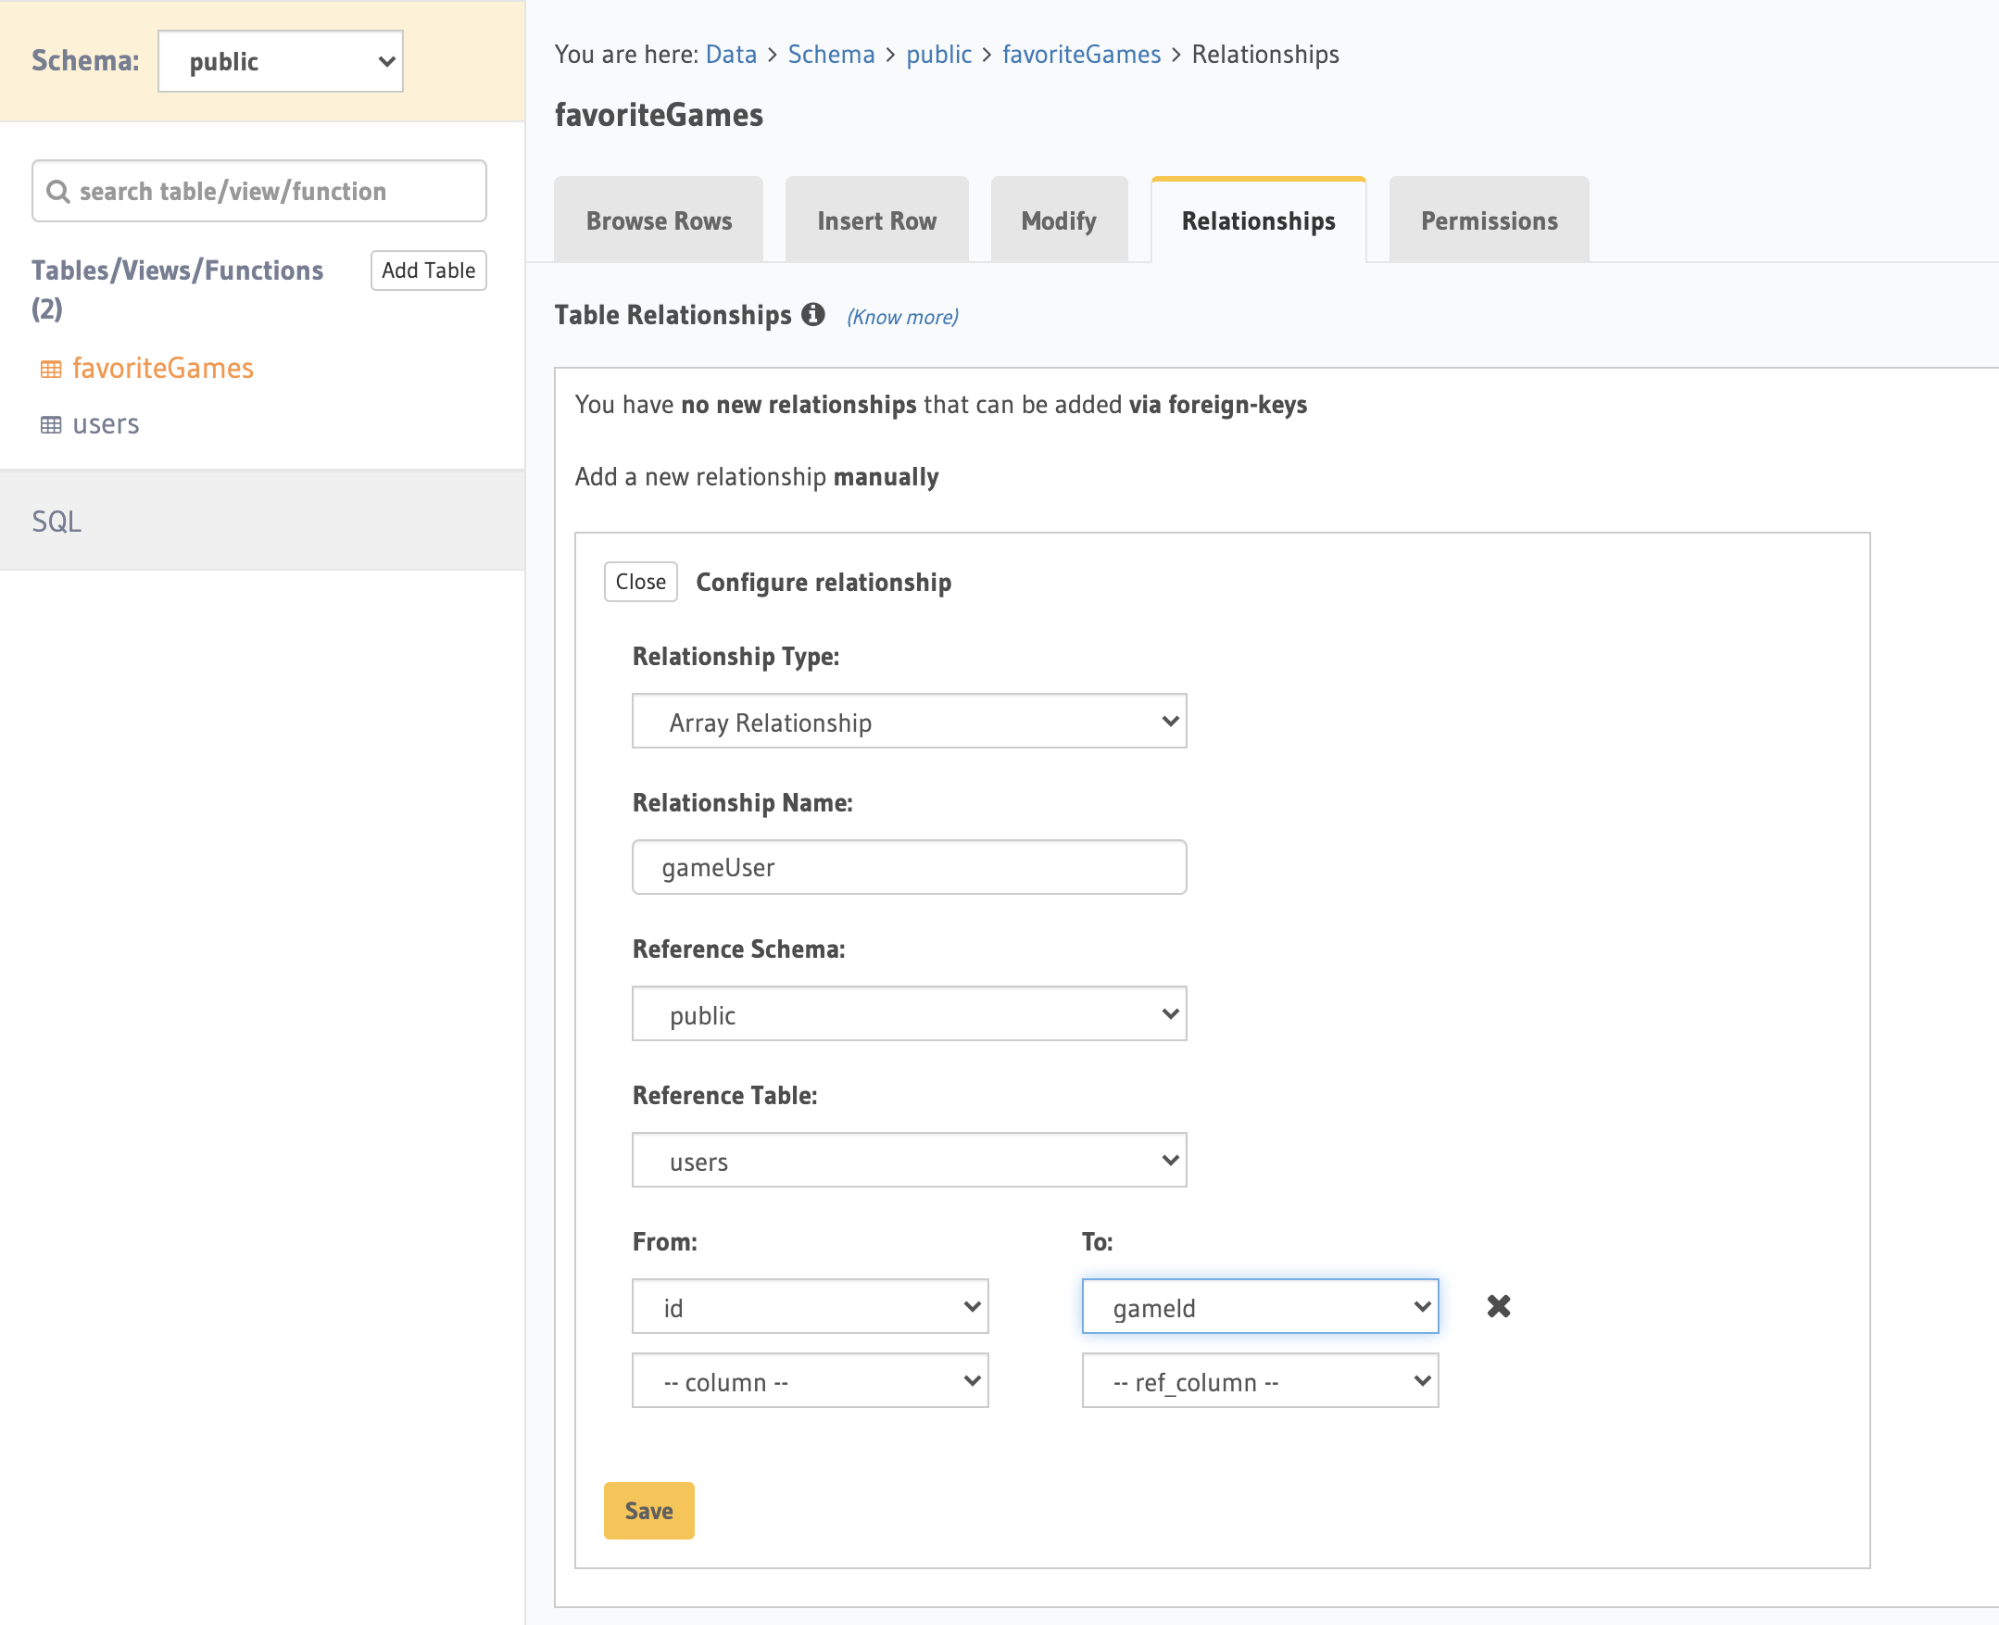
Once you save it, you should see the array relationship reflected in the table in this tab:
`users . gameId → favoriteGames . id`
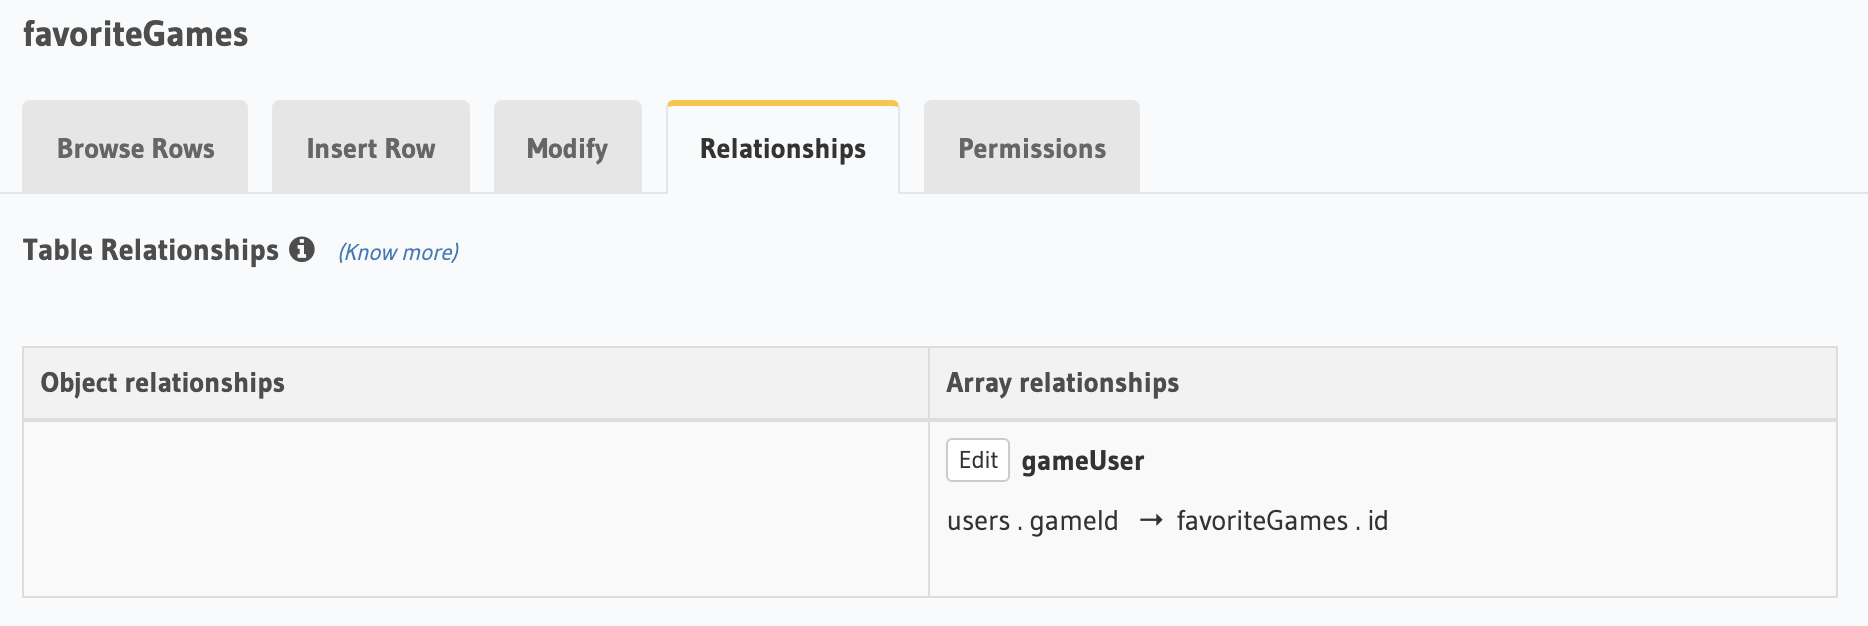
Now we can go back to the top GraphiQL tab, and type in a new query, with that relationship:
```
query getGames { favoriteGames { id image name rating gameUser { id name profileImg } }}
```
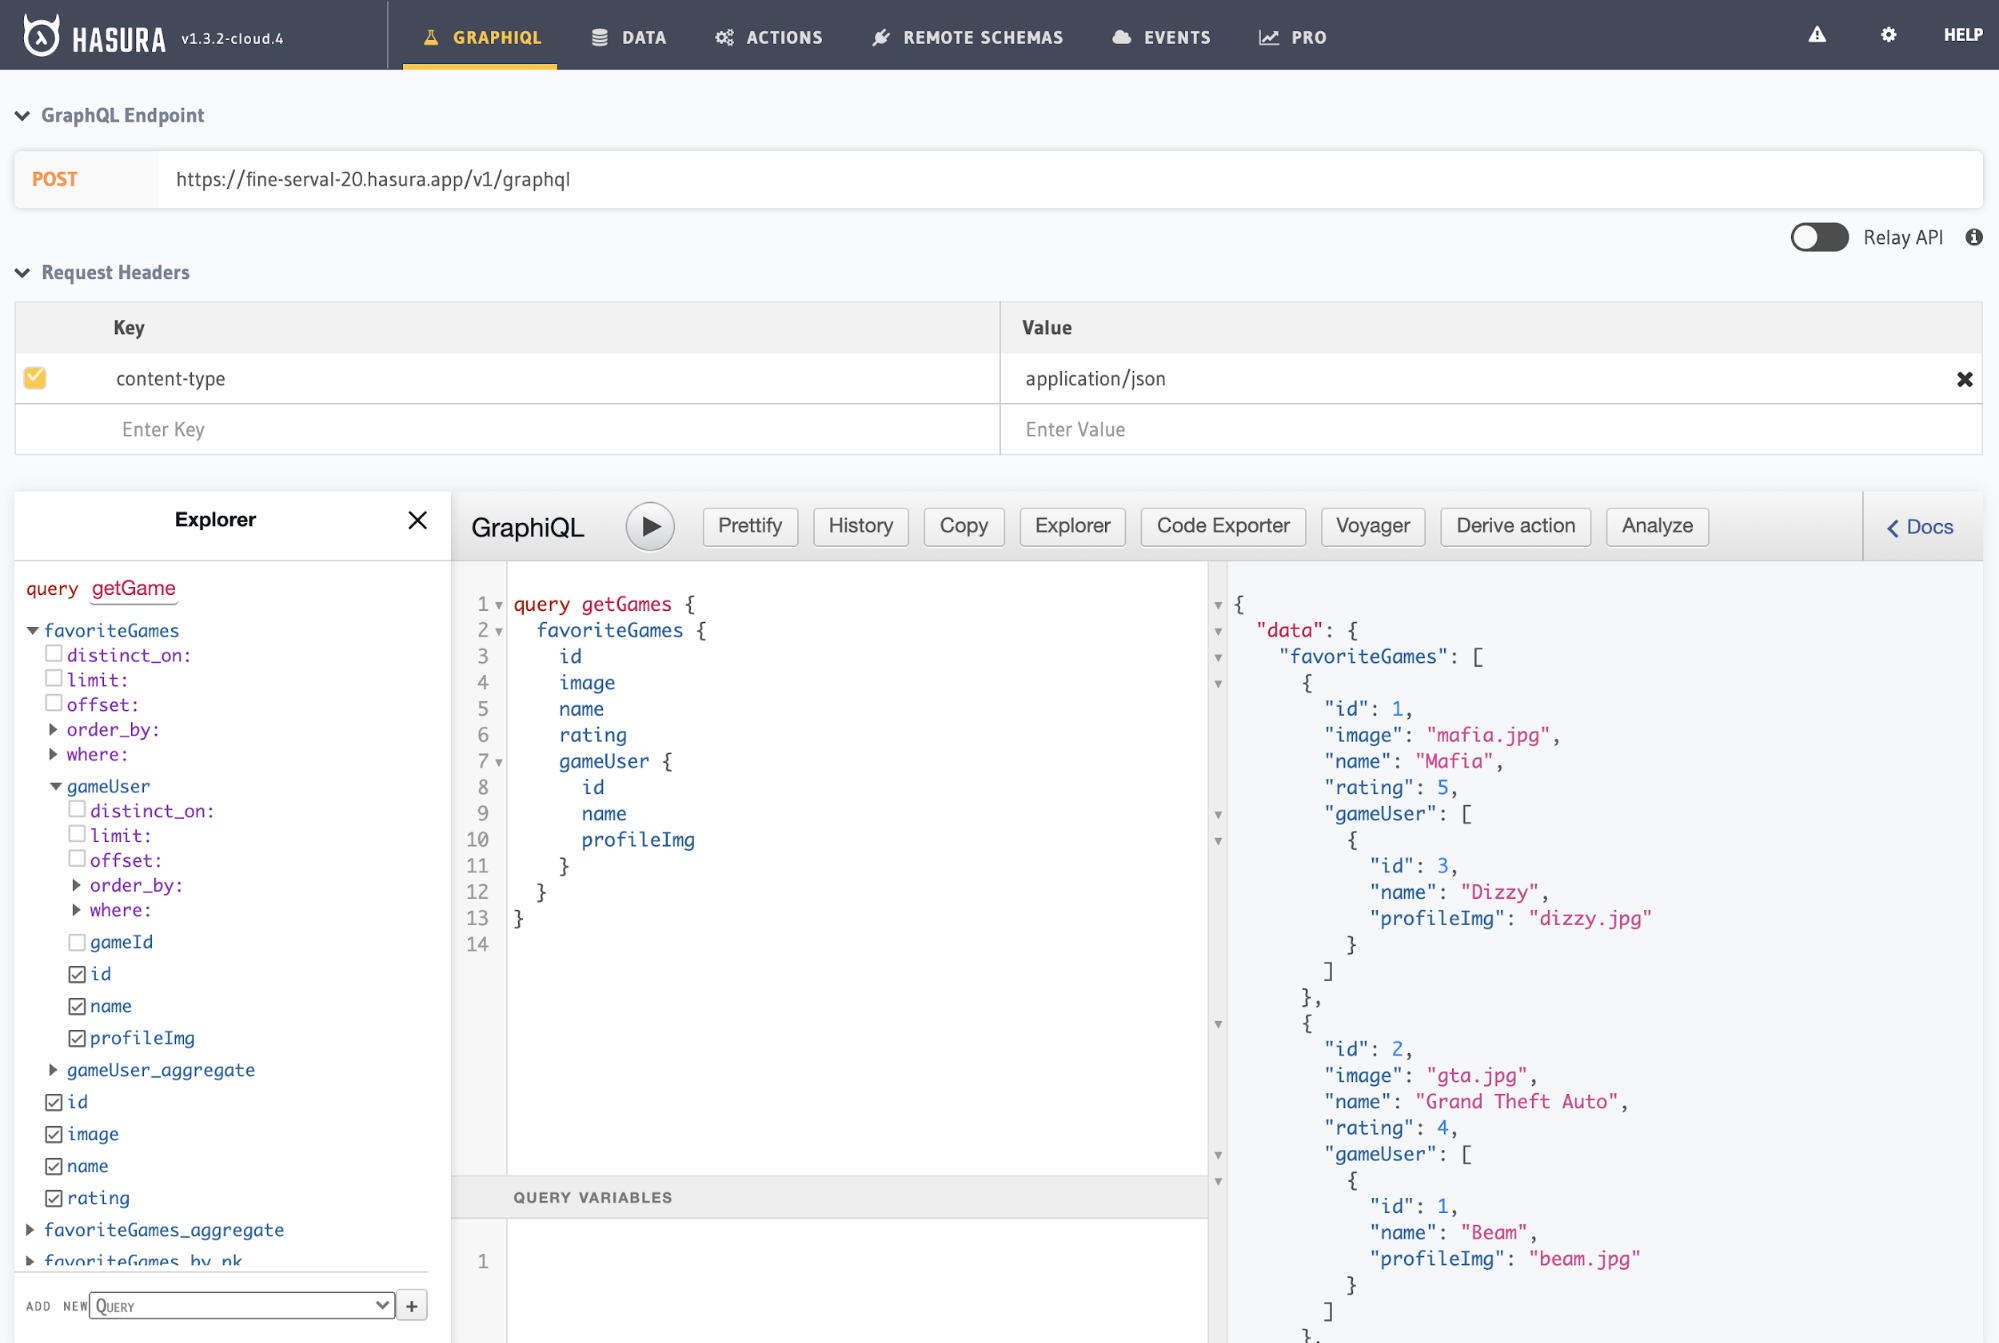
Cool! Now we have our first set of data and relationships set up and ready to use in our application.
## Let’s Build the Nuxt App
Ok! Now let’s build out our Nuxt application. This tutorial assumes basic knowledge of Nuxt, but if you aren’t aware of how to use it, I have a couple of [courses on Frontend Masters](https://frontendmasters.com/teachers/sarah-drasner/) that show you how to set it up.
Let’s create the app:
`yarn create nuxt-app`
Follow the prompts, and for the last prompt, pick `static` (Jamstack app) as the deploy target. Then we’ll add the packages we’ll need:
`yarn add @nuxtjs/apollo graphql-tag`
### Our Nuxt Configuration
From here, we can open our nuxt.config.js and let it know we’ll be using the module:
`modules: ["@nuxtjs/apollo"],`
and also add a section for Apollo:
```
apollo: { clientConfigs: { default: { httpEndpoint: process.env.HASURA_ENDPOINT } } },
```
You can see here that I am using an environment variable, I create a `.env` file at the base root of the project, and put in this endpoint:
```
HASURA_ENDPOINT=https://yourendpointhere.hasura.app/v1/graphql
```
You can find your endpoint at the top of the GraphiQL tab (it will say GraphQL endpoint).
## Bringing it into the store
In an application like this, you may want to pull the data from the Vuex store, if it’s fairly straightforward, so you can centralize your data sources. You might also want finite control over what data is pulled into what page. The app I built uses the Vuex store but I’ll show you how to do it both ways.
In our store/index.js:
First we need to install gql:
```
import gql from "graphql-tag";
```
Then we need the state, where we’ll eventually store our favoriteGames:
```
export const state = () => ({ favoriteGames: \[]});
```
In actions, we’ll call out to Apollo, using this.app to access it. We’ll create our query using gql, and then commit a mutation:
```
export const actions = { async callApollo({ commit }) { let response = await this.app.apolloProvider.defaultClient.query({ query: gql`query GetGames { favoriteGames { id image name rating gameUser { id name profileImg } } }` });
await commit("updateFavoriteGames", response.data.favoriteGames); }};
```
Now let’s create that mutation that will store this data in state:
```
export const mutations = { updateFavoriteGames: (state, data) => { state.favoriteGames = data; }};
```
Finally, we have to dispatch this action. I’ll create a plugin that I’ll call from the server using `.server.js` as the suffix of the filename:
plugins/getGames.server.js
```
export default async ({ store }) => { await store.dispatch("callApollo");};
```
Now, if I register that plugin in `nuxt.config.js`, any time I build the site, it will gather all the data for me in the Vuex store!
```
plugins: [`~/plugins/getGames.server.js`],
```
You can look in your devtools at the Vuex tab and see the data coming in as it should:
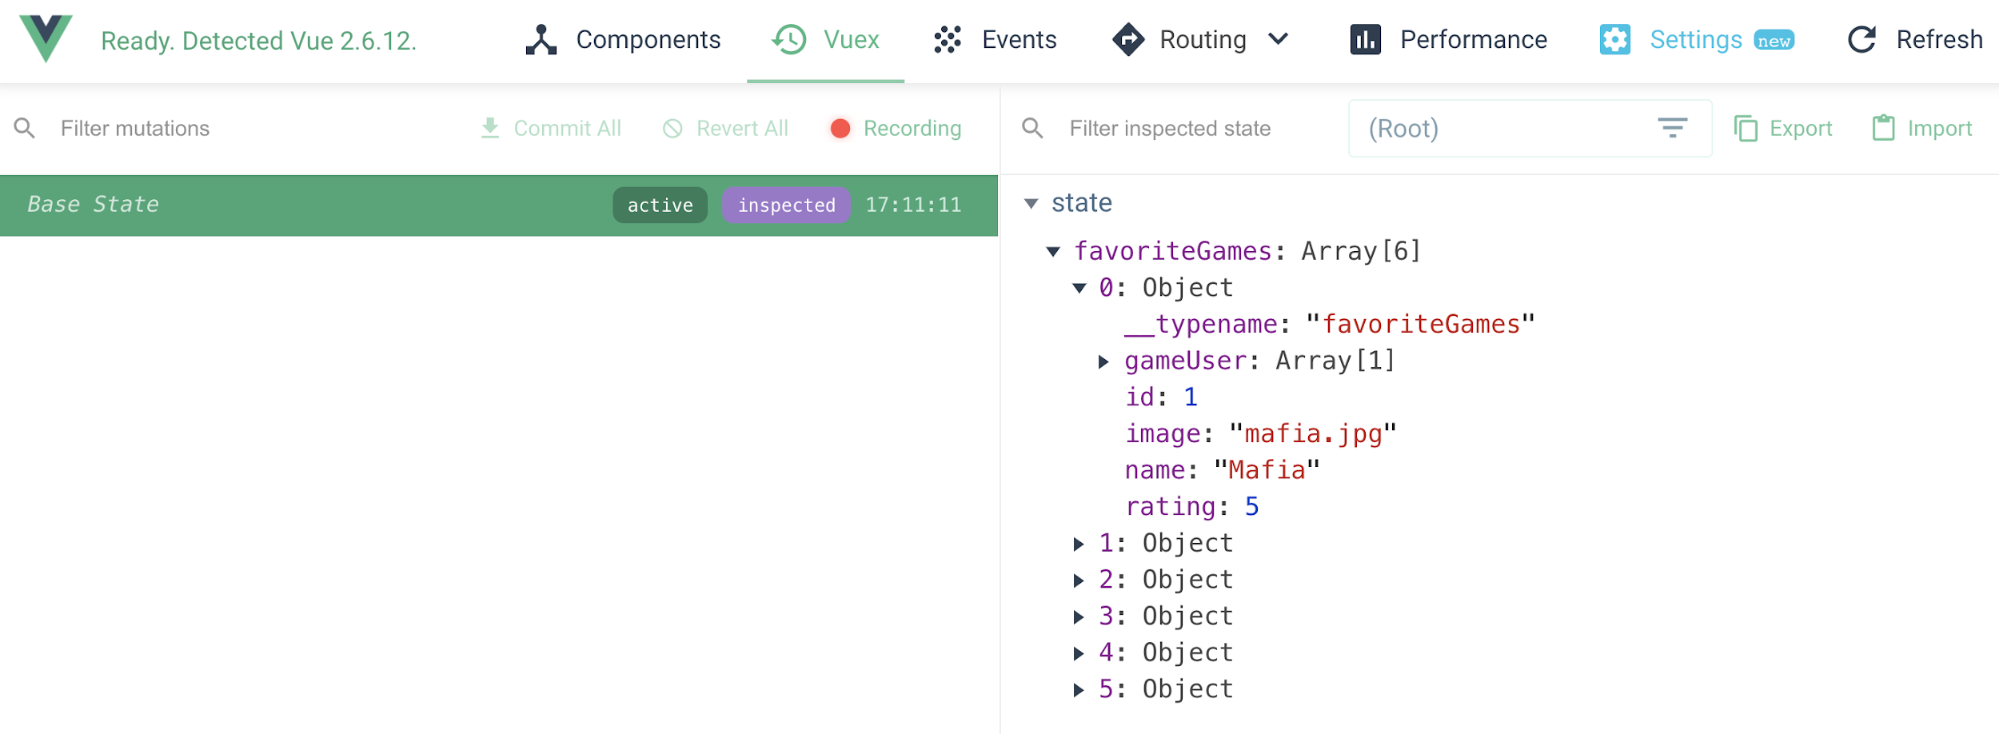
Awesome! Now we’ve created a relationship with our data from Hasura and our application.
Now I can add the data to my views as usual. In pages/index.vue:
```
```