---
title: "Easy HTML Forms in SvelteKit with Netlify Forms | Netlify"
description: "Forms are a necessary evil in web development. We may not want to deal with them, but sometimes we have to. Netlify makes this easy with built-in form handling."
source: "https://www.netlify.com/blog/easy-html-forms-in-sveltekit-with-netlify-forms/"
last_updated: "2026-07-01T05:18:50.000Z"
---
Forms are a necessary evil in web development. We may not want to deal with them, but sometimes we have to. Netlify makes this easy with [built-in form handling](https://www.netlify.com/products/forms/). This is done at build time by parsing static html files, with no extra API calls or server-side logic needed. These are standard **[HTML forms](https://docs.netlify.com/forms/setup/#html-forms)** with a data attribute for Netlify’s bots to detect it. We can utilize this great feature in new meta-frameworks like SvelteKit too by creating a prerendered route and using the HTML form. Let’s go through the steps to get your own Netlify form setup on SvelteKit.

| Updated for latest SvelteKit changes as of 8/22/22

## Setting up SvelteKit

To start up a new SvelteKit project, run `npm init svelte@next your-site-name` in a terminal where you want the directory to live. It’s important to mention that at the time of writing, SvelteKit is still in beta, meaning some things will probably change. The `@next` will be dropped when it hits an official 1.0. This command will prompt a command line interface, CLI, asking what things you want setup in your project. Step through the CLI, setting up your project with the Skeleton application. Once you hit enter on the last prompt, your new SvelteKit app is created and it prints a list of next steps.

1.  `cd your-site-name`
2.  `npm install` (or pnpm, or yarn, etc)
3.  `git init && git add -A && git commit -m "Initial commit"` (optional)
4.  `npm run dev -- --open` (or your package manager of choice)
5.  To close the dev server, hit `Ctrl+C`

## Netlify Adapter

SvelteKit uses the concept of adapters to _adapt_ the application to the platform you are deploying to. For Netlify, we can use the `adapter-static` or `adapter-netlify`. The static adapter will prerender your entire site. The Netlify adapter gives you more flexibility by allowing you to decide how to render each route, including [putting them on the \*edge](https://www.netlify.com/blog/sveltekit-with-netlify-edge-functions/).\* For this demo, we’ll be using the `adapter-netlify`.

1.  Install the adapter.
    
    ```
    npm i -D @sveltejs/adapter-netlify
    ```
    
2.  Open up the `svelte.config.js` file and edit the adapter import.
    
    ```
    - import adapter from '@sveltejs/adapter-auto'+ import adapter from '@sveltejs/adapter-netlify'
    ```
    

### Netlify TOML files

Netlify uses a `netlify.toml` file to hold information about build, dev, and function configuration and setup. Create a `netlify.toml` file at the root of your SvelteKit site. Inside add the following build configurations.

```
[build]    command = "npm run build"    publish = "build/"    functions = "functions/"
```

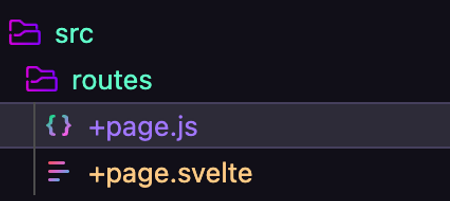
In SvelteKit, the `routes` directory is where the pages of your site live. A route file is created by adding a folder and prefixing the file with a `+`. The types of route files can be a `+page.svelte` and either a `+page.server.js` or a `+page.js` endpoint. The `+page.svelte` file is for the markup and the other files load the data into it and tell the page how to behave. The `+page.server.js` will only run on the server while the `+page.js` will run on the server and hydrate on the client. If you chose the skeleton project from the CLI, you will only have a `+page.svelte` file inside the routes directory as the `/` route. We’ll create a `+page.js` file beside it to prerender the home route.

![folder structure with +page.svelte and +page.js inside the route directory](https://cdn.sanity.io/images/o0o2tn5x/production/f84c4ed6125e35a3c49baac76047bb37c102abaf-426x190.png?w=450)

```
export const prerender = true
```

Now over in the `+page.svelte` file we can add the markup for the Netlify form.

```
<form name="netlify-form-example" method="POST" netlify-honeypot="bot-field" data-netlify="true">  <input type="hidden" name="form-name" value="netlify-form-example" />  <label for="name">Name</label>  <input name="name" id="name" required placeholder="Name" type="text" />  <label for="email">Email</label>  <input name="email" id="email" required placeholder="Email" type="email" />  <label for="message">Message</label>  <input name="message" id="message" required placeholder="Message" type="text" />  <input type="submit" value="Submit" /></form>
```

There is a lot to take in here, so let’s look at it line by line.

1.  The form element has several attributes on it, name, method, netlify-honeypot, and data-netlify.
    
    ```
    <form name="netlify-form-example" method="POST" netlify-honeypot="bot-field" data-netlify="true">
    ```
    
    1.  The name can be whatever you want to call your form and will be what you see in your Netlify dashboard once the form is deployed.
    2.  The method must be `"POST"` to allow it to post to Netlify’s servers.
    3.  The `netlify-honeypot` attribute is optional, but will attempt to catch bots and filter them out.
    4.  The `data-netlify="true"` is the secret sauce. This is what Netlify’s bots will look for when crawling the static output of your site.
2.  The hidden input element is the other piece of magic for Netlify to detect the form correctly
    
    ```
    <input type="hidden" name="form-name" value="netlify-form-example" />
    ```
    
    1.  The `type="hidden"` attribute ensures it isn’t seen by visual users or screen readers.
    2.  The `name="form-name"` must be kept as is. Do **NOT** change the name to your actual form name.
    3.  The value attribute is where you match the name of your form up to the input. Whatever value you set the form name attribute to is what should be set to value in the hidden input field.
    
    All the other inputs in the form are any valid HTML inputs that you would use in a regular form to get data from your user.
    

## Deploy to Netlify

Now that the form is setup and is ready to be deployed to Netlify, we can finish the steps to deploy the site. If you are not already a Netlify user, go ahead and [sign up for free](https://app.netlify.com/signup).

### Git Setup

If you didn’t setup the `git init` in the [SvelteKit setup](#setting-up-sveltekit), now is the time to put your site on your favorite git provider.

```
git init && git add -A && git commit -m "Initial commit"
```

1.  Create a repository, either using the CLI or by going directly to github.com. Link the new repository to your local site by copying the URL.

![Arrow pointing to copy button on repository url](https://cdn.sanity.io/images/o0o2tn5x/production/ed69d489227e342a785683e1efed515bcee5aa8b-386x372.png?w=450)

2.  Run the command to add the remote origin pasting your URL at the end.
    
    ```
    git remote add origin https://github.com/brittneypostma/sveltekit-netlify-forms
    ```
    
3.  Push your code to GitHub using the current branch, which is typically `main`.
    
    ```
    git push origin main
    ```
    

### Link to Netlify

Now that the site is on a git provider, head to your [Netlify dashboard](https://app.netlify.com/).

1.  Click on the **Add new site** button that drops down and click on **Import an existing project**.

![Add new site button clicked pointing to Import an existing project.](https://cdn.sanity.io/images/o0o2tn5x/production/2f9f6cf5c2ab102b78df20c42c5043386fd51ff0-434x356.png?w=450)

2.  Choose your Git provider.

![Import an existing project from a Git repository. Connect to Git provider](https://cdn.sanity.io/images/o0o2tn5x/production/22fa5c88c619f2902f685e7ff5828586cae3bdc7-1400x976.png?w=450)

3.  Use the search box to find your repo.

![Pick a repository from GitHub - sveltekit-netlify-forms searched](https://cdn.sanity.io/images/o0o2tn5x/production/42406bdff724ebf5551c2276a6a3bab55dca1b26-726x300.png?w=450)

4.  Since we set up a [`netlify.toml` earlier](#netlify-toml-files), the build settings should populate automatically. So just click the **Deploy site** button and Netlify’s robots will start building your site.

## Checking the form

Once the site is deployed, head to your site URL. Fill in the form and click the **Submit** button.

![Info filled into a form](https://cdn.sanity.io/images/o0o2tn5x/production/015ad9bf6b0a8c16d8e028f6595f30aeae76f1aa-393x248.png?w=450)

When the form is submitted successfully, you will be redirected to a Netlify page that says your form submission has been received.

![Thank you! Your form submission has been received. Back to our site.](https://cdn.sanity.io/images/o0o2tn5x/production/95266230cee5ec651cea14cffb75082a1d26c397-706x329.png?w=450)

Back in your [Netlify dashboard](https://app.netlify.com/), click on the **Forms** tab,

![Forms tab in Netlify - 1 form collecting data](https://cdn.sanity.io/images/o0o2tn5x/production/8851990b24af4fd370a994a8b76a2c1ca6945b40-686x292.png?w=450)

Down below the forms section will be a list of active forms with the names you set in your HTML.

![Active forms - netlify-form-example](https://cdn.sanity.io/images/o0o2tn5x/production/e6b84e98a1037871828b88ee3e269c61e5ff5902-1203x250.png?w=450)

Click into the form to see your submission.

![Submissions from netlify-form-example with a Verified submission listed](https://cdn.sanity.io/images/o0o2tn5x/production/f41ce97422aae228549373951c59c8af82df6174-507x521.png?w=450)

And that is it, no backend logic or complicated API calls, just straightforward form management with a pure HTML form. Happy form making!

### Share

-   [X (fka Twitter)](https://twitter.com/intent/tweet?text=Easy HTML Forms in SvelteKit with Netlify Forms&url=https://www.netlify.com/blog/easy-html-forms-in-sveltekit-with-netlify-forms/)
-   [LinkedIn](https://www.linkedin.com/shareArticle?mini=true&url=https%3A%2F%2Fwww.netlify.com%2Fblog%2Feasy-html-forms-in-sveltekit-with-netlify-forms%2F)
-   [Facebook](https://www.facebook.com/sharer.php?u=https://www.netlify.com/blog/easy-html-forms-in-sveltekit-with-netlify-forms/)
-   [Bluesky](https://bsky.app/intent/compose?text=Easy HTML Forms in SvelteKit with Netlify Forms+https://www.netlify.com/blog/easy-html-forms-in-sveltekit-with-netlify-forms/)

* * *

### Tags

-   [JavaScript](/blog/tags/javascript/)
-   [SvelteKit](/blog/tags/sveltekit/)
-   [Netlify forms](/blog/tags/netlify-forms/)

## Keep reading

![](/_astro/3f45eb6eda4ea8814be310e3df4a7883a5bd9ba0-1200x675_ZcBDUS.webp)

Guides & Tutorials May 15, 2026

[

### How to build a real-time AI chatbot in minutes with Netlify Agent Runners (no backend)

](/blog/how-to-build-a-real-time-ai-chatbot-in-minutes-with-netlify-agent-runners-no-backend)

-   ![Profile picture of Nahrin Jalal](/_astro/f0e7c8f227a03fe58340c99ef5439d5a896c0733-272x272_Z23kDpD.webp)
    
    Nahrin Jalal
    

![](/_astro/8fe9e8a23f944c9912003233d99a2df7fee637cf-1600x900_Z1gMhmf.webp)

Guides & Tutorials May 15, 2026

[

### Tracking AI search traffic: how to use Netlify Log Drains to maximize AEO

](/blog/tracking-ai-search-traffic)

-   ![Profile picture of Nahrin Jalal](/_astro/f0e7c8f227a03fe58340c99ef5439d5a896c0733-272x272_Z23kDpD.webp)
    
    Nahrin Jalal
    

## Recent posts

News & Announcements June 25, 2026

[

### Netlify Functions, designed for Agent Experience

](/blog/netlify-functions-designed-for-agent-experience)

-   ![Profile picture of Eduardo Bouças](/_astro/52958f21e8450baf6d8e60302341a984e220c0cd-512x512_13VDlu.webp)
    
    Eduardo Bouças
    

News & Announcements June 24, 2026

[

### How we measure Netlify’s Agent Experience

](/blog/how-we-measure-netlify-agent-experience)

-   ![Profile picture of Sean Roberts](/_astro/bbf2243f8171dbddd80ab2103622106cef84d125-512x512_Z1d2LKE.webp)
    
    Sean Roberts
    

Guides & Tutorials May 15, 2026

[

### How to build a real-time AI chatbot in minutes with Netlify Agent Runners (no backend)

](/blog/how-to-build-a-real-time-ai-chatbot-in-minutes-with-netlify-agent-runners-no-backend)

-   ![Profile picture of Nahrin Jalal](/_astro/f0e7c8f227a03fe58340c99ef5439d5a896c0733-272x272_Z23kDpD.webp)
    
    Nahrin Jalal
    

![](/_astro/3f255b372fa958df35802666ee33b4609b2d71bd-1200x1586_1VtE2D.webp)

### How do the best dev and marketing teams work together?

[Access the report](https://www.netlify.com/reports/2024-leadership-trend-report/access/)