Recently, Gatsby introduced powerful open source features that allow massive build speed improvements for sites with lots of images. Taking advantage of those features, Matt Biilmann set up parallel image processing for Gatsby using Google Cloud and open sourced it as gatsby-parallel-runner.
In this article we’ll implement gatsby-parallel-runner to make image-heavy Gatsby builds on Netlify nearly 2× faster!
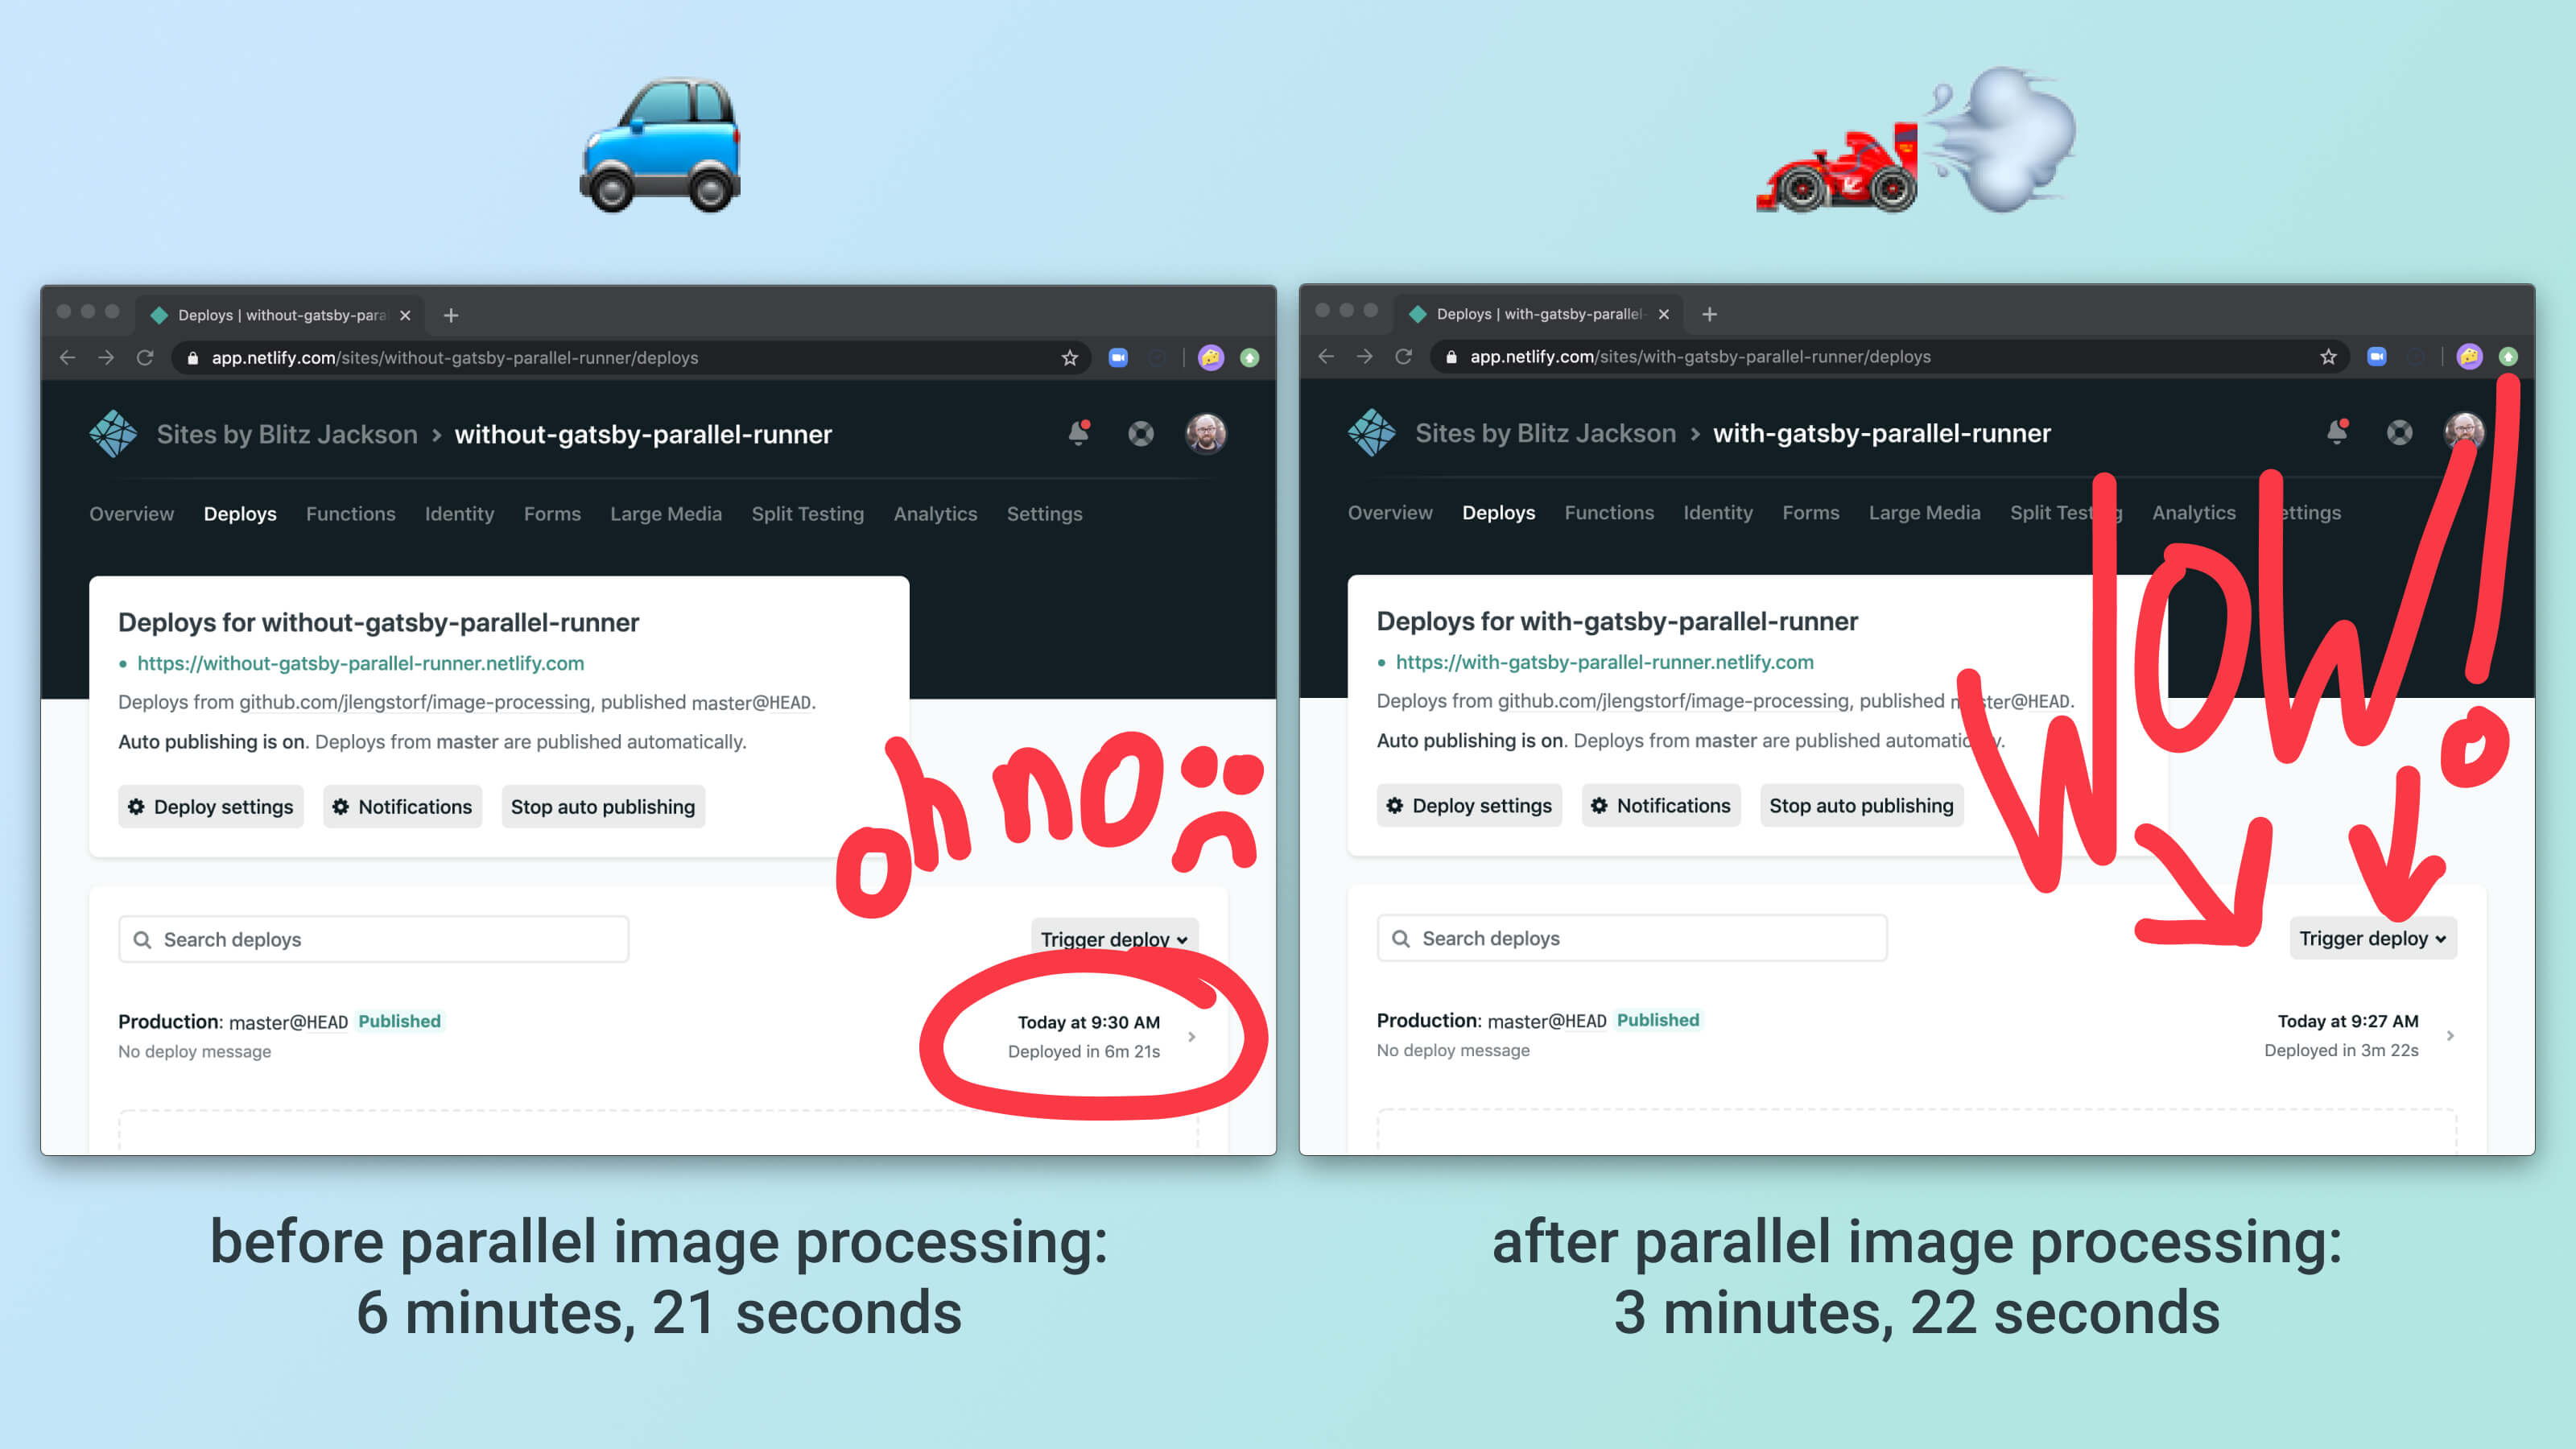
On a demo site with lots of images, adding gatsby-parallel-runner reduced build times for the site from 6 minutes and 21 seconds down to 3 minutes 22 seconds — a whopping 47% drop!
Watch: gatsby-parallel-runner setup in 15 minutes
If you prefer to watch videos instead of reading, I also put together a video walkthrough of this tutorial, which you can watch here:
(If the video above doesn’t load, you can watch the walkthrough on YouTube.)
How does parallel image processing work in Gatsby?
There’s a much better explanation of this in Matt Biilman’s post detailing how he built gatsby-parallel-runner, but the short version is: Gatsby recently introduced support for running as a child process that can send messages to the parent process. This means that, in theory, any Gatsby plugin can pass work outside of Gatsby to be done by another process, which allows for parallel processing. This is huge, because prior to this, the work all needed to happen in the same process, which limited us to the capabilities of whatever machine was building the site.
If you’ve ever seen your Gatsby builds chug along for multiple minutes at the “generating image thumbnails” step, that’s Gatsby doing all the work in a single process.
With the introduction of support for Gatsby as a child process that can pass work outside of itself, we now have the ability to send tasks to an entirely separate process — this means we can parallelize!
A note before we start: this is still experimental
We’ve been dogfooding this approach on several of our own sites and seeing great benefits, but this is still pretty experimental. Every once in a while, I’ve seen timeouts from Google Cloud, and there aren’t safeguards like retry logic built in yet. However, retrying the failed build usually clears it up.
That being said, use this with the standard disclaimer that we’re it’s still pretty early, so you may hit some weirdness. If you do, please open issues and — if you can — submit pull requests!
Set up the demo Gatsby site repo (optional)
For this tutorial, we’ll be using a repo with a lot of unoptimized images to make the impacts of parallel image processing clear. To avoid testing the speed of your internet connection, we’ll work entirely on Netlify for this tutorial.
Deploy the demo site to your Netlify account to get started. It’ll start building right away using the standard gatsby build command, which will take about 6 or 7 minutes.
You can also fork the demo repo on GitHub and run tests locally, but bear in mind that the speed of your internet connection can have a huge impact on the results.
Heads up! The steps we’re about to follow should work for most Gatsby sites, so feel free to upgrade an existing site instead of using the demo repo — remember, Netlify supports atomic deploys and rollbacks, so even if something goes wrong your site will stay up and you can roll back the changes with one click!
Where are we starting?
To get an idea of where things are without enabling parallel image processing, the demo repo contains 238 images ranging in size from 398 KB to 8.5 MB.
We can see how long this takes by checking the deploy log after the site builds:
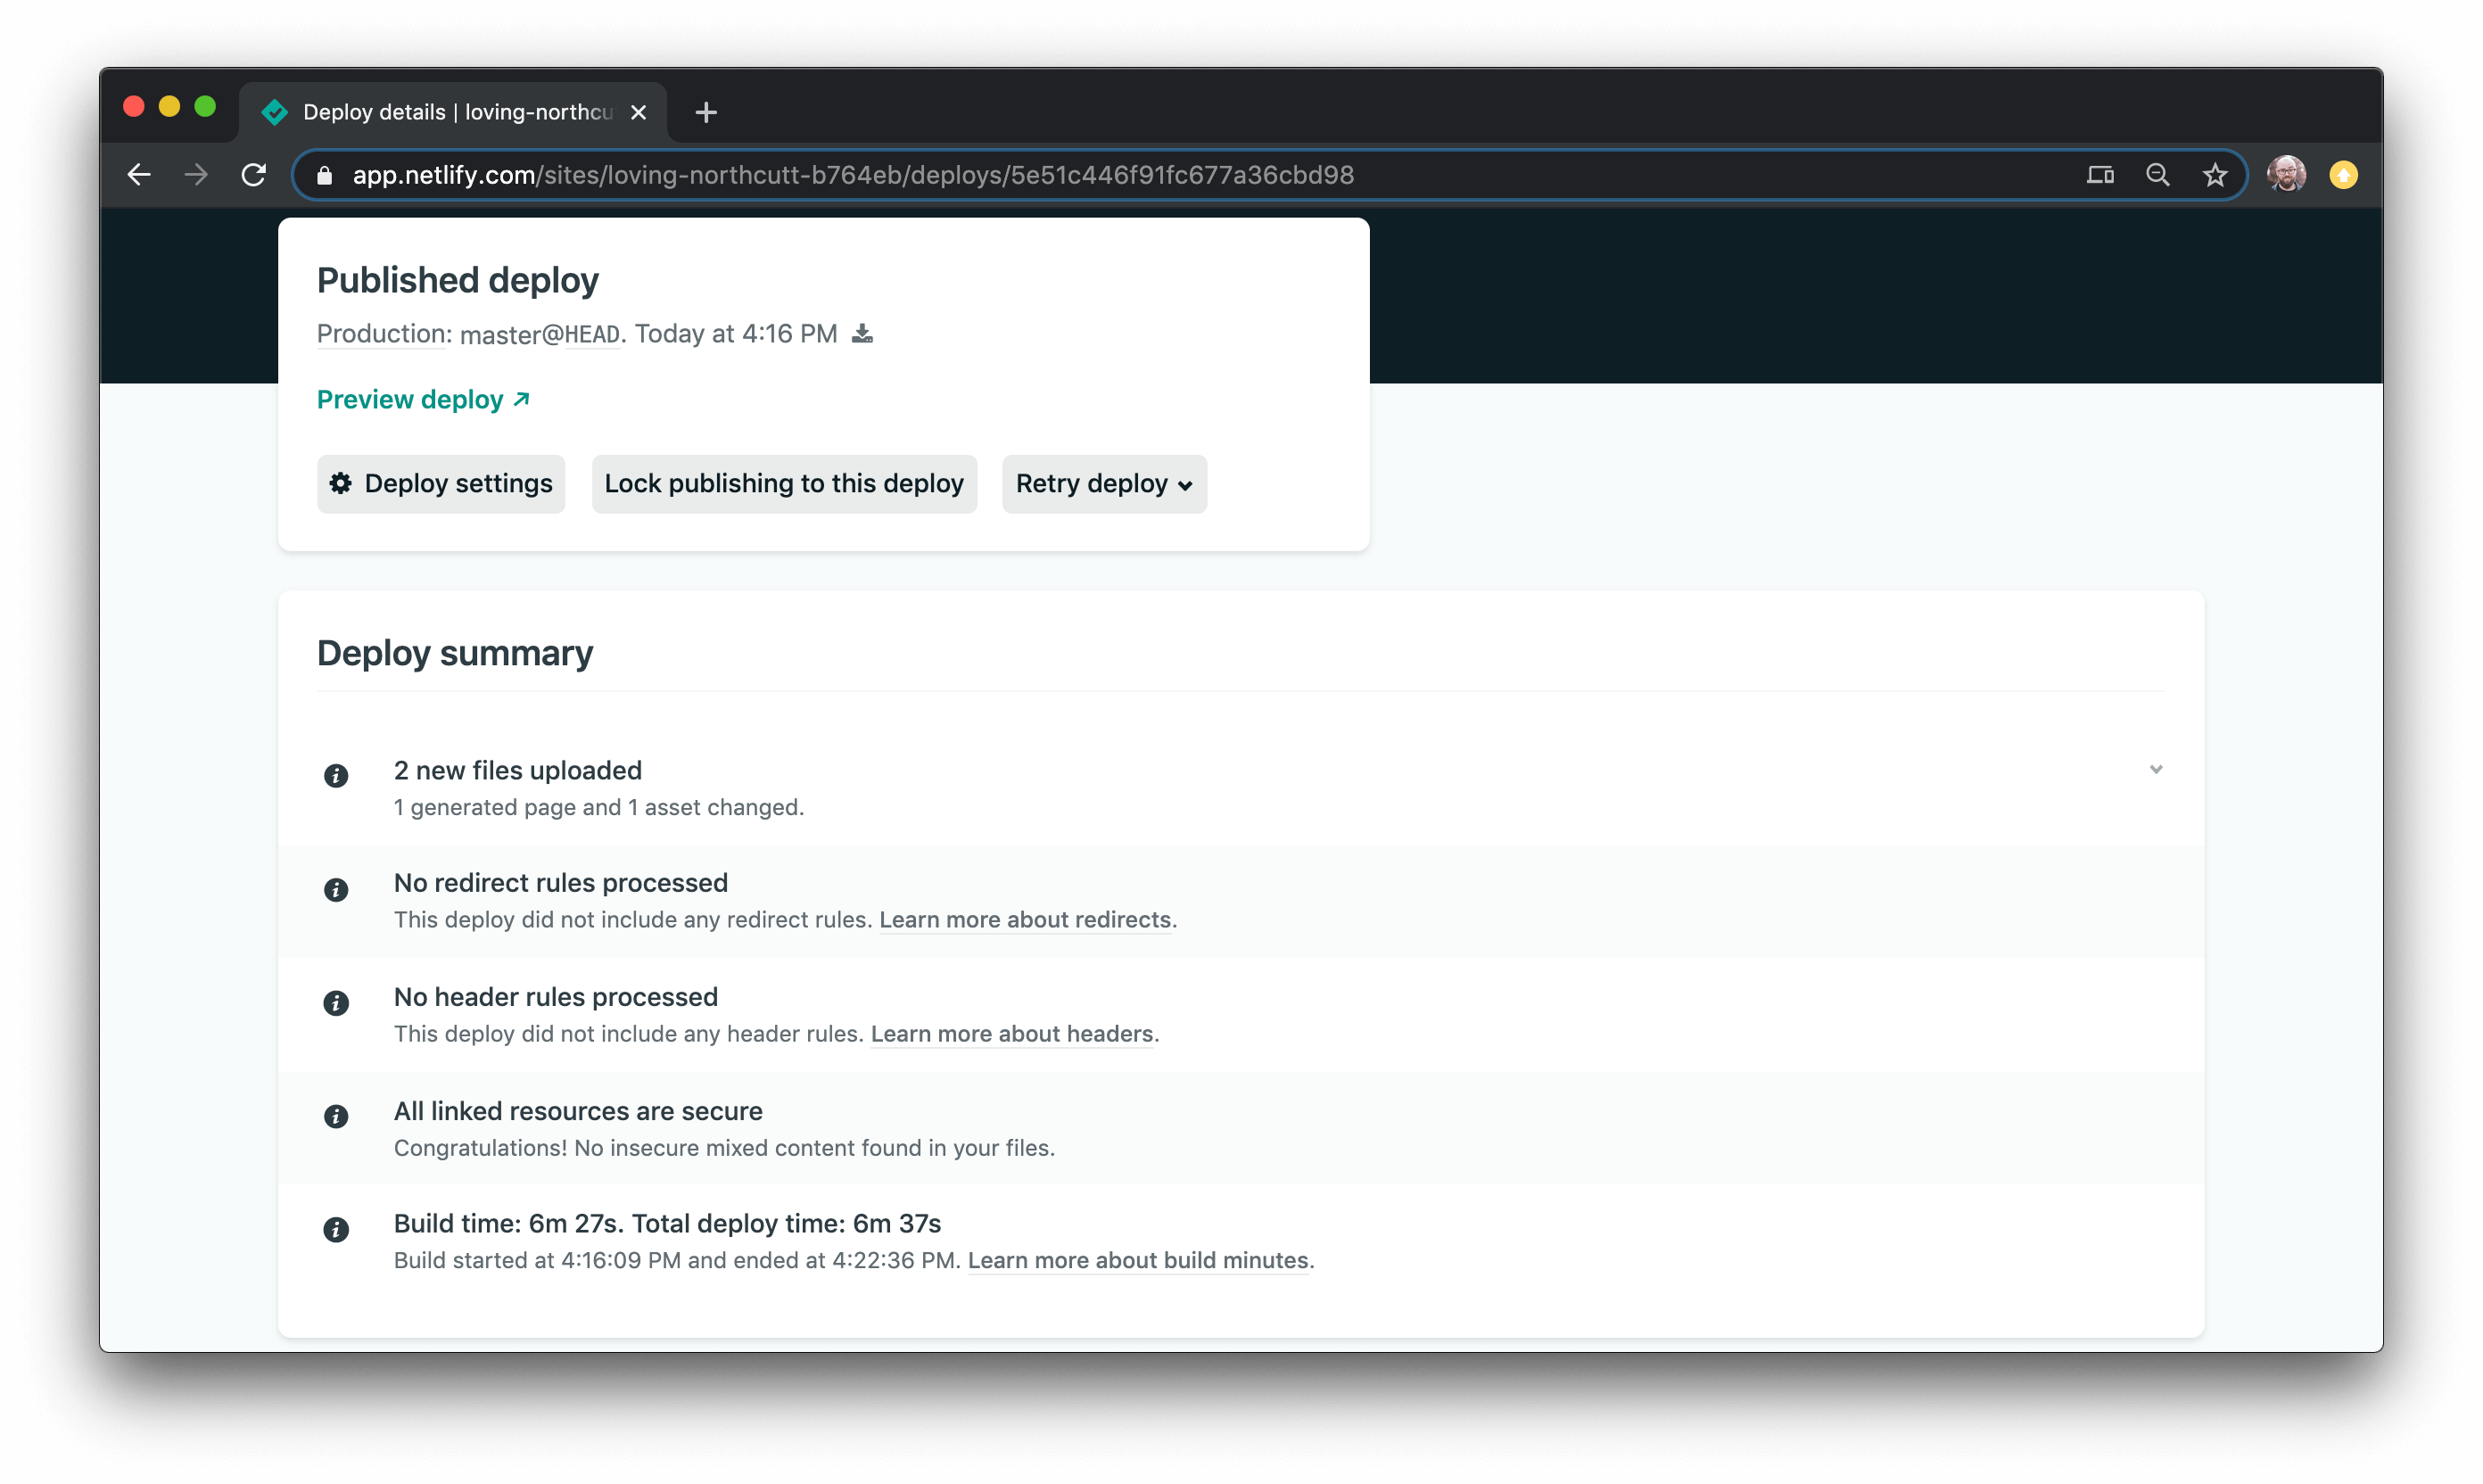
The site took 6 minutes and 27 seconds to build. If we look into the raw build logs, we can see that the vast majority of that build time comes from the “Generating image thumbnails” step:
4:22:29 PM: success Generating image thumbnails - 260.467s - 2140/2140 8.22/sIn an image-heavy site like this one, almost all of the build time comes from image processing.
Enable the required services on Google Cloud
If we want to take advantage of parallel builds, we need to have somewhere to do the work when it gets passed out of Gatsby. For this, we’re going to use Google Cloud. Specifically, we’ll use:
- Cloud Pub/Sub for sending messages between processes
- Cloud Functions for doing the work
- Cloud Storage to make sure any images that exceed the Pub/Sub size limits don’t break our builds
This means we’ll need to have a Google Cloud account and enable a few services.
Heads up! Google Cloud has a free plan that covers the services we’re using. You also get $300 when you sign up. So you can set this up for free!
Create a new project
Once you’ve created a Google Cloud account, go to the Google Cloud Platform dashboard.
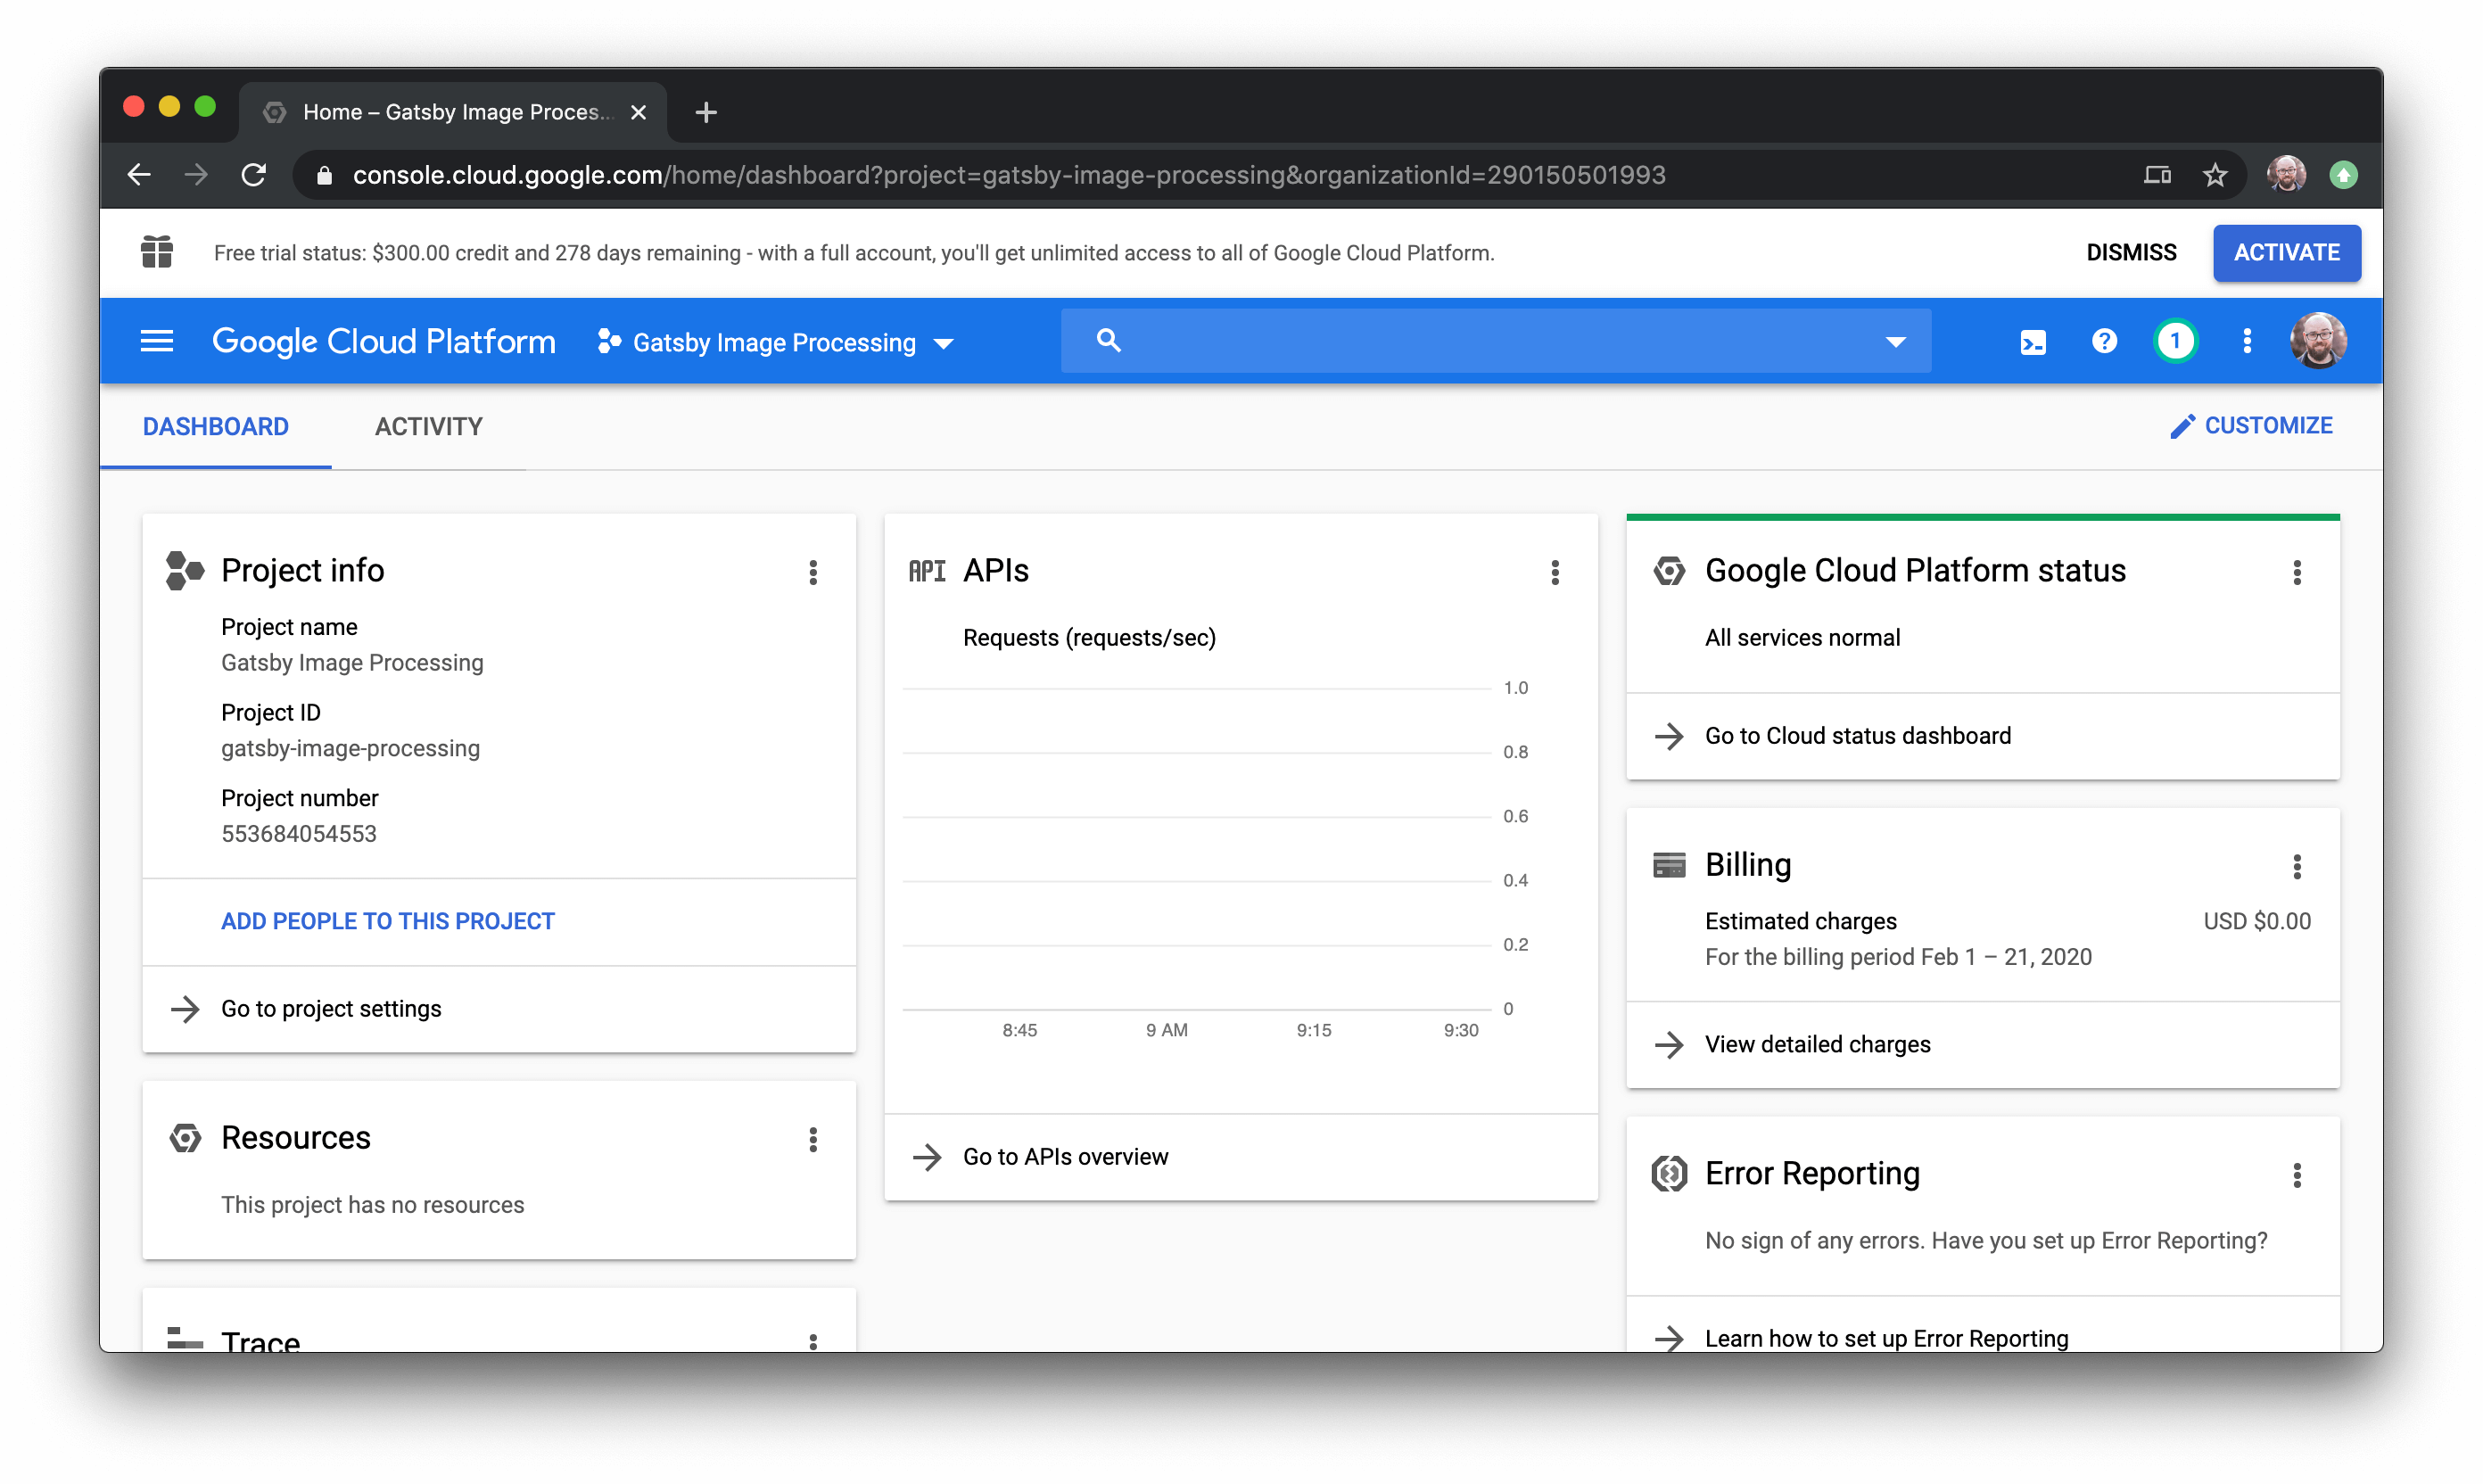
If you already have a Google Cloud account, click the dropdown next to the “Google Cloud Platform” banner, then choose “New Project” from the top-left of the modal that opens. Give it a name like “Gatsby Image Processing” so it’s easy to remember why you created it later.
If you just set up your Google Cloud account, it should walk you through creating your first project.
Enable Cloud Pub/Sub
From the dashboard, type “pub sub” into the search bar at the top, then click “Subscriptions” in the results that appear.
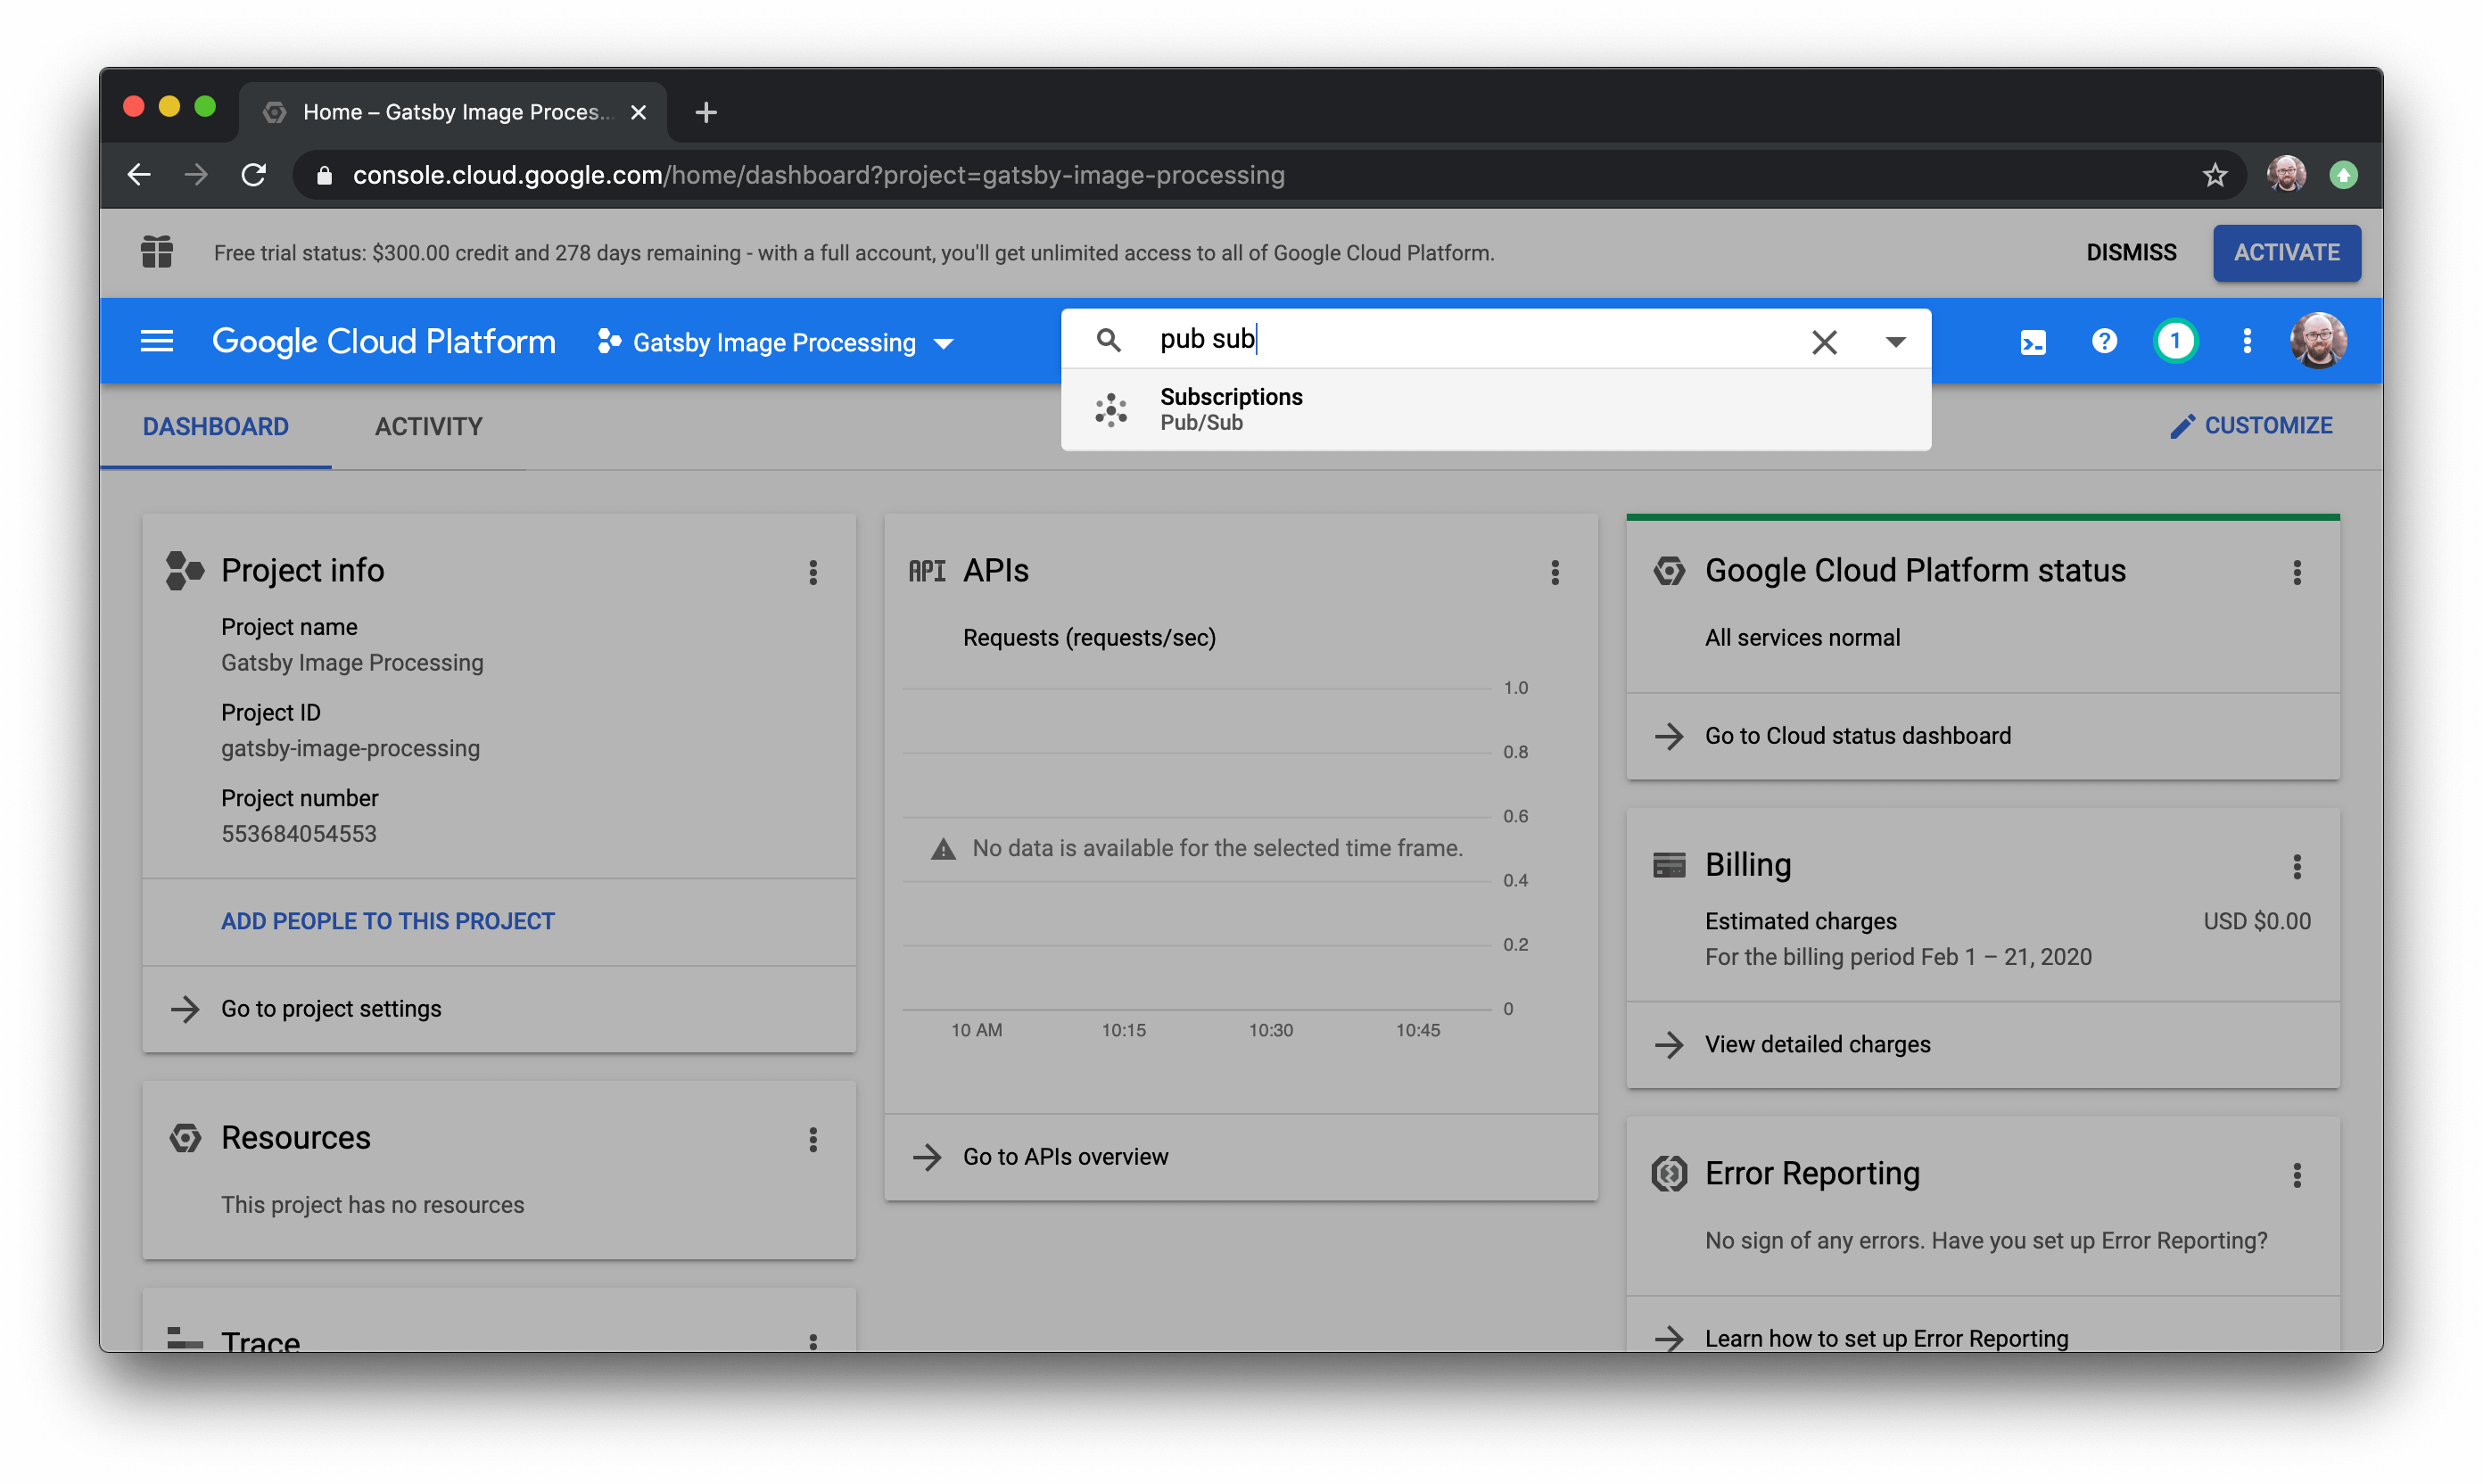
You’ll see a note that the Pub/Sub service is being enabled for your account.
This also enables the Pub/Sub API, which is called by the gatsby-parallel-runner to send and receive messages from Gatsby.
Enable Cloud Storage
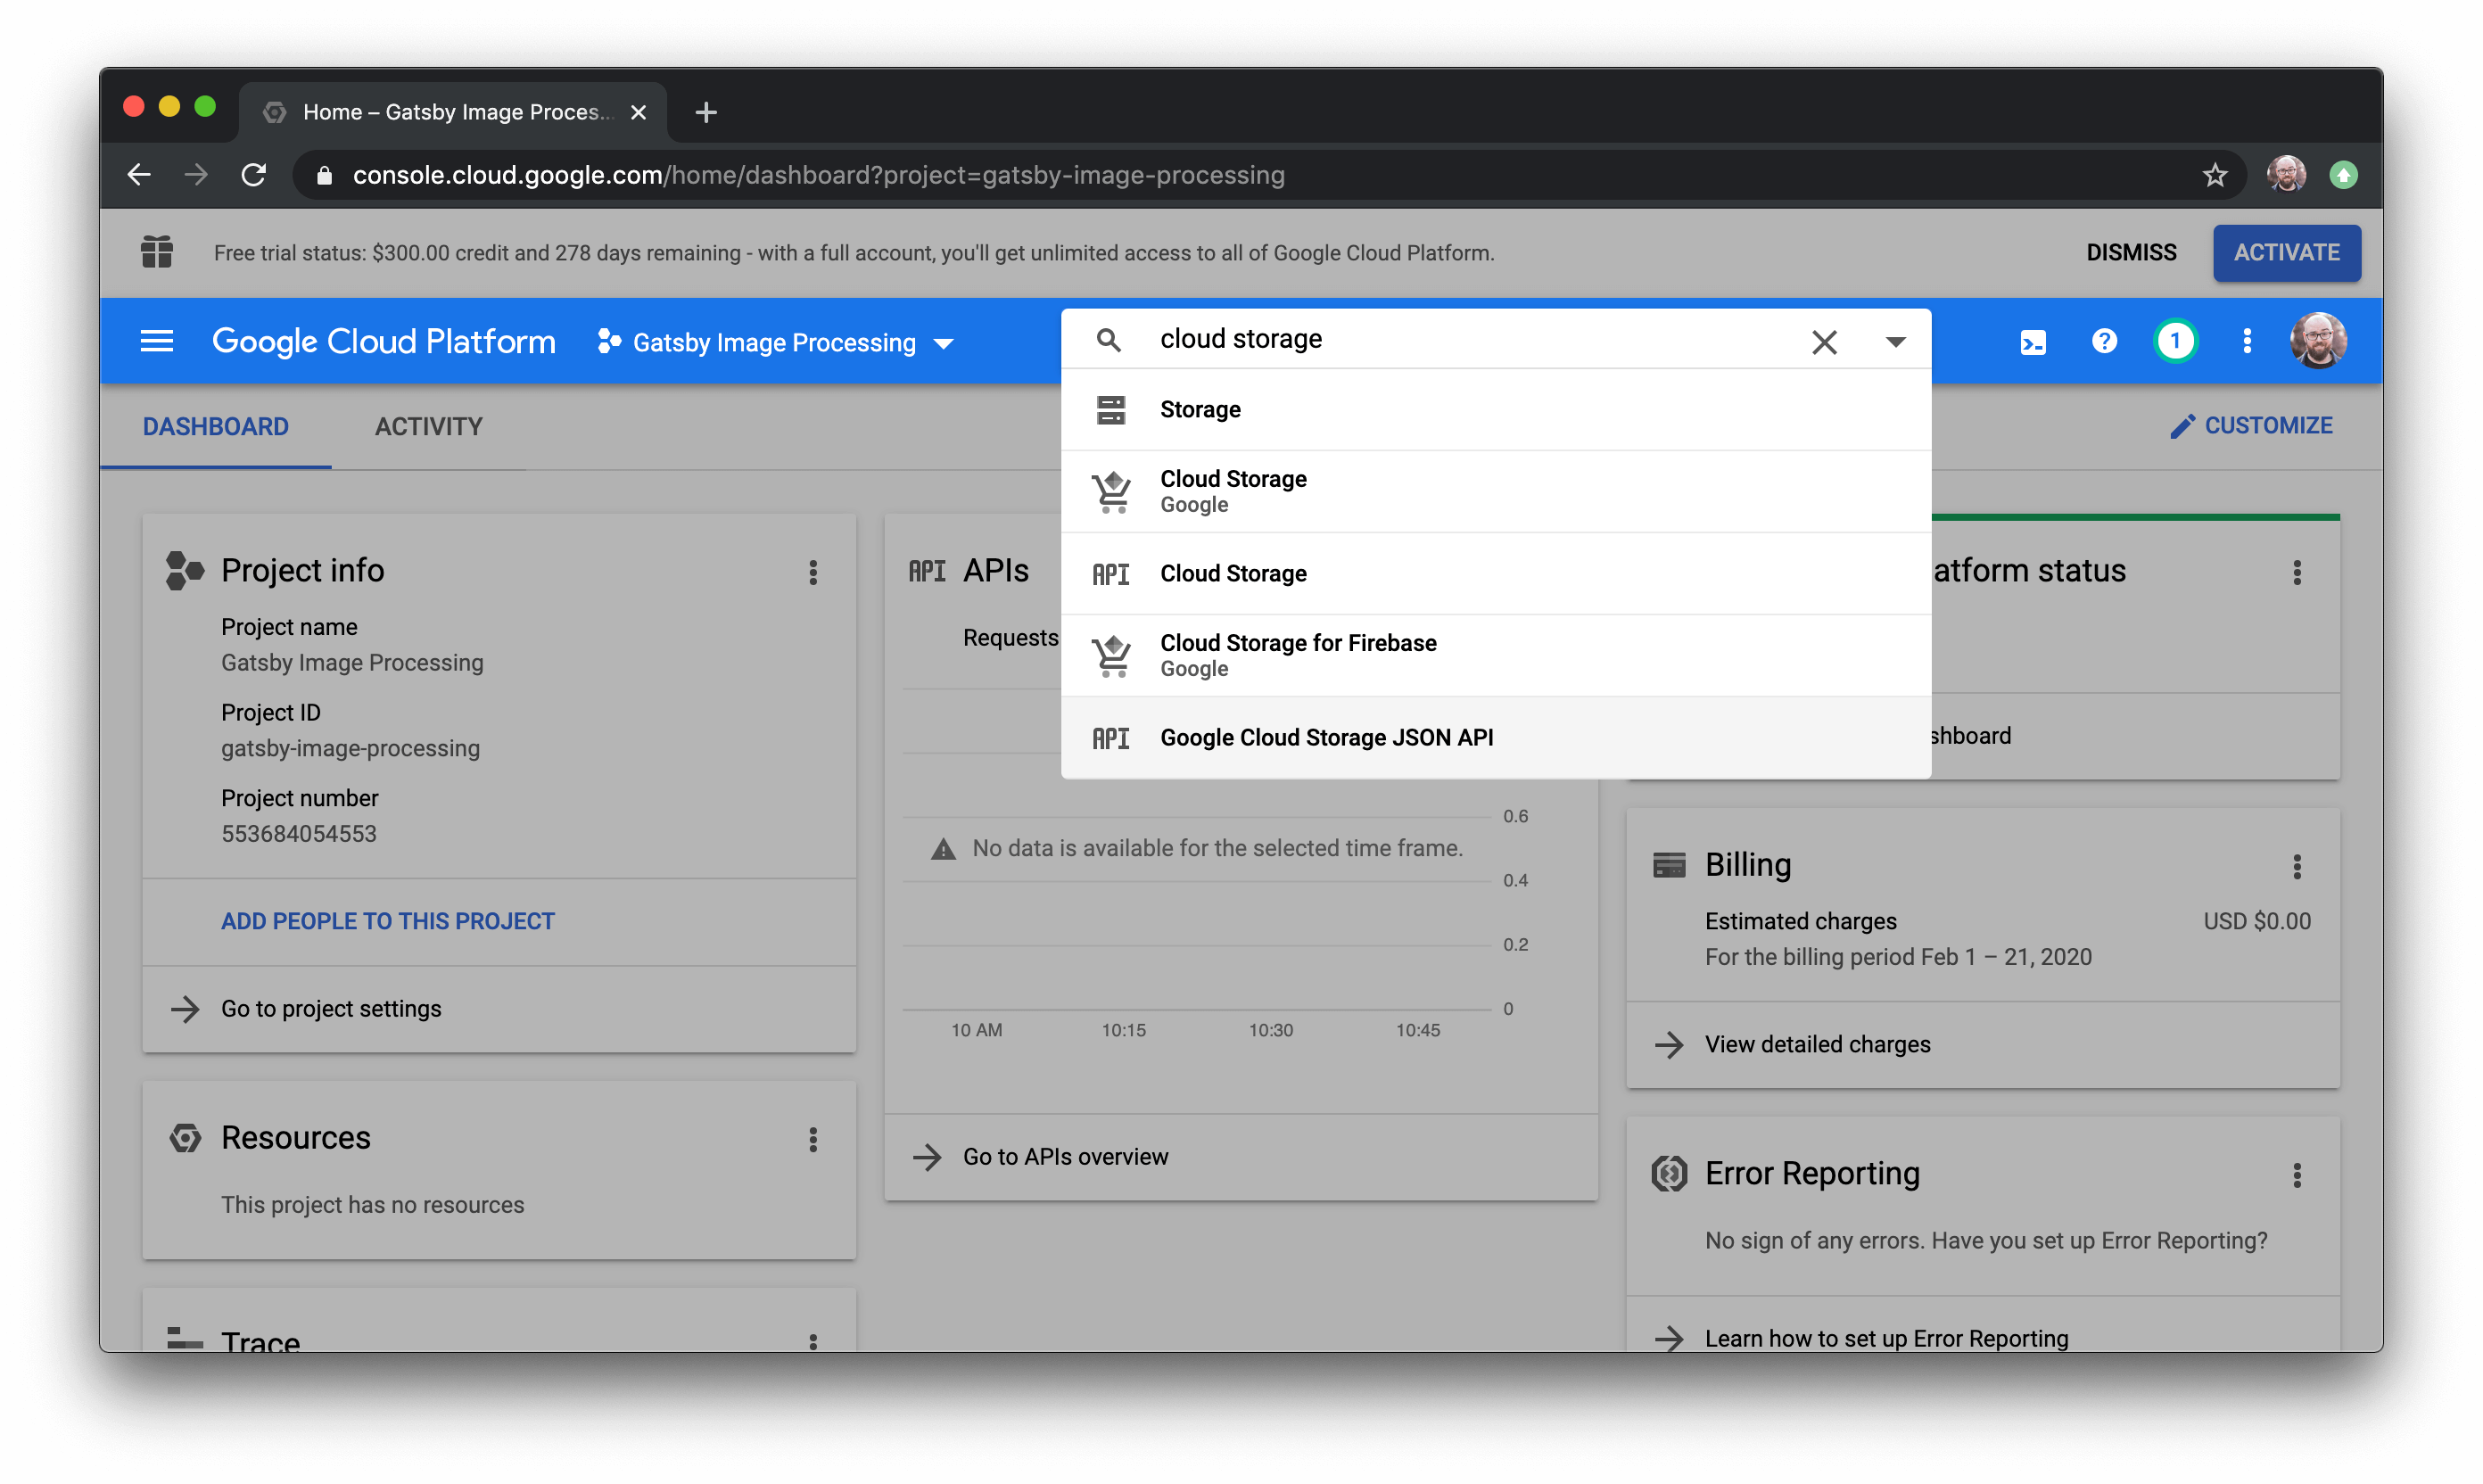
Next, type “cloud storage” into the top search bar and choose “Google Cloud Storage JSON API” from the results.
This is required for handling any images that are too large to send using Pub/Sub.
Enable Cloud Functions
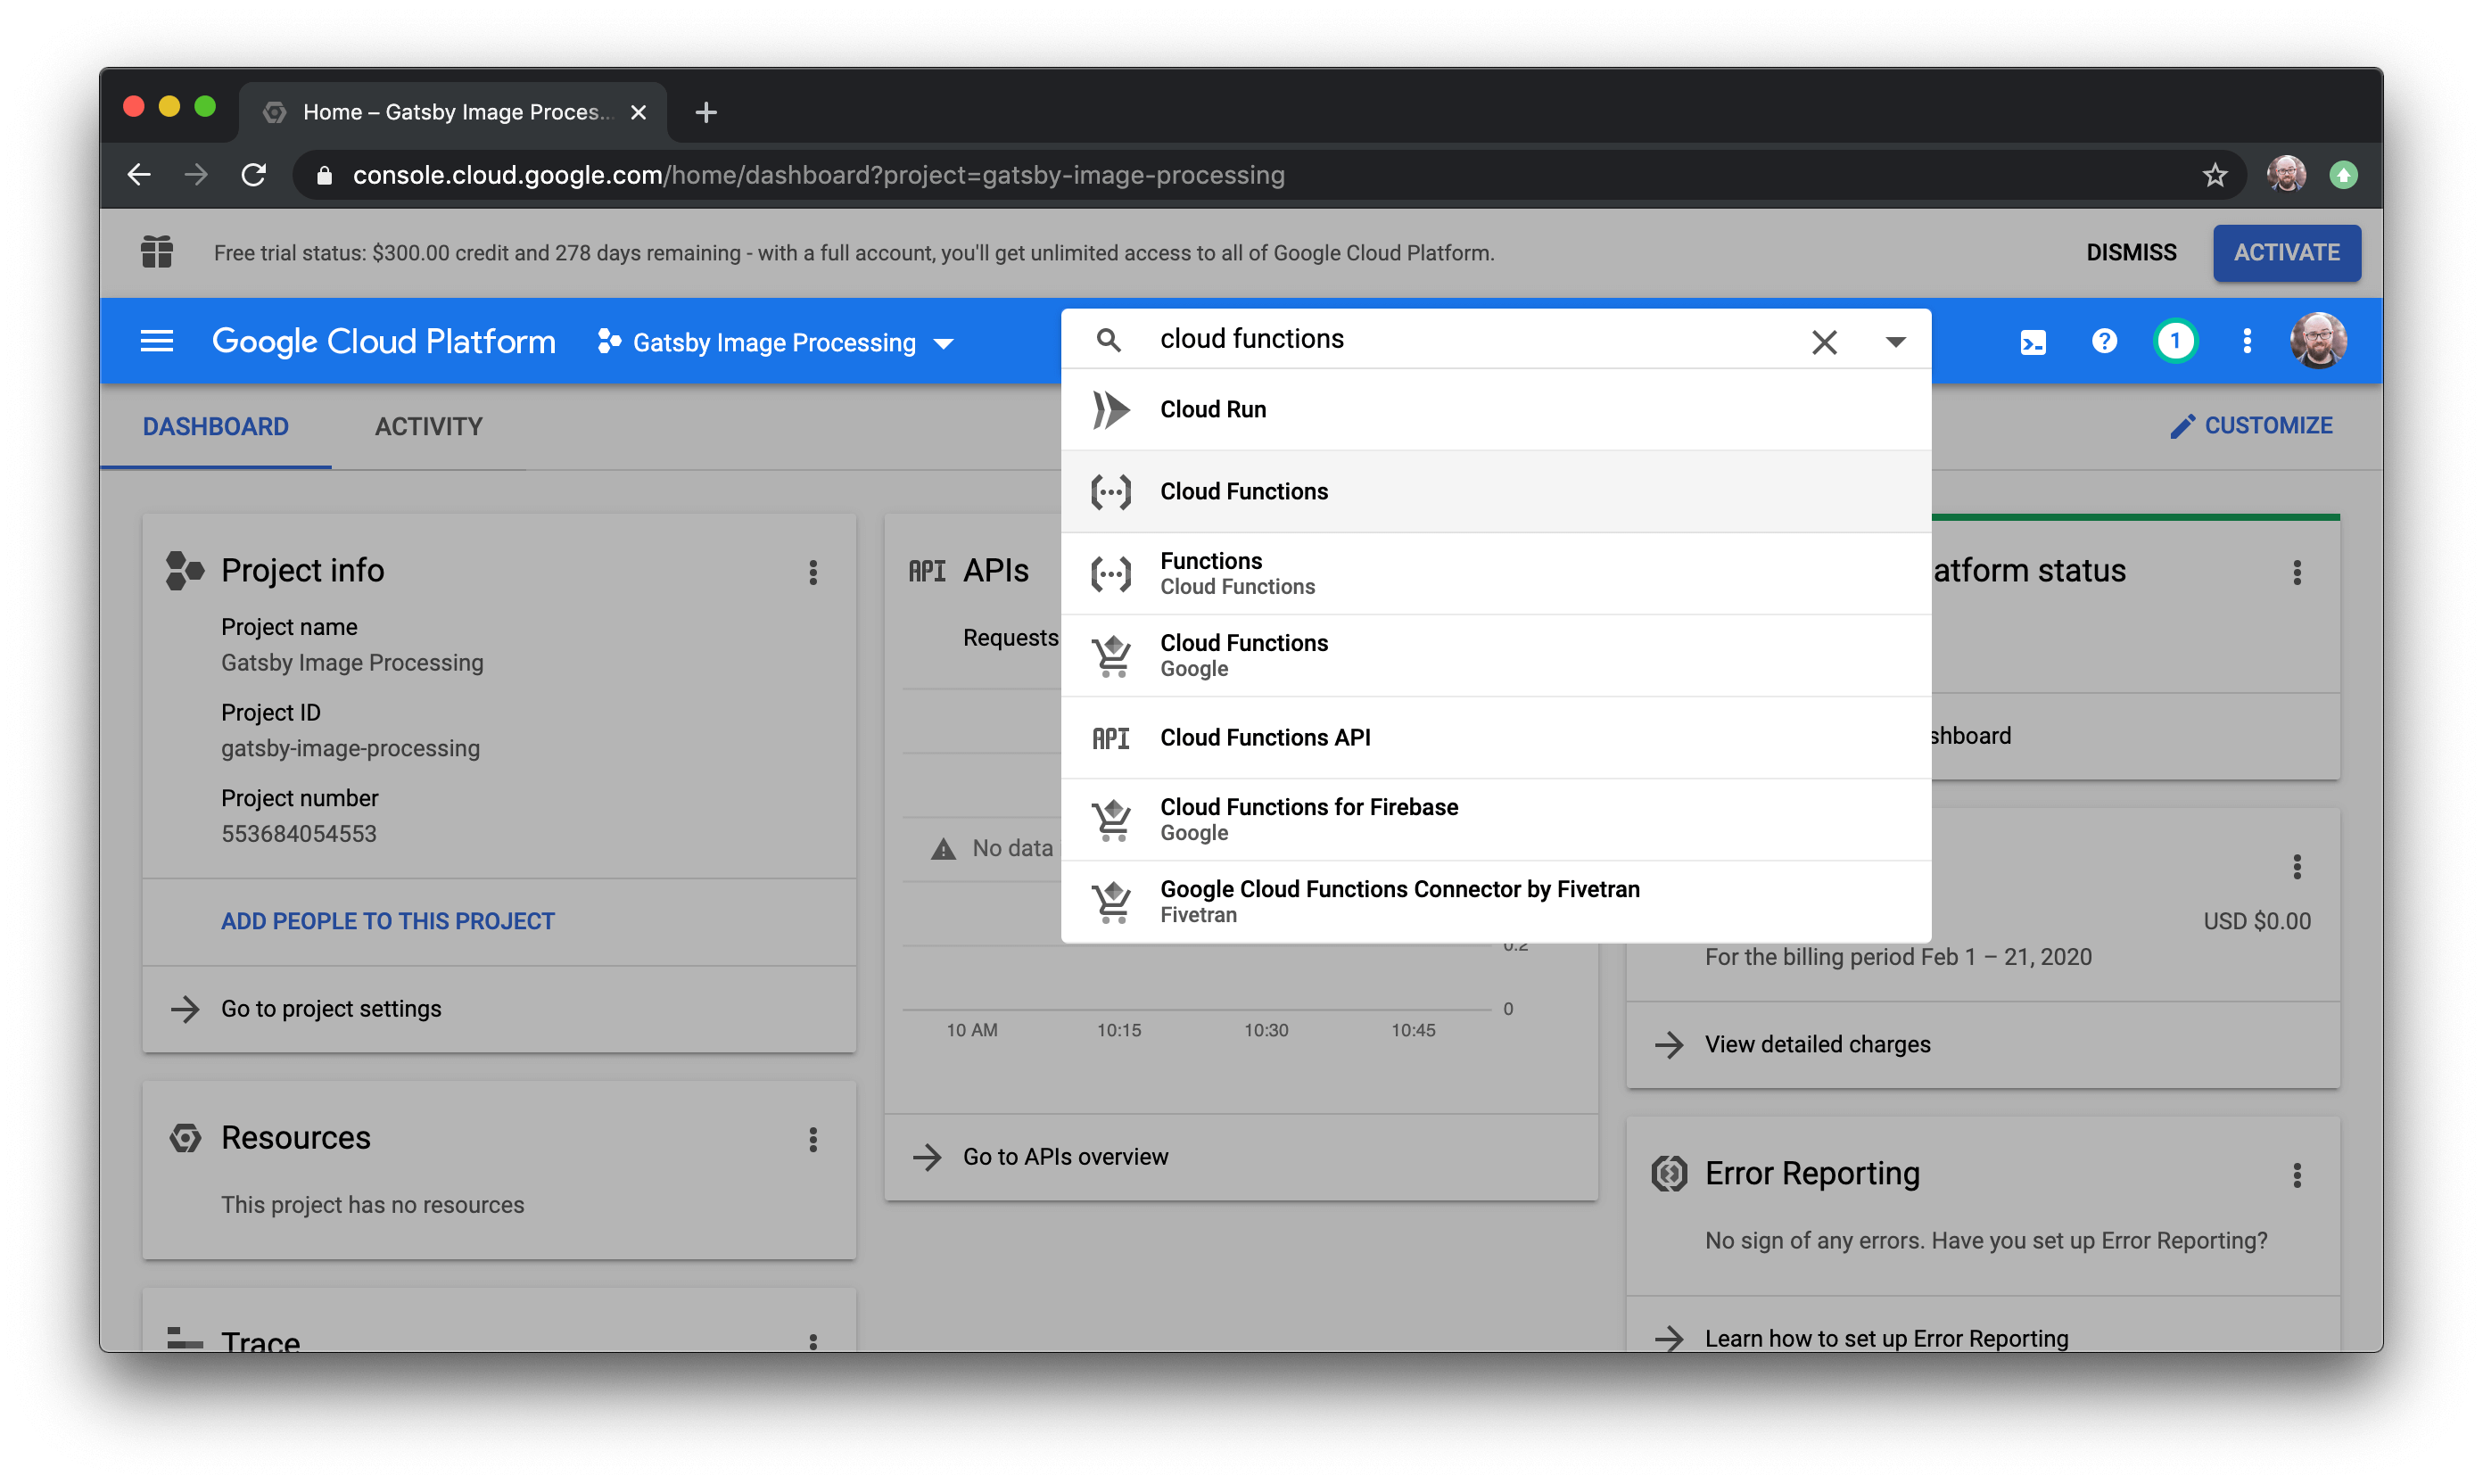
In the top search bar, type “cloud functions” and choose “Cloud Functions” from the options (there are a few options here — choose the one that only says “Cloud Functions”).
The parallel runner uses Cloud Functions to actually process images for Gatsby.
Create a service account and get credentials
Next, click the top-left hamburger nav, choose “IAM & Admin”, then click “Service Accounts”.
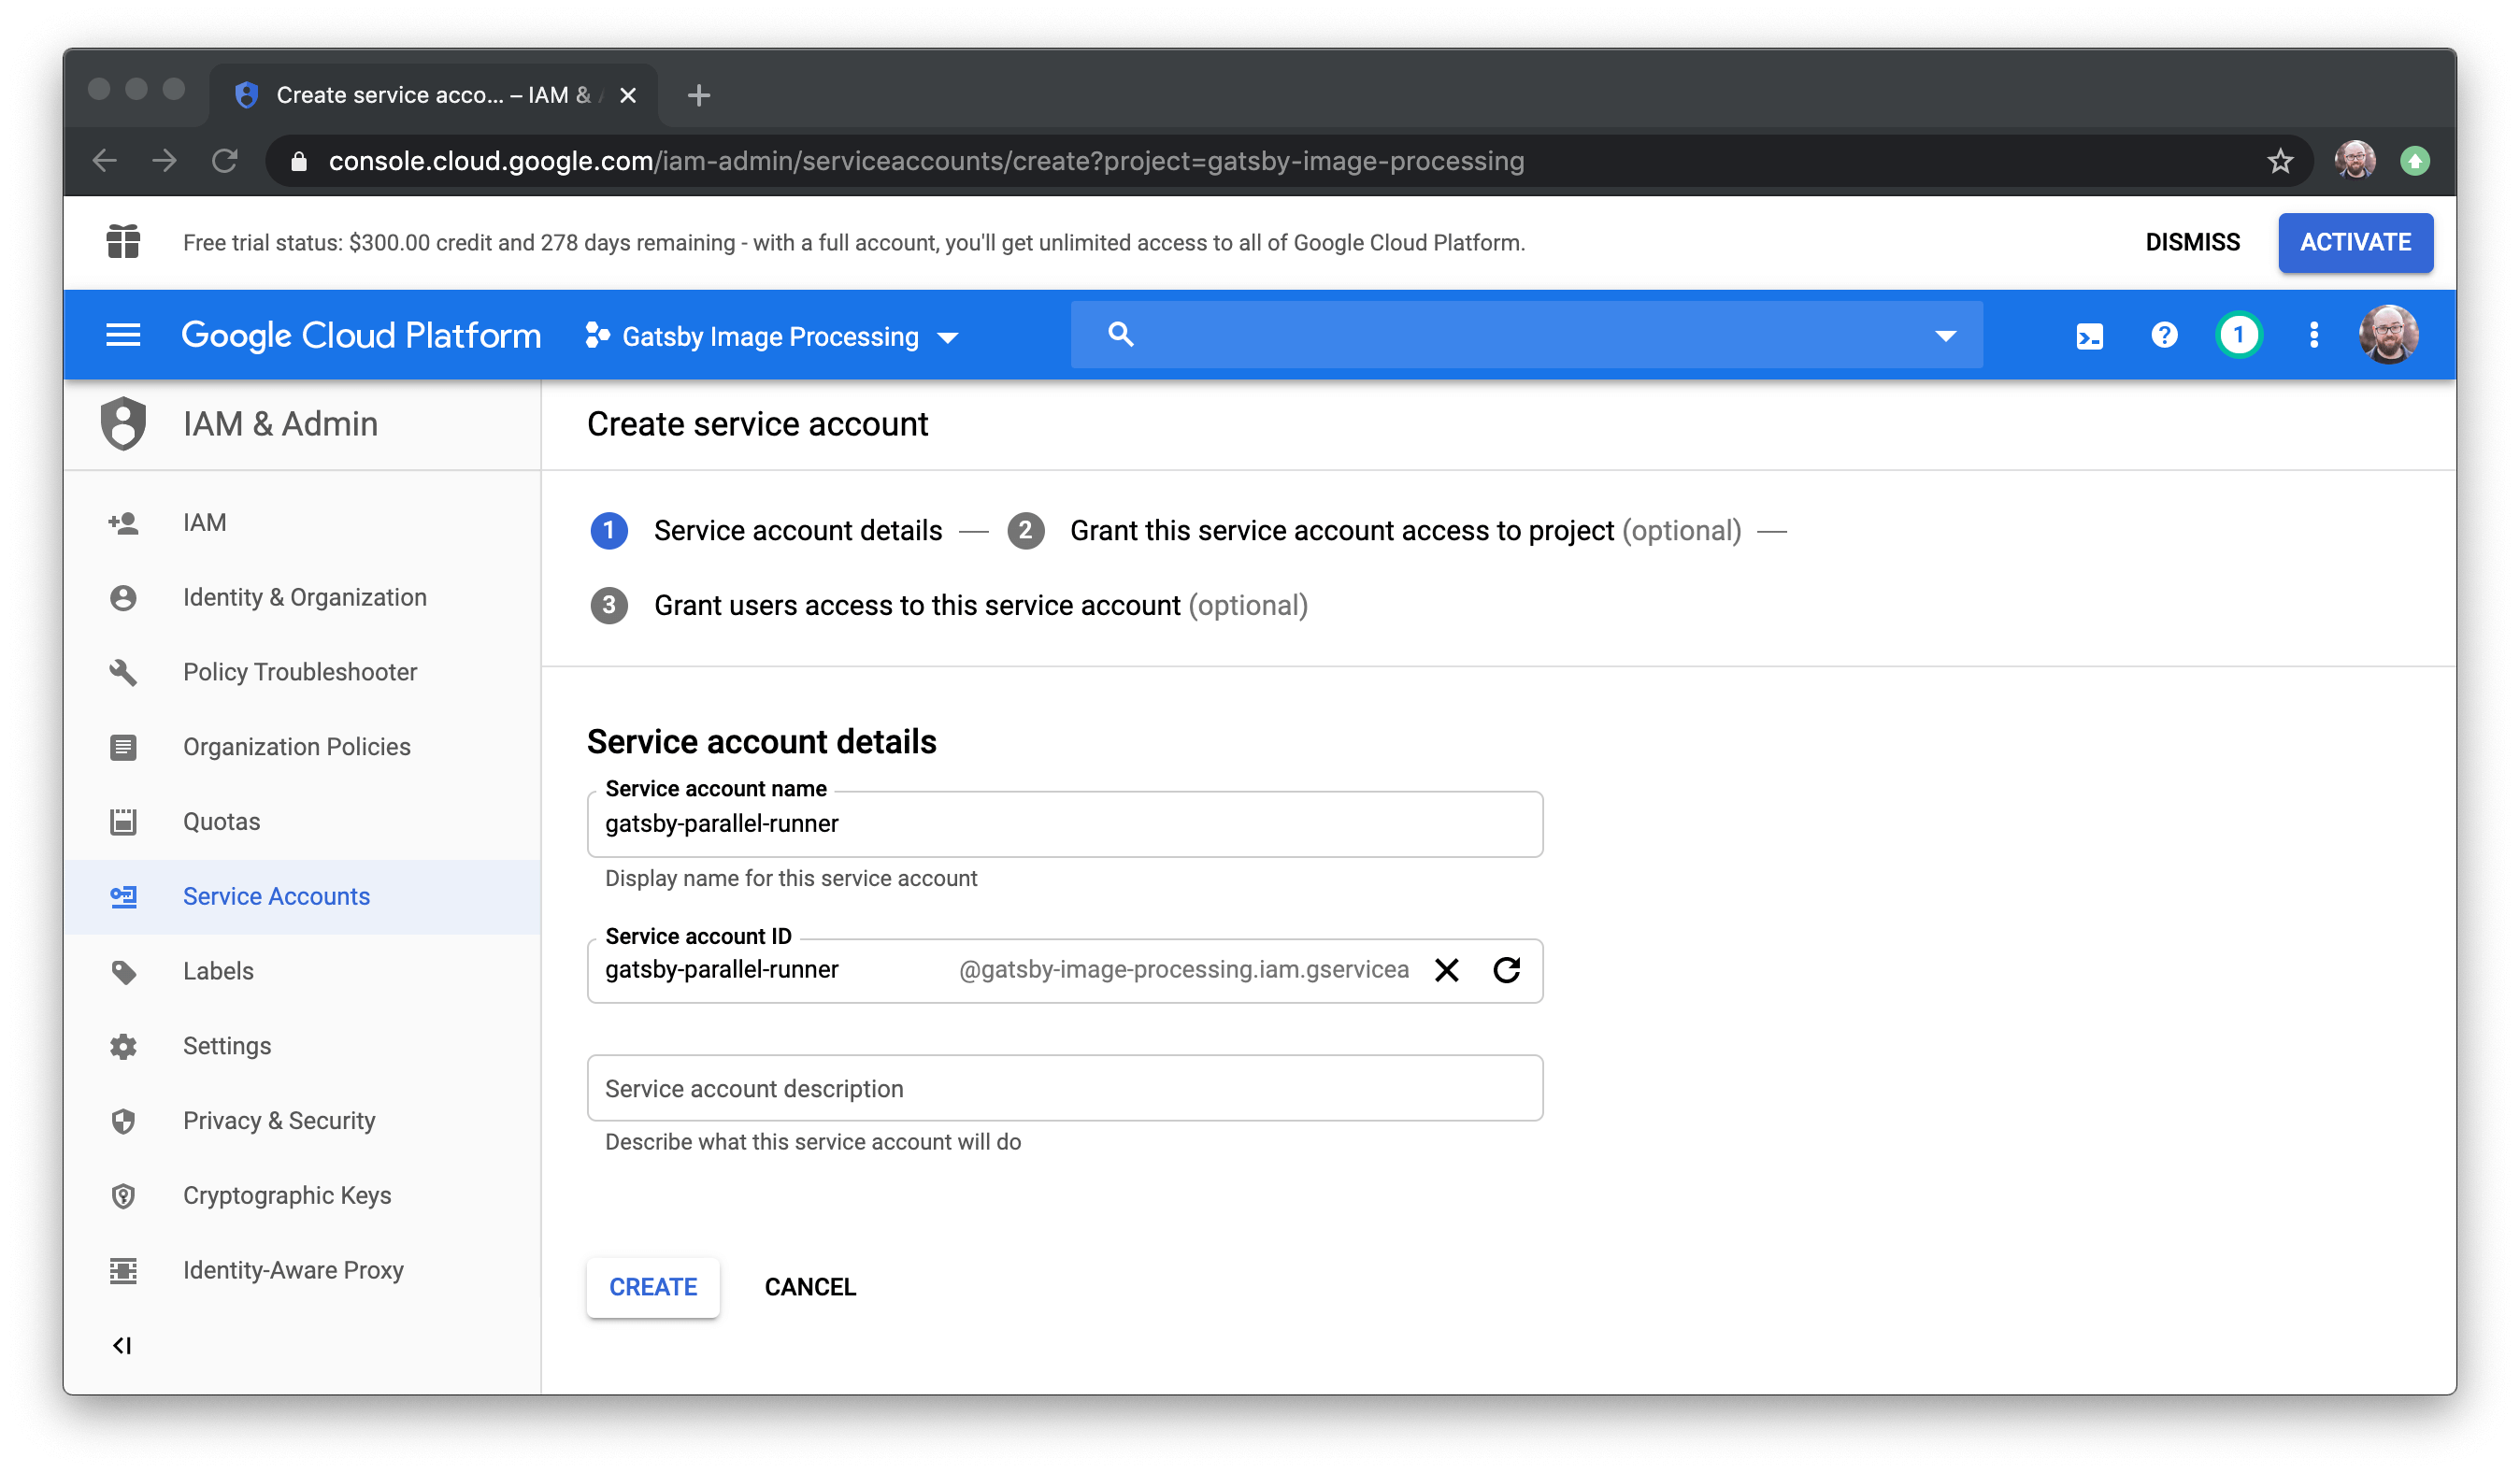
On the service accounts dashboard, click ”+ CREATE SERVICE ACCOUNT” near the top center of the screen.
On the next screen choose a name for your service account — to make it easy to remember, maybe choose something like “gatsby-parallel-runner”.
On the next screen add two roles:
- Storage Admin — required to create storage buckets and access them
- Pub/Sub Editor — required to create topics, as well as send and receive messages

On the third screen, scroll down to the “Create key (optional)” section and click the ”+ CREATE KEY” button. Leave the key type as JSON and click the “Create” button. A JSON file will be downloaded with your credentials.
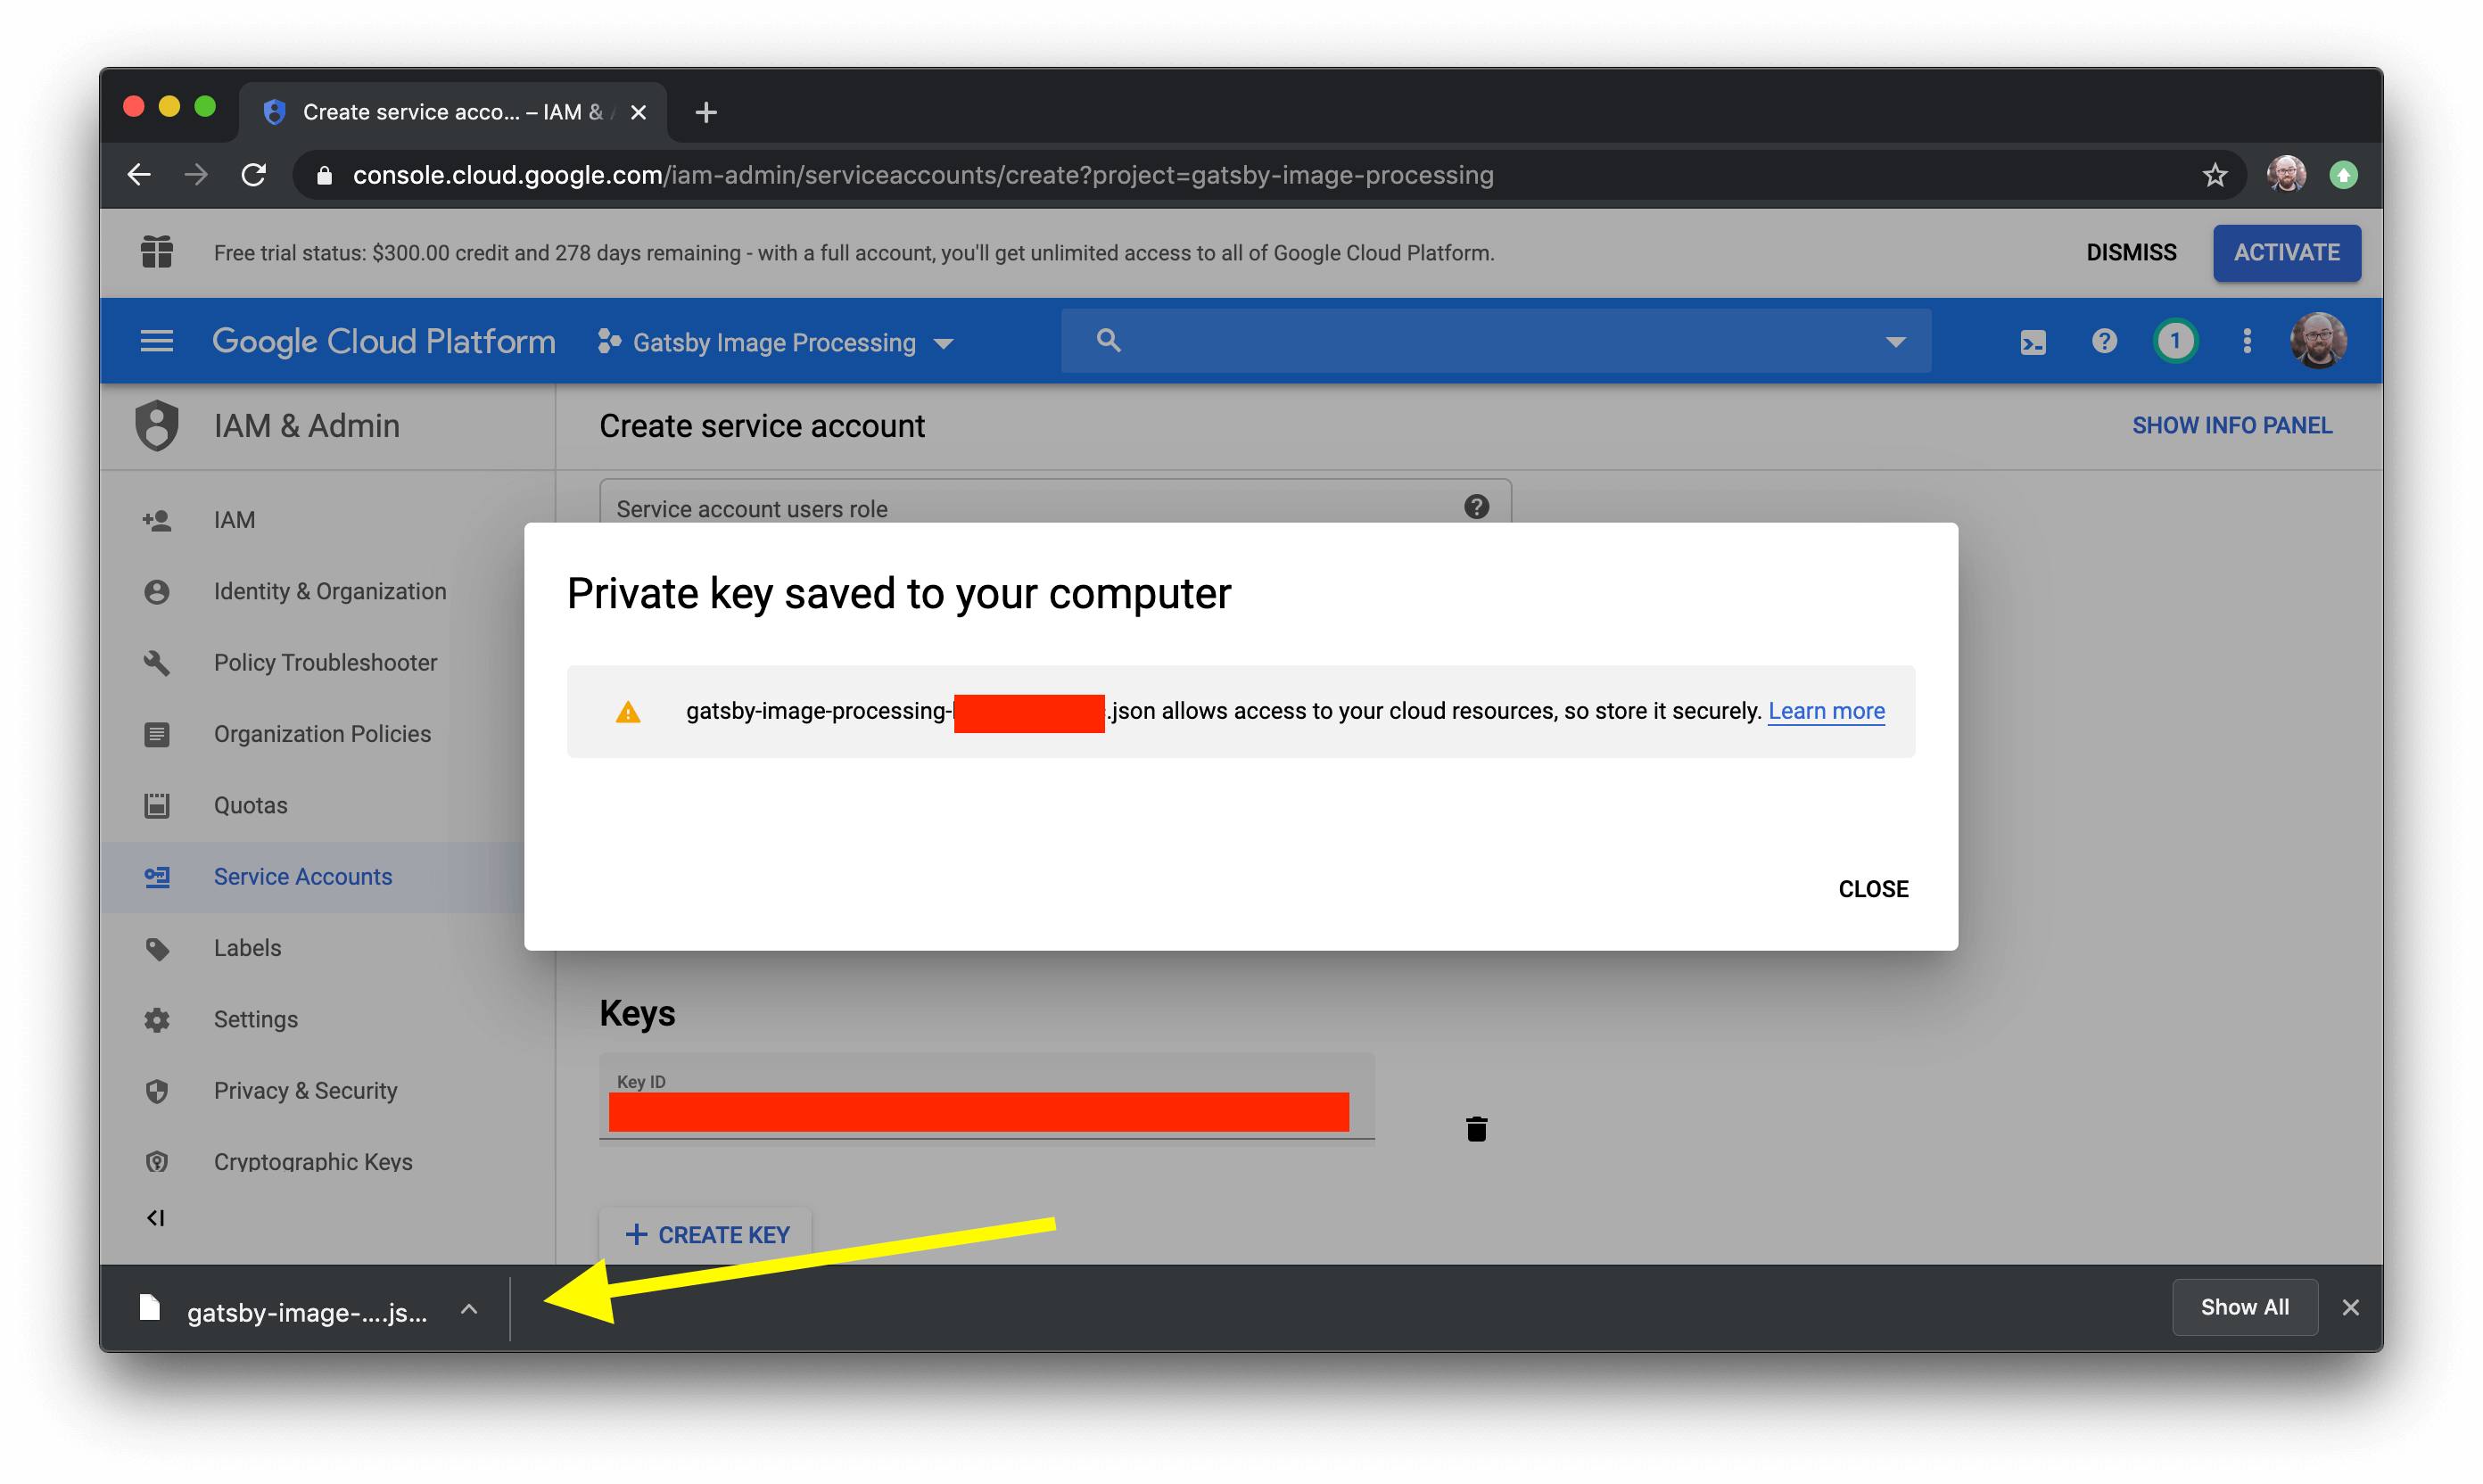
Move the downloaded file somewhere safe. For the purposes of this tutorial, we will assume that the file will be renamed to google-cloud-creds.json.
Heads up! The information in this file allows access to your Google Cloud account, so make sure it’s stored somewhere secure. Do not commit this file to GitHub!
Deploy the Google Cloud services for parallel image processing
Now that we have a service account with the appropriate permissions, we need to deploy the Pub/Sub, Cloud Storage, and Cloud Functions setup to support processing images.
Install the Google Cloud SDK
In order to deploy the Google Cloud services using the credentials we just created, we’ll need to have the Google Cloud SDK installed.
Head over to https://cloud.google.com/sdk/docs/quickstarts and install the SDK on your computer, then log in by running the following command:
gcloud auth loginDefine the required environment variables
We need three environment variables set to use gatsby-parallel-runner:
GOOGLE_APPLICATION_CREDENTIALS: this will be set to the path of the credentials file we saved (e.g.~/Downloads/google-cloud-creds.json)WORKER_TOPIC: Pub/Sub and Cloud Storage use this value to name things (e.g.my-image-processor) — this MUST be unique to your account, but note that you can use the same Google Cloud setup for multiple sitesTOPIC: this is a unique identifier for the site being built (e.g.site-name-1234) — this MUST be unique to avoid collisions if two sites are building on your account at once
Deploy the Google Cloud services required for parallel processing
Now that we have the credentials and environment variables, we’re ready to deploy the Google Cloud services to enable parallel image processing!
Since we won’t need gatsby-parallel-runner installed on our local computer except for this one command, we’ll use npx to run it without installing.
When we put it all together, we can declare the env vars inline, then call npx gatsby-parallel-runner deploy:
# the `\` allows us to escape newlines so this command is more readable# set our environment variables inline, then run the deploy command using npxGOOGLE_APPLICATION_CREDENTIALS=~/Downloads/google-cloud-creds.json \WORKER_TOPIC=my-image-processor \TOPIC=site-name-1234 \npx gatsby-parallel-runner deployThis will log out details as new Google Cloud resources are provisioned.
Heads up! If you see
Sorry, that name is not available. Please try a different one.it means yourWORKER_TOPICvalue isn’t unique and needs to be changed.
When it gets to the Cloud Function deployment it will ask you:
Allow unauthenticated invocations of new function[gatsbySharpProcessorPubSub]? (y/N)?We don’t need unauthenticated invocations, so type N (or press enter) to continue.
Next, it’ll ask about a second function:
Allow unauthenticated invocations of new function[gatsbySharpProcessorStorage]? (y/N)?Again, we don’t need unauthenticated access, so we can type N or press enter to continue.
Once this process completes, Google Cloud is set up and ready for parallel image processing!
Update your Netlify sites to use parallel image processing
The last step is to update our sites on Netlify to use gatsby-parallel-runner.
Get a Base64 version of the Google Cloud service account credentials
Since we can’t commit our credentials file to our repo safely, we need to store the credentials entirely as an environment variable.
To do this, we’ll convert the credentials to base64:
base64 -i ./.credentials/google-cloud-creds.jsonHeads up! If you’re on a Mac, you can add
| pbcopyto the end of the command, which means the output will be copied directly to your clipboard instead of being printed in the terminal.
Add the environment variables to Netlify
Go to your Netlify dashboard and choose the site you want to update.
Click “Settings” in the top nav, then click “Build & deploy” in the left-hand nav.
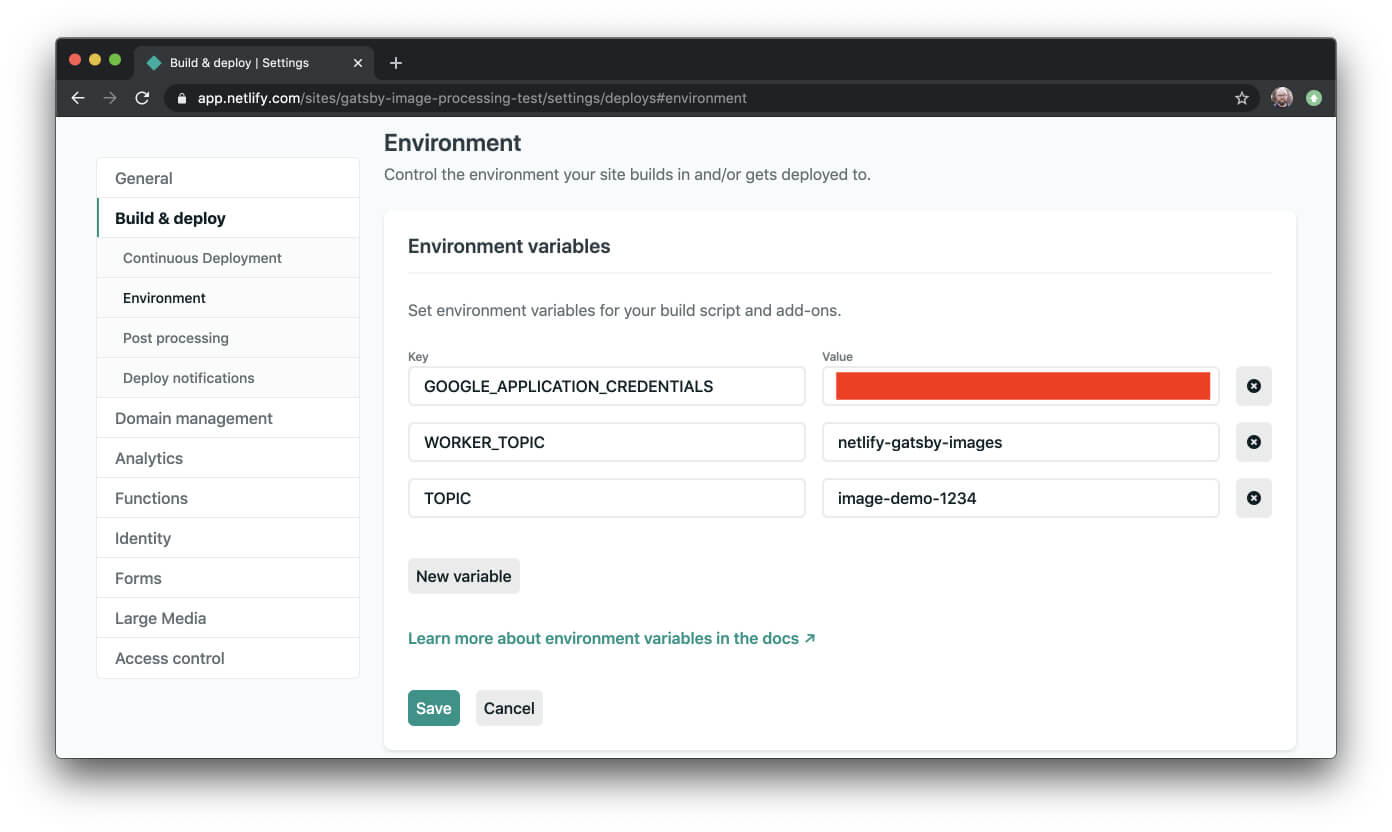
In the “Environment” section, add the following environment variables:
GOOGLE_APPLICATION_CREDENTIALS— set to the base64 credentials from the previous stepWORKER_TOPIC— set this to a unique value (this can be shared between your own sites, but it has to be unique to your Google Cloud account)TOPIC— set this to a unique value that identifies your site
Change your Netlify build command
In the same “Build & deploy” settings on your Netlify dashboard, change the build command to gatsby-parallel-runner:
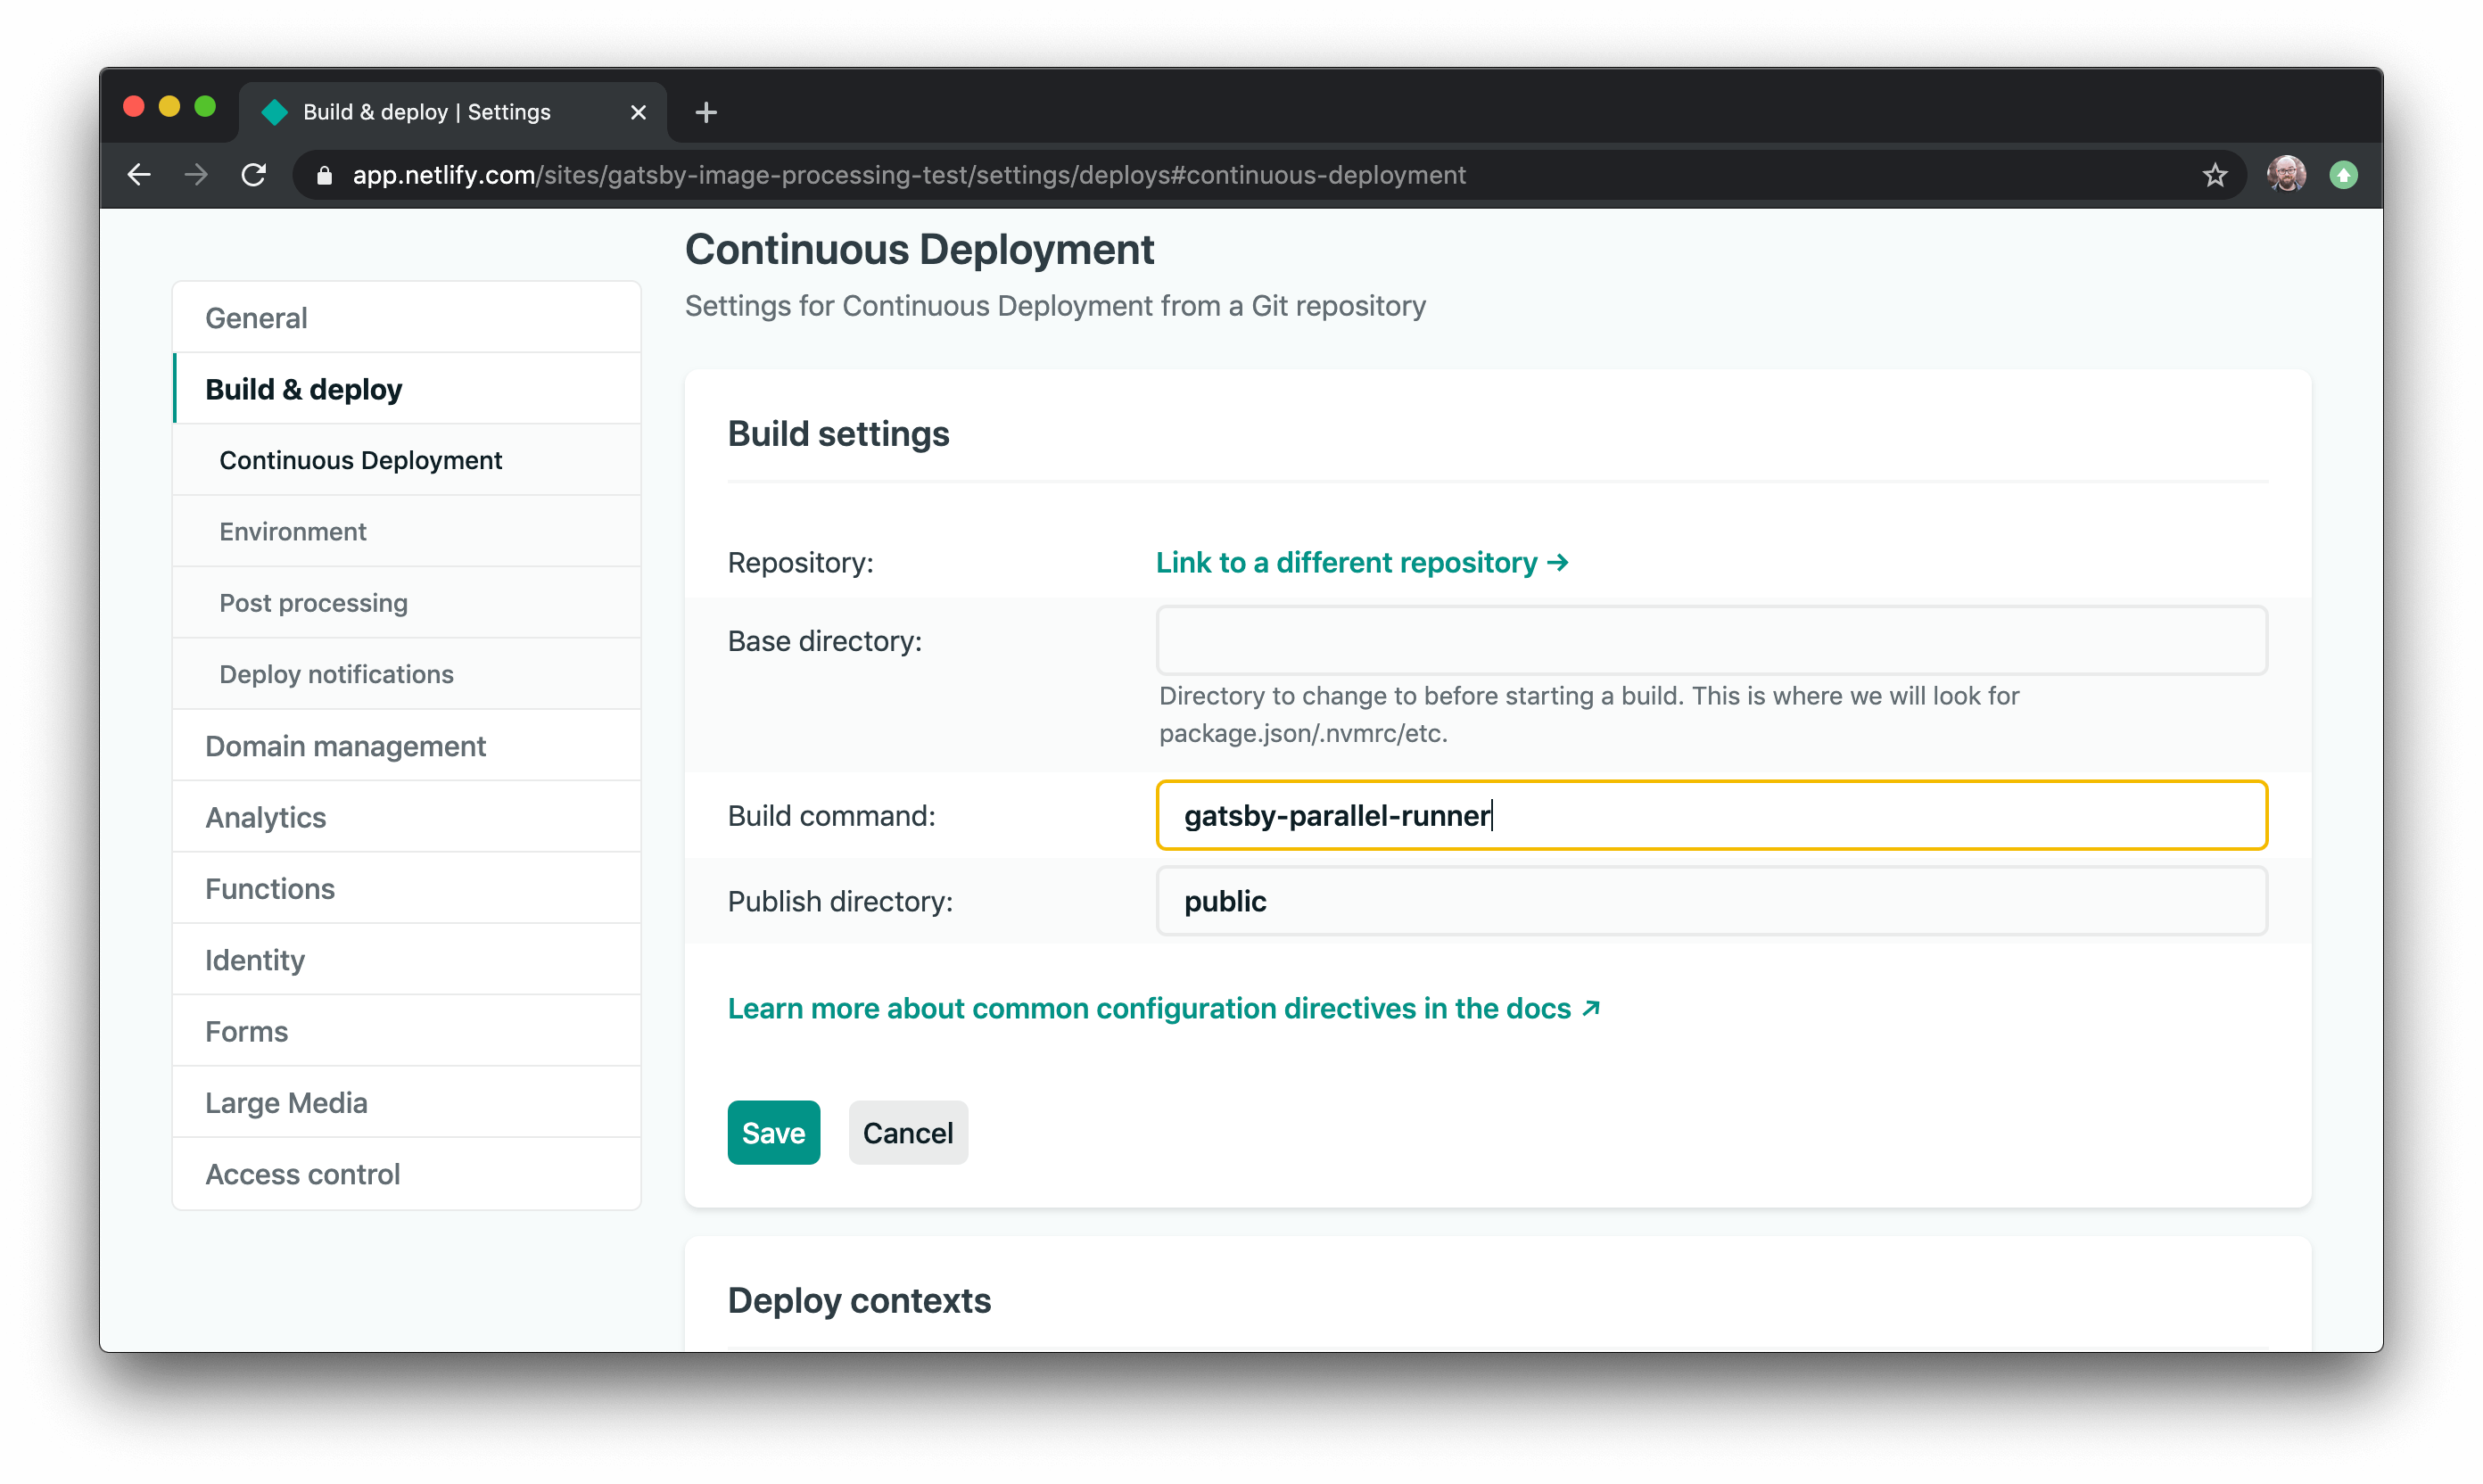
Heads up! If you use a Netlify config file, change the build command there instead.
Trigger a new build by pushing the repo changes
Earlier in this process we modified our repo to add the gatsby-parallel-runner as a dependency — if we commit those changes and push them, it will trigger a new build using the gatsby-parallel-runner.
On our demo repo, building the site is 47% faster when using gatsby-parallel-runner.
This is (probably) just the beginning
As of right now, Gatsby’s Sharp plugin is the only one that takes advantage of parallelization, but it’s easy to imagine a world where even more of the work done in Gatsby is able to take advantage of these improvements, resulting in even faster builds!
After you’ve added this to your own site, let us know how big the difference is — we’d love to hear from you!
Huge props go to the Gatsby OSS team for enabling parallel processing, and many thanks to Matt Biilmann and Shawn Erquhart for helping guide and edit this tutorial.