Let’s face it. One of the biggest headaches about social media is finding out that someone decided to squat on your desired username.

And while it would be one thing if people were genuinely using the account, the frustrating part is that more often than not, people:
- Squat popular usernames for profit or in bad faith (also known as domain squatting)
- Had the best of intentions with using it, but lose interest after a few days and the account sits completely unused
The issue of identity and verification has been a tricky one; but Bluesky, an up and coming social media platform, implemented a simple and elegant solution to this problem: use your custom domain as your username.
After all, as aptly paraphrased from this tweet:
Bluesky: “Hey Companies, do you have anything that uniquely identifies you online?”
Companies: “We own our own domains.”
Bluesky: “Let’s just use that.”
So, in this blog post, I’ll be showing how you can update your Bluesky handle to leverage your custom domain with Netlify.
Prerequisites
Before we get started, here are the things you’ll need to have to follow along:
- Bluesky account
- Netlify account
- Custom domain that’s connected to a site via Netlify DNS
With that, let’s jump right in!
Step 1. Get DNS record information from Bluesky
The first thing we need to get is to inform Bluesky of our intent to use a custom domain and grab the necessary credentials. Here are the steps you’ll need to take to:
- Visit the “Settings” section in Bluesky
- Click on “Change my handle”
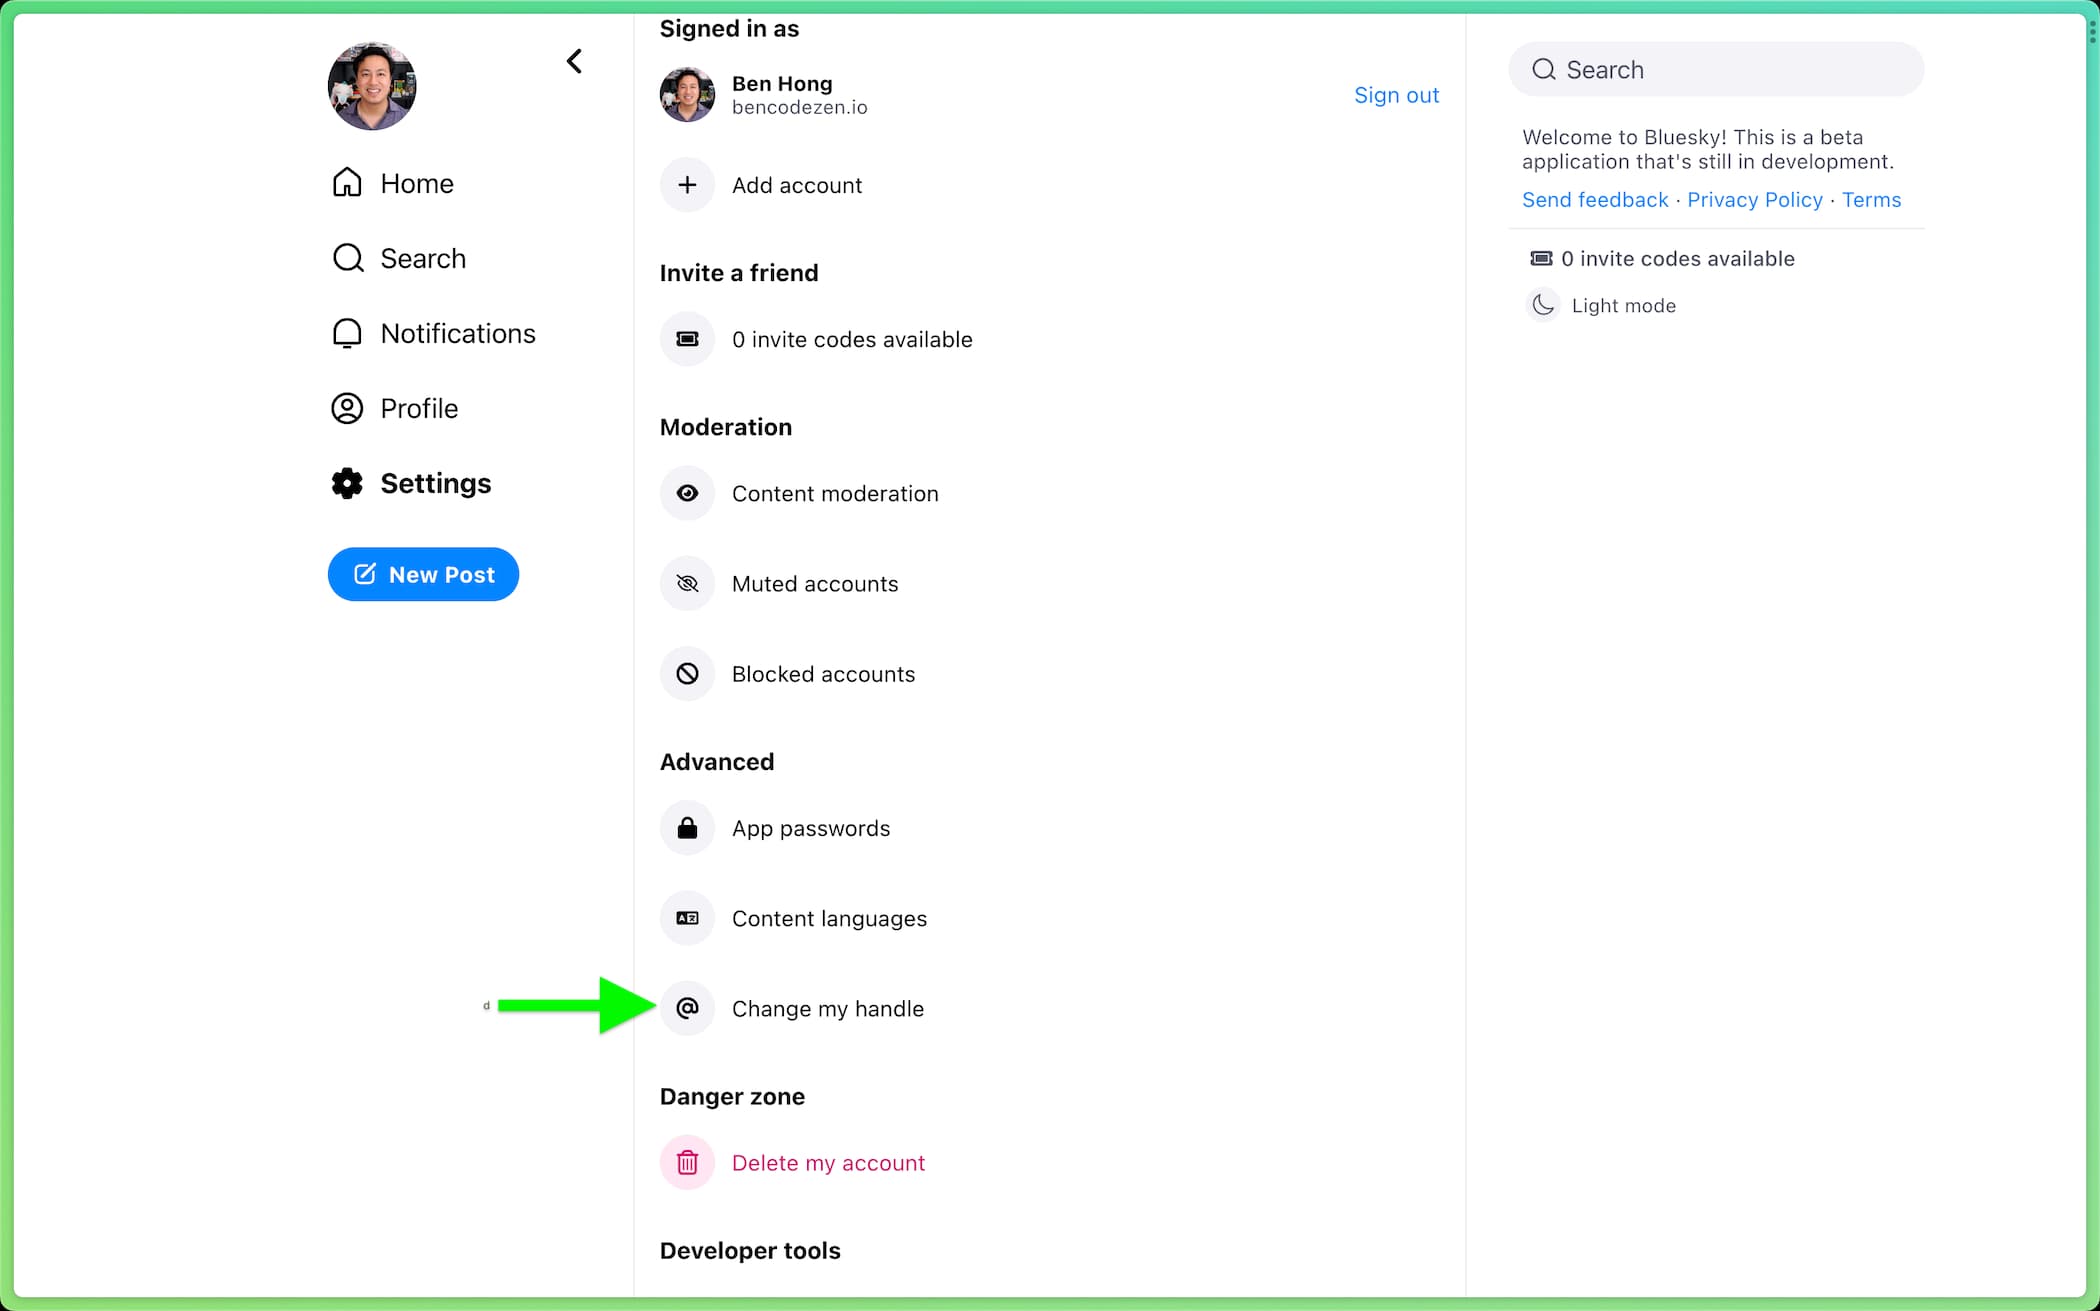
- Click on “I have my own domain” at the bottom of the prompt.

- Enter your desired custom domain in this text input.
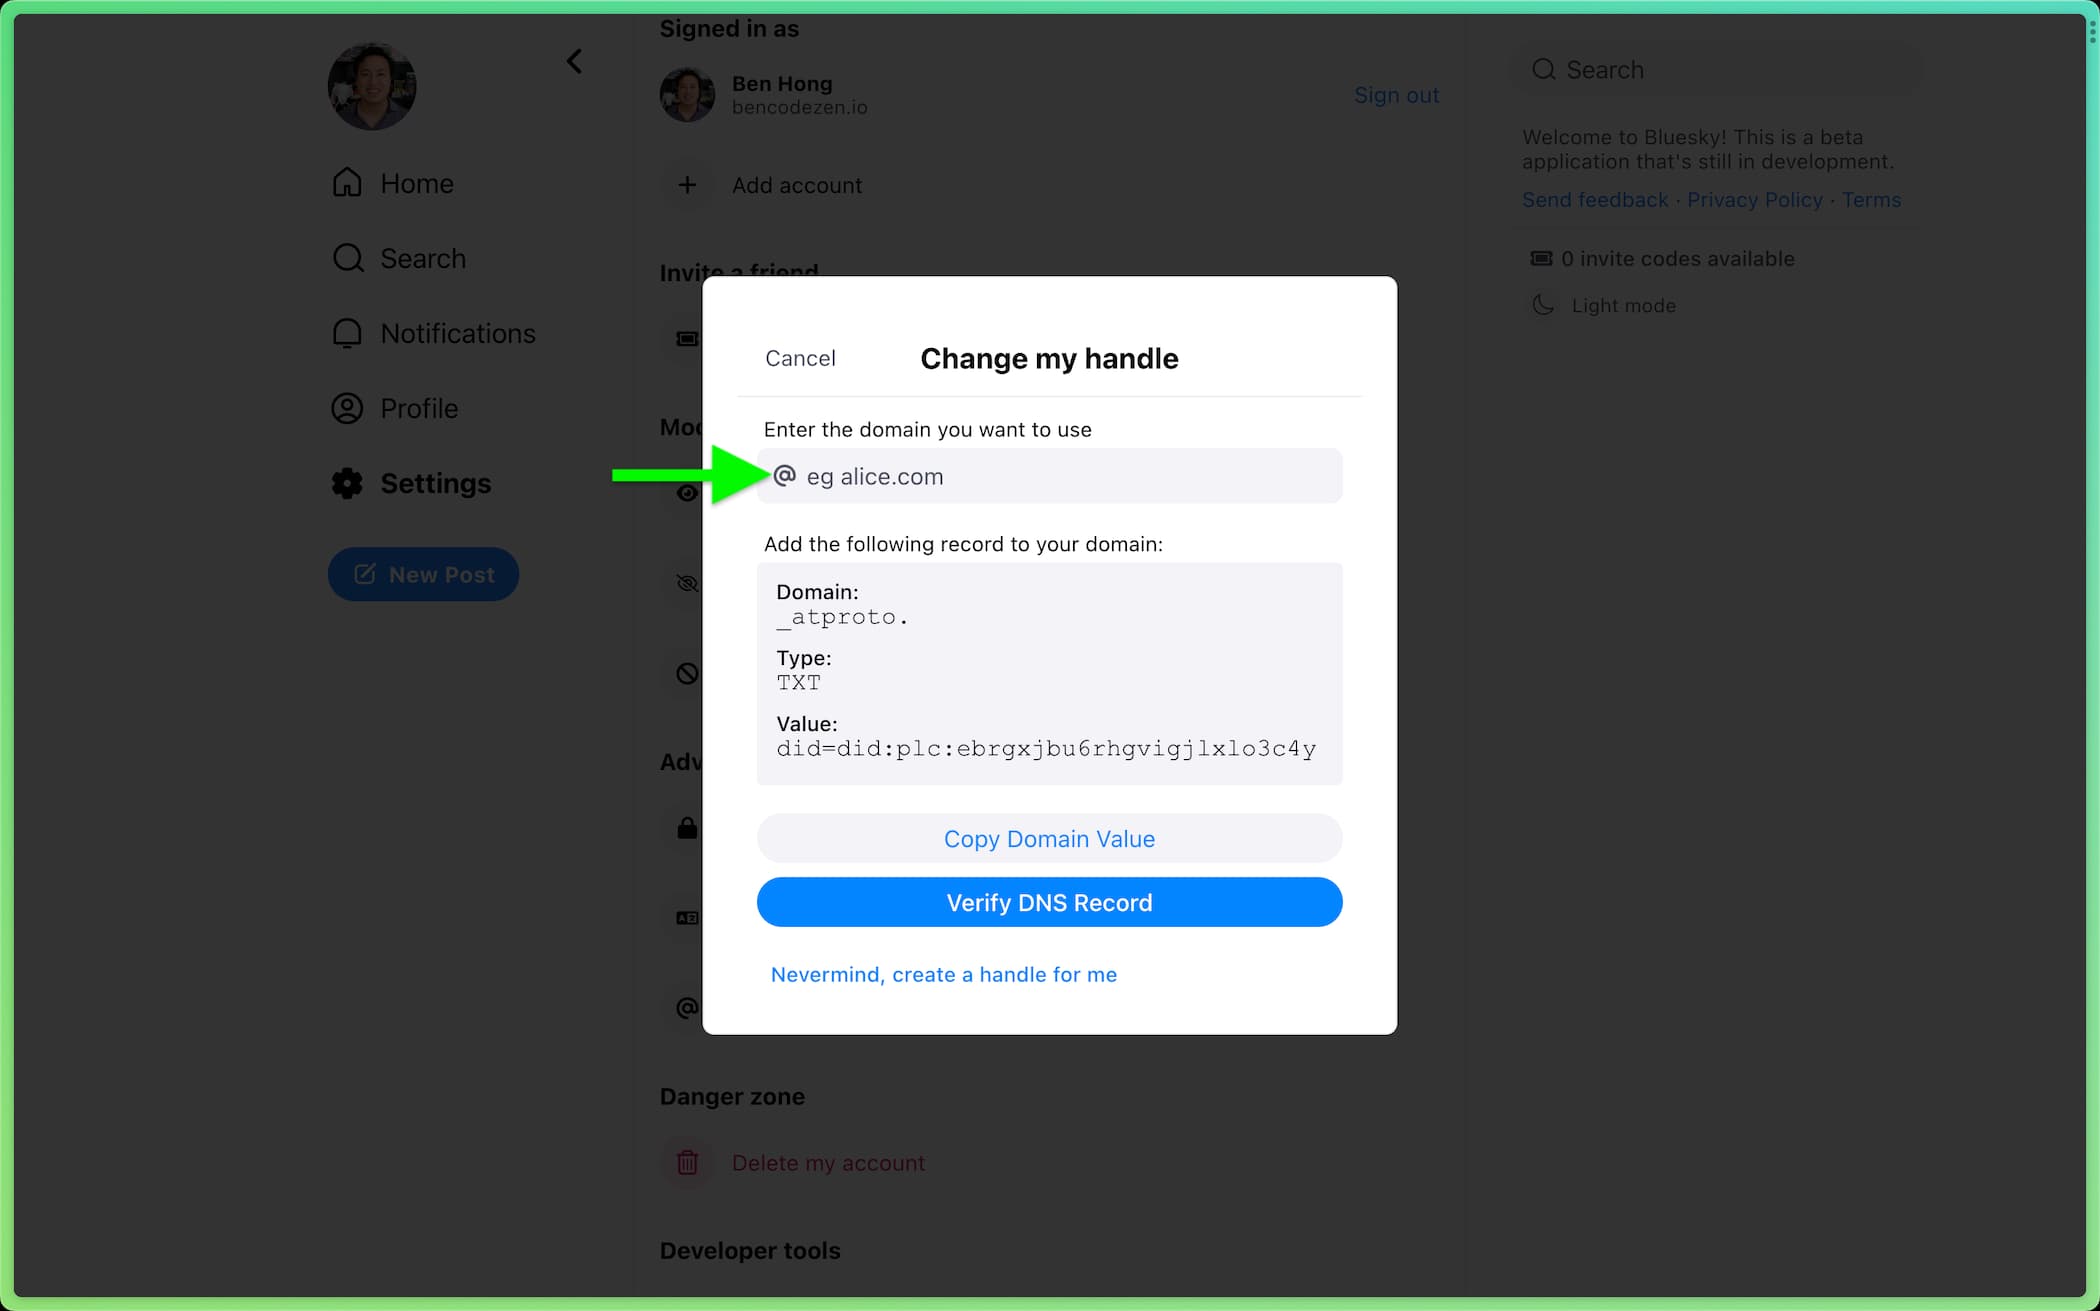
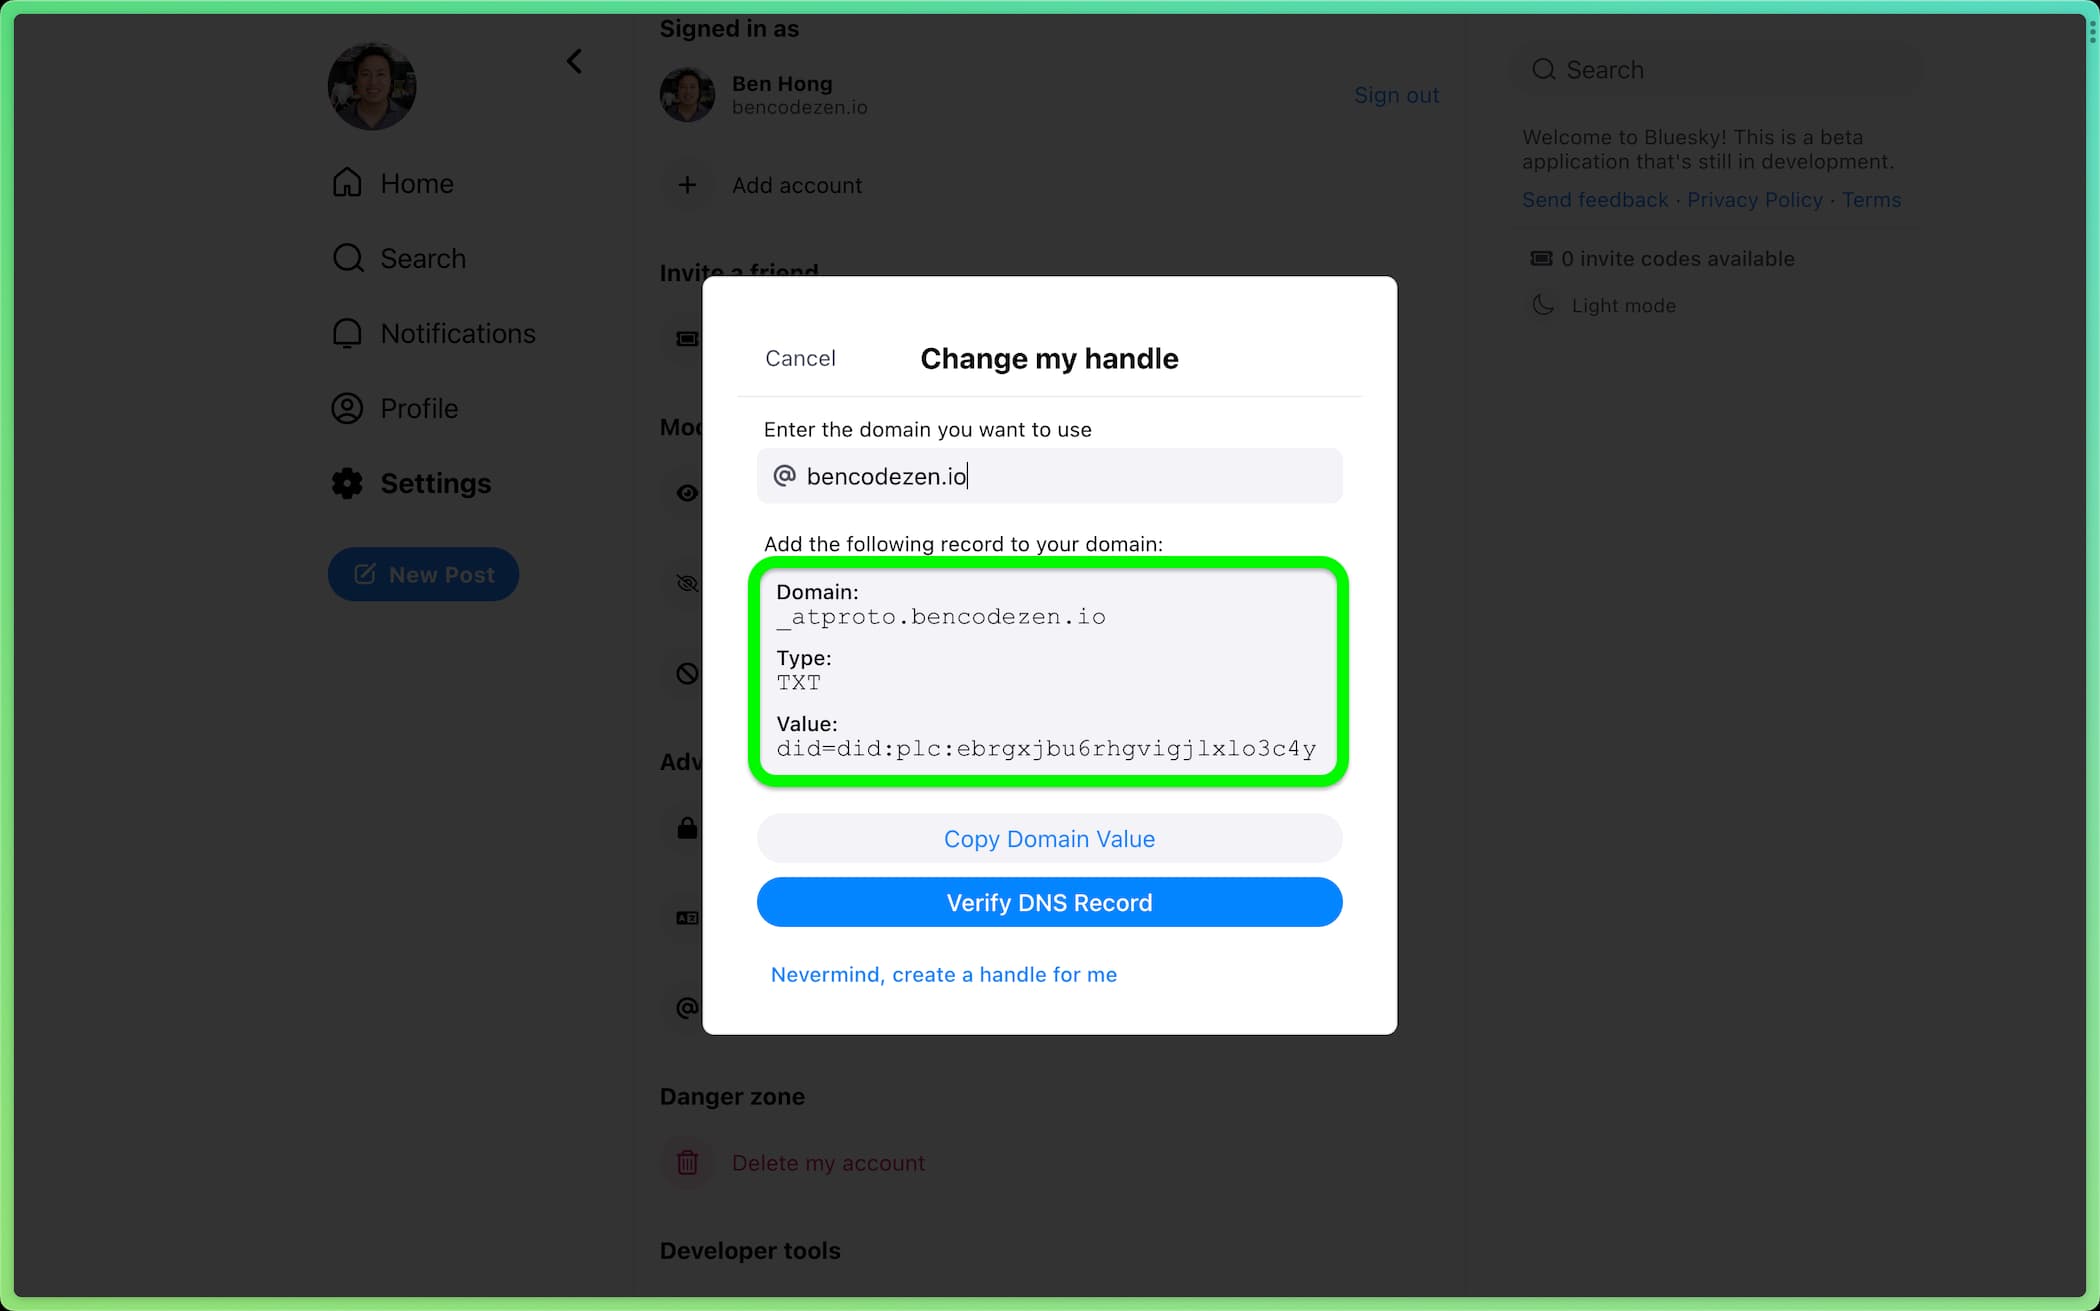
Once you’ve added your custom domain (e.g., bencodezen.io), the Domain value will update to the correct relevant value (e.g., _atproto.bencodezen.io).
Now that we have this information, it’s time to move on to next step!
Step 2. Add Bluesky DNS record to Netlify
Now that we have the necessary information from Bluesky, it’s time to login to Netlify so we can configure out domain to verify that we own it. Once you’ve navigated to your site on Netlify which uses your desired custom domain, you’ll want to follow the following steps:
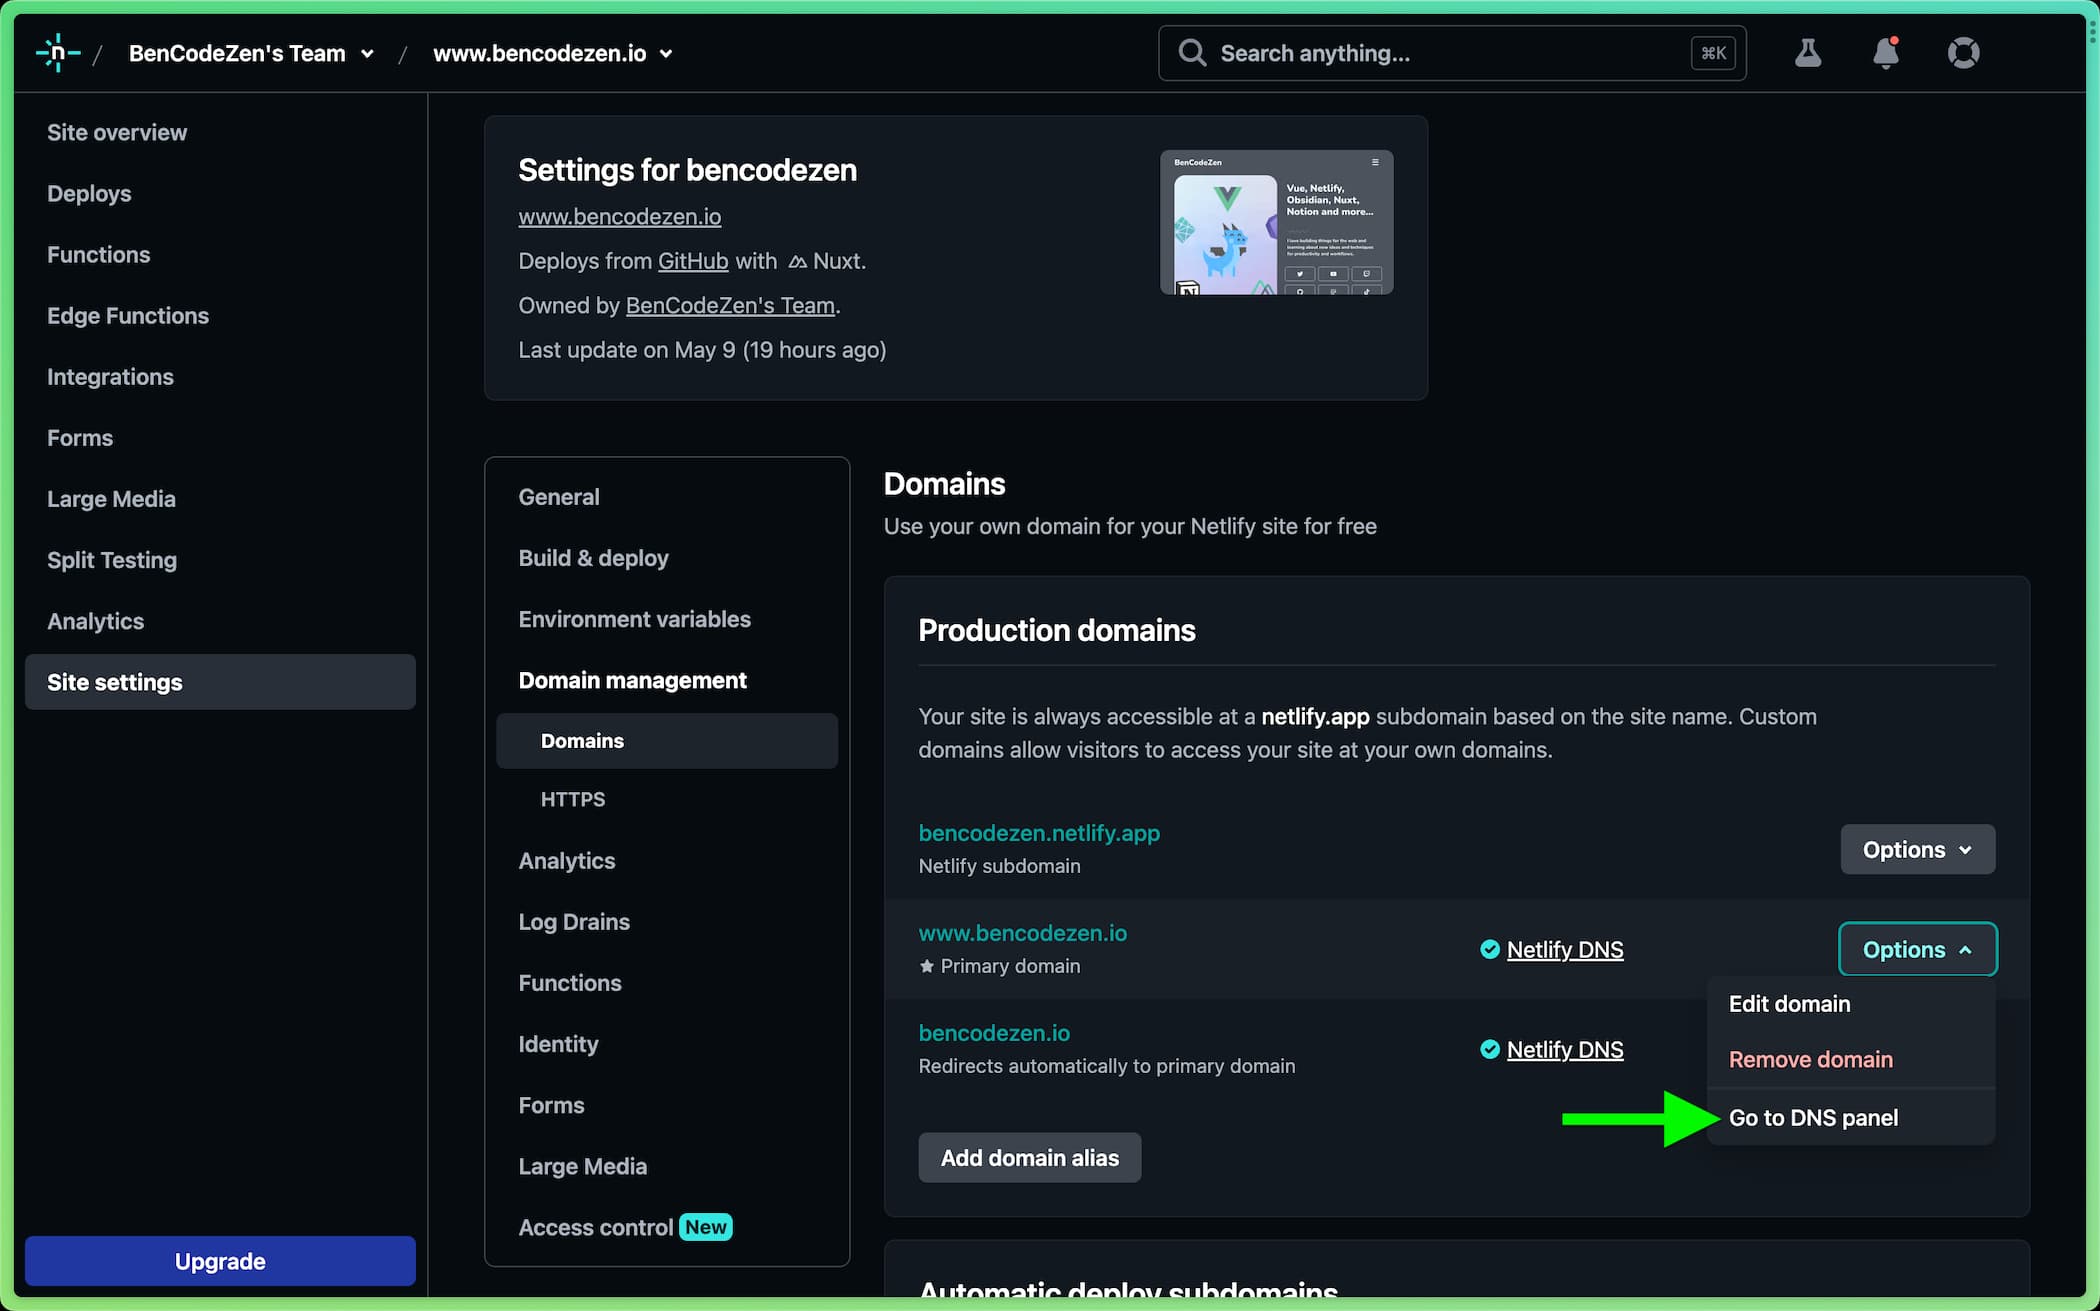
- Access the “Domain Settings” for the site that’s connected to the desired custom domain
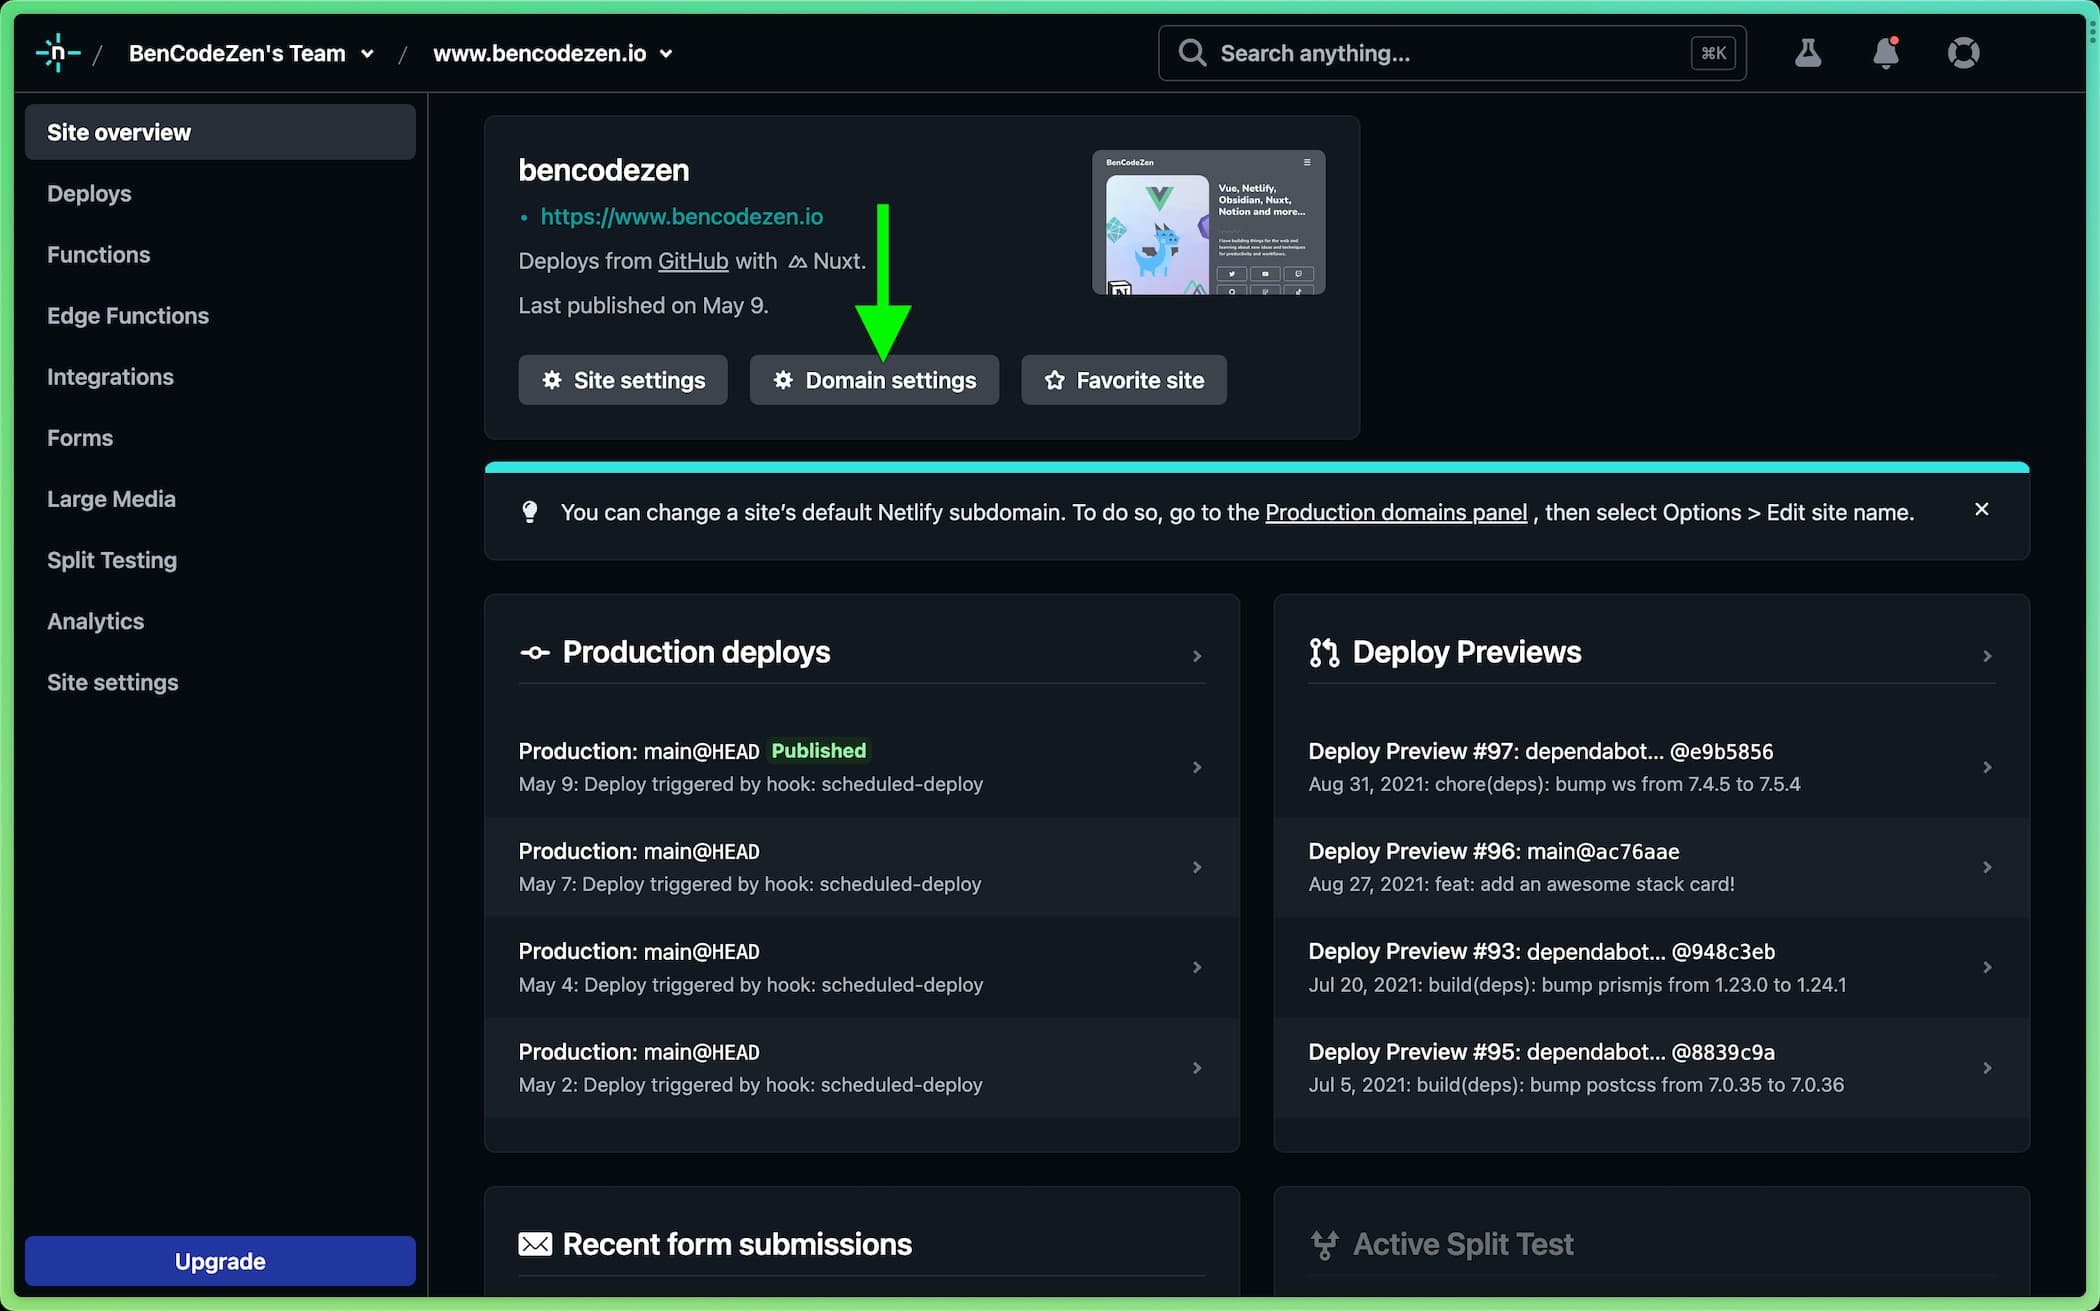
- Open the dropdown next to your domain name and click on “DNS panel”
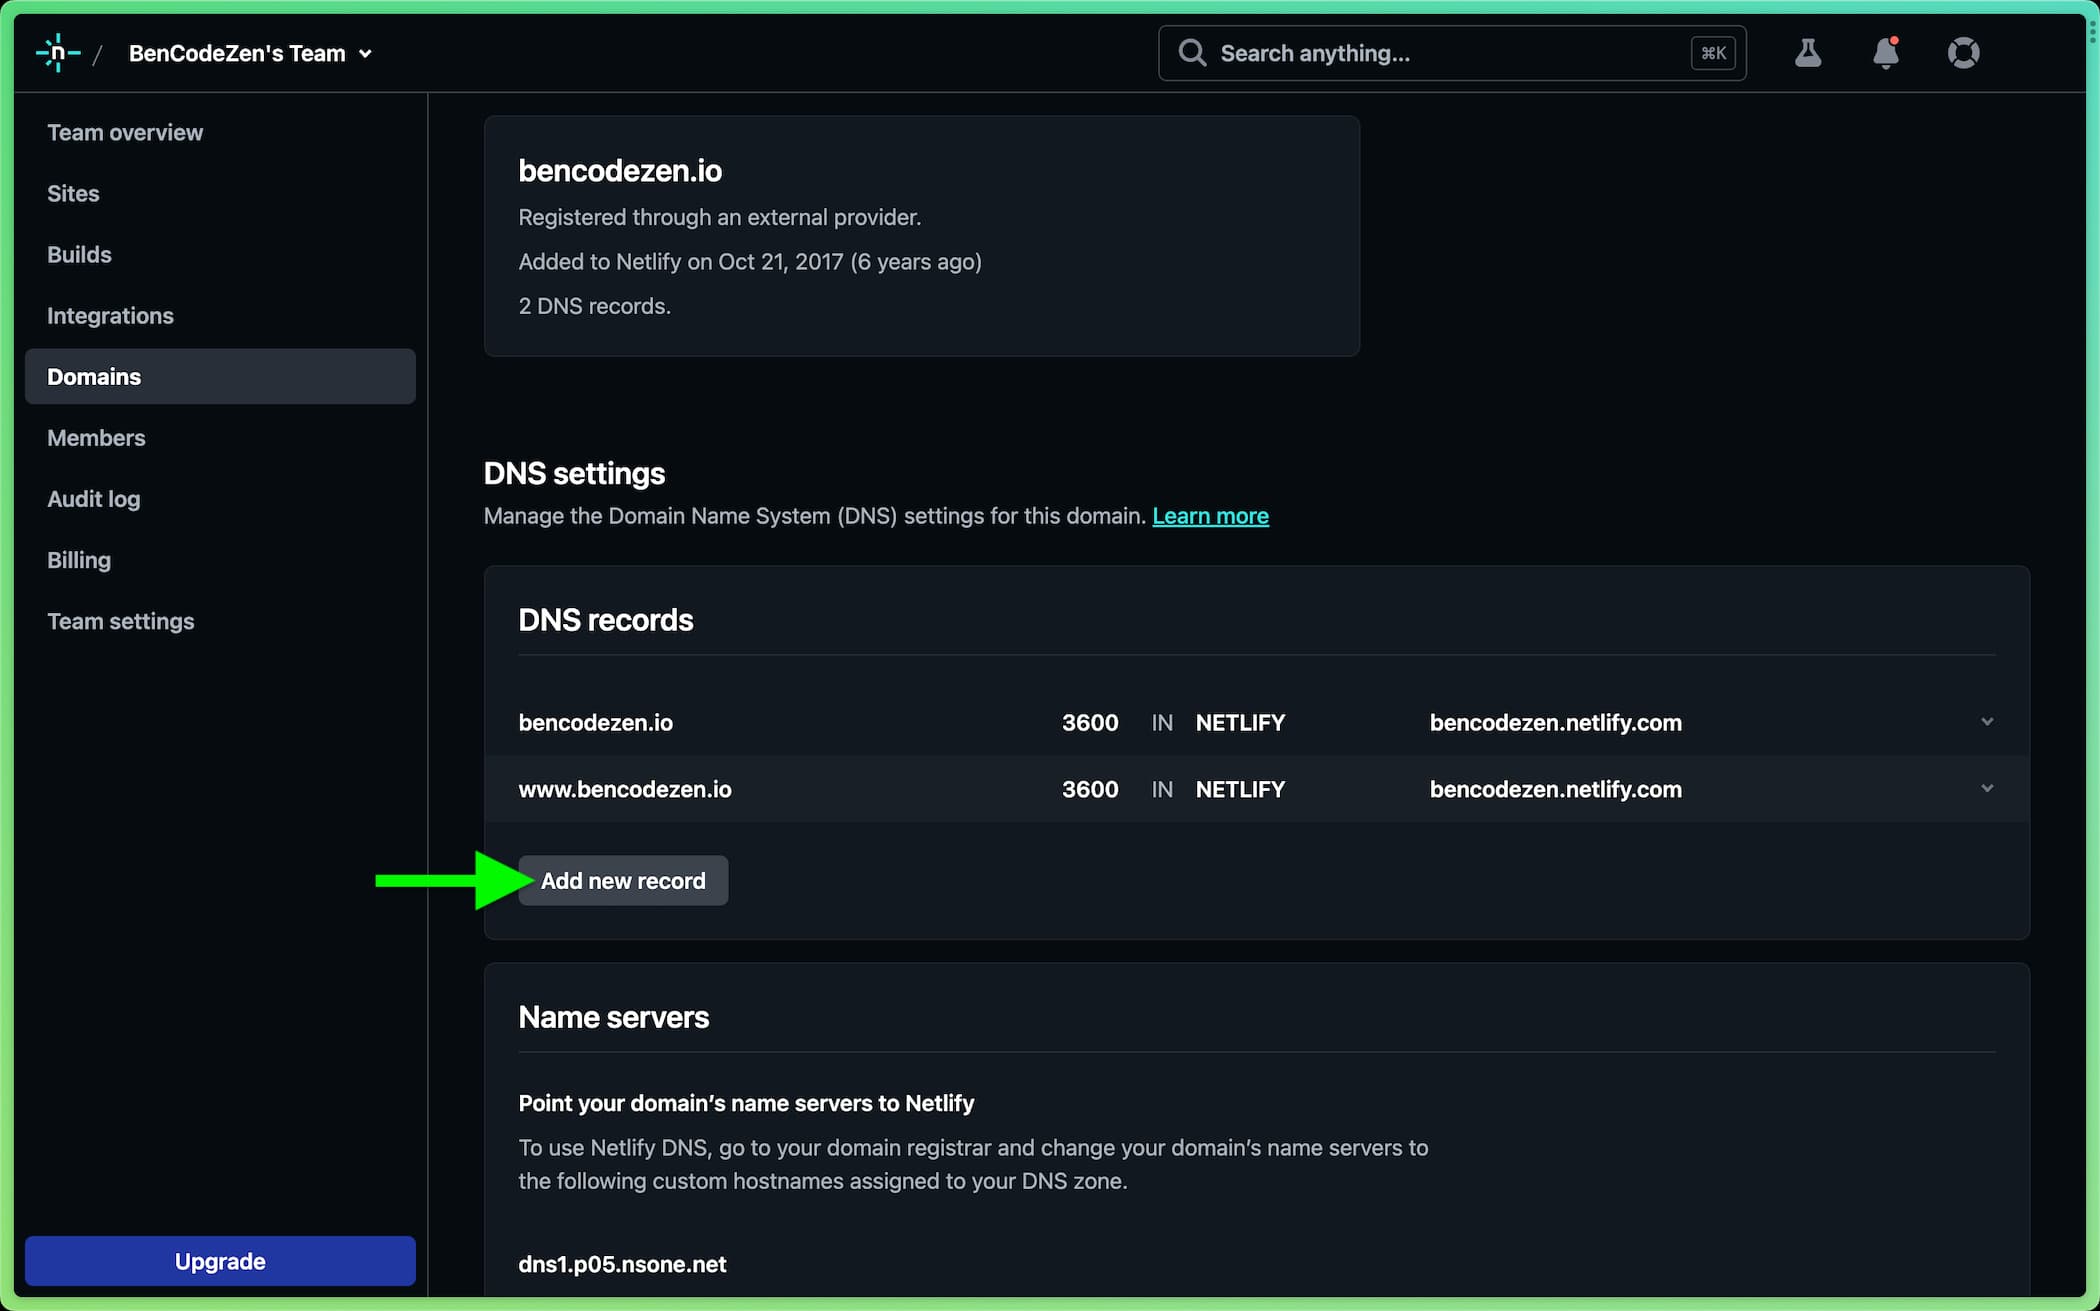
- Click on “Add a new record”
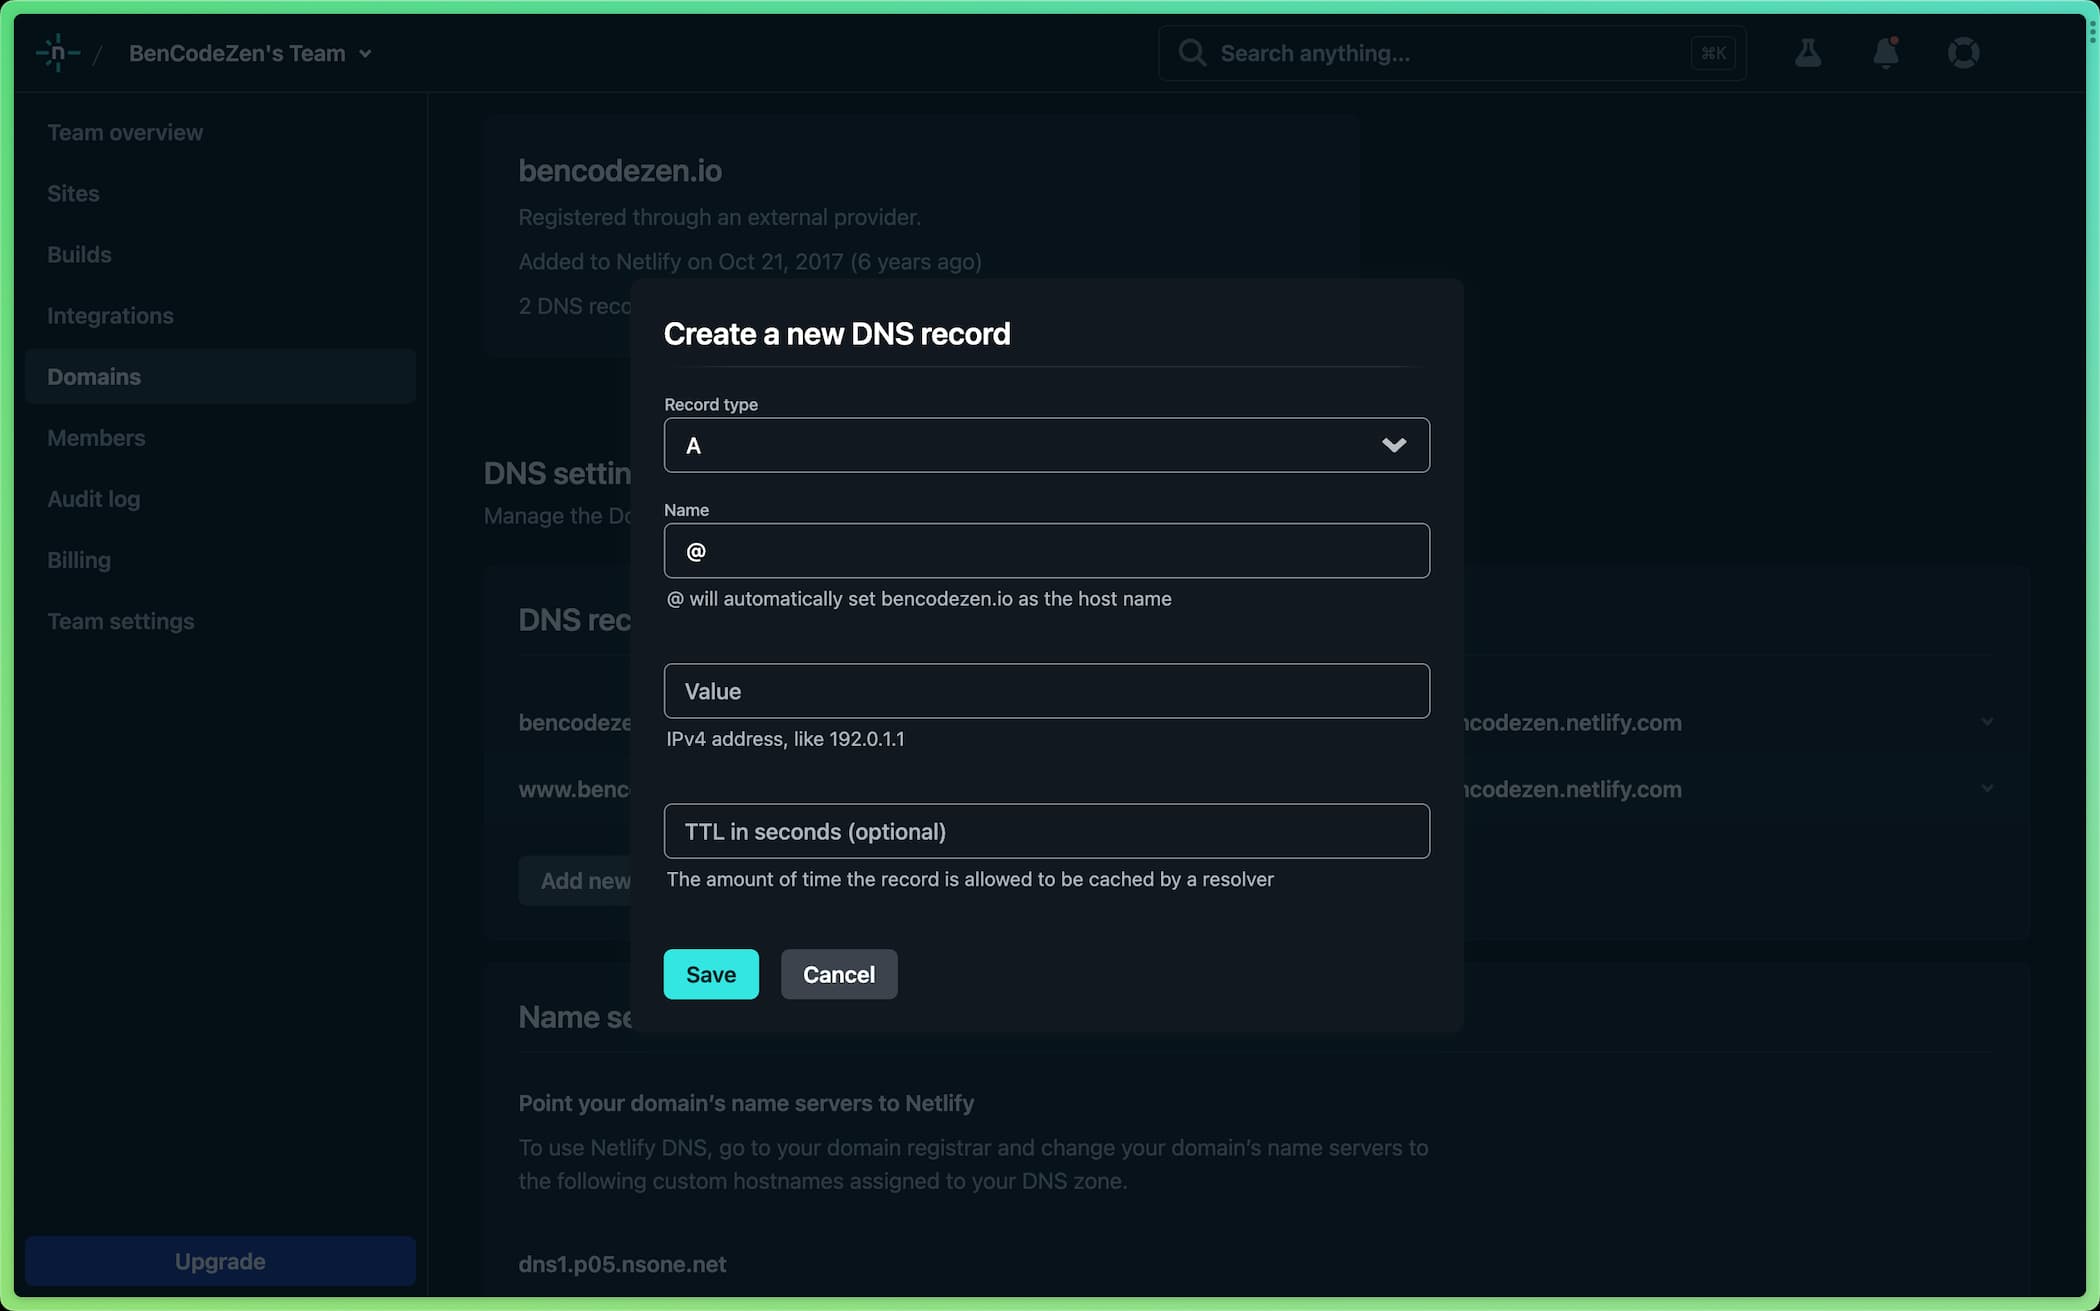
Now that you see the new DNS record form, it’s time to grab that information we got from Bluesky in step 1!
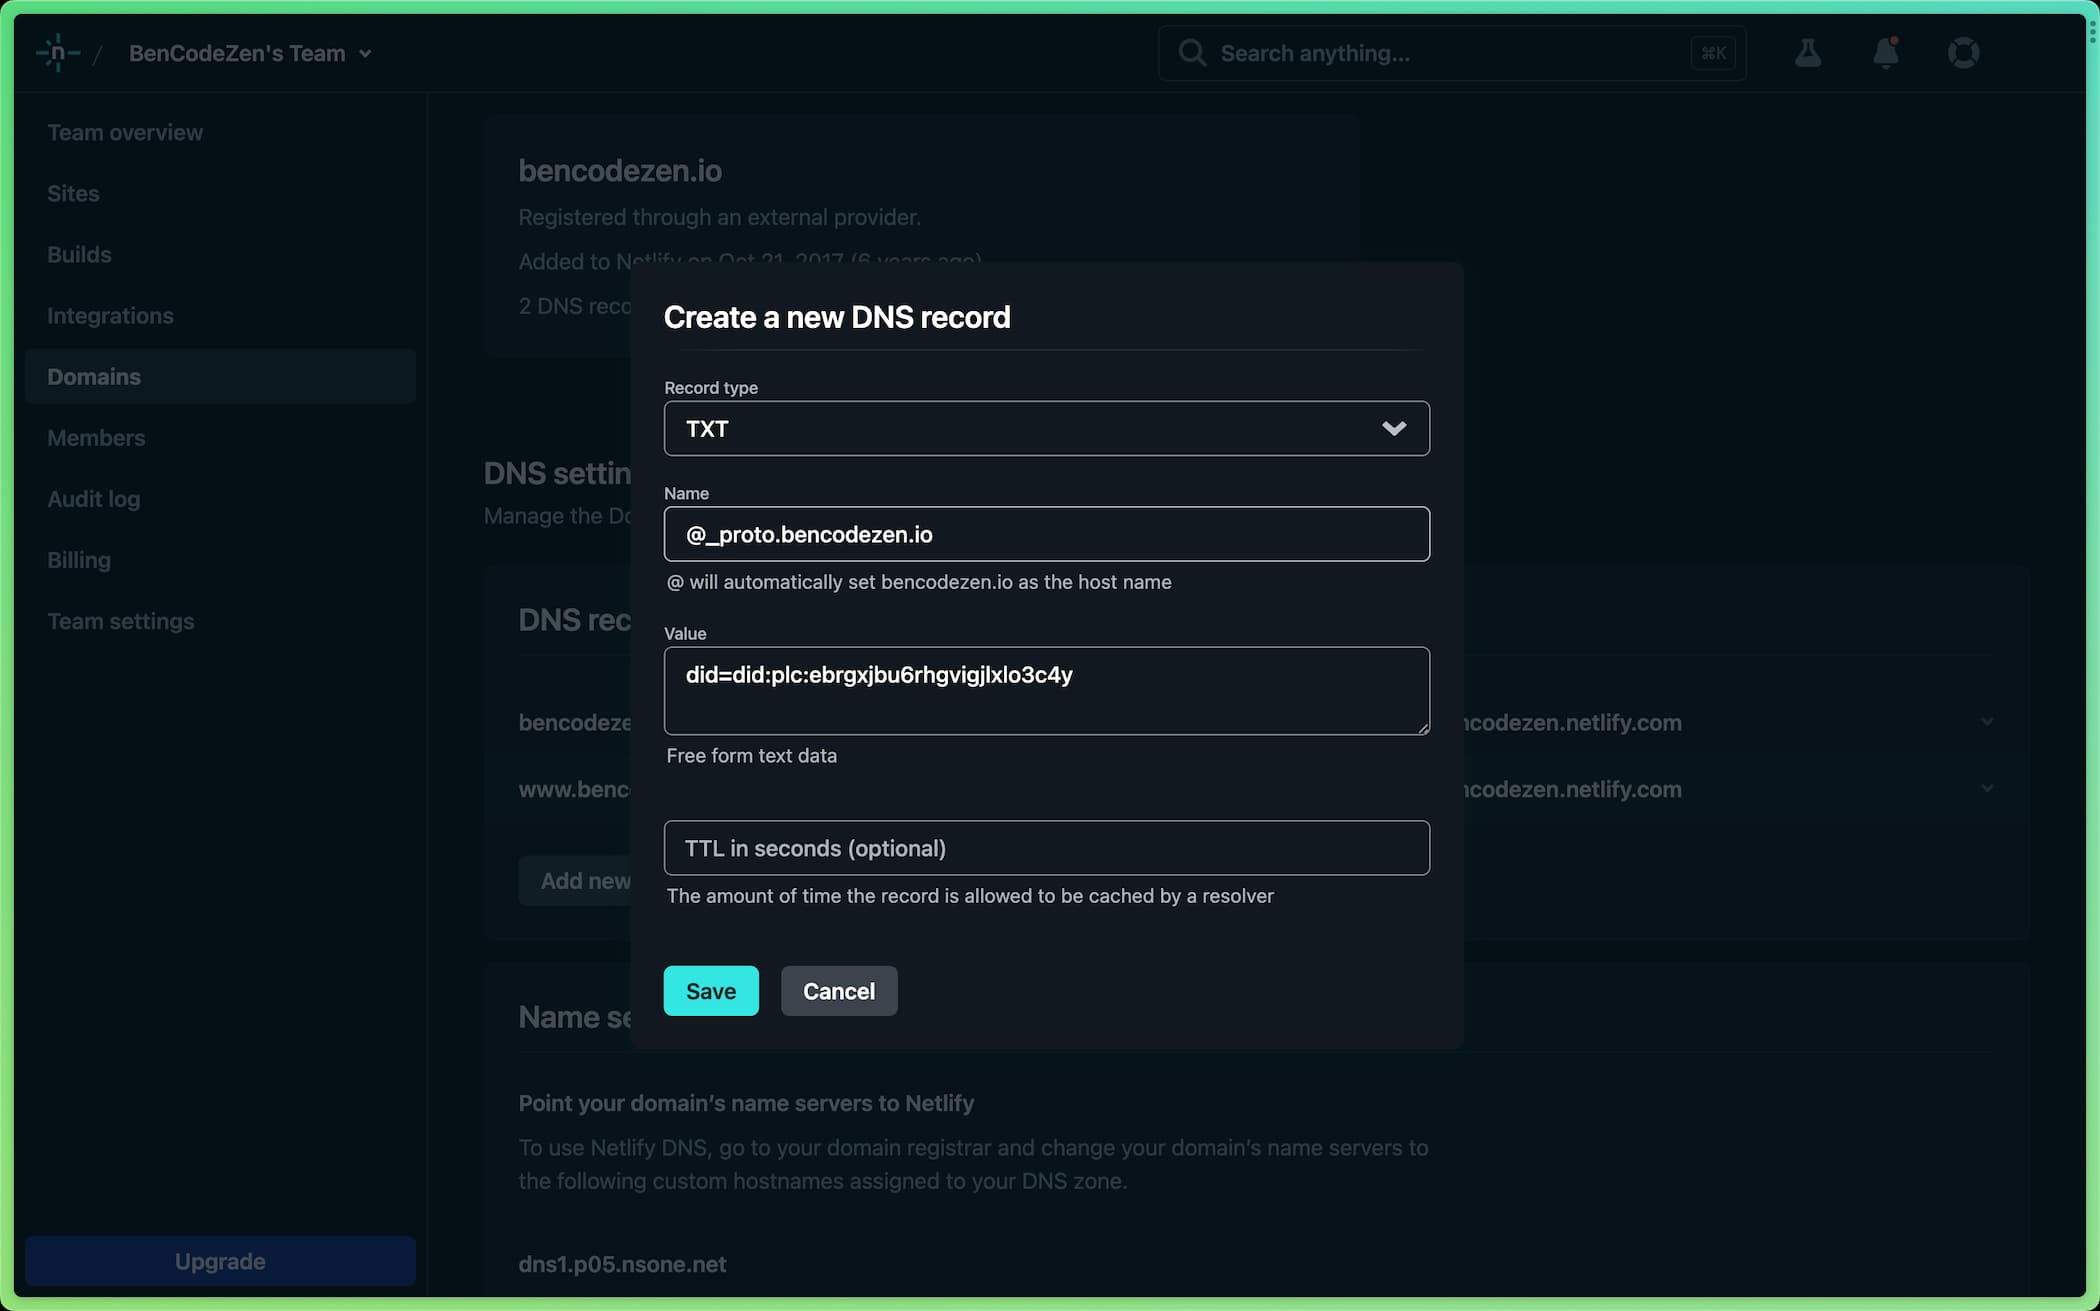
# Example data from Bluesky
Domain: _atproto.bencodezen.io  Type: TXT Value: did=did:plc:ebrgxjbu6rhgvigjlxlo3c4y
Unfortunately the information from Bluesky don’t completely match the form for Netlify DNS records, so here’s a quick reference on how the two correspond to one another:
Domain→NameType→Record typeValue→Value
With that understanding, now you’re ready to:
- Fill out the form using the information from Bluesky
- Verify that your new DNS record from Bluesky shows up in your dashboard.
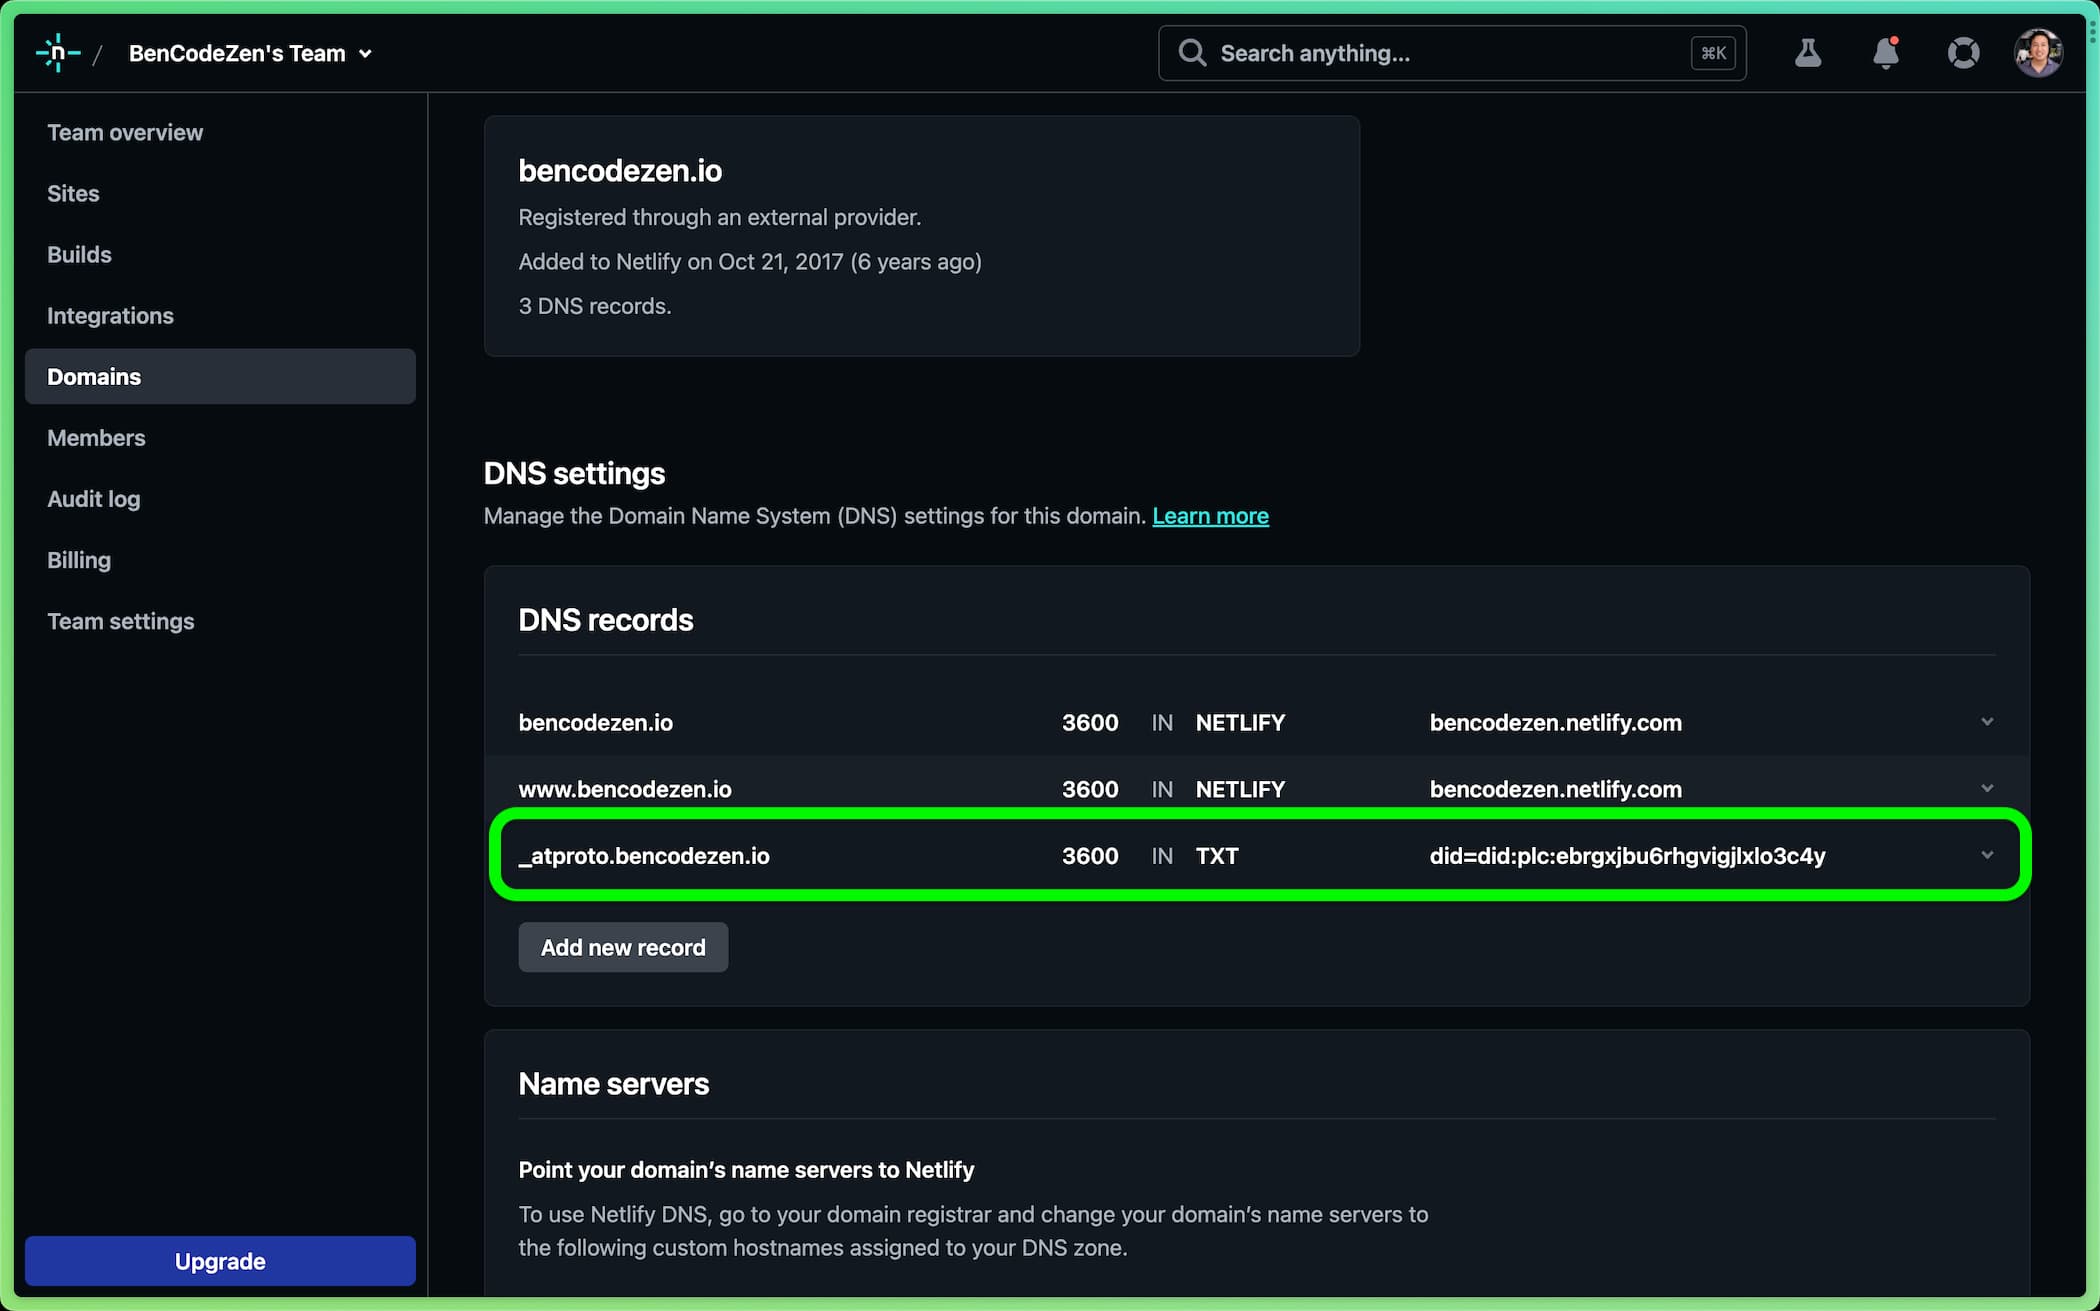
Now that we see it in the dashboard, this will kick off a process to update the servers to have this new record. However, please note that the time it’ll take for the change to propagate can vary. My change happened within a few minutes, but it can take up to a day or so in some cases.
Step 3. Verify the DNS record on Bluesky
Once you’ve finished adding a record, it’s time to:
- Verify the DNS record on Bluesky.

Assuming all the changes have propagated already, you will now see your shiny new handle that’s your custom domain! 🎉
Next steps
Congratulations! You’re now empowered to create all the properly branded Bluesky accounts without the anxiety of someone squatting your desired handle for your side project. 🙌
If you’d like to learn more about managing custom domains with Netlify, be sure to check out these resources:
Thanks for reading and I’ll see you over on Bluesky!


