Tailwind CSS has become a very popular option for styling applications. It uses atomic utility classes that are preconfigured with good defaults to get started easily. Remix is a JavaScript framework that aims to make creating a production ready application easier than ever. It uses React for the UI layer. Using Remix and Tailwind CSS together is a really powerful option to get your applications built quickly. To get started with Tailwind CSS in a fresh Remix application, we’ll run the following commands to create the Remix app or skip directly to the Tailwind setup. If you prefer video content, there is also a video tutorial.
Setting up Remix
-
Run the command to start the CLI.
npx create-remix@latest -
Name your project and select “Just the basics”.

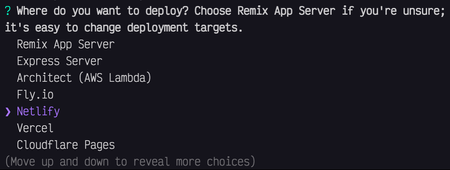
- Select Netlify from the list of deployment targets.
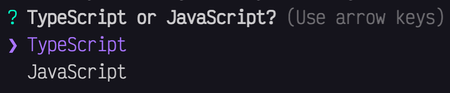
- Use either TypeScript or JavaScript, it’s your choice.
- Run
npm installby hitting Y.

- Now your Remix project is set up. You can open it in your favorite code editor and start setting up Tailwind CSS.
Setting up Tailwind CSS
-
Install the required packages for Tailwind.
npm install -D tailwindcss postcss autoprefixer concurrently -
Run the command to initialize Tailwind, this will generate a
tailwind.config.jsfile in the root of your project.npx tailwindcss init -
Open the newly created
tailwind.config.jsfile and add the file paths to the content section.tailwind.config.js /** @type {import('tailwindcss').Config} */module.exports = {content: ["./app/**/*.{js,ts,jsx,tsx}",],theme: {extend: {},},plugins: [],} -
Replace the scripts in the
package.jsonwith the new Tailwind scripts. These add two scripts to generate the Tailwind CSS files and updates thebuildanddevscripts to use the new CSS scripts. The path to the CSS files can be configured as needed, but by default it puts the initial file in the rootstyles/app.cssfile and the generated output goes toapp/styles/app.css.package.json {"scripts": {"build": "npm run build:css && remix build","build:css": "tailwindcss -m -i ./styles/app.css -o app/styles/app.css","dev": "concurrently \"npm run dev:css\" \"remix dev\"","dev:css": "tailwindcss -w -i ./styles/app.css -o app/styles/app.css"}} -
Where you set the path of your CSS to or the default location
styles/app.css, create the initial location for the CSS. From the root of your project, run the following commands.mkdir stylestouch styles/app.css -
Add the
@tailwinddirectives to the newly createdapp.cssfile.@tailwind base;@tailwind components;@tailwind utilities; -
Run
npm run devto generate the output CSS file inapp/styles/app.css. -
Import the generated CSS file into the
app/root.tsxfile.import styles from "./styles/app.css"export function links() {return [{ rel: "stylesheet", href: styles }]}One thing I ran into that I wanted to note here. Make sure your Remix app includes the
<Links />component from@remix-run/reactinside yourapp/root.tsxfile or the links will not be added.import { Links } from "@remix-run/react";import styles from "./styles/app.css"{/* ... */}export function links() {return [{ rel: "stylesheet", href: styles }]}{/* ... */}export default function Root() {return (<html><head><Links />{/* ... */}</head>{/* ... */}</html>);} -
Now you are setup to start using Tailwind classes inside of your components. Try it in the
app/routes/index.tsxfile. Remove the inline style from the wrapperdivelement and add in the Tailwind classes,className="font-sans leading-5 m-4". And give theh1some styles,className="text-3xl font-bold text-teal-600". Make sure your dev server is running,npm run dev, and open localhost://3000 to see your Tailwind styles applied.export default function Index() {return (<div className="font-sans leading-5 m-4"><h1 className="text-3xl font-bold text-teal-600">Welcome to Remix</h1><ul><li><atarget="_blank"href="https://remix.run/tutorials/blog"rel="noreferrer">15m Quickstart Blog Tutorial</a></li><li><atarget="_blank"href="https://remix.run/tutorials/jokes"rel="noreferrer">Deep Dive Jokes App Tutorial</a></li><li><a target="_blank" href="https://remix.run/docs" rel="noreferrer">Remix Docs</a></li></ul></div>);}

K-Pop Stack
Another option with Tailwind CSS already preconfigured is the K-Pop Stack. Netlify’s templates team has created this stack that is already configured with Tailwind and it uses Supabase for the database.


