Performance optimizations and low latency are important for most developers, but these priorities are especially critical for those building complex sites and web applications. Ecommerce stores, social media platforms, online marketplaces, and other types of apps typically put a significant load on the underlying database, which sometimes results in slow response times and degraded performance. In scenarios that also include high read traffic, geographically dispersed users, and limited database scalability, performance bottlenecks worsen, resulting in poor user experience.
Our latest integration with PolyScale addresses performance issues caused by slow database access by storing frequently accessed data in the cache, reducing the load on the underlying database and improving the overall performance of the application. This integration enables you to create or select a PolyScale cache from the Netlify UI, execute queries against your cache from your serverless functions, and use code snippets generated in the Netlify UI to get started easily.
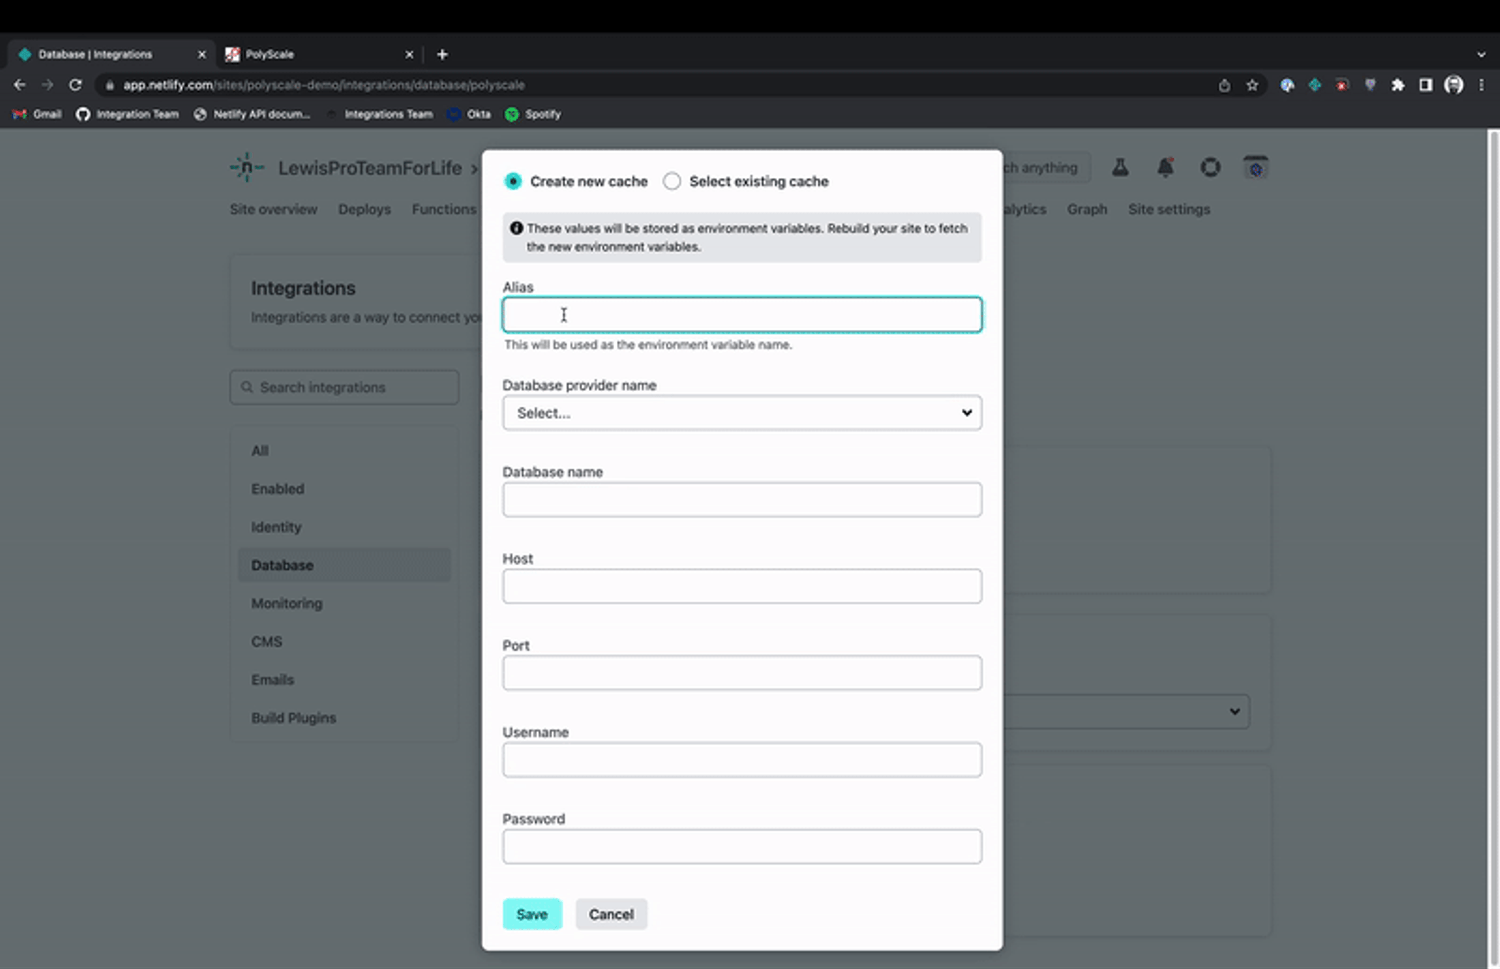
In the GIF above, you can see that creating and fetching the new cache is captured in a simple flow.
Calling Your Cache from a Function
After the cache has been added, you can select the cache you want to use from the Database cache menu (For detailed instructions on connecting your PolyScale account to your Netlify account and adding a cache, refer to our docs page). Note that the name of your cache uses the same alias you create initially.
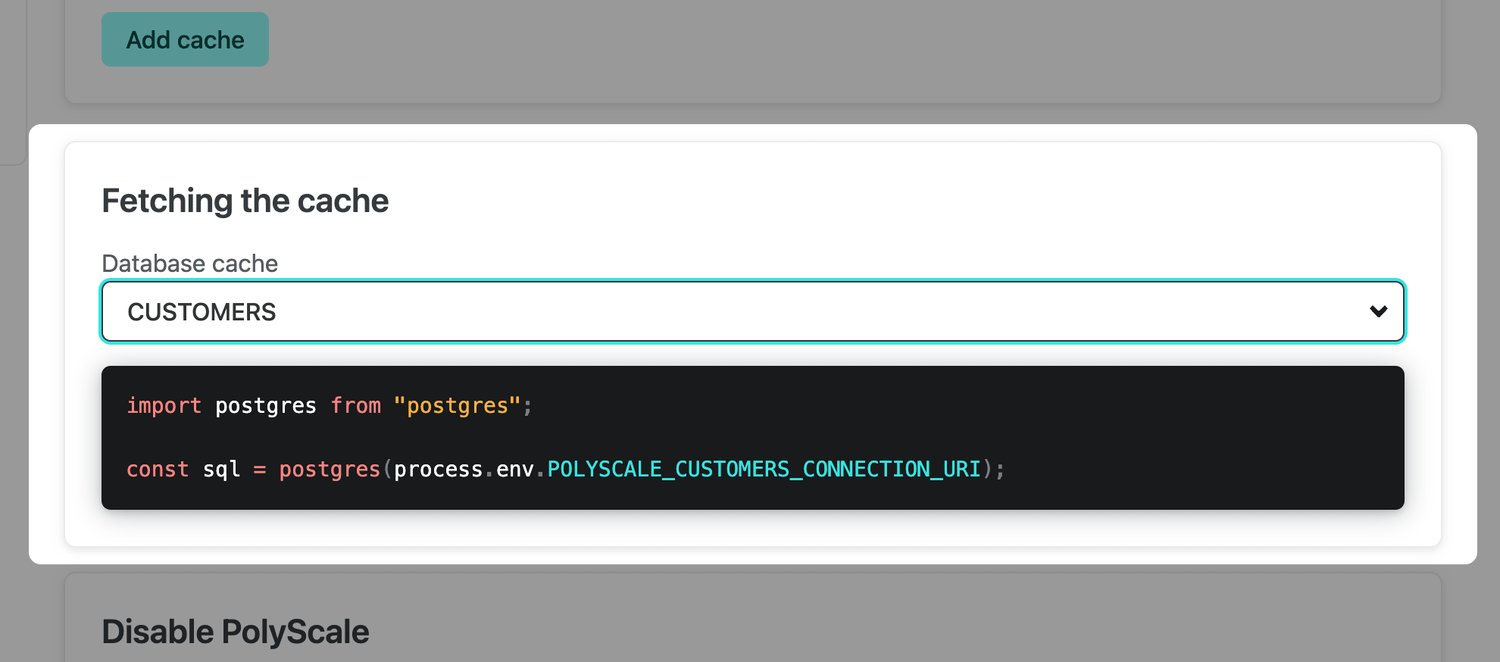
When you select a cache, the Netlify UI detects the type of database and generates a code snippet you can use to get started. For example, if a CUSTOMERS cache uses Postgres, the following code snippet generates:
import postgres from "postgres";
const sql = postgres(process.env.POLYSCALE_CUSTOMERS_CONNECTION_URI);
You can use this snippet in a serverless function. In a project, you may have a file structure similar to this:
├─ netlify/ │ └─functions/ │ └─ customers/ │ └─ index.ts └─package.jsonIn this example, index.ts is a function that executes a call to the Postgres database to select all customers. The snippet provides the starter code to add to this file. In this example, the snippet has been modified slightly to use TypeScript:
import { Handler } from "@netlify/functions";import postgres from "postgres";
const handler: Handler = async function(event, context) {  const sql = postgres(    process.env.POLYSCALE_CUSTOMERS_CONNECTION_URI as string  );
  const customers = await sql`SELECT * from customers`;
  console.log("customers", customers);
  return {    statusCode: 200,    body: JSON.stringify({      customers,    }),  };};
export { handler };
If you have any questions or feedback about this integration, feel free to post in our forums!