While static site generators with CMS capability may be a brand new thing, we did cover Netlify CMS previously, with the Jekyll version of our templates here. Today we’ll take a look at how to set up our pelican-netlify-cms template in much the same manner.
If you merely want to set up Pelican with continuous deployment on Netlify, check out this splendid article by Mr. Aaron Autrand and otherwise, please keep reading.
Please note that this guide assumes you have virtualenv, Ruby and Git installed.
Deploying Locally
We’ll start by preparing the netlify-git-api CLI tool and then we’ll clone the pelican-netlify-cms template repository to our local environment and set it all up.
1. The netlify-git-api CLI tool.
Browse to the netlify-git-api page and download the relevant version of the tool.
E.g. as I’m demonstrating this on Ubuntu, I will download the linux.zip file.
Once the download is done, unpack the netlify-git-api executable and place it in your PATH. The methods for doing this are numerous and differ slightly depending on your operating system and can usually be done easily through the graphical user interface.
We used the following commands in a terminal window (the Command Prompt in a Microsoft OS):
cd 'downloads'unzip linux.zipcd linuxsudo mv netlify-git-api '/usr/local/bin'On the first line we start by entering the downloads folder (substitute with your location) and on the second line we unzip the downloaded package. We then cd into the unpacked linux directory on the third line. On the fourth and final line we move the netlify-git-api executable to a folder that is in the PATH, so that it can be invoked easily from the terminal.
If you’re unsure of where to move the file, you can run the following command to see which directories are in the PATH on your computer:
echo $PATHFor convenience sake, keep the terminal window/command prompt open throughout this guide.
2. Fork and Clone the Template.
First we need to fork our own copy of the pelican-netlify-cms template and then rename it — we simply named ours Pelican.
Second, to make a local clone first we need to get the remote GitHub URL from the Pelican repo we just made. The button looks like this:

The commands below first take us to the location where we want to put our new Pelican site and the second command uses Git to create the clone:
cd 'my-sites-location'git clone https://github.com/github_username/repo-name.gitSubstitute my-sites-location with the location of your sites and substitute https://github.com/github_username/repo-name.git with your repository’s URL.
3. Setup the Netlify CMS server.
To start the Netlify CMS server, we need to run the following command for each user we wish to add to the system (you will be asked for an email, a name and a password):
netlify-git-api users addAlternatively you can create a user, including the information necessary, in a one liner like this:
netlify-git-api users add --name='User Name' --email=my@email.com --password=mypasswordYou need to create at least one user, to be able to test the system and make sure the email is in a valid format, as in the example above (e.g. emailname@emailprovider.com).
To start the Netlify CMS server, we then use the following command:
netlify-git-api serveKeep the Terminal Window/Command Prompt open to keep the server running!
4. Setup the Pelican server.
Before we can test the system there’s a few preparatory measures to be made to the Pelican part of our site, so open up a new terminal window (do not use the one that’s running the server) and enter the following commands, one by one:
cd my-site-directoryvirtualenv pelican-envsource pelican-env/bin/activatepip install -r requirements.txt./develop_server.sh startIn the first line we simply enter our new local repository’s directory with the good old cd command. In the second line we use virtualenv to create an isolated Python environment for our site (sudo apt-get install virtualenv if you haven’t already got it installed), then we activate/enter this environment in the third line and in the fourth line we install various requirements, before starting a devserver, which will run Pelican in regeneration mode as well as serve the output at http://localhost:8000.
It’s important to understand that the majority of the commands above, need not be used every single time you take a peek at your Pelican, but rather just once when you’re setting the environment up! However, when you want to use the CMS system, the Netlify CMS server must be running and for the Pelican to fly proper, you will still need to use these commands on successive runs (again in the 2nd terminal window, so as not to close down the Netlify CMS server):
cd my-site-directorysource pelican-env/bin/activate./develop_server.sh startThis makes sense, since the second time around, the pelican environment has already been created and just needs to be activated after you’ve located the correct directory and of course the final step is to run the devserver for Pelican.
5. Test Pelican and Netlify CMS.
Provided all the requirements installed as they should and that the server is running, we can now enjoy the fruits of our hard labour. To see the beautiful Pelican site, open up a browser at localhost:8000 and then try out the Netlify CMS system at localhost:8000/admin with the user account you made earlier.
Let’s take a look at the CMS system, by logging in and writing a quick article. Once you’ve written the article, refresh the Pelican site and you’ll see the new content appear in the blink of an eye.
Deploy to Production Environment
So far so good.
It’s time we push this repository back up to GitHub, to see the changes and try out the production environment. However, before we do so, we need to make sure our web configuration file is set up correctly.
Browse to the /Pelican/content/admin folder and open up the config.yml file in a text editor (change the path to your sites directory). In the top of the file, under prodution, you’ll find a line that says repo: netlify-templates/pelican-netlify-cms and one that says branch: master — these have to point to your repository and branch (seems quite logical doesn’t it?).
Below, to better illustrate what I’m talking about, you’ll see the first 10 lines of the config.yml file:
backend:  name: netlify-api  url: http://localhost:8080
production:  backend:    name: github-api    repo: GitHub_username/Pelican    branch: master
Simply substitute with your own GitHub user name and repository name.
1. Add & Commit Files.
Optional: To check that our local environment is set up correctly and will push the files to the correct repository we can use this command:
git remote -vWe need to add the new files from our local directory to our repository with the following line in Terminal/Command Prompt:
git add .Next we’ll commit the files we just staged in our local repository by entering the following line:
git commit -m 'First commit'2. Push to GitHub.
The final task before we’re done setting up and ready for Netlify, is to use the push command with git, as in the following line in Terminal/Command prompt:
git push -u origin masterOnce it’s done uploading the files (pushing them to GitHub), take a look at the repository online to check if everything looks correct.
It’s time to connect with Netlify.
Connect to Netlify
We’re ready to start a new project at Netlify’s to host our Pelican Netlify CMS template.
If you haven’t made one already, create an account and login at netlify.
1. Create Site.
Creating a new site on Netlify is intuitive and quick.
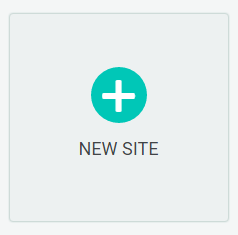
Once your account is created and you’re logged in, you’ll be taken to https://app.netlify.com/sites. Click the “New Site” button to get started (depicted above).
Next, select Link to GitHub and you’ll be shown a list of your GitHub repositories, as seen in the screen shot below. We’ll select the Pelican repository we made earlier. 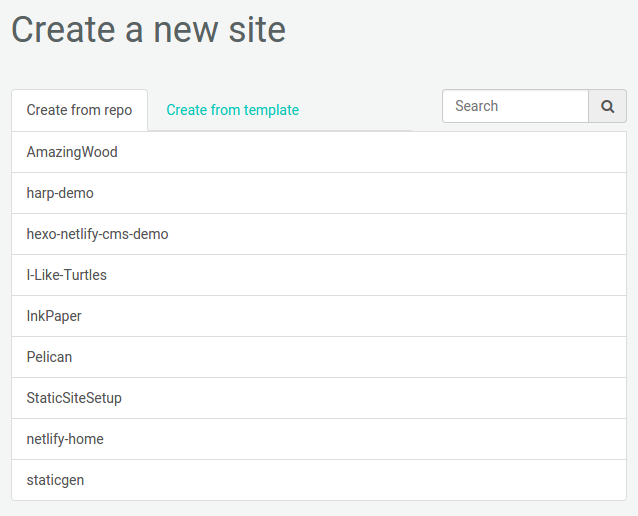
2. Configure Build.
You’ll notice that Netlify detects the Pelican build command to be pelican content, but we’ll change that to make publish instead, while using the /output as Dir, as seen in this screen shot: 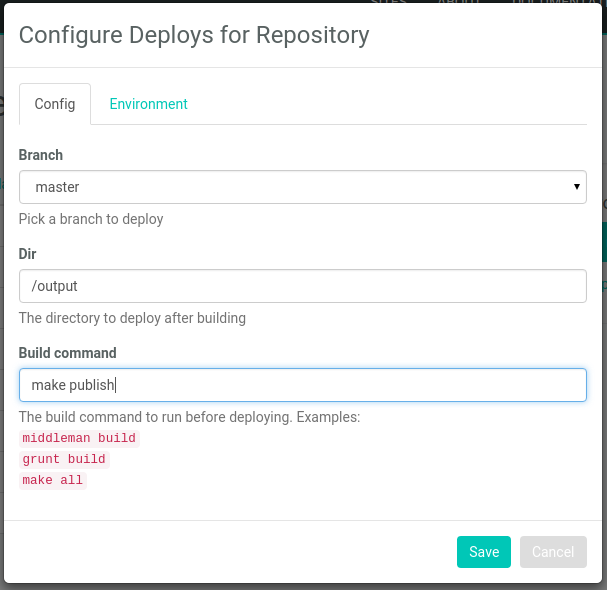
A few notes on the difference between the two commands, though both will work with Netlify.
The build command make publish will generate your site for production using the settings in the pelicanconf.py file. The advantage of this method is that the make command is built into most POSIX systems and won’t require installing anything else to be able to use it. The problem though is that non-POSIX systems such as Windows don’t include make and that it can be a bit of a long-haired affair to do so!
The pelican content command on the other hand, comes with pelican and will generate your site with any production specific settings and as such, would probably be the more likely candidate in most cases.
3. Build Your Site.
Once you click save, Netlify will step in and take over, while keeping you informed through a live build log, as seen in this screen shot: 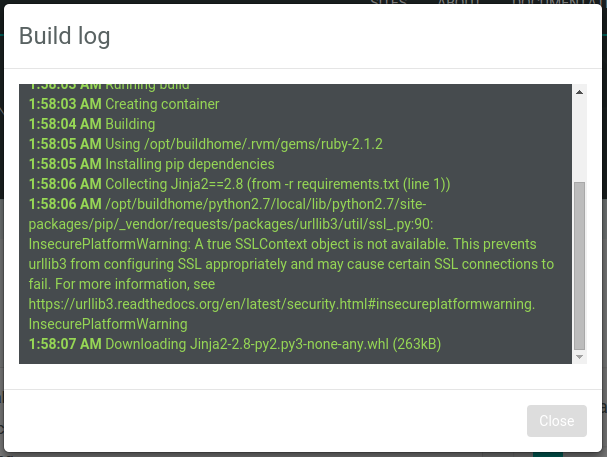
While it may seem alluring, following the nice green bulletin isn’t strictly necessary, as Netlify will also save it all in the log for your build, so now is as good a time as ever to take that break.
4. Register new Application.
Open up the GitHub developer application screen and select register a new application. Next fill out the application information as seen in the screen shot below — you can name and describe it however you want, but it is important that you use the exact URL for the Authorization callback like this: https://api.netlify.com/auth/done Use the screen shot below as an example:
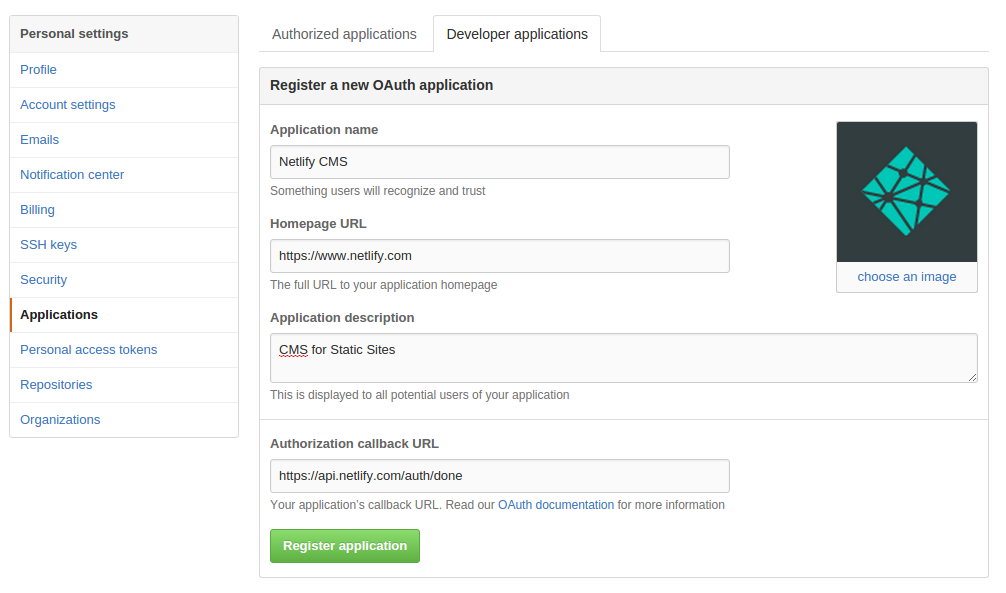
You can disregard choosing an image, though we did, to help distinguish the application.
Once you’re done filling out, simply click the green Register application button and you will get to the following screen shot (well, it will be similar at least):
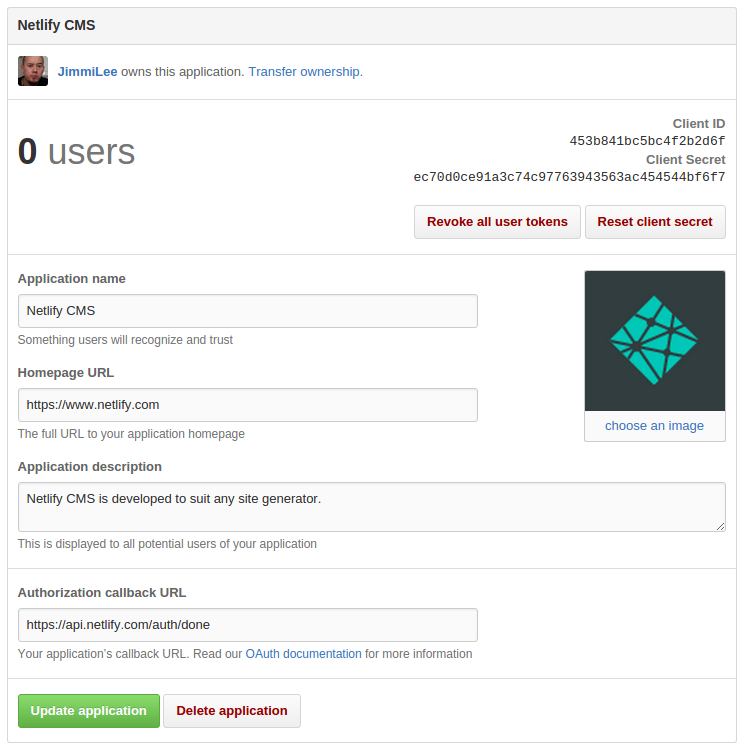
What you need to take note of here, is the Client ID and the Client Secret in the upper right corner. You will need to provide both in the next step!
5. Setup GitHub API Access.
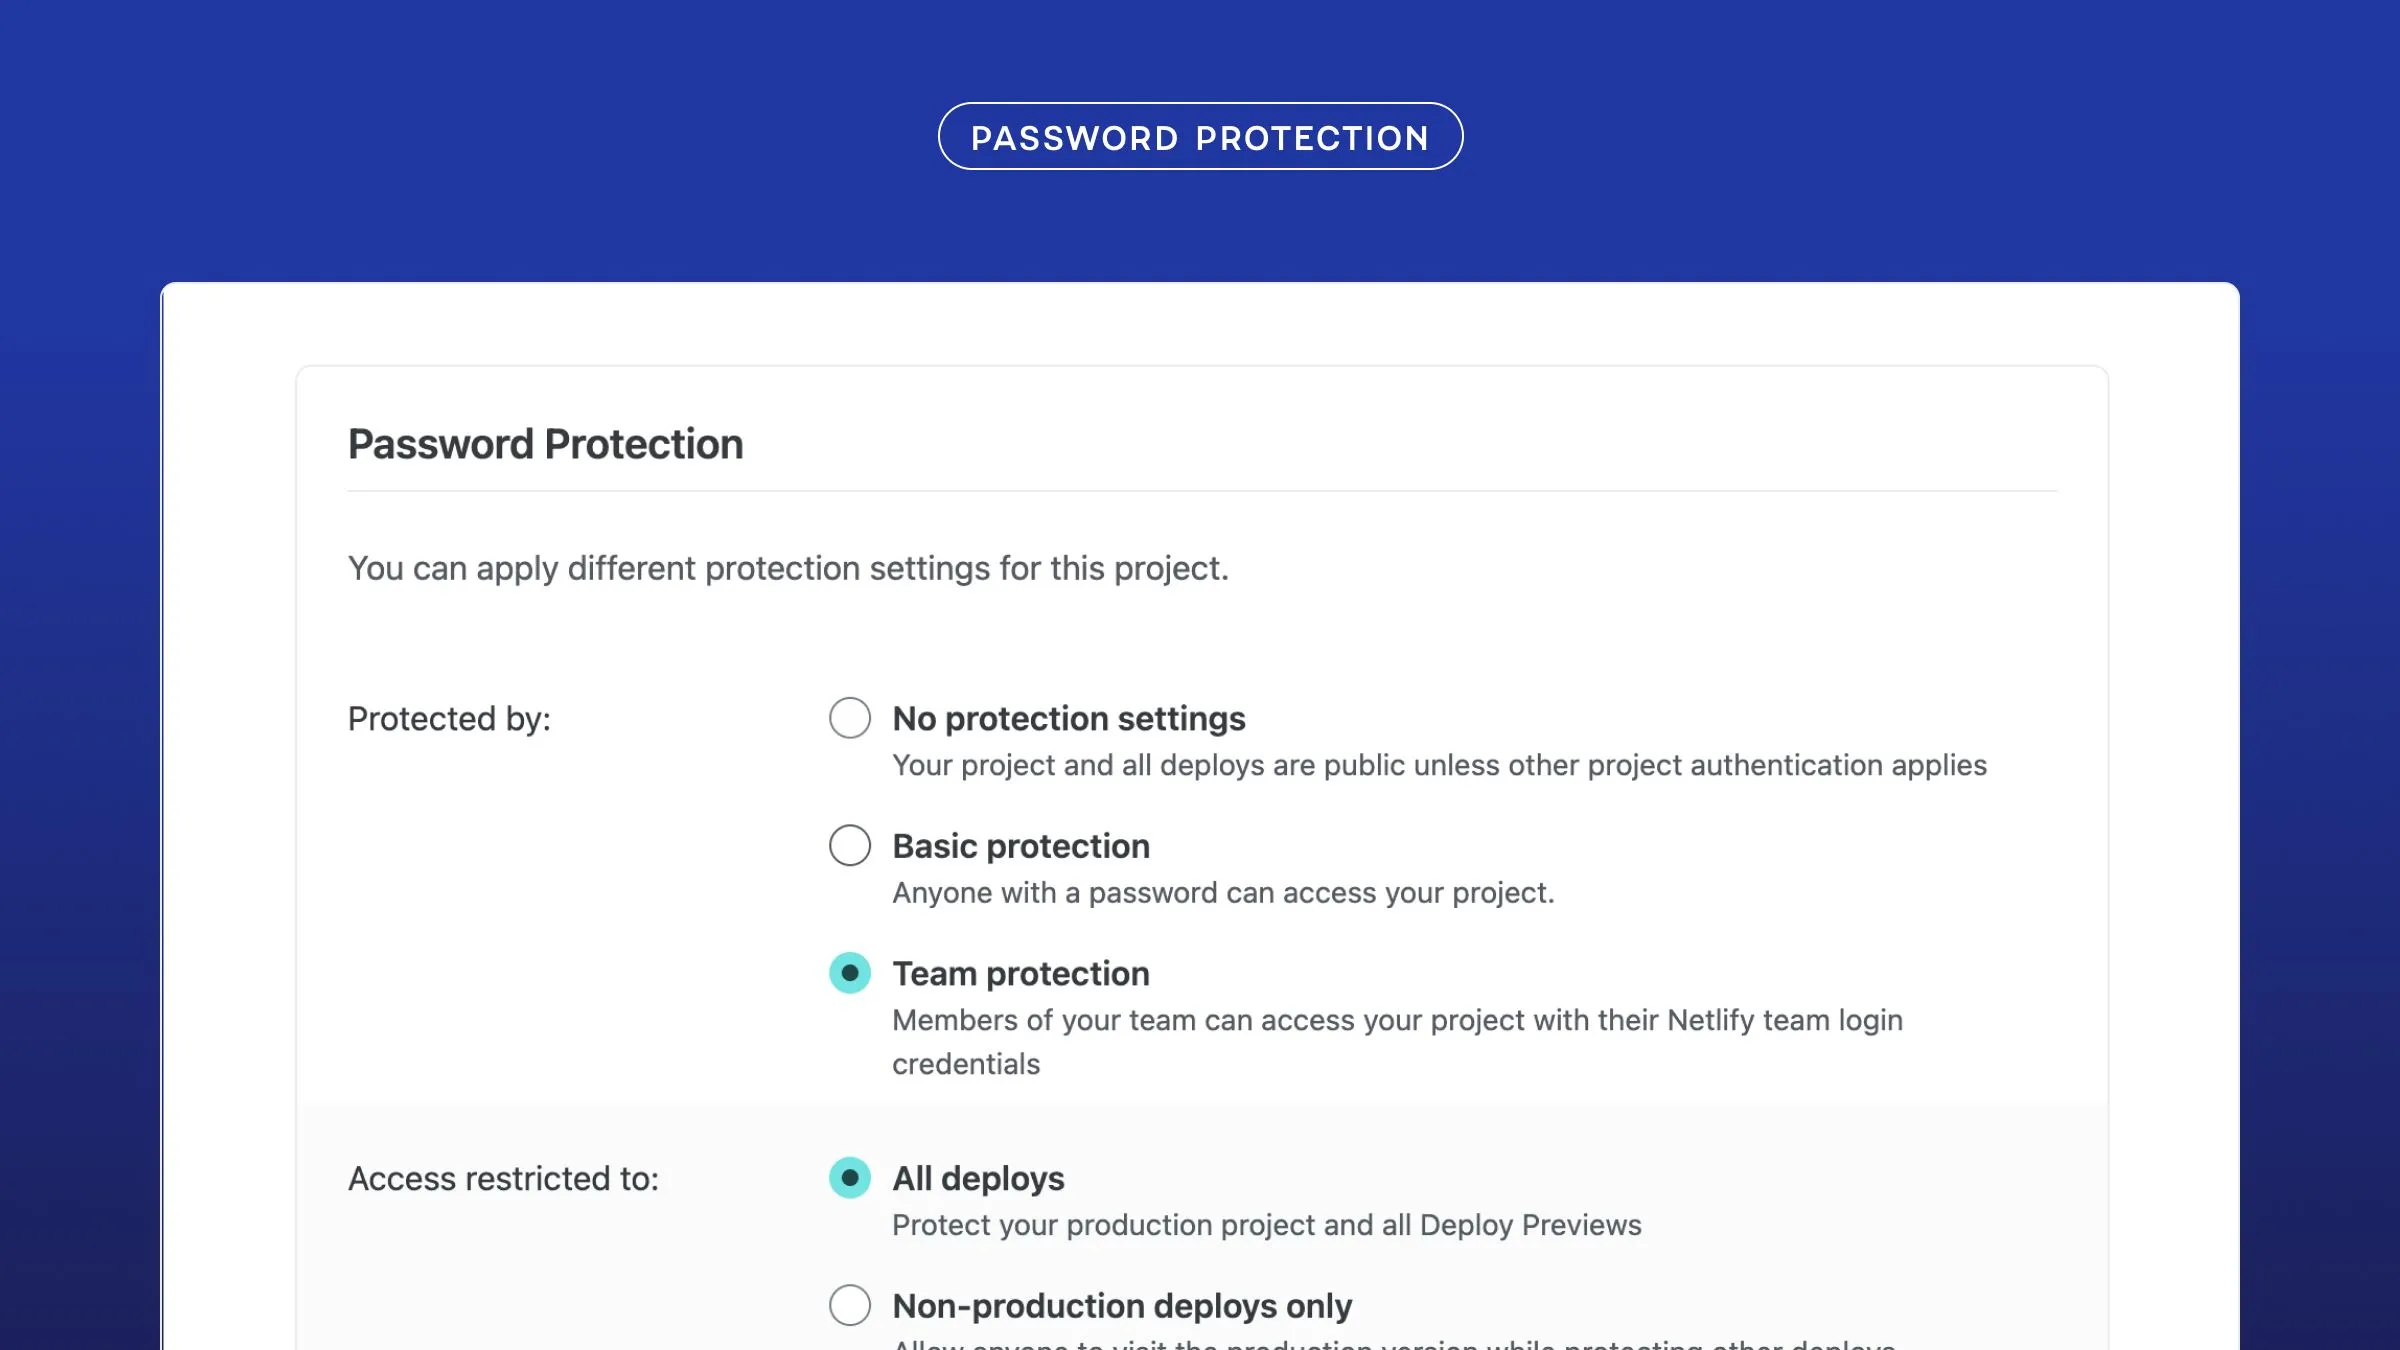
Return to Netlify and the site you just build and in the control panel select the Access panel.
This is where we give the GitHub Api access to our site with the application we just registered and you need to enter the Client ID and the Client Secret from above, as seen in the screen shot below:
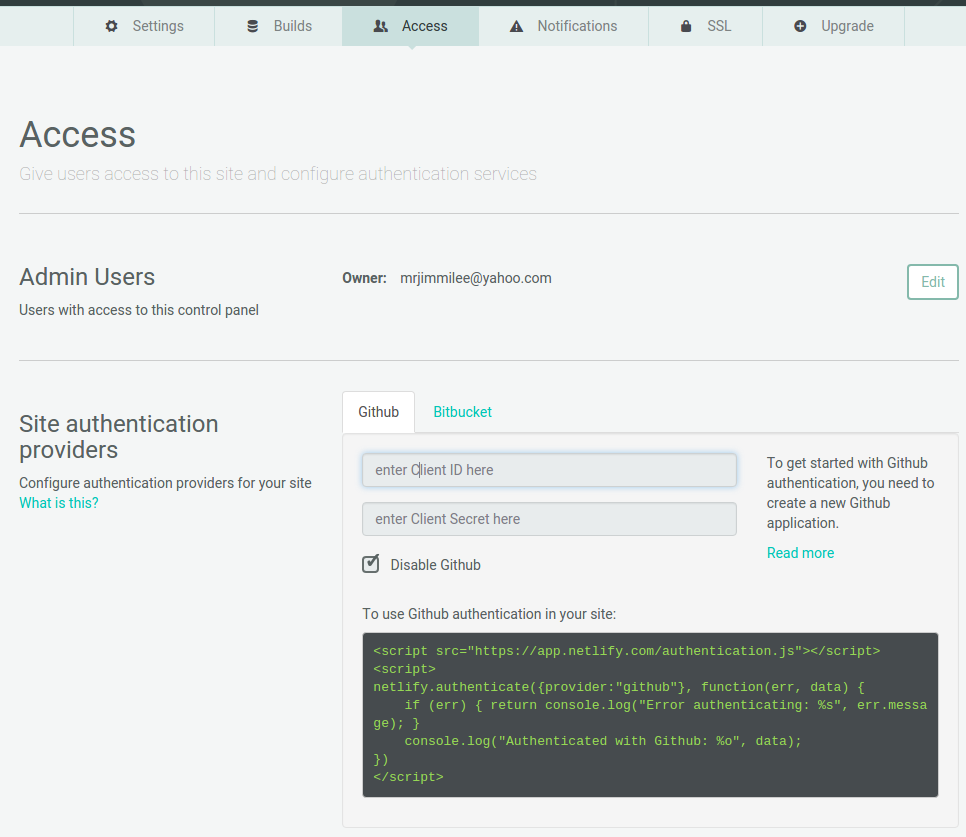
Simply paste them into the windows where it says enter Client ID here and below where it says enter Client Secret here and you’re good to go.
6: Trying Out Netlify CMS
We tried testing the CMS system locally earlier in this guide and it’s virtually the same using it online, you just have to change the address to https://mysite.netlify.com/admin (change to the URL of your site) to access the CMS system and then log in with GitHub, since we’re using GitHub auth when working online.
This screen shot depicts our CMS system with Pelican, after logging in: 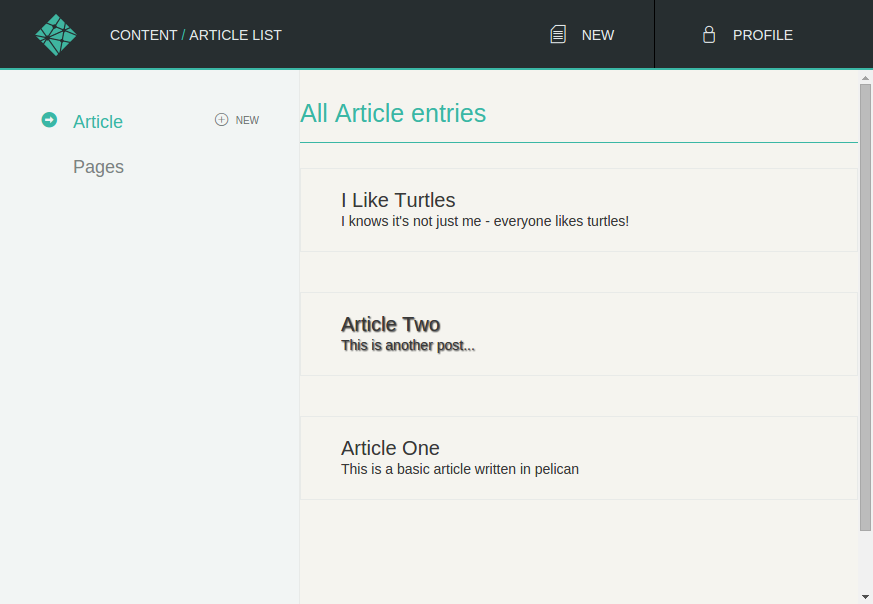
As you can see from our little guide, with this template you can have a Pelican site up and running with Netlify CMS in no time at all.
You can see our demo site here: http://pelicanos.netlify.com/ and the GitHub project for the demo site is here, with the GitHub repo for the template can be found here.