This guide was most recently updated on March 24th, 2020. Below are the package versions used:
- Node 13.7.0
- NPM 6.13.6
- gatsby-cli 2.11.1
Screenshots may be outdated.
In this post, we look at how to host a website built with Gatsby on Netlify, including setting up continuous deployment.
Gatsby is a fairly new static site generator, but it’s gaining traction fast! It’s made in what’s probably the only technology as hot as the Go language, React.js. React is a hugely popular JavaScript framework out of Facebook.
Let’s start from scratch (if you already have a Gatsby site set up, you can skip down to Connecting to Netlify).
Install Gatsby
Open your terminal, and enter the following command (this guide assumes you have Node.js installed):
npm install -g gatsby-cliThe -g flag installs Gatsby globally on your system, which makes sure Gatsby has access to the proper dependencies. Gatsby offers a few partially built starter sites, pre-configured to get your project up and running faster. In this post we are creating a blog, so we use the Blog starter. Navigate to where you want to set up your project, then run the command below. Whatever you decide to name your project, be sure not to call it gatsby (which is why we are calling this project gatsbynetlify).
gatsby new gatsbynetlifyThis command builds a new Gatsby site with the Starter Blog. Now you can see a gatsbynetlify directory, with all the assets you need to develop your site. Navigate into this new directory:
cd ./gatsbynetlifyNext run:
npm install gatsby-cli --saveThis command inserts gatsby into the dependencies of your package.json file, which tells Netlify what toolchain it needs to build your site. If you named your project gatsby, npm refuses to add gatsby as a dependency of itself. Open the /src/pages directory. Inside that directory, you should see several JavaScript files, which are the pages of your website and they are also React components.
For example the index.js file:
import React from 'react'import Link from 'gatsby-link'
const IndexPage = () => (  <div>    <h1>Hi people</h1>    <p>Welcome to your new Gatsby site.</p>    <p>Now go build something great.</p>    <Link to="/page-2/">Go to page 2</Link>  </div>)
export default IndexPage
By default, there should be two imports at the top and a single function. The contents of this function look a lot like HTML and are mostly the same. However, it’s actually JSX. Most of the syntax is interchangeable with HTML, but there are a few differences, like class in HTML, which is className in JSX. Gatsby generates your pages from the content inside this function, and you can change it as you see fit.
It’s time to display your content. Run the following command:
gatsby developGatsby compiles your site, creates an internal server at http://localhost:8000, and watches for changes. Add some content to index.js, and when you save your changes, reload your Gatsby site to see the updated content. Like what you see? Great. Let’s move on!
Prepping for Build
Netlify can use any number of versions of tools to build your site. Since Gastby uses Node.js and NPM, you need to know which version you are running on your local machine, so you can tell Netlify to use the same. In the terminal enter the following:
node -vAdd this same version of Node to your Netlify site by following these instructions.
Creating your Git Repo
Create a new repository on GitHub. To avoid errors, do not initialize the new repository with README, license, or .gitignore files. You can add these files after pushing your project to GitHub.
Open a terminal and navigate to the working directory of your local project:
cd ~/PATH/TO/gatsbynetlify/Initialize the local directory as a Git repository:
git initAdd the files in your new local repository, which stages them for the first commit:
git add .Commit the files that you’ve staged in your local repository:
git commit -m 'First commit'At the top of your GitHub repository’s Quick Setup page, click the clipboard icon to copy the remote repository URL, and add the URL for the remote repository where you will push your local repository.
git remote add origin https://github.com/<your-repository-url>Verify your URL:
git remote -vNow, it’s time to push the changes in your local repository to GitHub:
git push -u origin masterNow that your code is on GitHub let’s connect it to Netlify.
Connecting to Netlify
Step 1: Add Your New Site
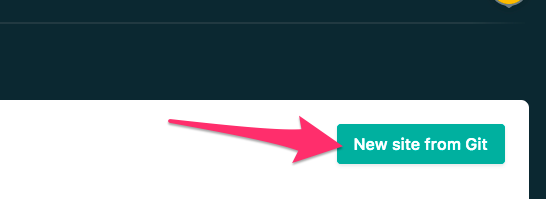
Once you’ve logged in, click the New site from Git button on your dashboard.
Step 2: Link to Your Repository
Clicking the button brings you to this screen where you connect Netlify to your Git repository. Select the service you use.
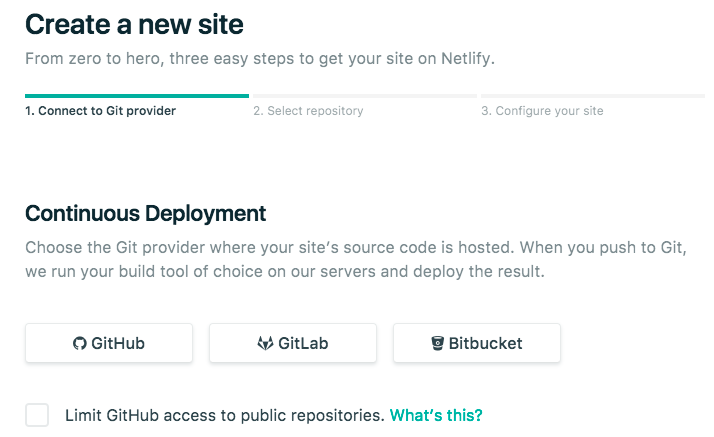
When you push to GitHub, Gitlab, or Bitbucket, Netlify does all the work for you, meaning no more manual deploying of updates or changes!
Step 3: Authorize Netlify

Click the Authorize Application button to allow Netlify and GitHub to talk to each other. Netlify doesn’t store your GitHub access token on our servers. If you’d like to know more about the permissions Netlify requests and why we need them, you can read our doc on GitHub permissions.
Step 4: Choose Your Repo
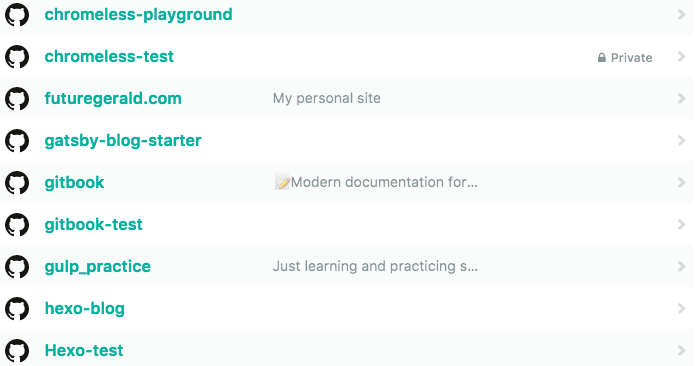
Now that you’ve connected Netlify and GitHub, you see a list of your Git repositories. Select the one you created earlier.
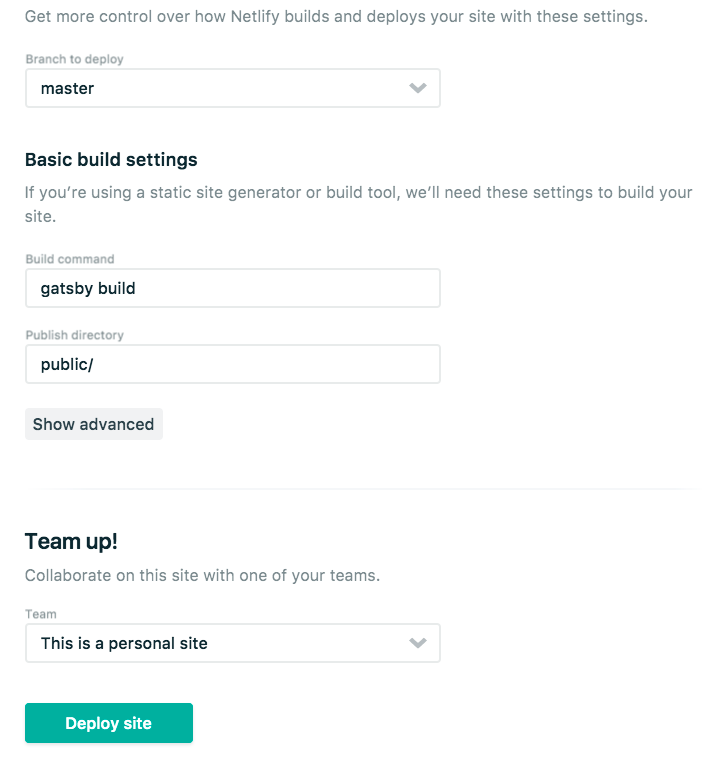
Step 5: Configure Your Settings
Here you configure your options. For this tutorial, the defaults are what you need, so click Deploy site.
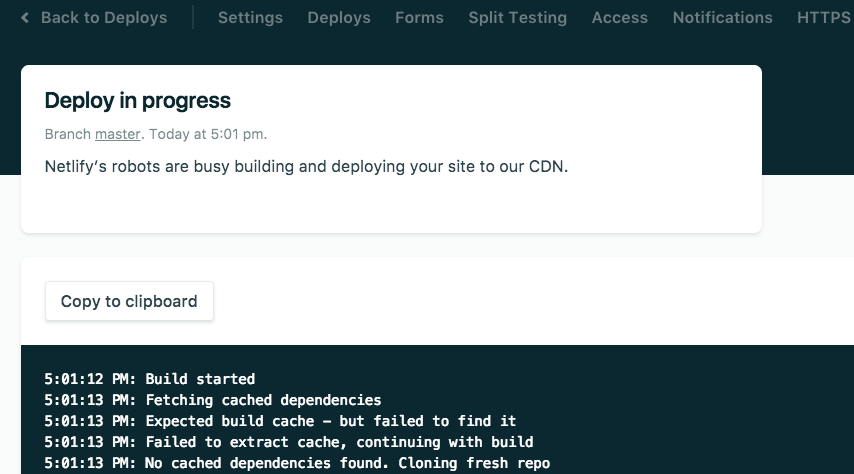
Step 6: Build Your Site
Now it’s time to sit back and relax, grab something cold to drink, scratch the dog behind the ears, or get up and walk around. (You’ve probably been in front of the computer for too long today, right?) Netlify does the rest, and you can watch the progress.
Step 7: Make changes
When you make changes to your site they are automatically reflected locally, but what about on the Netlify hosted version? Every time you commit and push changes to GitHub, it triggers a new build on Netlify, and as soon as the build finishes, your changes are also live on the internet.
Step 8: Done

Wait, you thought there was going to be more? Nope! Netlify has done it all for you, including giving your site a temporary name. Now you can add your custom domain, and your site is live for your adoring public to view. Congratulations, and thanks for using Netlify!
For next steps from here, we recommend you look at: