Changelog
-
You can now deploy sites to Netlify directly from OpenAI Codex using the Netlify plugin in the Codex plugin directory.
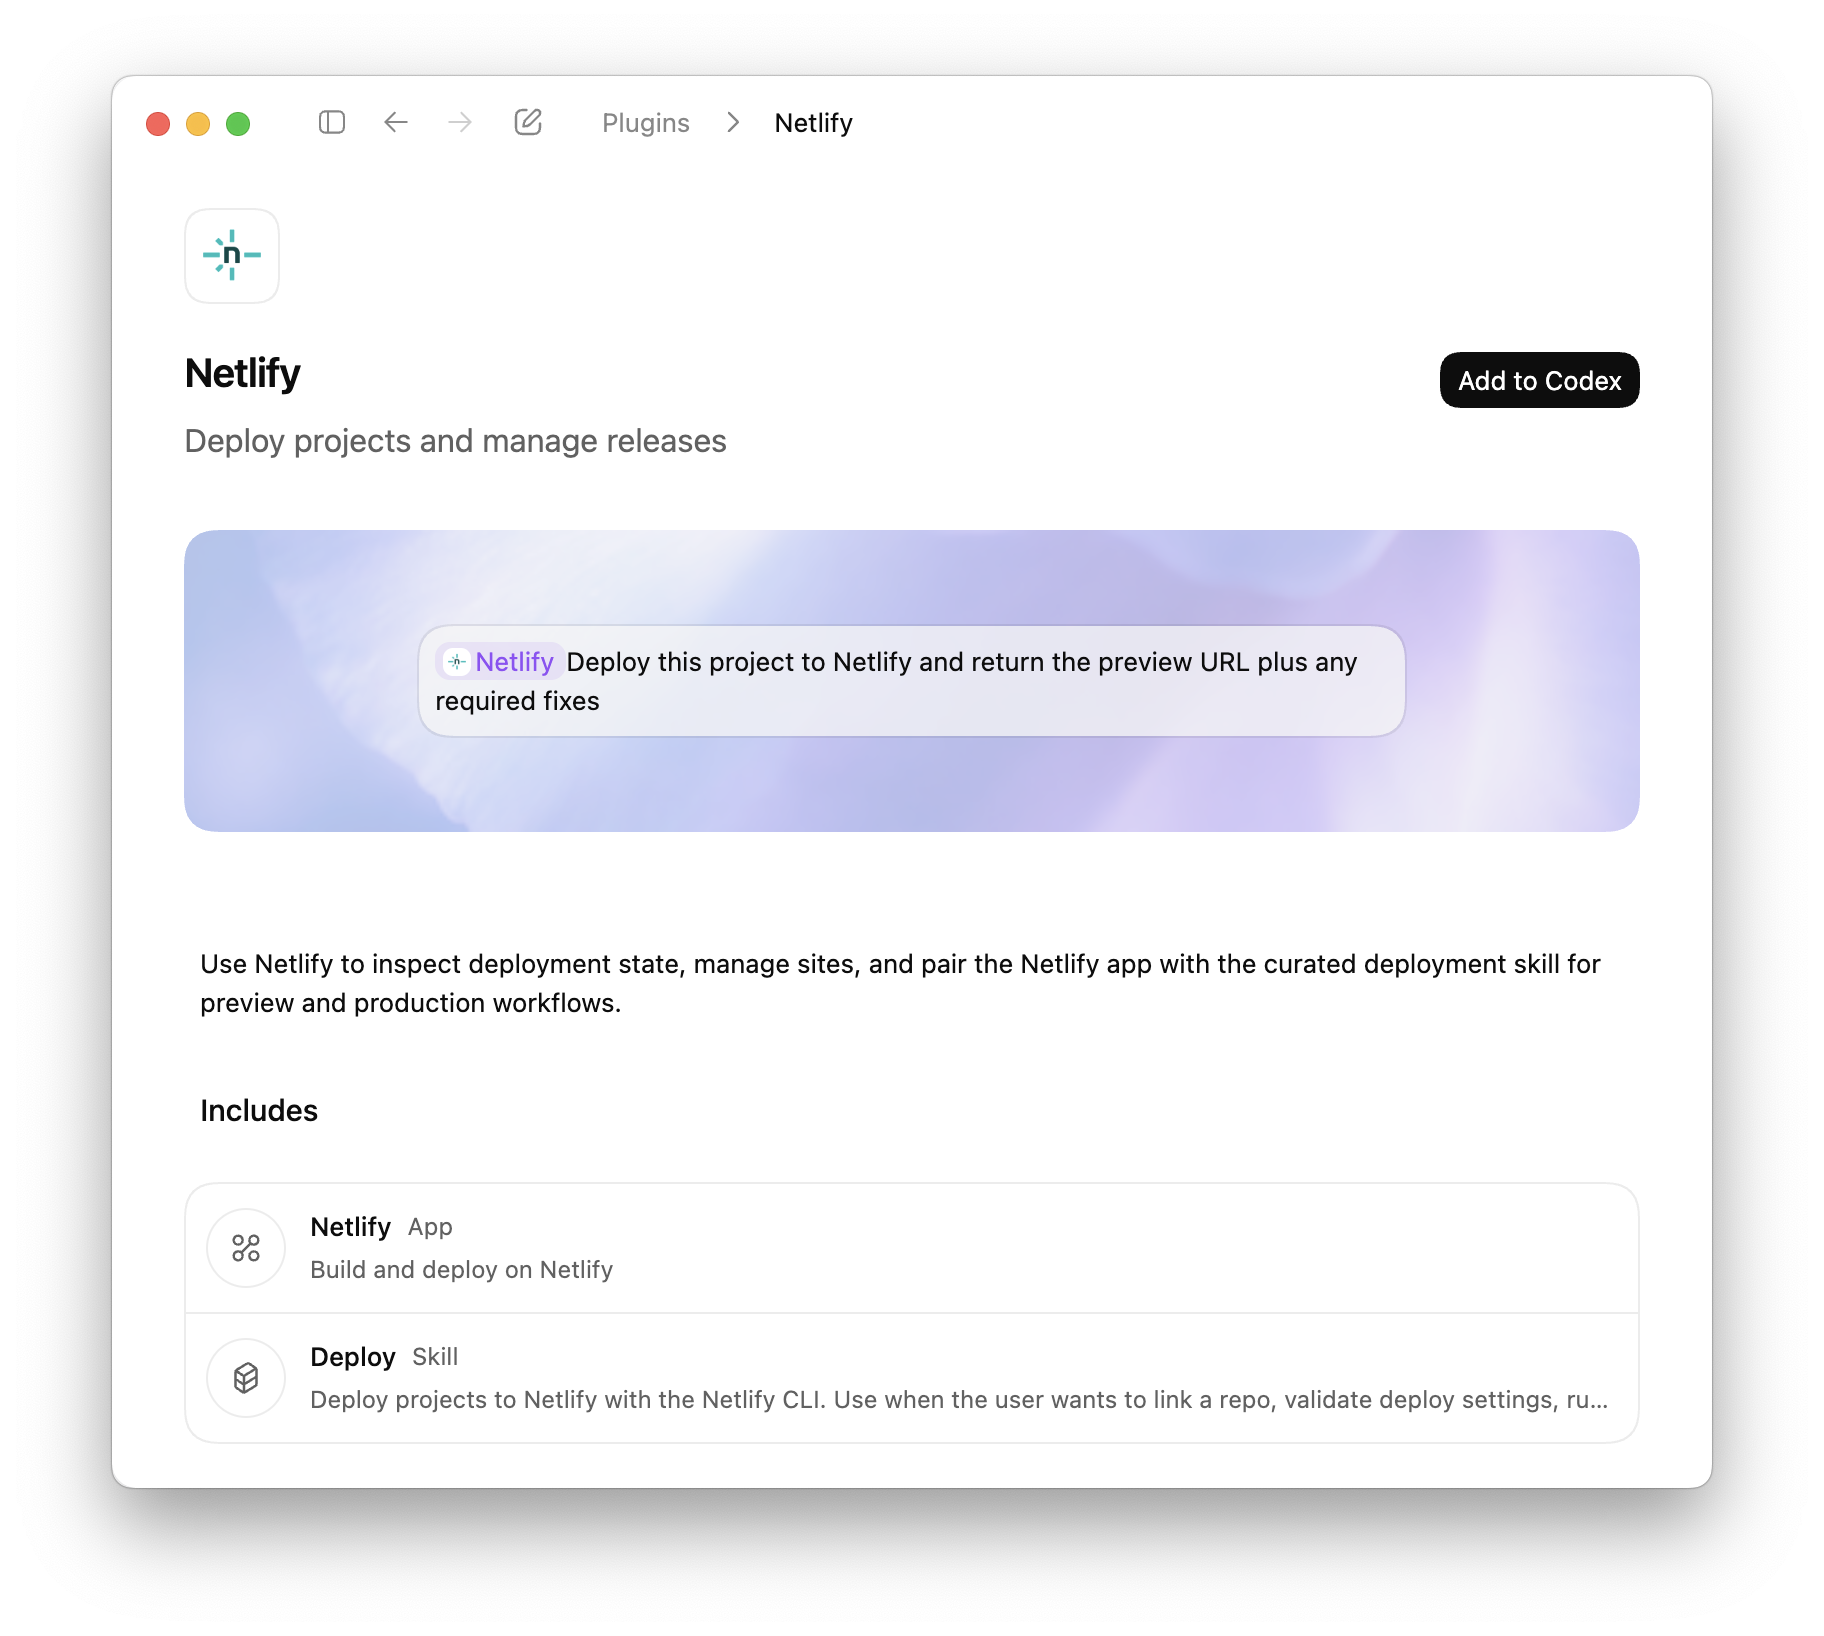
Codex plugins extend Codex with apps, skills, and MCP servers, to access external tools, data, and workflows directly from your coding environment. With the Netlify plugin, Codex can create projects, configure settings, and deploy without leaving the coding workflow.
What you can do
Deploy directly from Codex
- Deploy projects using the Netlify CLI workflow
- Generate preview URLs automatically
- Deploy to production when ready
- Validate build configuration before deployment
Manage your projects
- Create new projects
- Install extensions
- Manage environment variables
- Configure visitor access controls
- Manage forms
- Update project settings
Review and fix deployments
- Inspect deploy status
- Retrieve build logs
- Identify configuration issues
- Iterate on fixes within Codex
Codex is also available through Agent Runners, where you can prompt AI agents against your live project and deploy changes directly from the Netlify Dashboard.
The Netlify plugin for Codex is available now in the Codex plugin directory.
-
Shopify’s Hydrogen framework now works on Netlify with React Router 7 and Hydrogen 2026.1.0. The Netlify Hydrogen template has been fully rebuilt, and
@netlify/vite-plugin-react-routernow supports Hydrogen sites out of the box.The updated template also comes with two meaningful improvements:
- Netlify Cache API integration — Data fetching is cached using the Netlify Cache API, giving you low-latency responses without extra configuration.
- Full local platform emulation — The Netlify Vite Plugin provides zero-config local emulation of Blobs, Functions, Edge Functions, and AI Gateway during development, so what you test locally matches what runs in production.
To get started with a new Hydrogen site on Netlify, deploy the updated template:

To move an existing Hydrogen site over to Netlify, follow the How to deploy a Shopify Hydrogen storefront to Netlify guide.
Learn more:
-
Users on credit-based plans can now see a day-by-day breakdown of their credit consumption. Head to Usage & Billing > Account usage insights > Credits to view exactly how your credits are being used each day.
Track credit usage across the following meters:
- AI Inference
- Bandwidth
- Compute
- Production deploys
- Web Requests
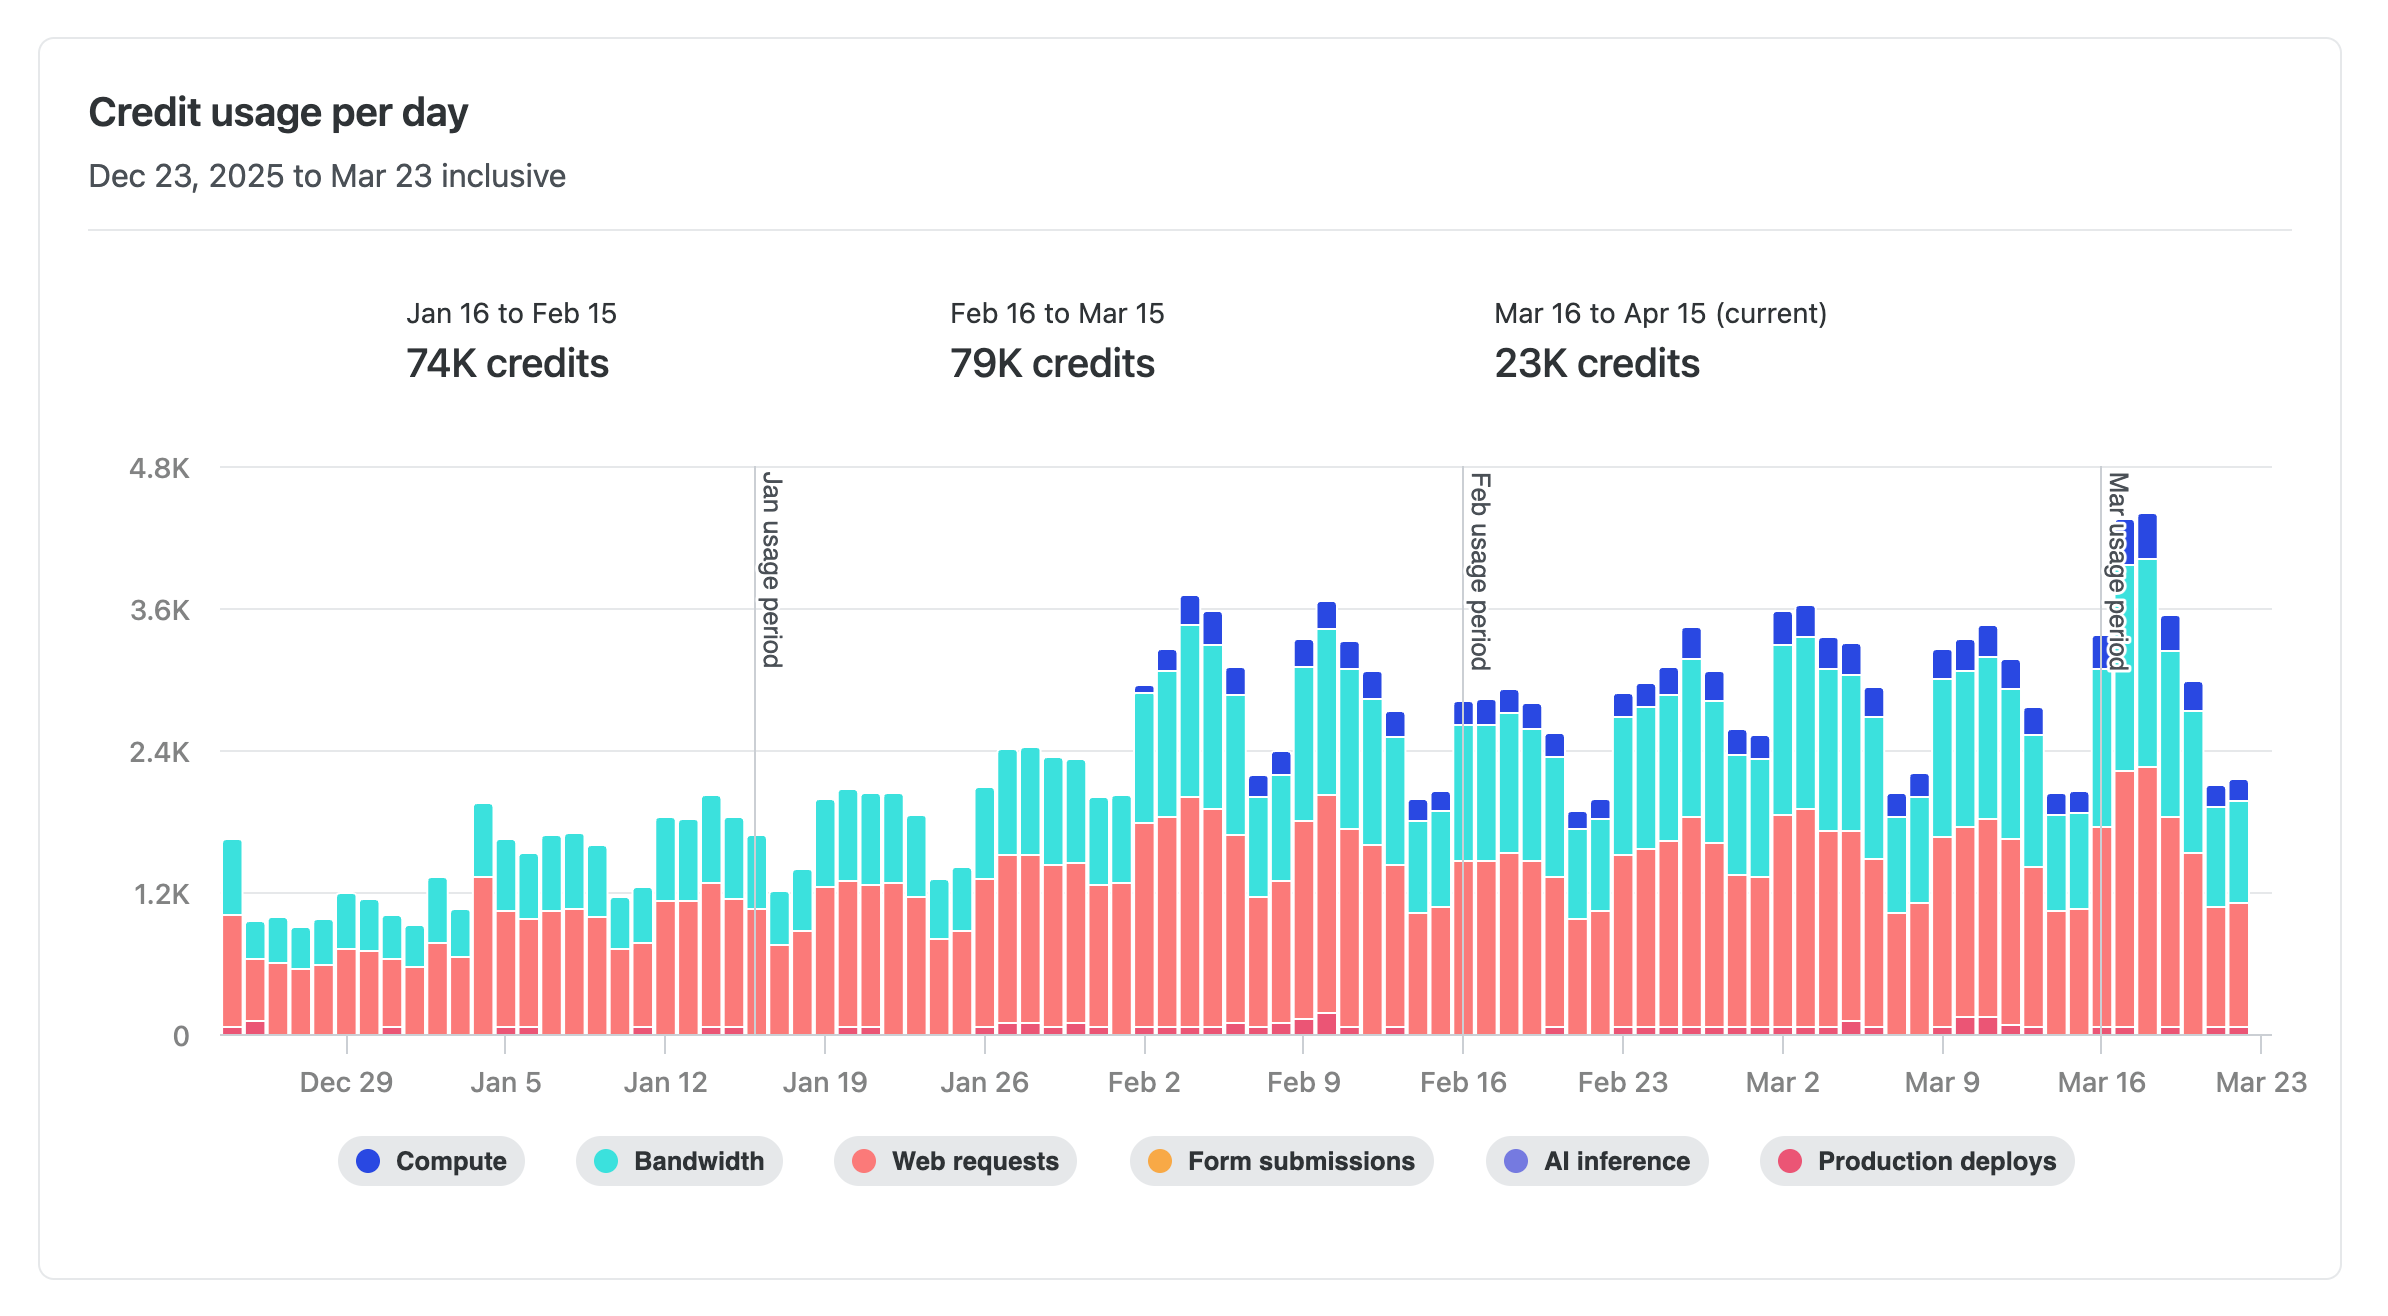
This makes it easier to spot usage trends, identify spikes, and plan ahead — so you can stay on top of your credit consumption without any guesswork.
Learn more about how credits work.
-
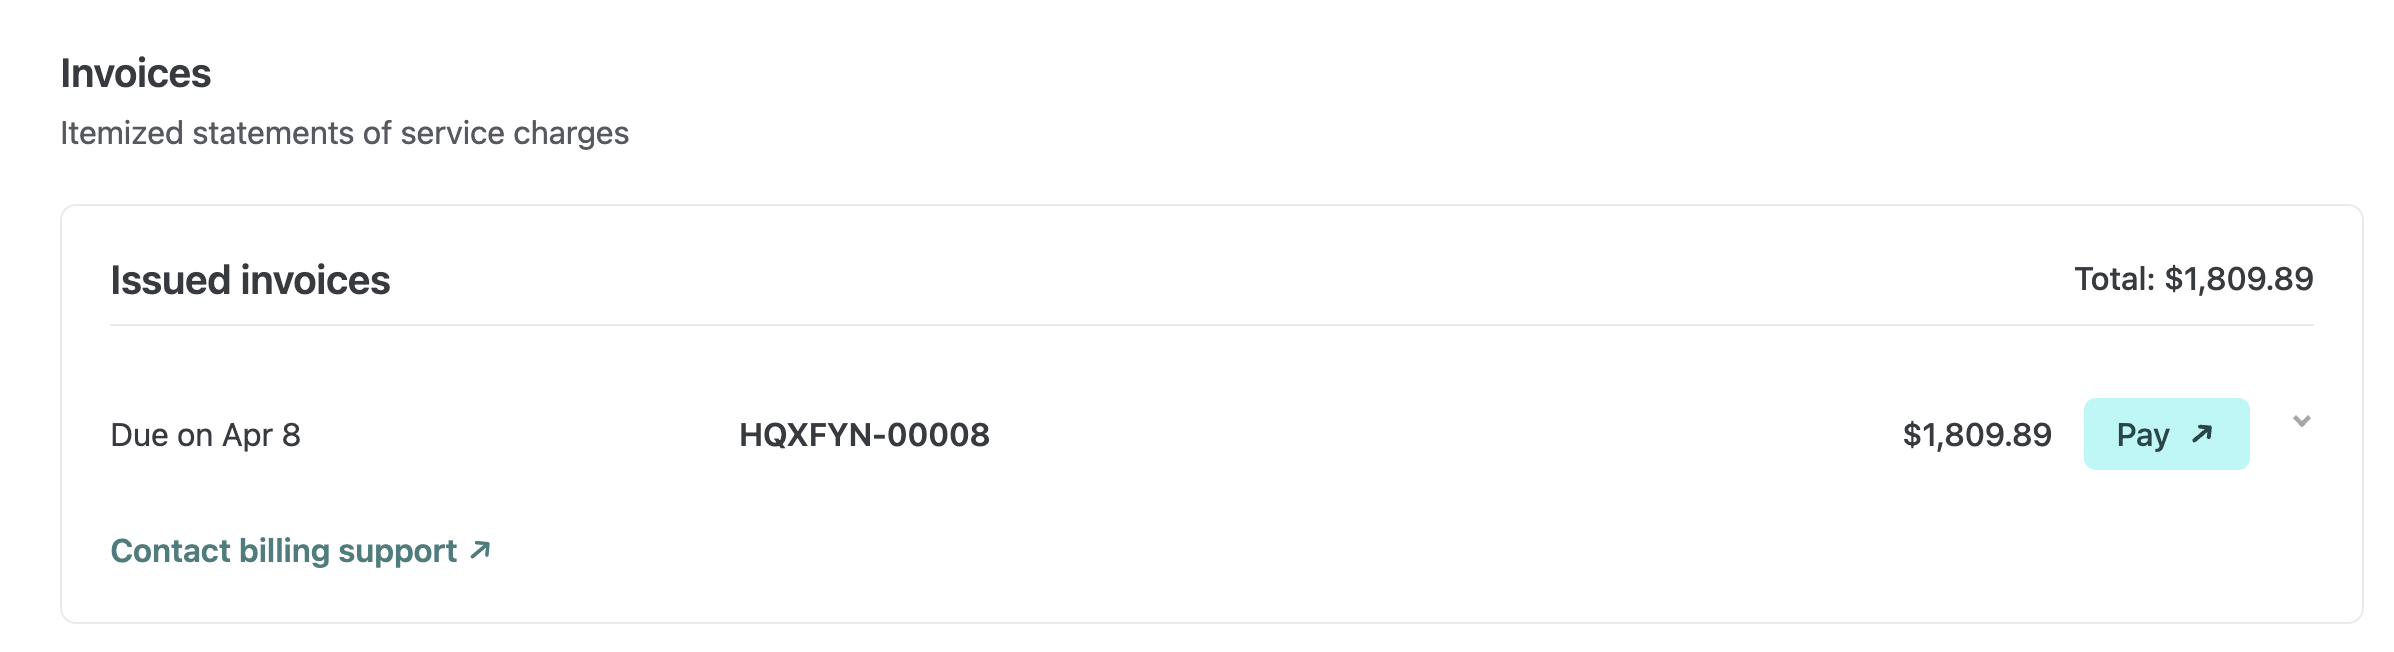
Enterprise and Grid customers can now find issued invoices directly on their billing pages in Netlify. You can review what each invoice includes and open it right away to pay or download.
On the team Usage & billing page for Enterprise and the Organization billing page for Grid, invoices are now listed where billing work already happens. This makes it faster to confirm charges, get details, and handle payment or download in fewer steps.
Enterprise teams without an organization grid plan: Find your invoices in your team’s Usage & billing dashboard.
Enterprise plans with an organization grid plan: Find invoices on your Organization’s billing dashboard.
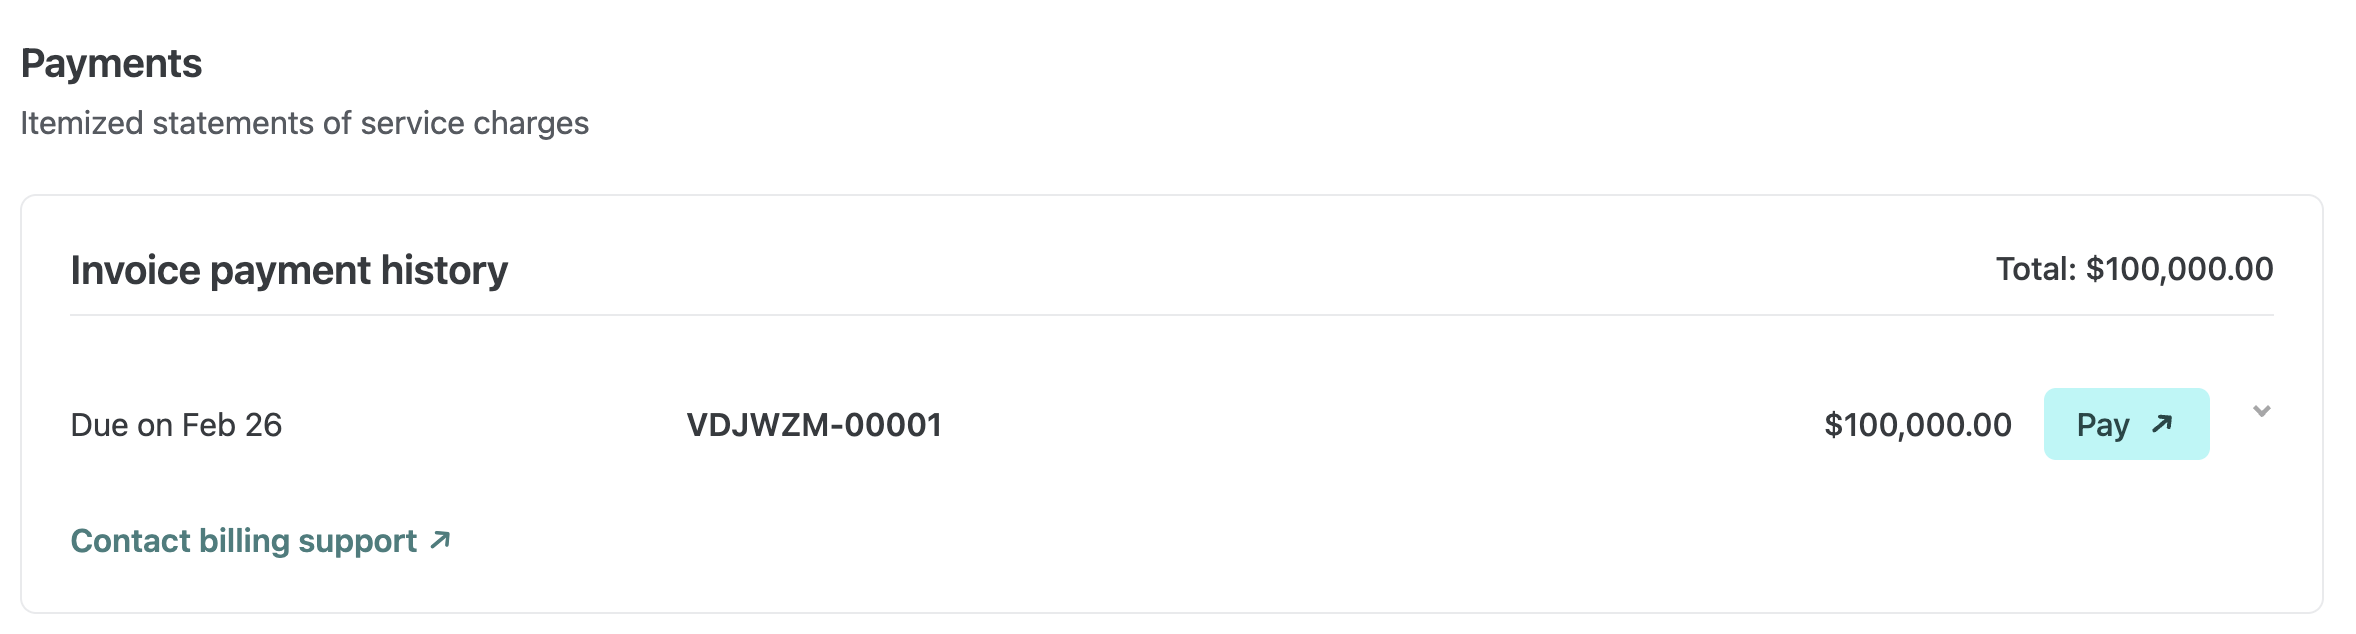
You can quickly see a breakdown for each invoice and use the Pay button to open the invoice portal when you’re ready to take action.
This update affects Enterprise teams and Grid organizations. No setup is required.
Learn more about Netlify billing.
-

Build and ship web apps faster with AI and Netlify. Start with a prompt, use production infrastructure, and grow without rebuilding.
-
To help you and your agents build more effectively, we’re introducing reusable Prompt Templates available directly from within Netlify.
Browse a curated collection of reusable prompts for common Netlify workflows: accessibility audits, A/B testing with Edge Functions, and more. Each template uses variable placeholders so you can adapt it to your project without starting from scratch.
Prompt Templates live directly in your project’s agent runs dashboard. From there you can:
- Browse public prompt templates
- Customize and save your own versions of any template for your team
- Submit templates back to the community to share what is working for you
Learn more about managing Prompt Templates for your team.
-
OpenAI’s GPT-5.4 Nano and GPT-5.4 Mini models are now available through Netlify’s AI Gateway with zero configuration required.
Use the OpenAI SDK directly in your Netlify Functions without managing API keys or authentication. The AI Gateway handles everything automatically. Here’s an example using the GPT-5.4 Nano model:
import OpenAI from 'openai';export default async () => {const openai = new OpenAI();const response = await openai.responses.create({model: 'gpt-5.4-nano',input: 'Give a concise explanation of how AI works.',});return Response.json(response);};GPT-5.4 Nano and GPT-5.4 Mini are available for all Function types. You get automatic access to Netlify’s caching, rate limiting, and authentication infrastructure.
Learn more in the AI Gateway documentation
-
We’ve updated how you manage who can access what on your Netlify project and created a new role designed for the workflow needs of cross-functional AI-assisted builders.
Teams have asked for clearer ways to support people building internal tools and people collaborating on existing projects with AI agents and some guardrails.
With the new Internal Builder role and more granular project access control, Netlify now better supports new ways of working with AI across your cross-functional teams.
Introducing the Internal Builder role
This role is ideal for marketers building campaign pages, HR teams spinning up internal sites, or anyone using AI tools to ship without a traditional dev workflow.
The Internal Builder role is built to cover these two use cases:
- Build with Agent Runners with guardrails for existing projects
- Support internal tool builders with their new projects
Build with Agent Runners with guardrails
Internal Builders can use Agent Runners to build and iterate on web projects with guardrails that support the ways cross-functional teams work.
The Internal Builder role can iterate on existing web projects using Agent Runners but cannot publish directly to production or access Project configuration settings, such as to change environment variables. This ensures the Internal Builder doesn’t accidentally break existing functionality.
For projects connected to a Git provider, the Internal Builder can open a pull request for review from their agent run. This allows Developers and Owners to decide when to go live with changes.
Use cases supported:
- Marketing team member who needs to build campaign landing pages quickly with stakeholder review
- Designer who iterates on pricing page with AI assistance with stakeholder review
Support internal tool builders
Once someone with an Internal Builder role creates a project, they automatically get a Developer role on that project without changing their role and access permissions to other projects.
This allows your cross-functional teams to own the building process for their internal tools.
Use cases supported:
- HR team member who wants to build an information site for a company trip to Mexico
- Sales rep building internal tools for their team
New granular project access
We’ve upgraded the ways you can manage project access for your team members.
Team Owners can specify project access when adding team members to projects or when they edit existing project access.
They can assign a role scoped only to specific projects or to all projects (including future ones).
This means the same person can be an Internal Builder on most projects but a Developer on the internal tool they’ve created. Access can be scoped to exactly what each person needs.
For more details, check out our docs on Roles and permissions and Manage project access.
Try it out
To add an Internal Builder to your team, go to your team’s Members page and invite a new member or update an existing member’s role. Let us know if you have any feedback.
-
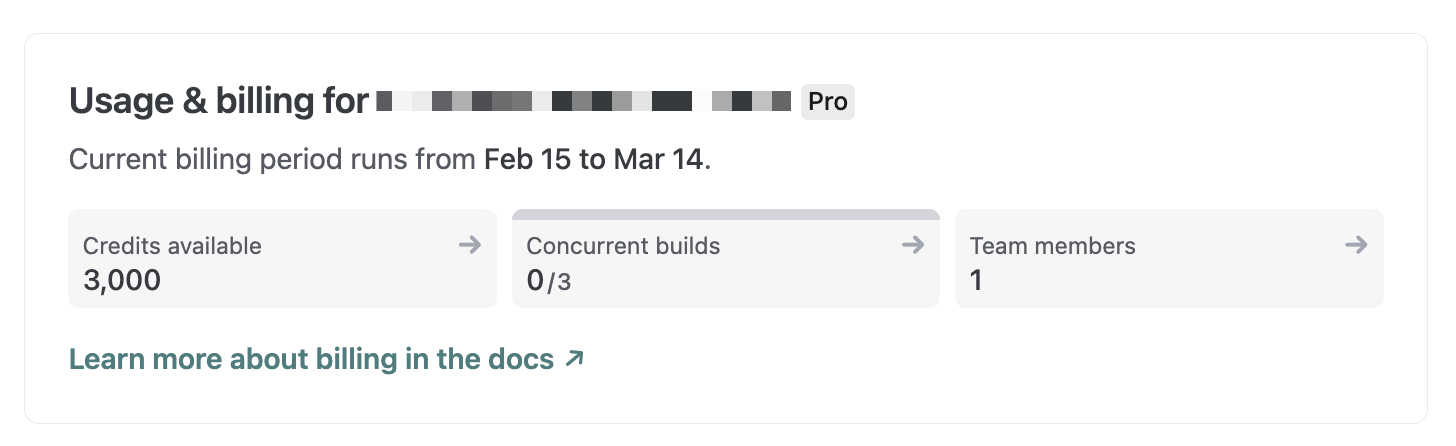
We’ve updated how credits are displayed across the Netlify UI. Instead of showing a “used credits / total credits” counter, you’ll now see your available credits — the number of credits you actually have left to use.
Now, you’ll see exactly how many credits remain on your account without needing to do the math yourself. For a detailed breakdown of your monthly credit consumption, check the Credit usage breakdown card on your team’s billing page.
Learn more about how credits work.