Welcome to Netlify and today’s article about a new and exciting Chinese technology—the InkPaper static site generator.
Among the multitude of site generators that have come into existence in the past few years, this one stands out for its simplicity, Chinese language support, extremely fast build time and much more.
It has a very elegant theme and is one of the fastest site generators to get up and running, as it has NO dependencies — all you have to do, is download and set it up.
This guide assumes that you have Git installed!
Quick Start
If you want to get a head start, you can download, install and setup from the terminal (or command prompt) in this quick start guide. However, if you need a more detailed introduction and guide, simply scroll down to here.
The quick start guides below do the same thing for each operating system, except that for OSX and Windows, they also download and rename the Linux versin of ink, so that it can be used to deploy to Netlify. Simply substitute with your inkpaper site location and name and you’ll be good to go.
Linux (64bit) Quick Start (in Terminal):
wget http://www.inkpaper.io/release/ink_linux_amd64.tar.gztar xzvf ink_linux_amd64.tar.gzmv ink_linux_amd64 my-inkpaper-sitecd my-inkpaper-sitemkdir binmv ink bin/ink.linuxOSX Quick Start (in Terminal):
curl -O "http://www.inkpaper.io/release/ink_darwin_amd64.zip"unzip ink_darwin_amd64.zipmv ink_darwin_amd64 my-inkpaper-sitecd my-inkpaper-sitemkdir binmv ink bin/ink.osx
curl -O "http://www.inkpaper.io/release/ink_linux_amd64.tar.gz"tar xzvf ink_linux_amd64.tar.gzmv ink_linux_amd64 my-inkpaper-sitecd my-inkpaper-sitemkdir binmv ink bin/ink.linux
Microsoft Windows (64bit) Quick Start (in Command Prompt):
Please note that Microsoft Windows will require 7zip to be installed, including the command line tool and it must be added to your path if you use the method below.
bitsadmin /transfer my-download-job /download /priority normal http://www.inkpaper.io/release/ink_windows_amd64.zip "C:\my-download-location\ink_windows_amd64.zip"cd my-download-location7z x ink_windows_amd64.zip -o"c:\my-inkpaper-site\"cd my-inkpaper-sitemkdir binmove ink.exe bin/ink.windows.exe
bitsadmin /transfer my-download-job /download /priority normal http://www.inkpaper.io/release/ink_linux_amd64.tar.gz "C:\my-download-location\ink_linux_amd64.tar.gz"cd my-download-location7z x ink_linux_amd64.tar.gz -o"c:\my-download-location\"7z x ink_linux_amd64.tar -o"c:\my-download-location\"cd ink_linux_amd64move ink "c:\my-ink-paper-site\bin\ink.linux.exe"
Substitute with your download folder location and inkpaper site location.
Please note that the quick guide above has only been tested on Windows 10, but should work fine on both Windows 7 and 8 as well.
Setup InkPaper
OK, let’s take a more detailed look into the setup of InkPaper.
If you already have an InkPaper repository forked on GitHub and only wish to connect, start here instead.
On the other hand, if you have InkPaper running locally, but need some guidance getting it on GitHub, before you deploy to Netlify, start here instead.
Finally, if you’re completely new to InkPaper, simply continue this guide chronologically.
1. Download InkPaper
The first thing you need to do is head over to InkPapers webpage and download the installation package that fits with your operating system. The package comes in both an OSX, a Windows and a Linux flavor and there are both 32bit and 64 bit versions for the Windows and Linux. 
2A. Linux and OSX: Extract and prepare InkPaper
If you are using OSX or a Windows OS, rather than Linux, it is important that you also download the Linux version of the ink executable, as this is the version needed when building on Netlify!
For this reason, we will move our ink executable into a bin folder in the root of the site and rename it ink.linux and if you’re on a Windows or OSX machine, make sure you also keep the ink executable needed by your OS to run locally.
Create a bin folder and rename the Linux version of the ink file ink.linux as we do in the command example below, but also keep an ink.osx OR an ink.windows file in there for local use if you’re in either OSX or Windows respectively.
We need to extract the downloaded package and change its folder name. These actions both differ depending on your operating system, yet are usually fairly simple.
In this example on Linux we open a terminal window and write the following commands in terminal (change to your download location, file name and site name):
cd 'my-download-location'tar xvzf ink_linux_amd64.tar.gzmv ink_linux_amd64 'site-location/my-site-name'cd 'site-location/my-site-name'mkdir binmv ink '/bin/ink.linux'The first line simply takes us to the location of the downloaded package (change to your download location). The second line unpacks the downloaded file (in our case the Linux 64 bit flavor). The third line renames and moves the downloaded folder to your location and name of choice, while the fourth line takes us to the root of our new site. In the fifth line we create a bin folder, while in the sixth and final line we move and rename the ink executable to the bin folder.
2B. Windows: Extract and prepare InkPaper
Instead of doing everything in command prompt, we advice you use the GUI and a compression tool of your choice.
In short, you need to download both the Windows and the Linux versions and then you need to move both executables to a new bin folder. Furthermore you need to rename both executables, so you can distinguish the Linux version from the Windows version.
After downloading, if you wish to use the command prompt, try to run the following two sets, changing the directory locations to fit with your system, by substituting download-location and my-inkpaper-site with the actual location and site name. And remember that the Windows section of our quick guide assumes you have 7z installed.
We get the Windows version first:
cd 'download-location'7z x ink_windows_amd64.zip -o"c:\download-location\my-inkpaper-site\"cd my-inkpaper-sitemove ink.exe "c:\my-ink-paper-site\bin\ink.windows.exe"We get the Linux executable as well:
cd 'download-location'7z x ink_linux_amd64.tar.gz -o"c:\download-location\"7z x ink_linux_amd64.tar -o"c:\download-location\"cd ink_linux_amd64move ink "c:\my-inkpaper-site\bin\ink.linux.exe"Feel free to keep the terminal window/command prompt open between steps for your own convenience!
3. Preview InkPaper
Provided you’ve still got your terminal window open in the InkPaper directory, all you need to do is enter the following commands, lean back and check out the beautiful result in a web browser:
./bin/ink.linux build./bin/ink.linux previewPlease note that the official documentation merely uses ink preview and ink build as the commands, but as we’ve moved and renamed the file, we also have to change the command slightly to reflect this, as seen above.
The Windows commands corresponding with the above, can be found here:
call bin\ink.windows buildcall bin\ink.windows previewOpen your web browser of choice and enter http://localhost:8000/ in the address bar and there you go.
Quite honestly — could it get any easier or more elegant?
4. Website Configuration and Content Creation
Let’s dig a little deeper and look at how to configure the website, as well as create some content.
As with many other static site generators, the config.yml file is where we do the website configuration and it’s pretty much self explanatory as seen both in the config.yml generated in your site (just take a look — it’s in the blog sub directory), but also in this shorter format example taken from InkPapers homepage:
site:    title: Website Title    subtitle: Website Subtitle    limit: Max Article Count Per Page    theme: Website Theme Directory    disqus: Disqus Plugin Username    root: Website Root Path #Optional    lang: Website language #Support en, zh, Configurable in theme/lang.yml
authors:    AuthorID:        name: Author Name        intro: Author Motto        avatar: Author Avatar Path
build:    port: Preview Port    copy:        - Copied Files When Build    publish: |        Executed command when using 'ink publish'
To create content, simply create any .md file in the source directory or in a subdirectory of the source directory, using the following YAML frontmatter format (as described on the InkPaper homepage):
title: Article Titledate: Year-Month-Day Hour:Minute:Second #Created Time,Support TimeZone, such as " +0800"update: Year-Month-Day Hour:Minute:Second #Updated Time,Optional,Support TimeZone, such as " +0800"author: AuthorIDcover: Article Cover Path #Optionaldraft: false #If Draft,Optionaltop: false #Place article to top, Optionalpreview: Article Preview,Also use <!--more--> to split in body #Optionaltags: #Optional    - Tag1    - Tag2
---
Markdown Format's Body
Notice that the content is written in markdown below the three dashes and that you only need one set of these, as opposed to the more commonplace practice of placing the article information between two sets of dashes.
As long as you’re working on the page, the modified ink preview command we entered in terminal/command prompt earlier, will automatically watch and rebuild the source directory, so you can see your changes locally and instantly, by simply refreshing the browser (provided that you keep the terminal window/command prompt open and the service running).
For further information about ink commands, customizing InkPaper and choosing or modifying a theme, see the InkPaper getting started webpage.
Setup your GitHub Repository
Let’s set up a GitHub repository and push our site there.
1. Create your Git Repo
Head over to GitHub and create a new repo. We’re naming ours InkPaper and we’ll postpone adding files to the repository until after its creation, as this can sometimes create problems (The README, license and gitignore files).
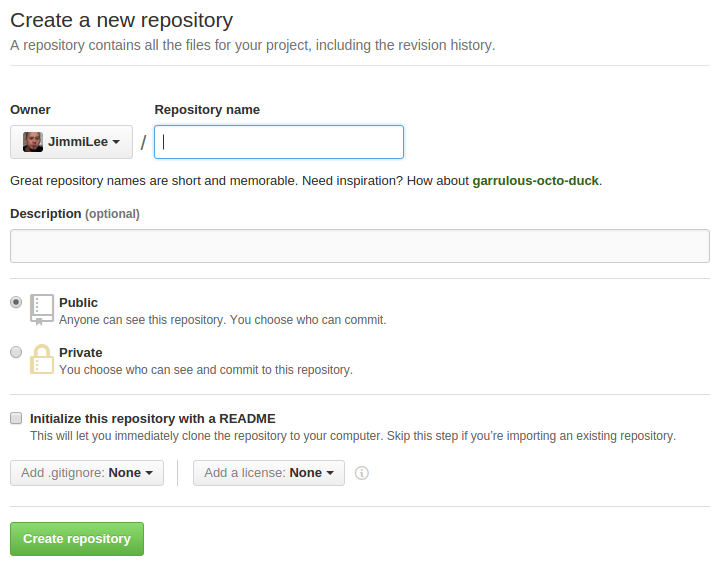
Once the repository has been named and created you’re ready to go local.
2. Initialize Directory
We’ll initialize the local directory as a git repository with the following command:
git init3. Add & Commit Files
We need to add the files from our local directory to this Git repository and stage them for their first commit with the following line in Terminal/Command Prompt:
git add .Commit the files you just staged in your local repository by entering the following line in Terminal/Command Prompt:
git commit -m 'First commit'Windows users: the command looks slightly different as we need to use double quotes:
git commit -m "First commit"4. Get & Add Remote URL

It’s now time to return to the GitHub repository and get the URL for this remote repository where your local repository will be pushed. Either copy paste the whole command or use the button as depicted above, to copy just the path to your clipboard. Return to the Terminal window/Command prompt and paste the remote repository URL inside the following line (instead of My-Repository-URL):
git remote add origin My-Repository-URLOptional: To check that it’s set up correctly, you can use the following command:
git remote -v5. Push to GitHub.
The final task before we’re done setting up and ready for Netlify, is to use the push command with git, as in the following line in Terminal/Command prompt:
git push -u origin masterAll your files will be copied to your online repository. Once it’s done, take a look at the repository online to check if everything looks correct.
It’s time to connect it with Netlify.
Connecting to Netlify
Creating a new site on Netlify is simpler than with any other host. Once you’ve created an account and logged in, you’ll be taken to https://app.netlify.com/sites
Step 1: Add Your New Site
Click the “New Site” button (as seen above) to get started.
Step 2: Link to Your GitHub
Clicking “New Site” brings you to this screen: 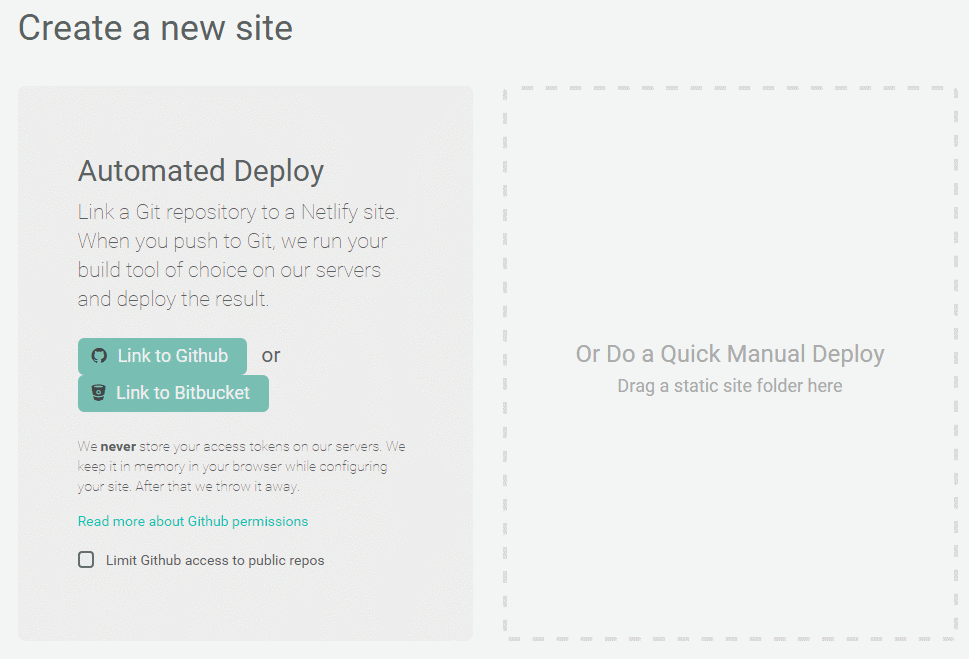 When you push to GitHub, Netlify does all the work. No more wasting time on manual deploying of updates or changes!
Since your assets are hosted on GitHub, we’ll need to link Netlify to GitHub. Click the button “Link to GitHub”.
Step 3: Authorize Netlify
Please note that this step is omitted if you already have an account with Netlify set up to login automatically!
You will be asked to provide your GitHub login details: 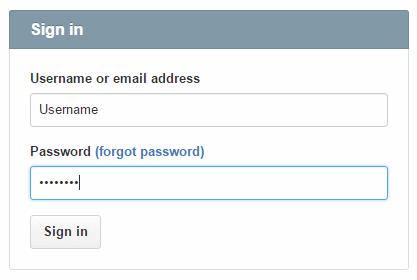
We need to let Netlify and GitHub talk to each other, so review the permissions and then click authorize application. 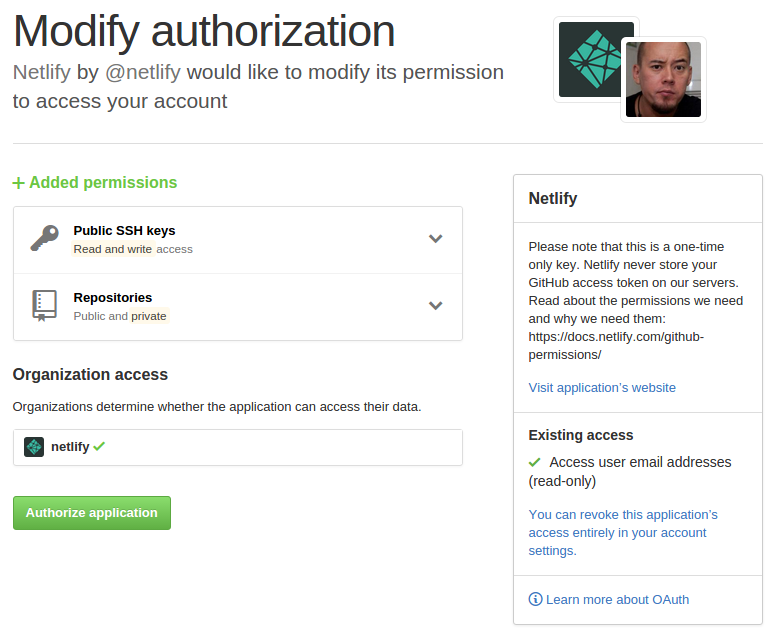
Like it says in the image above on the right, Netlify doesn’t store your GitHub access token on our servers!
If you’d like to know more about the permissions Netlify requests and why we need them, you can check out our documentation on GitHub Permissions.
Step 4: Choose Your Repo
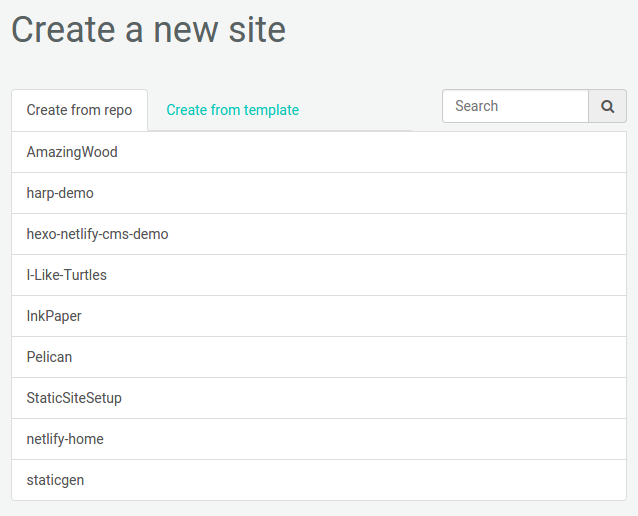 Once you’re connected to GitHub, Netlify will show you a list of your Git repos, as seen above. For the purpose of this tutorial we’ll select the “InkPaper” repo we just pushed to GitHub.
Step 5: Configure Your Settings
Fill in the configuration settings as seen in the screen shot below, using the master branch, the “/blog/public” directory and the ”./bin/ink.linux build” command. 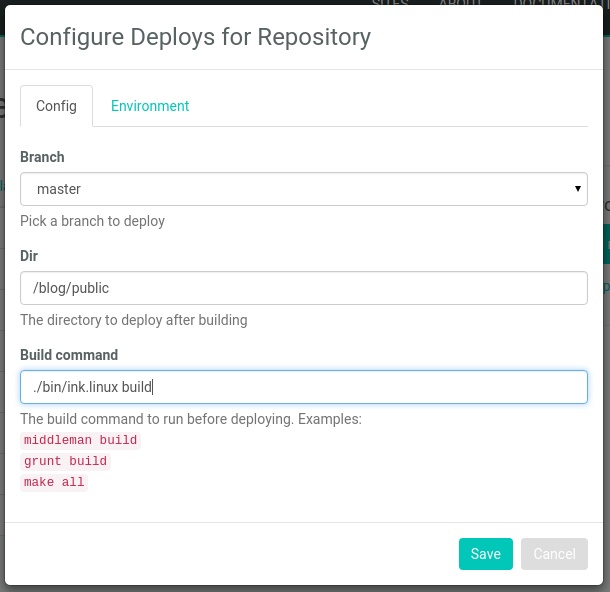
Click the ‘Save’ button and watch the magic unfold.
Step 6: Build Your Site
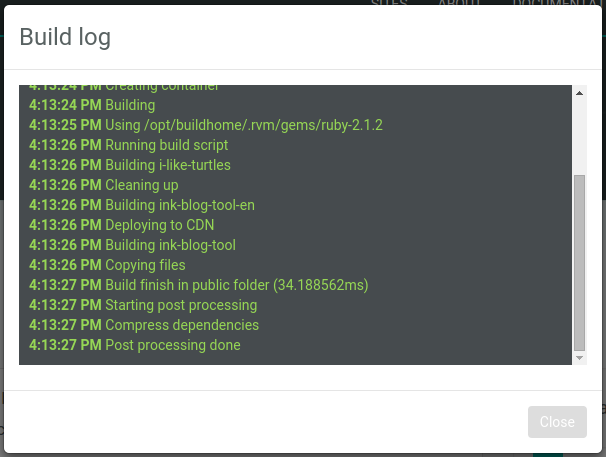 Once you click save, Netlify will step in and take over, though it will let you know what’s happening along the way. This may take a few minutes, so take a break and Netlify will do the rest, while you watch the progress.
Step 7: Done
Once Netlify has build your site, you’ll be presented with the result and your very own randomly generated name and as you can see from this screen shot, you now have access to the control panel for the site. 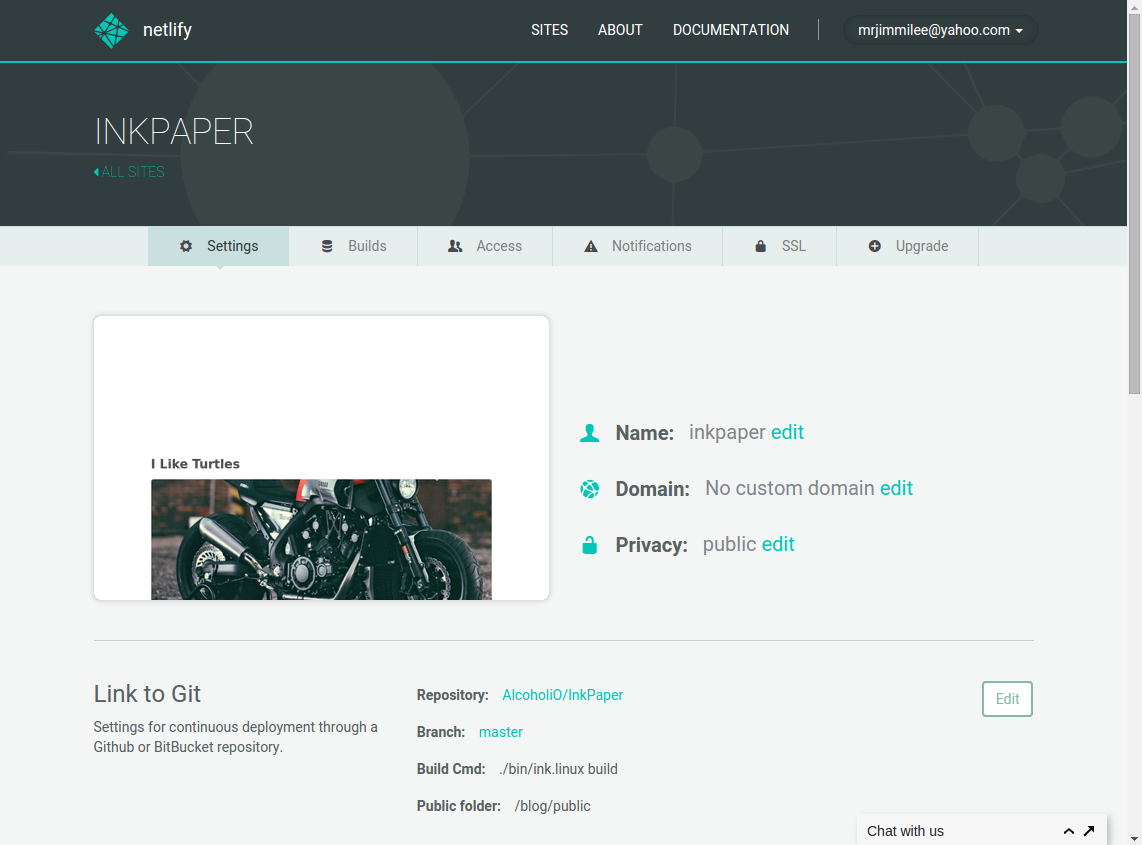
The site starts as default public, but you can easily and quickly change this now along with the options to add a custom domain name and changing from the randomly generated name to something more appropriate (we named ours InkPaper).
Beautiful, simple and easy!


