This guide was most recently updated/verified on Tuesday, February 26th, 2019. Below are the package versions used to verify:
- GitBook 3.2.3
- gitbook-cli 2.3.2
The screenshots may be outdated.
Today, we’re going to look at how to host a book built with GitBook on Netlify, including setting up continuous deployment.
Let’s start from scratch. If you already have GitBook set up, you can skip straight to the [Connecting to Netlify](#netlifystart) section.
Installing Gitbook
This guide assumes you have Node.js installed.
Let’s get your workstation prepped.
First, use mkdir to create the gitbook directory where you’ll be working:
$ mkdir /PATH/TO/gitbook$ cd /PATH/TO/gitbookNow we need to create the package.json file, which will tell Netlify how to handle your content
$ npm initYou don’t have to enter any values for the questions that the above command will ask you. Just hit the enter key for each one. The necessary info will be injected into the package.json file with the following command:
$ npm install -g gitbook-cli --save-devThis will install GitBook, and the --save-dev updates your package.json file.
Now, GitBook will set up your book for you:
$ gitbook initIn your gitbook directory you’ll now see README.md and SUMMARY.md. Open README.md in your favorite text editor, and you’ll see that it’s ready to function as the introduction to your book. Let’s add some text to it:
# Introduction
This is a book written in GitBook and hosted with Netlify.
Let’s make a few chapters for your book. Create a file called chapter1.md and put some content in it:
# The Jabberwocky
`Twas brillig, and the slithy toves  Did gyre and gimble in the wabe:All mimsy were the borogoves,  And the mome raths outgrabe.
Let’s repeat that for chapter2.md:
# A Modest Proposal
## For Preventing The Children of Poor People in Ireland From Being Aburden to Their Parents or Country, and For Making Them Beneficial to The Public
It is a melancholy object to those who walk through this great town or travel in the country, when they see the streets, the roads, and cabin doors, crowded with beggars of the female sex, followed by three, four, or six children, all in rags and importuning every passenger for an alms. These mothers, instead of being able to work for their honest livelihood, are forced to employ all their time in strolling to beg sustenance for their helpless infants: who as they grow up either turn thieves for want of work, or leave their dear native country to fight for the Pretender in Spain, or sell themselves to the Barbadoes.
Now let’s update your SUMMARY.md file, which functions as your table of contents.
# Summary
* [Introduction](README.md)* [The Jabberwocky](chapter1.md)* [A Modest Proposal](chapter2.md)
GitBook allows you to test your book before you push it to the web by using this command:
$ gitbook serveLooks nice, doesn’t it? You can even make changes to the text, and your book will update on the fly.
Like what you see? Great. Let’s move on!
Preparing for Deployment
If you are satisfied with your site, it’s time to get it ready to deploy. First, let’s make sure that GitBook and GitHub will play nicely together.
Create a new file called .gitignore in /PATH/TO/gitbook and paste the following into it:
# Node rules:## Grunt intermediate storage (http://gruntjs.com/creating-plugins#storing-task-files).grunt
## Dependency directory## Commenting this out is preferred by some people, see## https://docs.npmjs.com/misc/faq#should-i-check-my-node_modules-folder-into-gitnode_modules/
# Book build output_book/
# eBook build output*.epub*.mobi*.pdf
Okay, you’re ready to go!
Now it’s time to push it to your repo of choice. Directions for GitHub follow here.
Creating your Git Repo
Create a new repository on GitHub. To avoid errors, do not initialize the new repository with README, license, or gitignore files. You can add these files after your project has been pushed to GitHub.
Open Terminal (for Mac users) or the command prompt (for Windows and Linux users).
For our purposes, let’s call your new repo “gitbook”.
Make sure your current directory is that of your local GitBook project.
$ cd ~/PATH/TO/gitbookInitialize the local directory as a Git repository.
$ git initAdd the files in your new local repository. This stages them for the first commit.
$ git add .Commit the files that you’ve staged in your local repository.
$ git commit -m 'First commit'At the top of your GitHub repository’s Quick Setup page, click the clipboard icon to copy the remote repository URL.
In Terminal, add the URL for the remote repository where your local repository will be pushed.
git remote add origin Git_Repository_URLVerify your URL
git remote -vNow, it’s time to push the changes in your local repository to GitHub.
git push origin masterNow that your assets are up and running on GitHub, let’s connect them to Netlify.
Connecting to Netlify
Step 1: Add Your New Site
 Creating a new site on Netlify is simple. Once you’ve logged in, you’ll be taken to https://app.netlify.com/sites. If you’re just starting out, there’s only one option.
Step 2: Link to Your GitHub
Clicking “New Site” brings you to this screen:

When you push to GitHub, Netlify does all the work. No more manual deploying of updates or changes!
Since your assets are hosted on GitHub, we’ll need to link Netlify to GitHub. Click “Link to GitHub”.
Step 3: Authorize Netlify

It’s time to allow Netlify and GitHub to talk to each other. Clicking the “Authorize Application” button will do just that. Like it says in the image below, Netlify doesn’t store your GitHub access token on our servers. If you’d like to know more about the permissions Netlify requests and why we need them, you can visit our documentation on Git provider permissions.
Step 4: Choose Your Repo
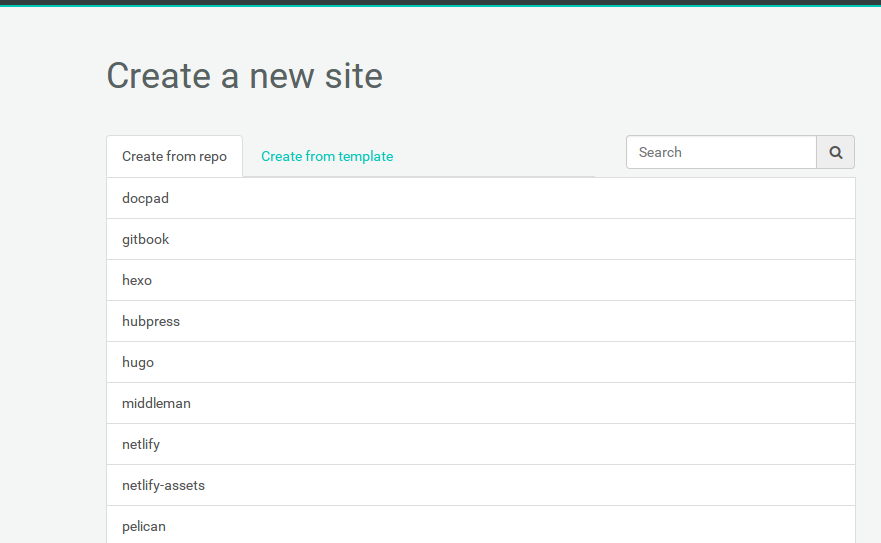
Now that you’ve connected netlify and GitHub, you can see a list of your Git repos. There’s the “gitbook” repo we just pushed to GitHub. Let’s select it.
Step 5: Configure Your Settings
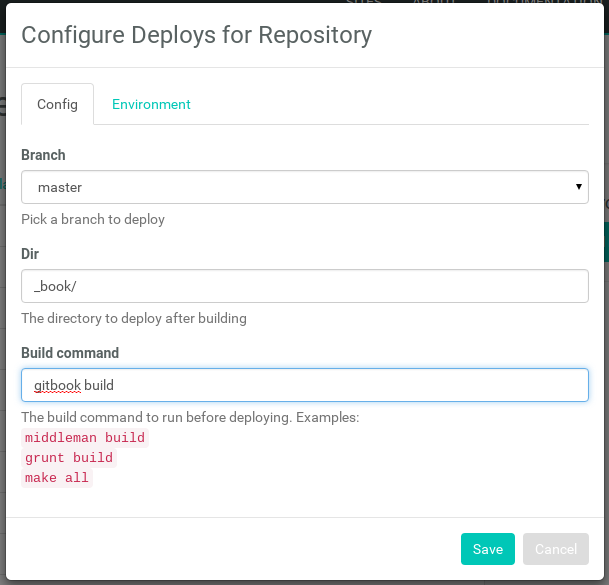
Here you can configure your options. Make sure your settings are the same as above, then click “Save”.
Step 6: Build Your Site

Now it’s time to sit back and relax. Go grab something cold to drink, scratch the dog behind the ears, or just get up and walk around (you’ve probably been in front of the computer for too long today, right?). Netlify will do the rest, and you can watch the progress.
Step 7: Done
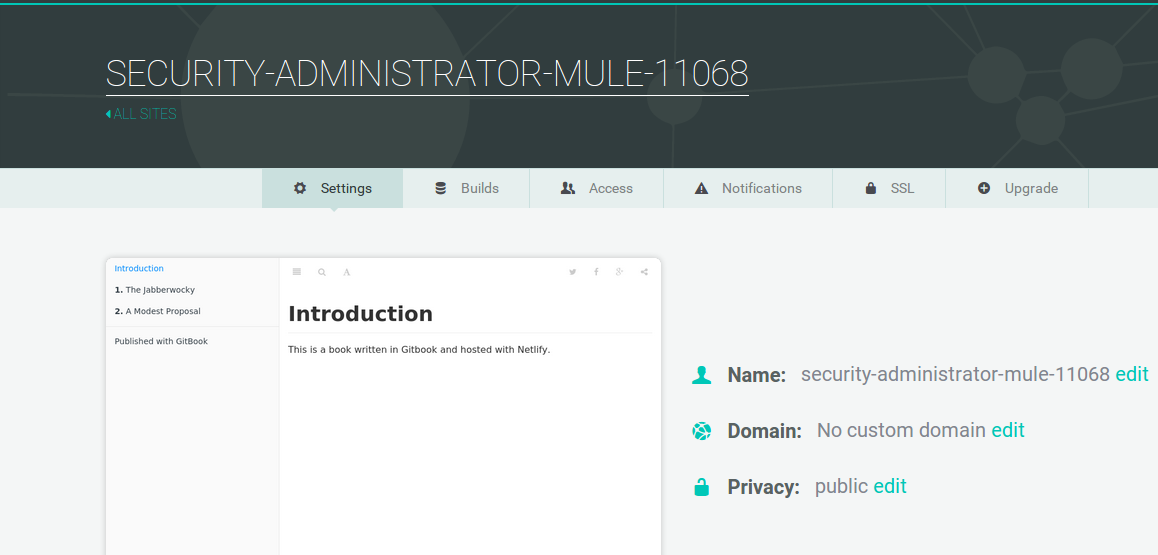
Wait, you thought there was going to be more? Nope! Netlify has done it all for you, including giving your site a temporary name. Let’s make it look a little prettier:
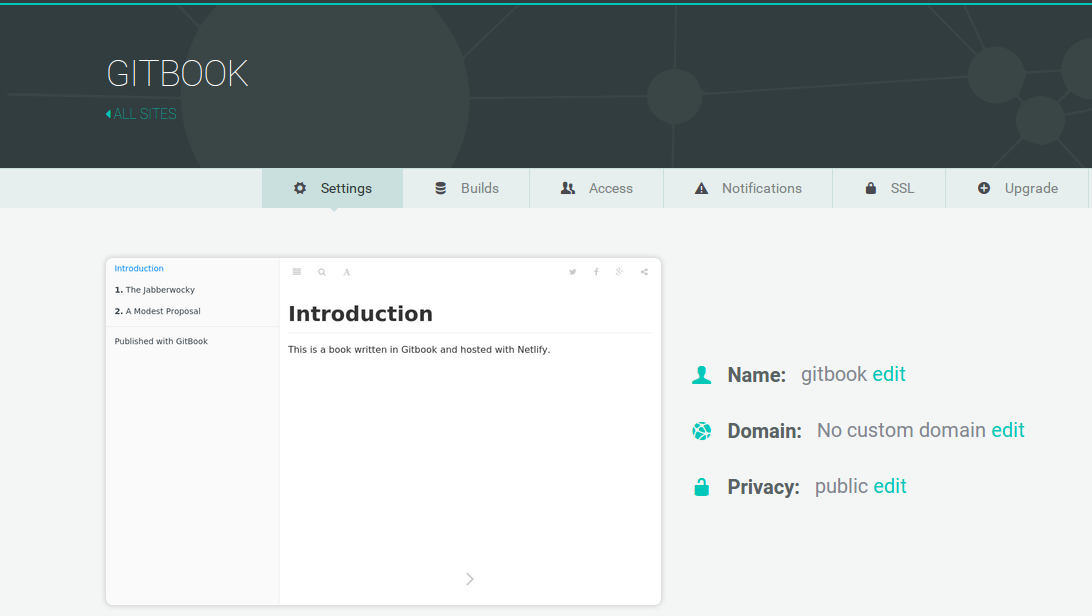
There, that’s better. Now you can add your custom domain, and your site will be live for your adoring public to view. Congratulations, and thanks for using Netlify!


