Today I’m writing about Metalsmith.
Metalsmith is a fairly well known static site generator that bills itself as An extremely simple, pluggable static site generator. To me personally, that’s indeed exactly how it felt, like working with a very customizable static site generator, for better or worse. It’s in fact so customizable that it can imitate other static site generators and even has templates for this!
But enough talk, let’s get to the meat and bones.
In this tutorial we will set up a basic Metalsmith demonstration site, with a build file, static assets and some plugins. The aim of this site is to show a simple Metalsmith setup with continuous deployment on Netlify using GitHub.
If you already have a Metalsmith repository on GitHub and only wish to connect with Netlify, you can skip the bulk of this guide and start here instead.
On the other hand, if you have Metalsmith running locally, but need some guidance getting it on GitHub, before you deploy to Netlify, start here instead.
Finally, if you’re completely new to Metalsmith, simply continue this guide onwards and downwards.
Please note that this guide assumes you have npm and node.js installed — any version above 0.12.x !!
For information about installing and handling node.js using nvm please see this guide.
Setup Metalsmith
Metalsmith is not only a static site generator, but can do a lot of other things equally well and in more general terms one might define it as a file manipulator with plugins. This means it’s extremely versatile, while remaining simple, but it also means that there’s a bit more to be done on the setup side, than what we’re used to from other static site generators.
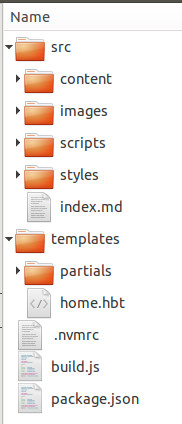
1. Create Folder Structure
We’ll start out by creating a simple folder structure for our project as outlined in the picture below, with a number of files.
Alternatively you can fork a clone of the empty structure here, complete with empty files, ready to be filled in.
We’ll fill in the content of the files in the following steps and more files will be added along the way.
The folder structure for this project:
2. Create .nvmrc file
Did you notice the .nvmrc file in the tree above?
The helpful program nvm or node version manager, has a little known feature that’ll help you define what version of node you’re running with your project, by simply adding a file to the root of the project named .nvmrc with the version inside. While you may not be using nvm yourself (you should really consider it), Netlify will use this information when building your site for you.
Since Metalsmith is a little picky with regards to what version of node it works with (anything after 0.12.x should do), we’ll add the newest version number we know is running on Netlify to this file.
To figure out which options we have, we open Netlify’s build image here and from line 95 and down we find the various versions of node available, with version 5.1.0 being the newest.
In the .nvmrc file I write the following and save:
stableEasy enough. To simply use the newest stable version available on Netlify, we write stable. You could also write 5.1.0, as seen in the build image, but as any newer version should also work flawlessly, we stick with stable.
3. Setup the Node Package manager
To handle the various packages you will need to have node.js and npm installed, which are bundled together.
Open a terminal window and cd to the root of your Metalsmith site (cd my-metalsmith-site) and use the npm init command to intialize the directory and create a package.json file with user feedback.
Note that apart from the file, npm also creates a node_modules folder, to hold the various packages. Alternatively npm init -f will intialize the current directory and create a package.json file with default settings.
For convenience sake, keep the terminal window open throughout this guide.
4. npm install
To actually install the various packages, we’ll use the following command (substitute package-name with the various packages): npm install package-name --save
The --save flag tells npm to save the installations as dependencies in the package.json file. It is then possible to uninstall and remove the package again using npm uninstall package-name --save
Let’s get started. The first package we need is Metalsmith itself, so go ahead and enter the following command:
npm install metalsmith --save5. Create .gitignore file
If you check your folder you’ll notice that npm has created a node_modules folder and filled it up with packages. Since this is only needed locally and since the build folder is also only used locally, we want to avoid pushing them to GitHub, simply to save space and keep them out of where they don’t belong.
This it where the .gitignore file comes into play. Create a file in the root of the site named .gitignore and fill it in with the following:
# To avoid uploading the node_modules folder, filled with node.js packages:node_modules/
# To avoid uploading the local build folder:build/
Save it. So far so good, let’s add some plugins.
6. Adding Packages
Metalsmith itself needs a few dependency packages to run (no need to worry, as it will install these by itself), but apart from that what packages or in Metalsmith terms, what plugins do we want or need? Well, I’m getting used to Markdown and statistically speaking so is the average reader of this article, so I’ll add a plugin that will enable Markdown to the list with the following command in terminal:
npm install metalsmith-markdown --saveAs you can see, it’s easy to install plugins and even Metalsmith itself is a plugin.
Using the npm ls command it’s possible to see the dependency tree.
7. Create build file
To build our site with these plugins, we need to define an output folder and run a script. We’re using a simple JavaScript for this and we’ve aptly named this script build.js (since every time we run it, it will build the site).
Create the build.js file and fill it in as seen below:
var Metalsmith = require('metalsmith'),    markdown   = require('metalsmith-markdown');
Metalsmith(__dirname)    .use(markdown())    .destination('./build')    .build(function (err) { if(err) console.log(err) })
Did you notice a pattern here?
First, for each plugin you want to install, you need to run the following command in terminal:
npm install plugin-name --saveSecond, you have to add each plugin to your build file with a variable declared and set to require ('plugin-name') and third, below that invoked with .use(variable-name()) as seen in the build.js file above.
Furthermore the destination folder is defined with .destination('./build') and in the final line, the build method is called, with a callback to handle possible errors.
Once you have the build file saved, you can try to build the page with the following command:
node buildIf everything went according to plan, there should be a new file in the build directory, molded according to our plugins. It’s very simple and not much is happening there yet of course, but we’ll get to that. This is merely to see if your installation so far is working.
8. Add more Plugins
Well, what else do we need? There’s a whole list of plugins here and it’s even possible to write them yourself, should you feel inclined to do so, but for our basic tutorial we won’t get into this.
We’re going to need a templating engine, as well as some templates to wrap around our content. We’ll use the handlebars templating engine, though there are other equally useful options. For the templates, we’ll use the metalsmith-templates plugin. We’ll start by installing the two plugins with the following lines in terminal:
npm install metalsmith-templates --savenpm install handlebars --saveWe need to update our build.js file with these changes as well.
Updated build.js:
var Metalsmith = require('metalsmith'),    markdown   = require('metalsmith-markdown'),    templates  = require('metalsmith-templates');
Metalsmith(__dirname)    .use(markdown())    .use(templates('handlebars'))    .destination('./build')    .build(function (err) { if(err) console.log(err) })
The above script follows the norm set before, except that we need to tell the templates which templating engine to use, rather than just add them one by one like before. This is done with the line: .use(templates('handlebars'))
You might want to check the changes made to the dependency tree by running the npm ls command again.
9. Create a Simple Template
The next thing we want to do is create one simple template in the templates directory. We create the home.hbt file with the following content in the templates folder:
<!doctype html><html lang="en"><head>    <meta charset="UTF-8" />    <title>{% raw %}{{ title }}{% endraw %}</title>
    <link rel="stylesheet" type="text/css" href="./styles/main.css" /></head><body>
    <div class="main-wrapper">        {% raw %}{{{ contents }}}{% endraw %}    </div>
</body></html>
We also need a landing page, so create an index.md file in the content folder and fill it in with this YAML frontmatter, which simply points to the template above like this:
---title: Hometemplate: home.hbt---Whatever content we want on our front page...To run the build script and check out the changes, first save and next run the build command from terminal once more: node build
Check the output in the build directory and see if the template HTML created above was added properly.
10. Folder Structure
To discern between the various content we’re going to have, we will set up a folder for each type of content in the content folder. E.g. we want one type for displaying pages and one of these pages will be our about page, so we’ll create a src/content/pages folder with a new file in it named about.md with the following content:
---title: Abouttemplate: page.hbt---This is a small Metalsmith demonstration site that aims at showing you a very basic site build with Metalsmith.As you can see in the YAML frontmatter above, we’re using the page template and not the home template we made earlier and so naturally we also need to create this template file.
We’ll keep it simple and merely present the content with a title and the aforementioned header and footer partials.
I present to you the page.hbt file (in the templates directory):
{% raw %}{{> header}}{% endraw %}
<h2>{% raw %}{{title}}{% endraw %}</h2>
<article>    {% raw %}{{{contents}}{% endraw %}}</article>
{% raw %}{{> footer}}{% endraw %}
To add the partials we simply insert the line {% raw %}{{> partial-name }}{% endraw %} as seen above.
Let’s move on to creating these partials.
11. Template Partials
Template partials are useful for the elements that are part of every page, such as a footer and a header for example or perhaps your logo. In Metalsmith how these are handled comes down to your templating engine and in our case for this tutorial that means it comes down to the handlebars templating engine.
First we create the partials files header.hbt and footer.hbt in the templates/partials directory. For the partials to work in Metalsmith, we need to register them in our build file.
Since Consolidate.js supports partials for handlebars, we have a nice and easy way of registering them. In the build file change the line with .use(templates('handlebars')) to the code below:
.use(templates({ engine: 'handlebars', partials: { header: 'partials/header', footer: 'partials/footer' } }))It’s simple enough, we choose a templating engine and then we register the two partials.
Let’s create these partials.
The header partials file header.hbt in the templates/partials folder:
<!DOCTYPE html><html>    <head>        <meta charset="utf-8">        <meta http-equiv="X-UA-Compatible" content="IE=edge">        <title>Metalsmith Demo Site</title>
        <meta name="viewport" content="width=device-width">        <link rel="stylesheet" href="/styles/main.css" type="text/css" />    </head>    <body>
        <header>            <img src="/images/metalsmithlogo.jpg" alt="Metalsmith Demo Site" height="226" width="709">        </header>
        <div class="main-wrapper">
The footer partials file footer.hbt in the templates/partials folder:
</div> {% raw %}{{!-- END .main-wrapper --}}{% endraw %} <footer> © Metalsmith demo site - demonstrating Metalsmith in continuous deployment using GitHub on Netlify. </footer> </body></html>Notice the stylesheet link in our header.
To make the site we’re working on a little less bleak, we’re going to add a stylesheet.
12. Add a Stylesheet
We’re going to simply add a stylesheet in the src/styles folder named main.css as referenced in our header.
You can use any old external css stylesheet or create a new one. Once you run build, Metalsmith will copy this file over, duplicating the file structure and any other static assets you may have added in this simple manner.
13. Collections and Link Plugins
To illustrate the power and flexibility of Metalsmith, we’ll use two additional plugins to set up some collections with metalsmith-collections and create a collection for our pages and one for our articles. We’ll also add the metalsmith-permalinks plugin, to change our files so that they’re nested properly.
npm install metalsmith-collections --savenpm install metalsmith-permalinks --saveApart from simply adding these two plugins to the build file, we also have to define the two collections we want to use, by giving them a pattern as seen below in our full updated build.js file:
var Metalsmith = require('metalsmith'),    markdown = require('metalsmith-markdown'),    templates = require('metalsmith-templates'),    collections = require('metalsmith-collections'),    permalinks = require('metalsmith-permalinks');
Metalsmith(__dirname)    .use(collections({        pages: {            pattern: 'content/pages/*.md'        },        articles: {            pattern: 'content/articles/*.md',            sortBy: 'date'        }    }))    .use(markdown())    .use(permalinks({        pattern: ':collections/:title'    }))    .use(templates({        engine: 'handlebars',        partials: {            header: 'partials/header',            footer: 'partials/footer'        }    }))    .destination('./build')    .build(function (err) { if(err) console.log(err) })
The pattern for the pages is defined as all markdown files in the pages folder, while the same holds true for the articles collection which is made up of all the markdown files in its corresponding articles folder. Furthermore the articles are sorted by date in reverse.
The collection() method creates internal arrays of the files, which can be accessed in templates using collections.collection-name or when setting up the permalinks as seen in the last line.
The permalinks must be set AFTER the markdown plugin to work properly!
We set the pattern to use the collection and the title, so that the about.html file instead becomes pages/about/index.html, which is considered better SEO. The way we’ve set it up right now, this procedure of creating a folder for each file, with an index.html file, encompasses all the files we had in the pages folder, but also all the files we had in the articles folder.
If there are any pages within these folders which we don’t want to use this changed link format with, we can simply add this line to the YAML front-matter and the plugin will disregard them:
---permalink: false---We’ll go ahead and add this YAML line to each of our articles.
14. Creating Content
To see the difference between our two collections, the pages and the articles, we also need to create the article template, so go ahead and create the article.hbt file in the templates directory.
The article.hbt template file:
{% raw %}{{> header}}{% endraw %}
<h2>{% raw %}{{title}}{% endraw %}</h2>
<article>    {% raw %}{{{contents}}{% endraw %}}</article>
{% raw %}{{> footer}}{% endraw %}
Next, we need to create at least one article, but preferably a few more than that, to illustrate how the files are sorted. Each of the articles should have the following YAML frontmatter:
---title: "Title of the Article"date: YYYY-MM-DDtemplate: article.hbtpermalink: false---It’s pretty self explanatory, as we’ve defined ourselves what YAML frontmatter makes sense through our implementation of Metalsmith. It’s pretty much the same as the YAML we put with our about page, except for the added date and the permalink setting to false.
15. Create Articles Content Page
We also need a page which can show our articles sorted by date in reverse. We’ll create a blog.md file in the src/content/pages folder and put a bit of YAML in it:
---title: Blogtemplate: blog.hbt---For our blog template, we create a blog.hbt file in the templates folder and put the following content in it:
{% raw %}{{> header}}{% endraw %}
<h2>{% raw %}{{title}}{% endraw %}</h2>
<article>    <ul>        {% raw %}{{#each collections.articles}}{% endraw %}            <li>                <h3>{% raw %}{{this.title}}{% endraw %}</h3>                <article>{% raw %}{{this.contents}}{% endraw %}</article>            </li>        {% raw %}{{/each}}{% endraw %}    </ul></article>
{% raw %}{{> footer}}{% endraw %}
Remember the collections we made, aptly named pages and articles?
Well, as mentioned it’s easy to access these in the template and we’re doing this with the {% raw %}{{#each collections.articles}}{% endraw %} line in the template above. The subsequent calls to this.title and this.contents are easy to comprehend and will print out the title and content for each of the files in the articles collection.
16. Build It
If you made it this far, you should already have an idea of how Metalsmith works internally and where to start if you want to use Metalsmith with continuous deployment on Netlify, with GitHub serving the files.
Run the node build command again and see if the files generate properly. If they do and you’re happy with your tree (npm ls), it’s time to check out GitHub.
Setup your GitHub Repository
Let’s set up a GitHub repository and push our Metalsmith site and generator to a repo of our own.
1. Create your Git Repo
We start by creating a GitHub repository for our metalsmith page and generator.
We’re naming ours metalsmith-demo and we’ll skip adding files to the repository until after its creation, as this can sometimes create problems (The README, license and gitignore files).
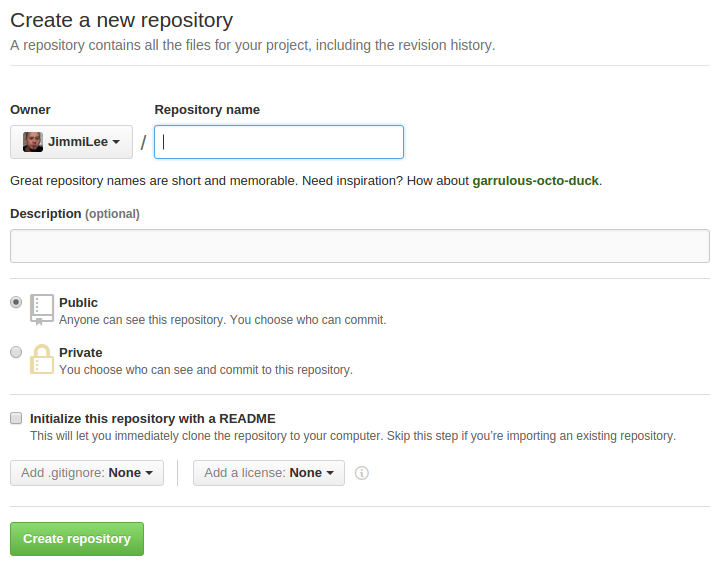
Once the repository has been named and created we need to setup our local environment with GitHub.
2. Initialize, Add & Commit
We’ll initialize the local directory as a git repository with the following command:
git initNext we need to add the files from our local directory to this Git repository and stage them for their first commit with the following line in Terminal:
git add .Finally we’ll commit the files we just staged in our local repository by entering the following line in Terminal:
git commit -m 'First commit'3. Get & Add Remote URL

It’s now time to return to the GitHub repository created above and retrieve the URL for the remote repository, since this is where our local repository will be pushed. Either copy paste the whole command or use the button as depicted above, to copy just the path to your clipboard. Return to the Terminal window/Command prompt and paste the remote repository URL inside the following line (instead of My-Repository-URL):
git remote add origin My-Repository-URLOptional: To check that it’s set up correctly, you can use the following command:
git remote -v4. Push to GitHub.
The final task before we’re done setting up, is to use the push command with git, as in the following line in Terminal:
git push -u origin masterAll your files will be copied to your online repository. Once it’s done, take a look at the repository online to check if everything looks correct.
It’s time to connect it with Netlify.
Connecting to netlify
Creating a new site on Netlify is super easy and once you’ve created an account and logged in, you’ll be taken to https://app.netlify.com/sites.
Step 1: Add Your New Site
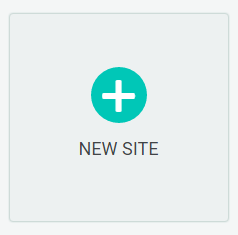 Click the “New Site” button (as seen above) to get started.
Step 2: Link to Your GitHub
Clicking “New Site” brings you to this screen: 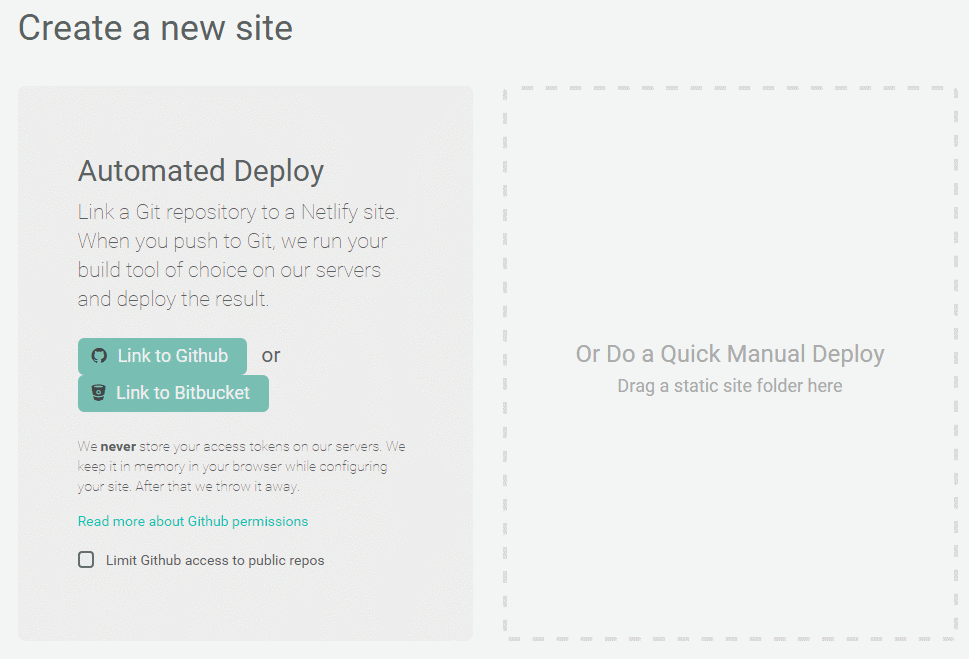 When you push to GitHub, Netlify does all the work. No more wasting time on manual deploying of updates or changes!
Since we’re hosting the site assets on GitHub, we’ll need to link Netlify to GitHub. Click the button “Link to GitHub”.
Step 3: Authorize Netlify
You can skip this step, if you already have an account with Netlify set up to automatically login!
You will be asked to provide your GitHub login details: 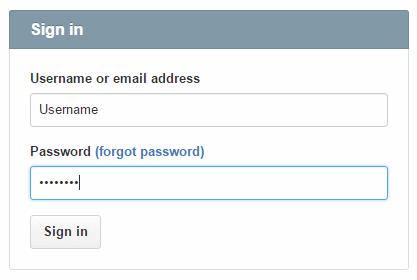
We need to let Netlify and GitHub talk to each other, so review the permissions and then click authorize application. 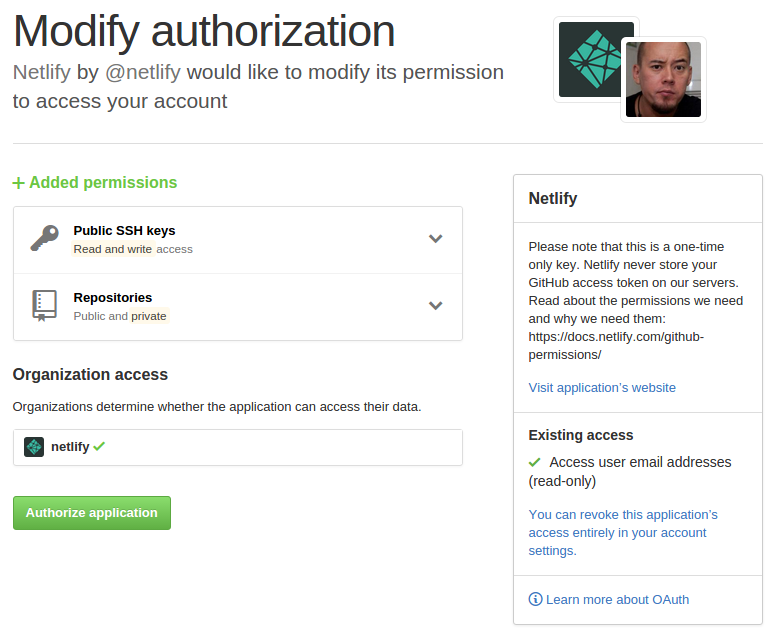
Like it says in the image above on the right, Netlify doesn’t store your GitHub access token on our servers!
If you’d like to know more about the permissions Netlify requests and why we need them, you can check out our documentation on GitHub Permissions.
Step 4: Choose Your Repo
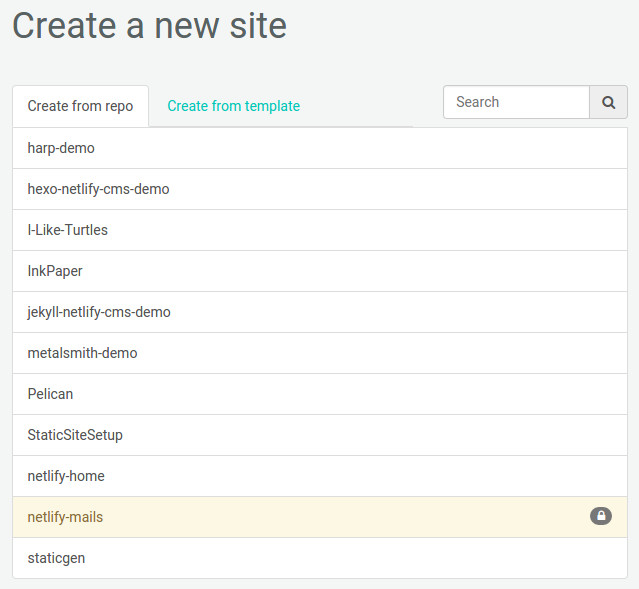 Once you’re connected to GitHub, Netlify will show you a list of your GitHub repositories, as seen above. For the purpose of this tutorial we’ll select the “metalsmith-demo” repo we just pushed to GitHub.
Step 5: Configure Your Settings
Fill in the configuration settings as seen in the screen shot below: 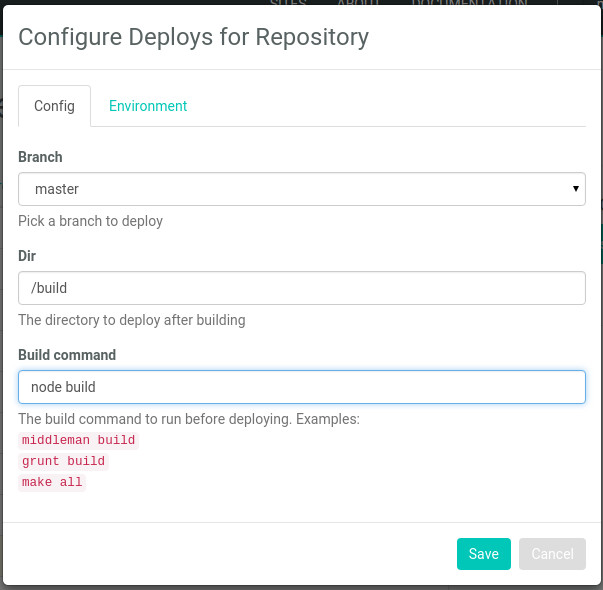
Click the ‘Save’ button and watch the magic unfold.
Step 6: Build Your Site
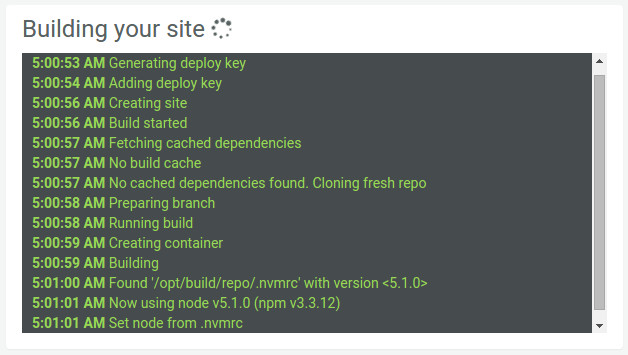 Once you click save, Netlify will step in and take over, though it will let you know what’s happening along the way. This may take a few minutes, so take a break and Netlify will do the rest, while you watch the progress.
Step 7: The End
That’s it.
Once Netlify has build your site, it will assign a random name to it and you’ll be presented with the site and the control panel for the site, ready for additional customizing. 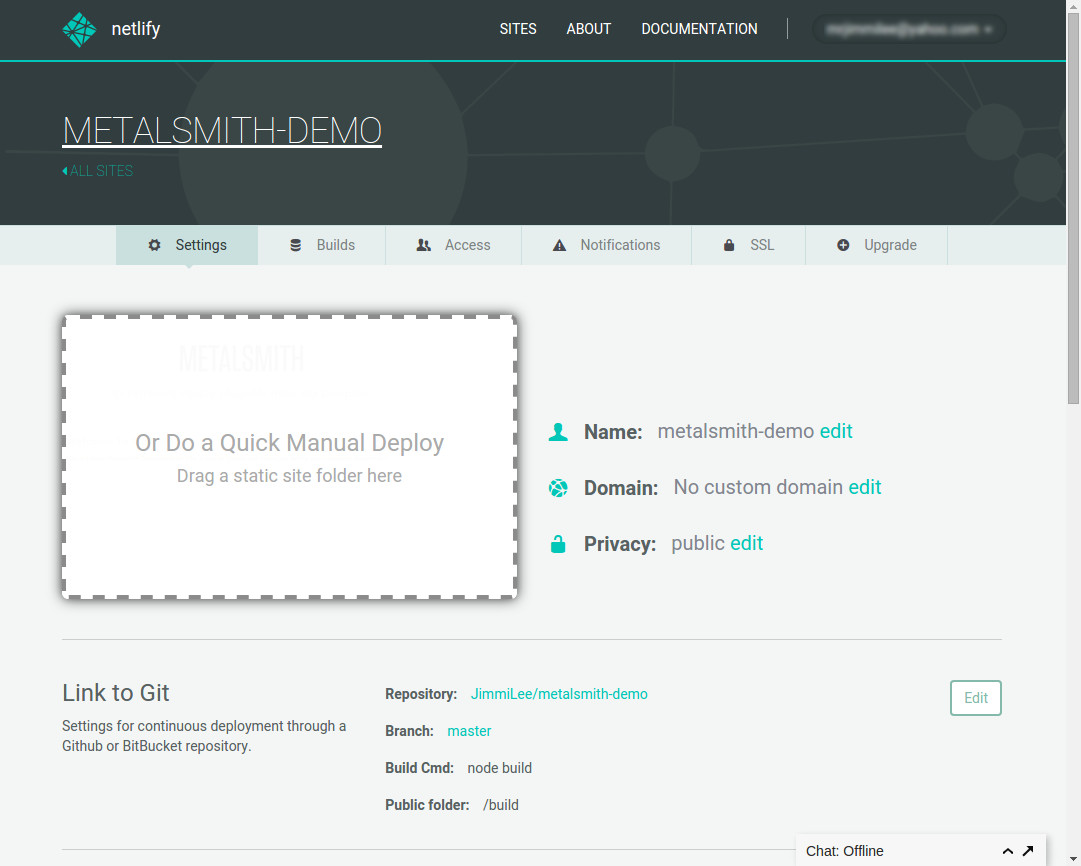
You can change the site to be private and password protected, which is great for work in progress. You can also assign a custom domain name and it’s easy to change settings for your site in general and gives you a good quick overview.


