Up until recently I had never even heard of Nanoc.
I stumbled upon this gem of gems (pun intended), while searching for a well documented static site generator with on-going support and a live community.
Nanoc has both in abundance and after checking out their up-to-date and aesthetically pleasing documentation, I quickly grew to like this extremely easy to use static site generator.
In this little guide, we will set up Nanoc and check out its site generation abilities and once we’re up and running locally, we will push the project to GitHub and deploy on Netlify with continuous deployment.
If you already have a Nanoc repository forked on GitHub and you just wish to connect with Netlify, you can skip the majority of this guide and scroll down here instead.
On the other hand, if you have Nanoc running locally, but need some guidance getting it pushed to GitHub, before you deploy to Netlify, start here instead.
Finally, if you want to try check out our small Nanoc tutorial before linking up with GitHub and Netlify, simply continue this guide.
Please note that this guide assumes you have Ruby 2.1 and up, RubyGems and Bundler installed !!
For information about installing and handling Ruby with Bundler please see this documentation.
Set up Nanoc
Instead of installing Nanoc gem by gem, we’ll set up the site with Bundler and a gemfile from the beginning, to specify what gems we want to install, all in one file.
1. Install Nanoc and create site
The first thing we’ll do is install the Nanoc gem with the following command in a terminal window:
gem install nanocNext, cd to the location where you want the site locally (cd my-site-location) and run the following command, to create a basic Nanoc site we can work with:
nanoc create-site my-site-nameSimply substitute my-site-name with the name of your site. We used the name nanoc-demo for our demonstration.
2. Set up gemfile
Before you compile the site or do anything, make sure you have Bundler installed! Using the command bundler -v will let you know what version (if any) is installed.
Let Bundler initialize the site with the following command in terminal, from the root of your Nanoc site folder (cd my-nanoc-site):
bundle initThis will create a gemfile, in which we let Bundler know which gems and what versions of these gems we wish to install with our Nanoc site.
To install the Nanoc gem as well, we need to add it to our gemfile, so open the gemfile found in the root of your Nanoc site and add the following lines:
gem 'nanoc', '~> 4.0'gem 'kramdown'gem 'adsf'This will ensure that nanoc version 4.0 is installed along with kramdown and finally adsf, which we need to view our site live (it’s basically to enable the bundle exec nanoc view command).
Once you’ve saved the gemfile, we need to run one more command to install the gems in the gemfile:
bundle install3. Compile the Site
It’s quite possible to compile without Bundler, using e.g. the nanoc compile (or even the short hand notation, simply nanoc) and the site will be build. However, it is recommended that one uses Bundler and that is exactly what we intend to do, following up on the last step.
From terminal and once again from your site root, use this command:
bundle exec nanocIt will build the site, bar any errors and let you know how quick it all went down.
If you want to see how pretty it is, run this command:
bundle exec nanoc viewThis will open the site up for view in your local browser here.
Optional: check if Nanoc is installed properly and the version by using the --version flag like this:
nanoc --version4. Check the nanoc.yaml file
The nanoc.yaml file is a good place to see how powerful the Nanoc static site generator is. It’s well documented with comments and full of various settings and other goodies. I recommend reading it through, though we won’t change anything in it for this particular guide (the default settings will suffice).
5. Edit Rules file
For our kramdown gem to work properly, we need to let Nanoc know we changed the default language from HTML to markdown. To do this we need to open the Rules file found in the root of your Nanoc site and then we need to edit the compilation rules found herein, to take markdown files.
Did that sound complicated? Don’t worry, because it really isn’t!
Editing compile and route rules in a Rules file is actually quite easy, but on top of this, the people behind Nanoc have anticipated our switch from HTML to Markdown and thus in our Rules file we find that the compile rule for Markdown using the kramdown filter, has already been written, it’s just commented out.
Normally we would also need to set up a route rule for the .md or markdown files, but again the fortune tellers behind Nanoc have anticipated our move and the markdown files are already added to one of the existing route rules.
The edited Rules file we ended up with, after the comments have been taken out:
#!/usr/bin/env ruby
compile '/**/*.html' do  layout '/default.*'end
compile '/**/*.md' do  filter :kramdown  layout '/default.*'end
route '/**/*.{html,md}' do  if item.identifier =~ '/index.*'    '/index.html'  else    item.identifier.without_ext + '/index.html'  endend
compile '/**/*' do  write item.identifier.to_send
layout '/**/*', :erb
If you’re using kramdown like us, simply use the above in your Rules file and if you’re using HTML, there’s nothing to edit (as that’s the default). However, if you choose a third option, check out Nanoc’s documentation on rules here.
6. Under the Hood
Let’s take a look at what’s under the hood of this Nanoc site. First take a look at the folder structure, as depicted in the illustration below, the files and directories created are as follows:
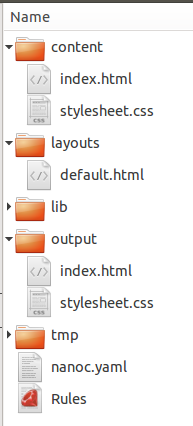
In the file and folder tree above, there are some distinct folders and to create content and customize the layout, it’s important to know what goes where and why!
In Nanoc we use the term layouts instead of templates and these all go in the layouts folder.
The content we’re creating goes in the content folder and here you’ll find the landing page and a stylesheet, ready for editing.
Then there’s the lib folder, which contains custom Ruby code and the output folder to which the static site will be written.
Of the files, its worth noting that nanoc.yaml contains site-wide configuration details and that the Rules file is used by Ruby to describe how pages and assets will be processed.
7. Edit Landing Page
To distinguish our new basic Nanoc site, we’ll start by editing the two files it comes with as default. We take the index.html file and change its extension to reflect that we’re using markdown instead of HTML and it becomes index.md. In the content I remove any HTML tags and instead I insert some sample markdown text content and change its title. Take note that this file only contains the content of the page and none of the layout.
I’ll fill the index.md file in as seen below and I suggest you do something similar. The title in the YAML front matter is important, but the text outside the YAML front matter you can fill in as you want to.
Here’s what we came up with:
---title: Nanoc Demo Site---
# Nanoc on NetlifyThis page is mainly created to demonstrate a basic Nanoc site, with assets hosted on GitHub using Netlify to deploy in continuous deployment.
We'll run some font and layout tests...
**This font is Bold.**
*This font is Italic.*
***This font is Bold and Italic.***
## Headline Title TwoI wonder if the title above will render in the proper size and font.
## Headline Title ThreeI wonder if the title above will render in the proper size and font.
### Headline Title FourI wonder if the title above will render in the proper size and font.
As you can see we’re simply adding sample text to check the format and layouts of the site, as the next stop is — you guessed it — we’ll fiddle with the layout.
8. Edit Layout
We’ll follow the advice left for us in the original landing page and change the layout.
The default.html file in the layouts folder is where you can set up the layout of your page, using HTML and eRuby instructions. Nanoc has build in support for Haml and Mustache as well and it’s possible to add support for other layout engines rather easily using filters (as we did with markdown in the Rules file earlier).
<!DOCTYPE HTML><html lang="en">  <head>    <meta charset="utf-8">    <title>A Brand New Nanoc Site - <%= @item[:title] %></title>    <link rel="stylesheet" href="/stylesheet.css">
    <!-- you don't need to keep this, but it's cool for stats! -->    <meta name="generator" content="Nanoc <%= Nanoc::VERSION %>">  </head>  <body>    <div id="main">      <%= yield %>    </div>    <div id="sidebar">      <h2>netlify</h2>      <ul>        <li><a href="https://www.netlify.com/">Home</a></li>        <li><a href="https://www.netlify.com/documentation/">Documentation</a></li>        <li><a href="https://www.netlify.com/Blog/">Blog</a></li>      </ul>      <h2>Nanoc</h2>      <ul>        <li><a href="http://nanoc.ws//">Home</a></li>        <li><a href="http://nanoc.ws/doc/">Documentation</a></li>        <li><a href="http://nanoc.ws/community/">Community</a></li>      </ul>      <h2>GitHub</h2>      <ul>        <li><a href="https://github.com/">Home</a></li>        <li><a href="https://help.github.com/">Help</a></li>      </ul>    </div>  </body></html>
You can either leave the default.html alone and check out the basic site (which comes with additional links and documentation) or you try something out yourselves or use our slightly modified default.html content as seen above.
We’ve just changed the sidebar links to link to Netlify, Nanoc and GitHub, but feel free yo try out some eRuby or one of the other layout languages.
If you want more information about layouts in Nanoc, head over to Nanoc’s excellent documentation on layouts and partials here.
9. Final Build
To test that our changes were made properly, we’ll do a final build and a view, before setting up GitHub.
To compile and then view the site, we’ll use these two commands in terminal:
bundle exec nanocbundle exec nanoc viewThe commands will build your site and offer it up for view at http://localhost:3000/.
Take a look and see if the changes worked as expected.
As is obvious, Nanoc is lightning fast and incredibly easy to get up and running with some basic content, as it comes with a file structure with some rudimentary content pre-installed.
We’re ready to set up the local site with an online GitHub repository.
Set up your GitHub Repository
We’ll set up a GitHub repository to hold our assets, before we connect and deploy on Netlify.
1. Create your Git Repo
Start by opening up GitHub and create a new repository for your Nanoc site.
We’re naming our site nanoc-demo and we’ll skip adding files to the repository until after its creation, as this can sometimes create problems (The README, license and gitignore files).
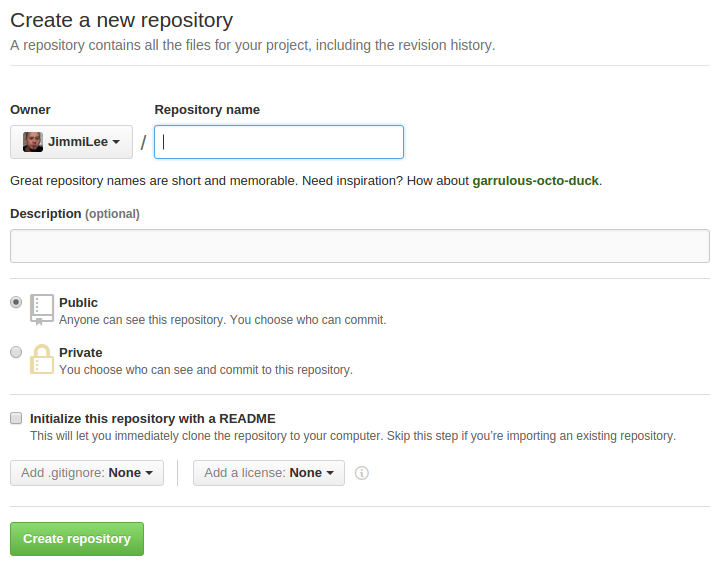
As you’ll see once you create the repository, GitHub provides very good documentation on what to do next.
2. Create .gitignore file
In the root of your Nanoc site, create a .gitignore file and fill it in with the text below:
# Default location for output defined in config.yamloutput/# Temporary file directorytmp/# Crash Logcrash.logBasically there’s no need for us to push the output content online and the same goes for the temporary file directory and the crash.log file. Adding them to the .gitignore file makes Git ignore them and leave them behind on your local machine.
3. Initialize, Add & Commit
We’ll initialize the local directory as a git repository with the following command: Before we push (copy the files to our new online repository) the files online, we need to prep our local site and you need to have Git installed for this.
Double check to make sure you are in the root of the Nanoc site (cd my-site-folder), then use the following commands
This command initializes your project as a git repository
git initThis adds all the files in the directory to the repository:
git add .Finally, this command commits all the files to GitHub:
git commit -m 'First commit'4. Get & Add Remote URL
To let our local Git repository know where to push these files to, we need to give it the remote URL of our remote repository on GitHub. This URL can be found under the settings and you need to use it with the following command in terminal (substitute My-Repository-URL with your actual URL):
git remote add origin My-Repository-URLOptional: To check which online repository you’re working with, you can use the following command:
git remote -v5. Push to GitHub.
To do the actual moving after staging and committing, we’ll need the push command. From the root of your Nanoc site enter it like this in terminal:
git push -u origin masterAll your files will be copied by Git to your online repository. Once it’s finished, take a look at the repository online to check if everything went according to plan.
Now we’re ready to connect your repository to Netlify.
Connecting to Netlify
We want to connect our GitHub repository with Netlify, so that Netlify can build the site, whenever we push changes to our online repository — this is what’s meant with continuous deployment — as soon as you’ve pushed changes to GitHub, Netlify will rebuild your site, to reflect these changes.
If you haven’t got a Netlify account already, head over and make one — it’s completely free of charge.
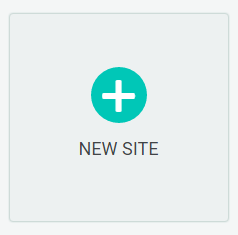
Step 1: Add Your New Site
Click the “New Site” button to get started.
Step 2: Link to Your GitHub
Next you’ll be brought to this screen, where you can choose between manual deploy or linking to GitHub or Bitbucket - we’ll link with GitHub for this demonstration: 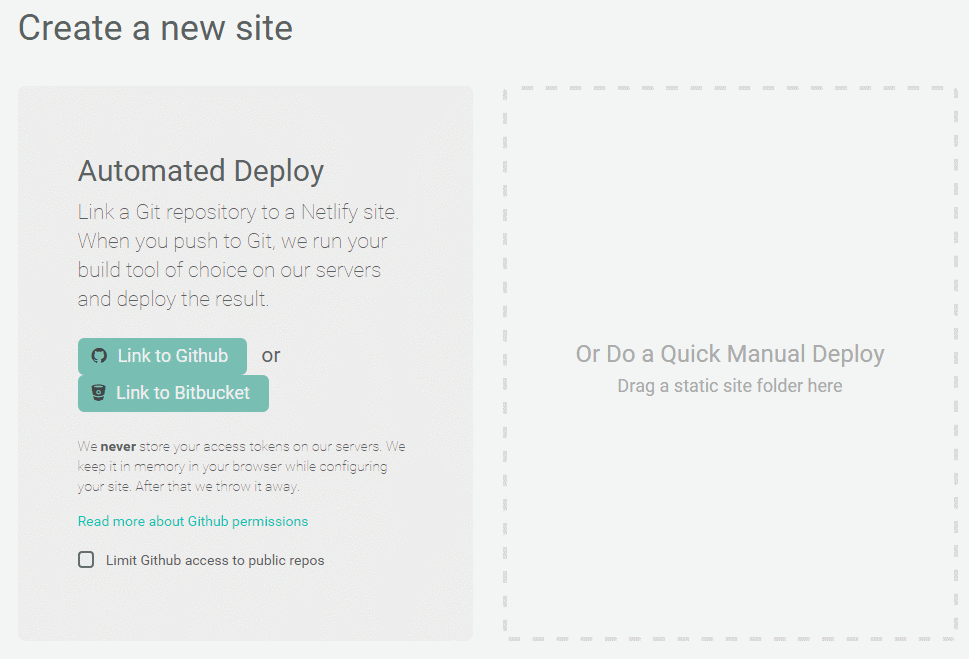 When you push to GitHub, Netlify does all the work. No more wasting time on manual deploying of updates or changes!
To link Netlify with GitHub click the button “Link to GitHub”.
Step 3: Authorize Netlify
You can skip this step or rather it will be skipped automatically, if you already have an account with Netlify set up to automatically login!
If not, you’ll be asked to provide your GitHub login details: 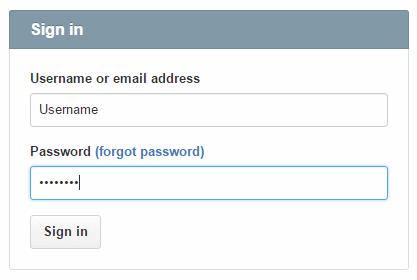
We need to let Netlify and GitHub talk to each other, so review the permissions and then click authorize application. 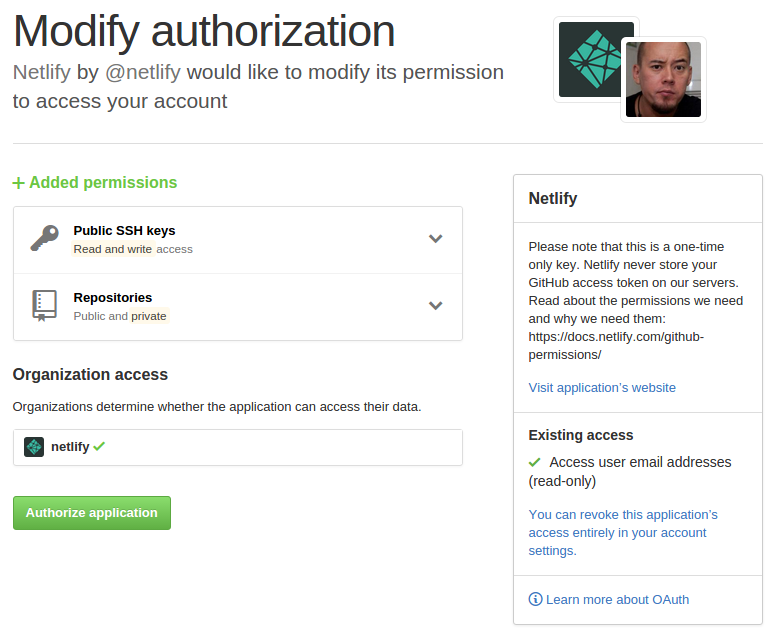
Like stated in the image above on the right, Netlify doesn’t store your GitHub access token on our servers!
If you’d like to know more about the permissions Netlify requests and why, you can check out our documentation on GitHub Permissions.
Step 4: Choose Your Repo
Once you’ve connected Netlify with GitHub, you will be shown a list of your GitHub repositories, as seen below.
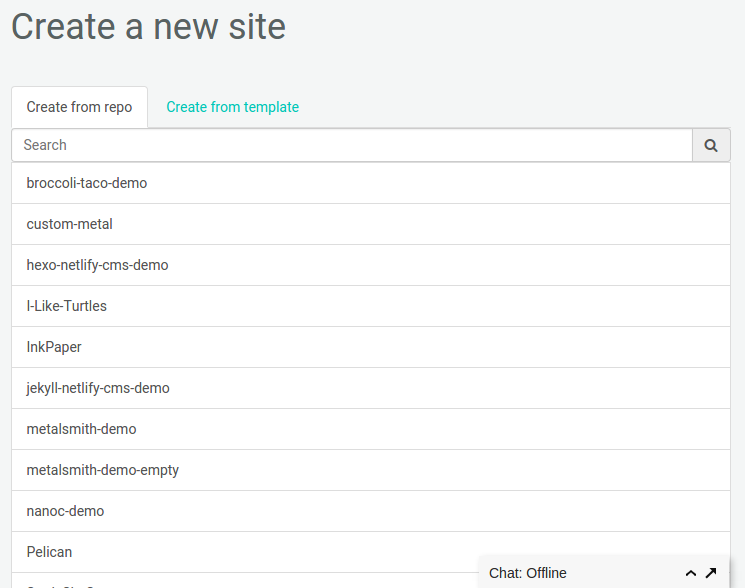
For the purpose of this tutorial we’ll select the “nanoc-demo” repo we just pushed to GitHub.
Step 5: Configure Your Settings
Verify the configuration settings as seen in the screen shot below:
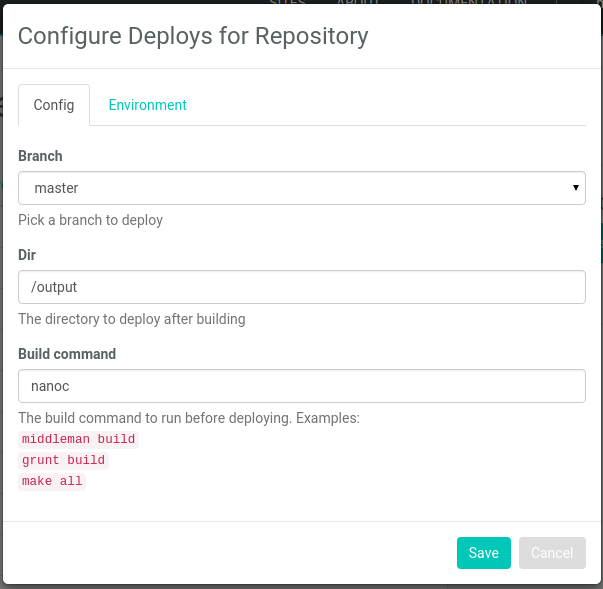
You shouldn’t have to do anything, Netlify has actually done it for you. Click the ‘Save’ button and watch the magic unfold.
Step 6: Build Your Site
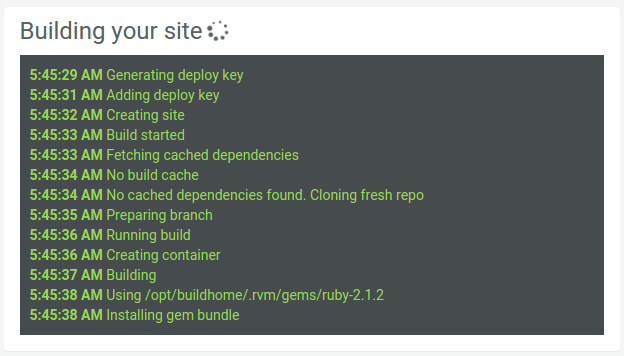 The first time, assuming you haven’t added copious amounts of content, Netlify will build your Nanoc site very quickly. A console will let you know what’s happening along the way. If you don’t want to wait, simply do something else and you can always return and check the log file later, since Netlify will keep the log of each build.
Step 7: The End
That’s all there is to it.
Once Netlify has build your site, it will assign a random name to it and you’ll be presented with the site and the control panel for the site, ready for additional customizing. 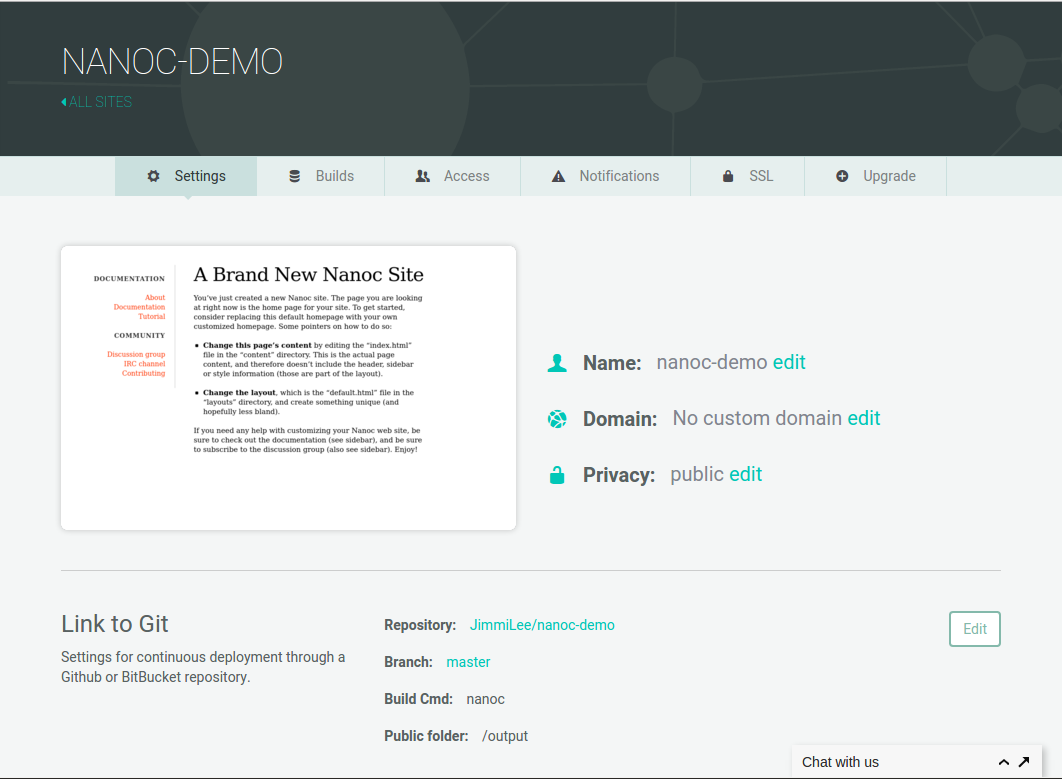
You can change the site to be private and password protected, which is great for work in progress. You can also assign a custom domain name and it’s easy to change settings for your site in general and gives you a good quick overview.
You can see our demo site here and the GitHub repository for our demo site here.


