This guide was most recently updated on Oct 17th 2017. Below are the package versions used:
Python 2.7 Lektor 2.3
Screenshots may be outdated.
Today, we’re going to look at how to host a website built with Lektor on Netlify, including setting up continuous deployment.
The interesting thing about Lektor is that it comes with a built-in GUI CMS and a Mac app. This makes content creation less daunting for newer users.
Let’s start from scratch. If you already have a Lektor site set up, you can skip straight to the Preparing for deployment or Connecting to Netlify sections.
Installing Lektor
This guide assumes you have Python installed.
Lektor allows for an easy install, either with a Mac app or through the command line.
If you are running the Lektor app, after installation, launch the app. In the Mac menu bar, click Lektor, then Install Shell Command.
If you prefer the command line, Linux and Mac users can install Lektor via this shell script:
$ curl -sf https://www.getlektor.com/install.sh | shIf you are on Windows, install Lektor with this command line entry:
@powershell -NoProfile -ExecutionPolicy Bypass -Command "iex ((new-object net.webclient).DownloadString('https://getlektor.com/install.ps1'))" && SET PATH=%PATH%;%LocalAppData%\lektor-cliNow that you have Lektor installed, let’s put it to use.
Building Your Site
Lektor can build a skeleton for your site, which will set up directories within the lektor directory to hold your content, html that Lektor builds for you, and all of your necessary configuration files. Let’s do that now. In your command prompt enter:
$ lektor quickstart(If you are using the Mac app, you’ll still need to do the quickstart in the command prompt)
Lektor will ask you a few questions to get your project started. For the purposes of this tutorial, name your project Netlify-Lektor. If you see something in square brackets after the question, that’s the default setting. You can change the settings to meet your needs.
After you’ve created your project, you’ll want to change to the directory where the project lives:
$ cd Netlify-LektorNow that that is all out of the way, let’s play around with the site. Lektor has a built-in server that allows you to see your work as you tweak things to your liking.
$ lektor serverThis launches an instance of your project at localhost:5000. Go ahead and open it up.
Click the pencil in the upper right hand to launch the admin panel. In the left hand column, you will see the actions you can use to edit the page, as well as sub pages that you can navigate to (and then edit as well).
To see some of the things you can do with Lektor (including changing text input fields), the Lektor team has created a basic video walkthrough to get you started.
Preparing for Deployment
If you are satisfied with your site, it’s time to get it ready to deploy. First, let’s make sure that Lektor and GitHub will play nicely together.
Lektor generates your website to a system directory, which won’t play nice with Netlify. We’ll want Lektor to generate the site in a directory we’ve specified called build when it runs on Netlify, so we’ll create a .gitignore file in the root directory and add build to it:
$ echo "/build" >> .gitignoreNext up you probably want to ensure that our versions of Python and Lektor match yours! To choose a python version, create a /runtime.txt file with the python version closest to the one you use locally. Versions available are listed here.
Finally, you’ll want to tell us what dependencies you have — our build environment is rather bare but we’ll automatically install everything listed in /requirements.txt — which should include at least “lektor”.
Now it’s time to push it to your repo of choice. Directions for GitHub follow here.
Creating your Git Repo
Create a new repository on GitHub. To avoid errors, do not initialize the new repository with README, license, or gitignore files. You can add these files after your project has been pushed to GitHub.
Open Terminal (for Mac users) or the command prompt (for Windows and Linux users).
For our purposes, let’s call your new repo “lektor”.
Make sure you are in your project directory (the one we named Netlify-Lektor):
$ cd ~/PATH/TO/Netlify-LektorInitialize the directory as a Git repository.
$ git initAdd the files in your new local repository. This stages them for the first commit.
$ git add .Commit the files that you’ve staged in your local repository.
$ git commit -m 'First commit'At the top of your GitHub repository’s Quick Setup page, click the clipboard icon to copy the remote repository URL.
In Terminal, add the URL for the remote repository where your local repository will be pushed.
git remote add origin Git_Repository_URLVerify your URL
git remote -vNow, it’s time to push the changes in your local repository to GitHub.
git push origin masterNow that your assets are up and running on GitHub, let’s connect them to Netlify.
Connecting to Netlify
Step 1: Add Your New Site
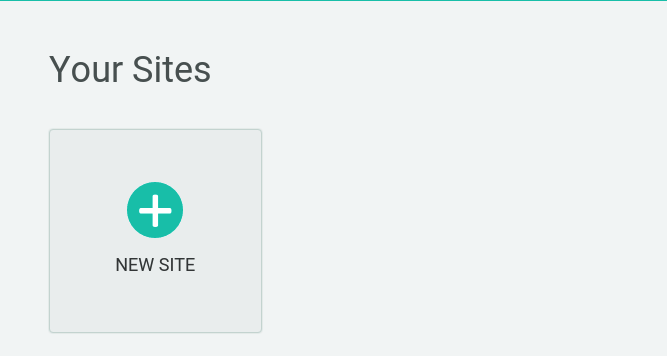
Creating a new site on Netlify is simple. Once you’ve logged in, you’ll be taken to https://app.netlify.com/sites. If you’re just starting out, there’s only one option.
Step 2: Link to Your GitHub
Clicking “New Site” brings you to this screen:
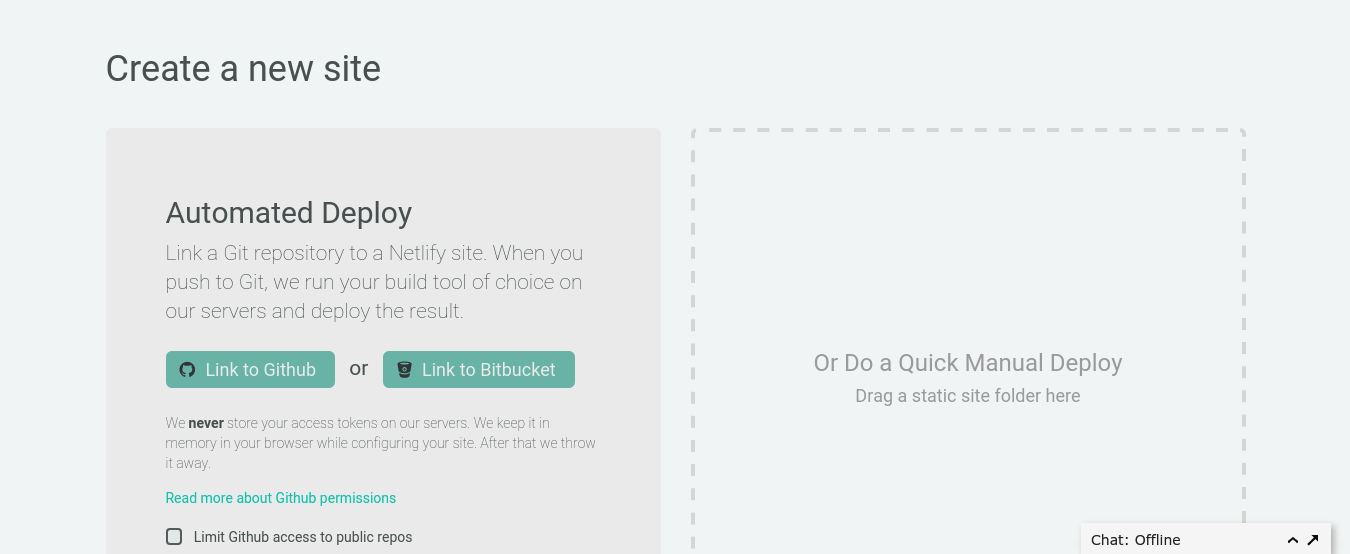
When you push to GitHub, Netlify does all the work. No more manual deploying of updates or changes!
Since your assets are hosted on GitHub, we’ll need to link Netlify to GitHub. Click “Link to GitHub”.
Step 3: Authorize Netlify
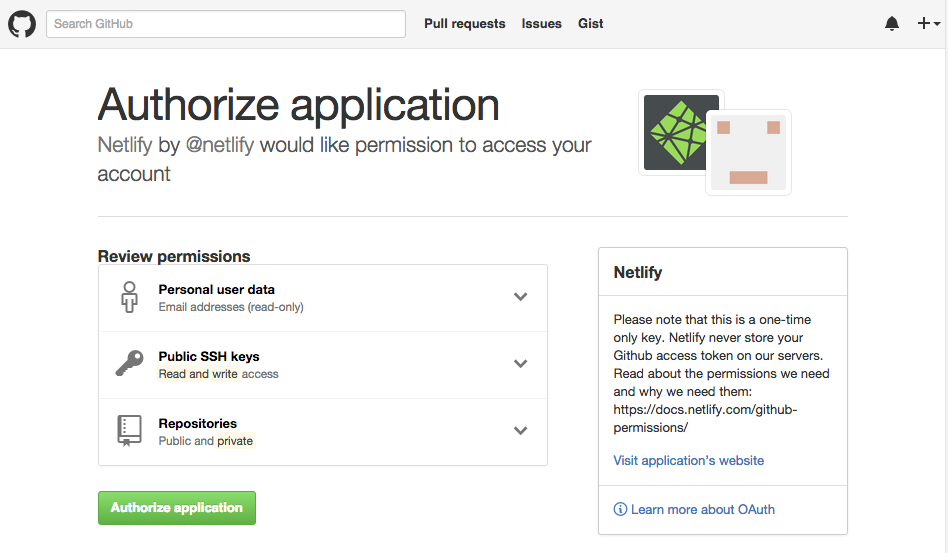
It’s time to allow Netlify and GitHub to talk to each other. Clicking the “Authorize Application” button will do just that. Like it says in the image below, Netlify doesn’t store your GitHub access token on our servers. If you’d like to know more about the permissions Netlify requests and why we need them, you can visit our documentation on Git provider permissions.
Step 4: Choose Your Repo

Now that you’ve connected Netlify and GitHub, you can see a list of your Git repos. There’s the lektor repo we just pushed to GitHub. Let’s select it.
Step 5: Configure Your Settings
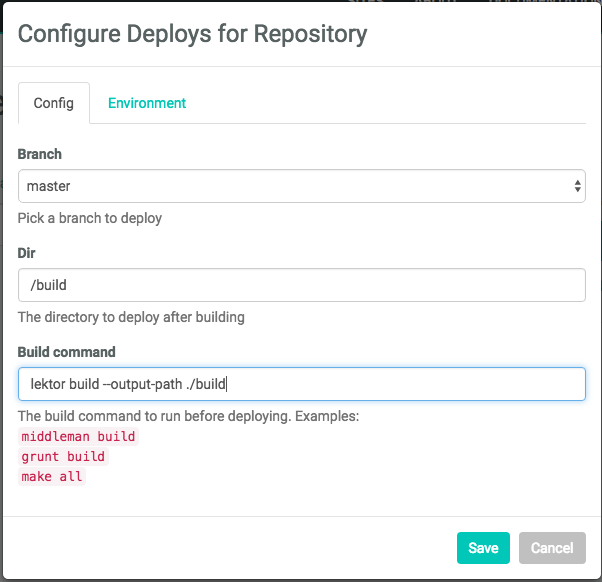
Here you can configure your options. Make sure that /build is the directory you want to deploy, and enter lektor build --output-path ./build as your build command.
Step 6: Build Your Site
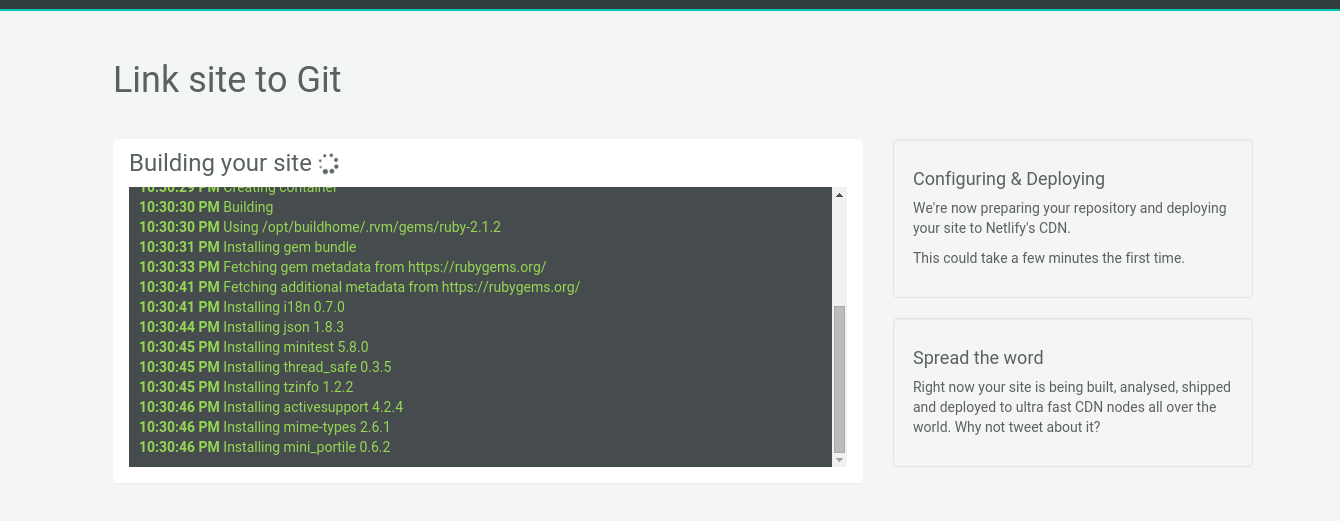
Now it’s time to sit back and relax. The first build will take some time, as Netlify gathers all the dependencies needed to build your site.
Step 7: Site Is Live
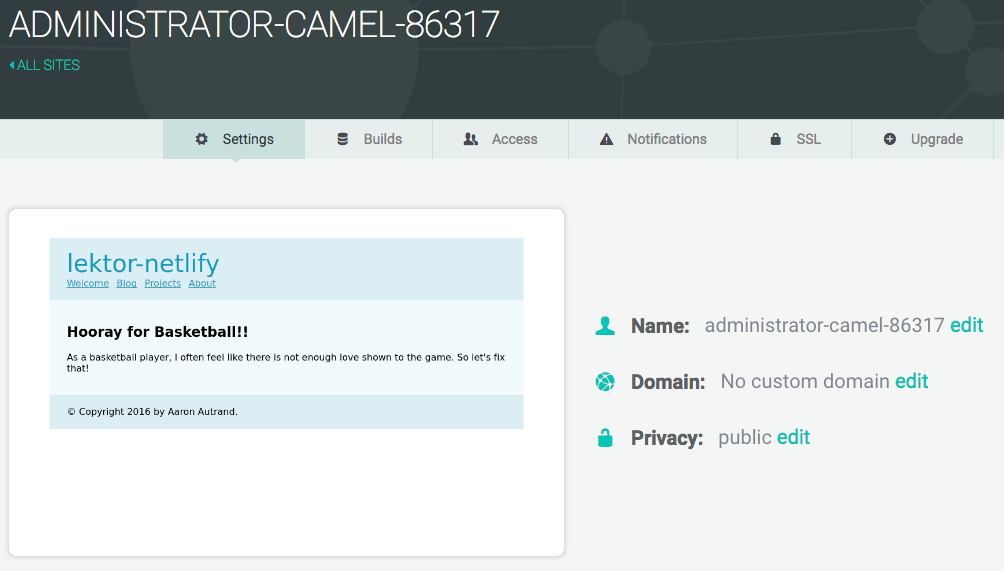
Netlify has given your site a temporary name, and it’s now up and running for all to see. Pretty great, huh?


