Do you have a static site or a single-page app that is slow or vulnerable? (Don’t know? Test your site at TestMySite.IO.) Lets fix that up with a quick and easy tutorial on how to take these JAMstack projects and host them on Netlify (where smart CDNs maintain high-octane speeds and impenetrable security for you).
In this tutorial, we will be reviewing how to set up your existing GitHub repo on Netlify for continuous deployment (that means all you have to do is push your code and Netlify will do the rest of your publishing tasks for you). If you haven’t quite discovered the amazing power of version control with GitHub you can always drag and drop your static files here (just drop your zipped files in the dashed box).
Screenshots have been updated in May 2022.
Getting started on Netlify
In this section, we will show you how easy it is to launch your site on Netlify. If you are not already a Netlify user, go ahead and sign up for free here first.
Step 1: Add Your New Site
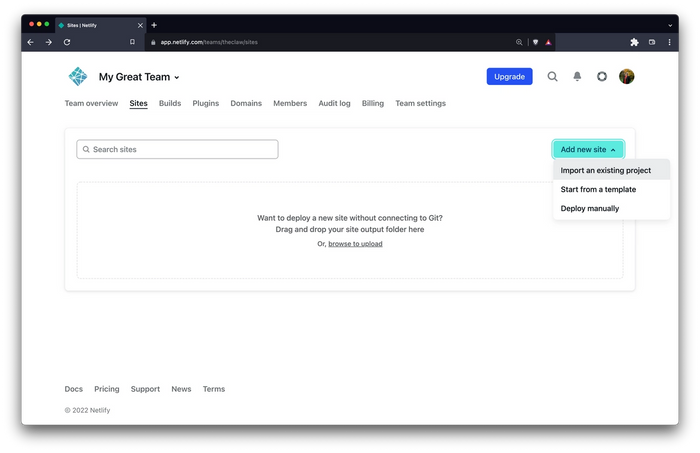
Creating a new site on Netlify is simple. Once you’ve logged in, you’ll be taken to https://app.netlify.com. If you’re just starting out, there’s only one option, Click the Add new site button shown above.
Step 2: Link to Your GitHub (or supported version-control tool of choice)
Clicking “Import an existing project” brings you to this screen:
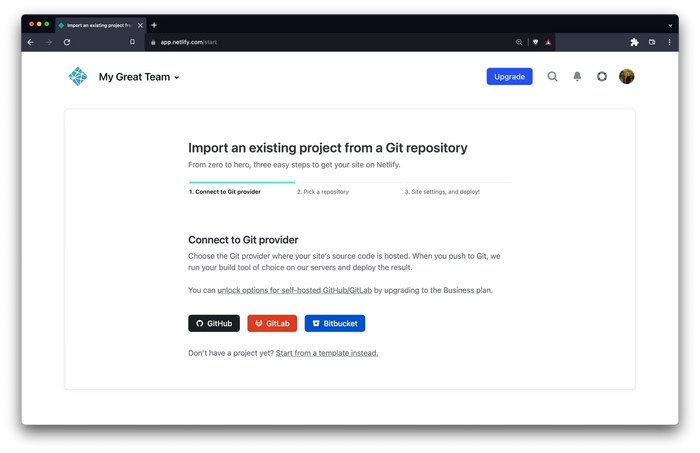
Be sure to push your repo to GitHub, so that all we’ll need to do is link Netlify to GitHub. Click the GitHub button as illustrated in the screenshot above.
Step 3: Authorize Netlify
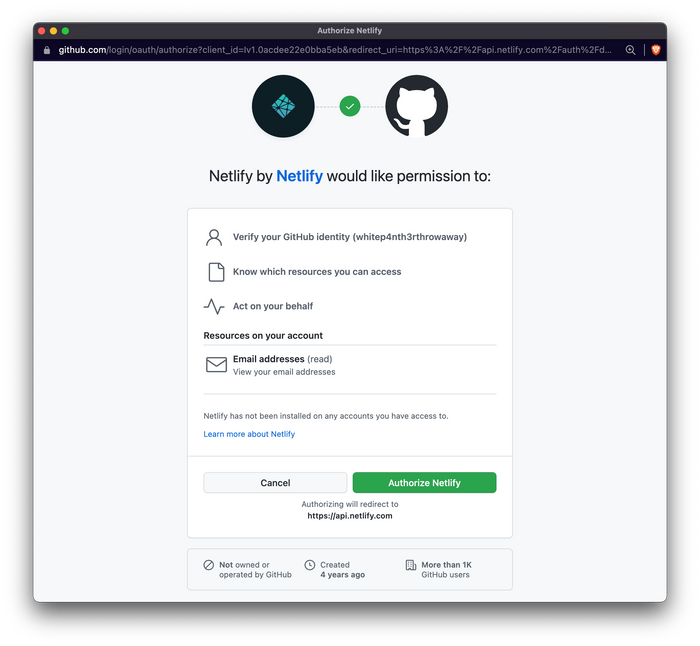
It’s time to allow Netlify and GitHub to talk to each other. Clicking the Authorize Netlify button will do just that. Like it says in the image below, Netlify doesn’t store your GitHub access token on our servers. If you’d like to know more about the permissions Netlify requests and why we need them, you can visit our documentation on Git provider permissions.
Step 4: Select Your Repo
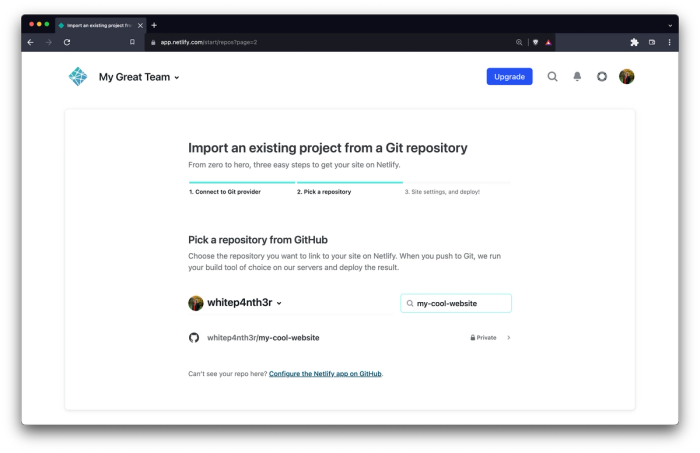
Now that you’ve connected Netlify and GitHub, you can see a list of your Git repos. Select your static site or single-page app.
Step 5: Configure Your Settings
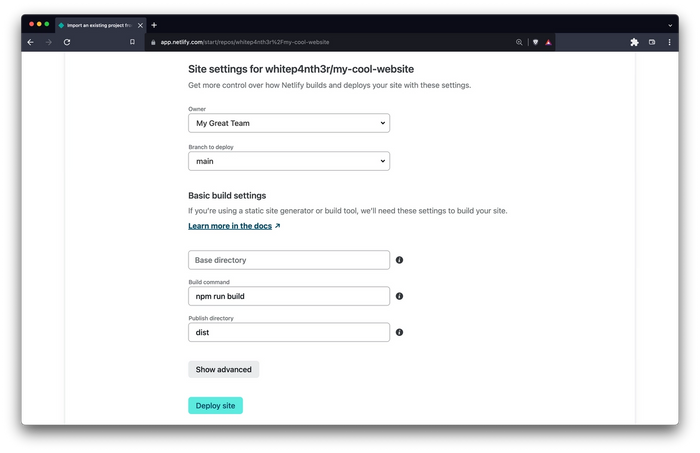
Here you can configure your options (if necessary). For example, if we were using the Victor Hugo boilerplate when building our static site, we would need to set our build directory to dist/ and our build command to npm run build. If your site is not using any preprocessors or compiling software then just set the directory to / and leave the build command blank.
When you’re satisfied with your configurations, click the Deploy site button to continue.
Step 6: Build Your Site
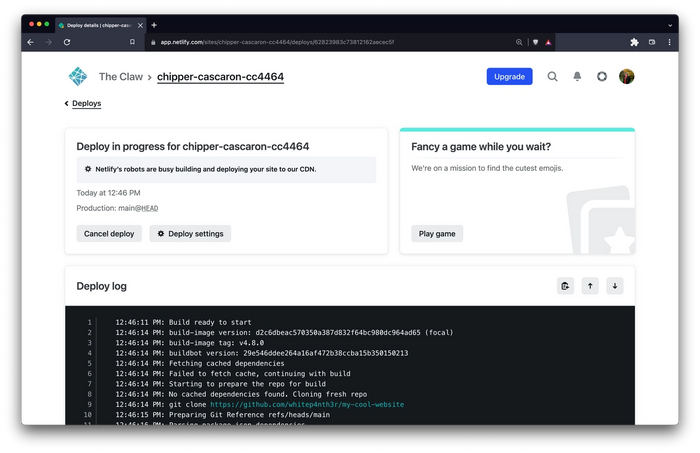
Now it’s time to sit back and relax. You did your part let Netlify take care of the rest — it’ll only take a minute.
Step 7: All Done
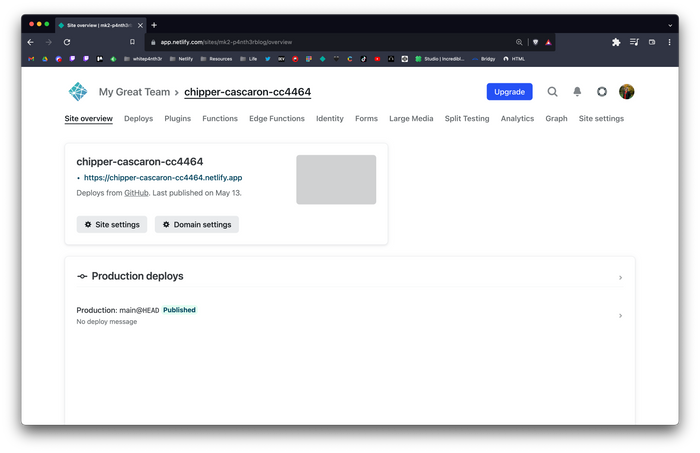
Netlify went ahead and gave your site a temporary name. Let’s quickly update that to make it look a little prettier:
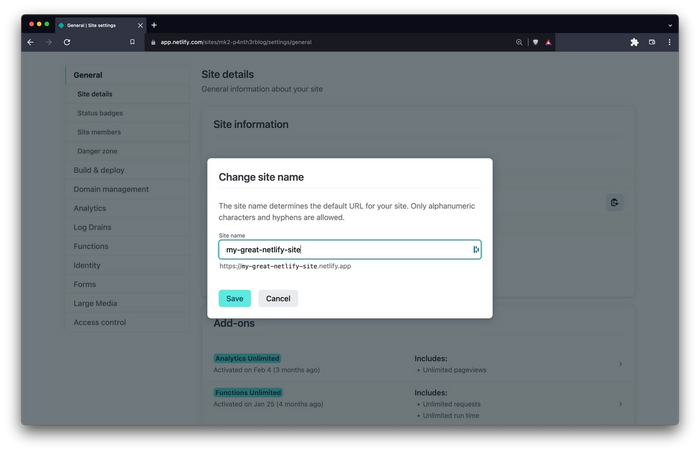
BOOM! You now have your site hosted on Netlify with blazing fast speeds, powerful CDNs, simple management, and ironclad security. Wasn’t that easy? Take it a step further and setup your custom domain (Learn how to do that here). Congratulations, and thanks for using Netlify!


