Whether you’re an enterprise business, a mid-sized startup, a solo entrepreneur, or somewhere in between, you need ways to make money if the business is going to survive. With Stripe, it’s more accessible than ever to quickly set up payment processing for websites and apps, whether it’s selling products, accepting donations, or selling recurring subscriptions. When you combine Stripe with the Jamstack, it’s possible to stand up full-featured subscription management in a fraction of the time it would take with other approaches.
In this tutorial, you’ll build a complete subscription management solution, including role-based content access.
tl;dr
If you prefer to jump straight to the code, you can!
- Try this out on the live demo
- Check out the source code on GitHub
- Watch Thor and Jason build this live on Learn With Jason
It looks like a lot, but you can do this
You’re going to cover a lot of ground in this tutorial. By the time you’re done, you will:
- Set up user authentication using Netlify Identity
- Display content based on a user’s current role, which is determined by their subscription level, with fallback content if they’re not authorized
- Store Netlify user IDs and Stripe customer IDs in a Fauna database
- Create new customers with a free subscription using Stripe
- Let users manage their subscription status using the Stripe Billing customer portal
- Use Netlify Functions to change a user’s roles in Netlify Identity based on their Stripe subscription status
NOTE: you can click any of the above items to jump to that section.
Authentication has a lot of moving parts, but — if you stick with me — by the end of this post you’ll build a production-ready subscription management workflow with secure payment handling and content access control. The app you’ll build can serve as a solid foundation for any subscription service you dream up.
Set up and deploy a new site
Set up the repo from a starter app by clicking this button:
Clicking this button will:
- Create a new GitHub repo on your account with the demo starter code (see the starter repo)
- Create and deploy a new Netlify site using your repo
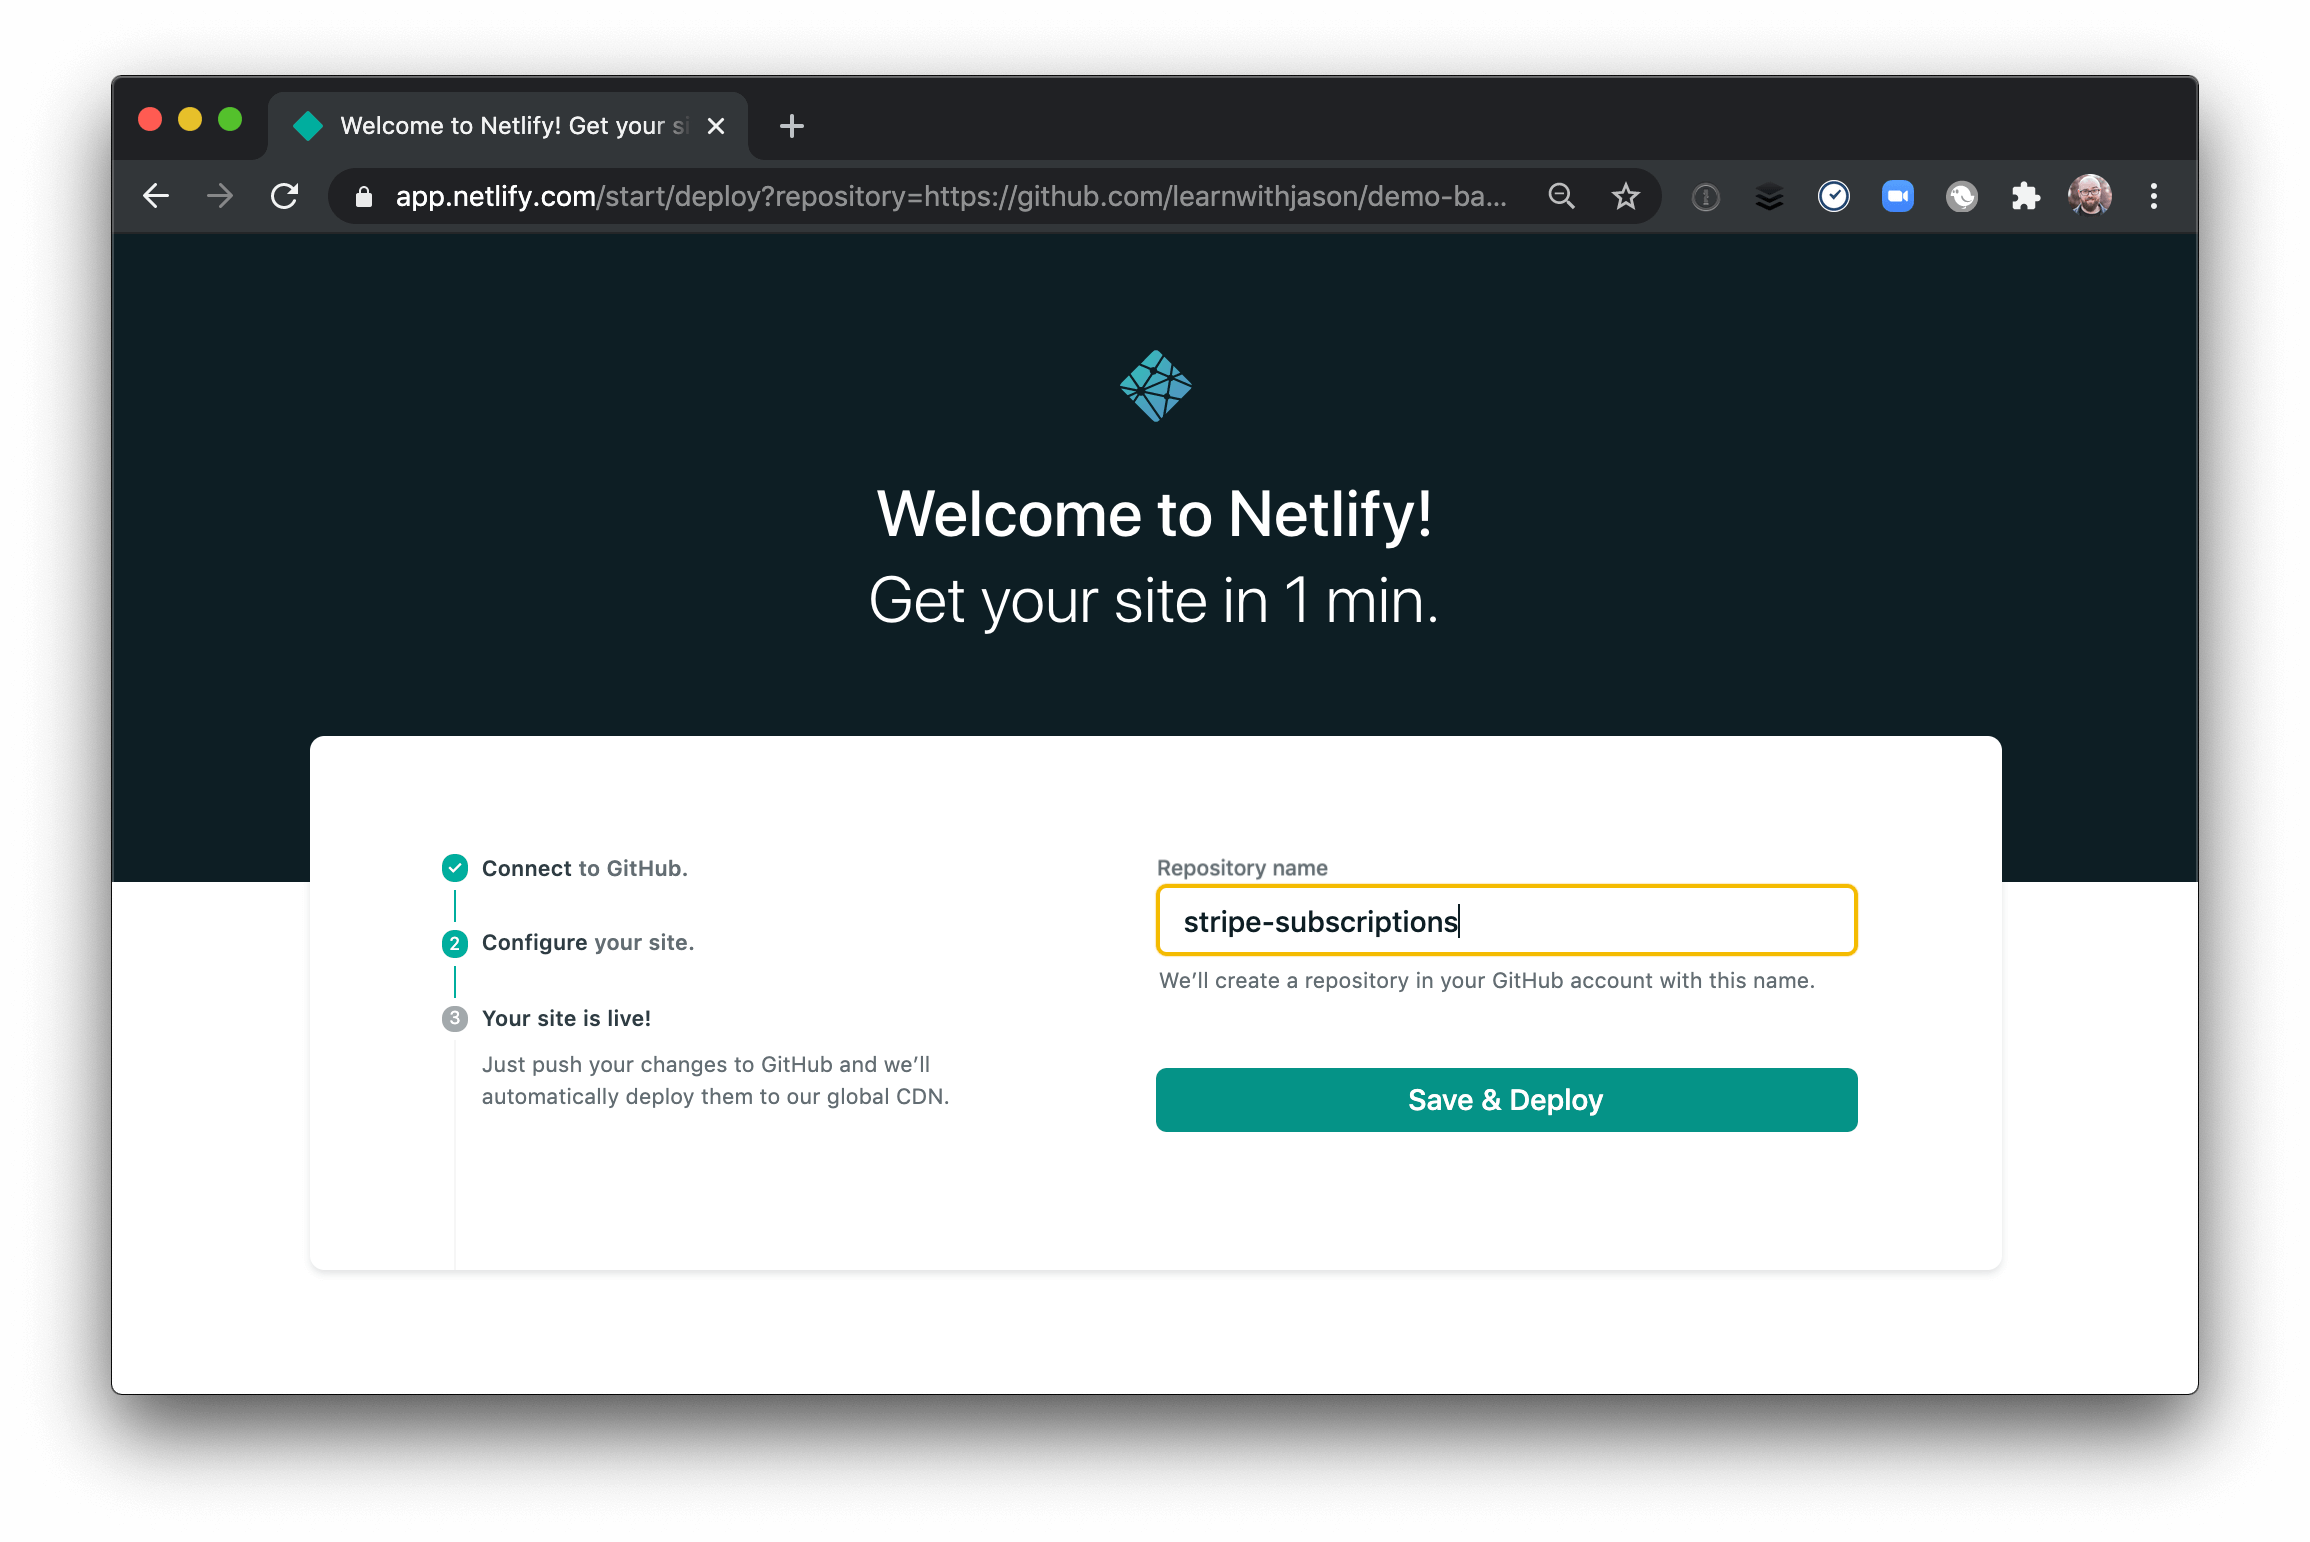
Choose a name for your new repo, then click “Save & Deploy”. Once the deployment is complete, you’ll have a deployed, live site with the demo code. You’ll also have a new repository in your GitHub account with the code for the demo.
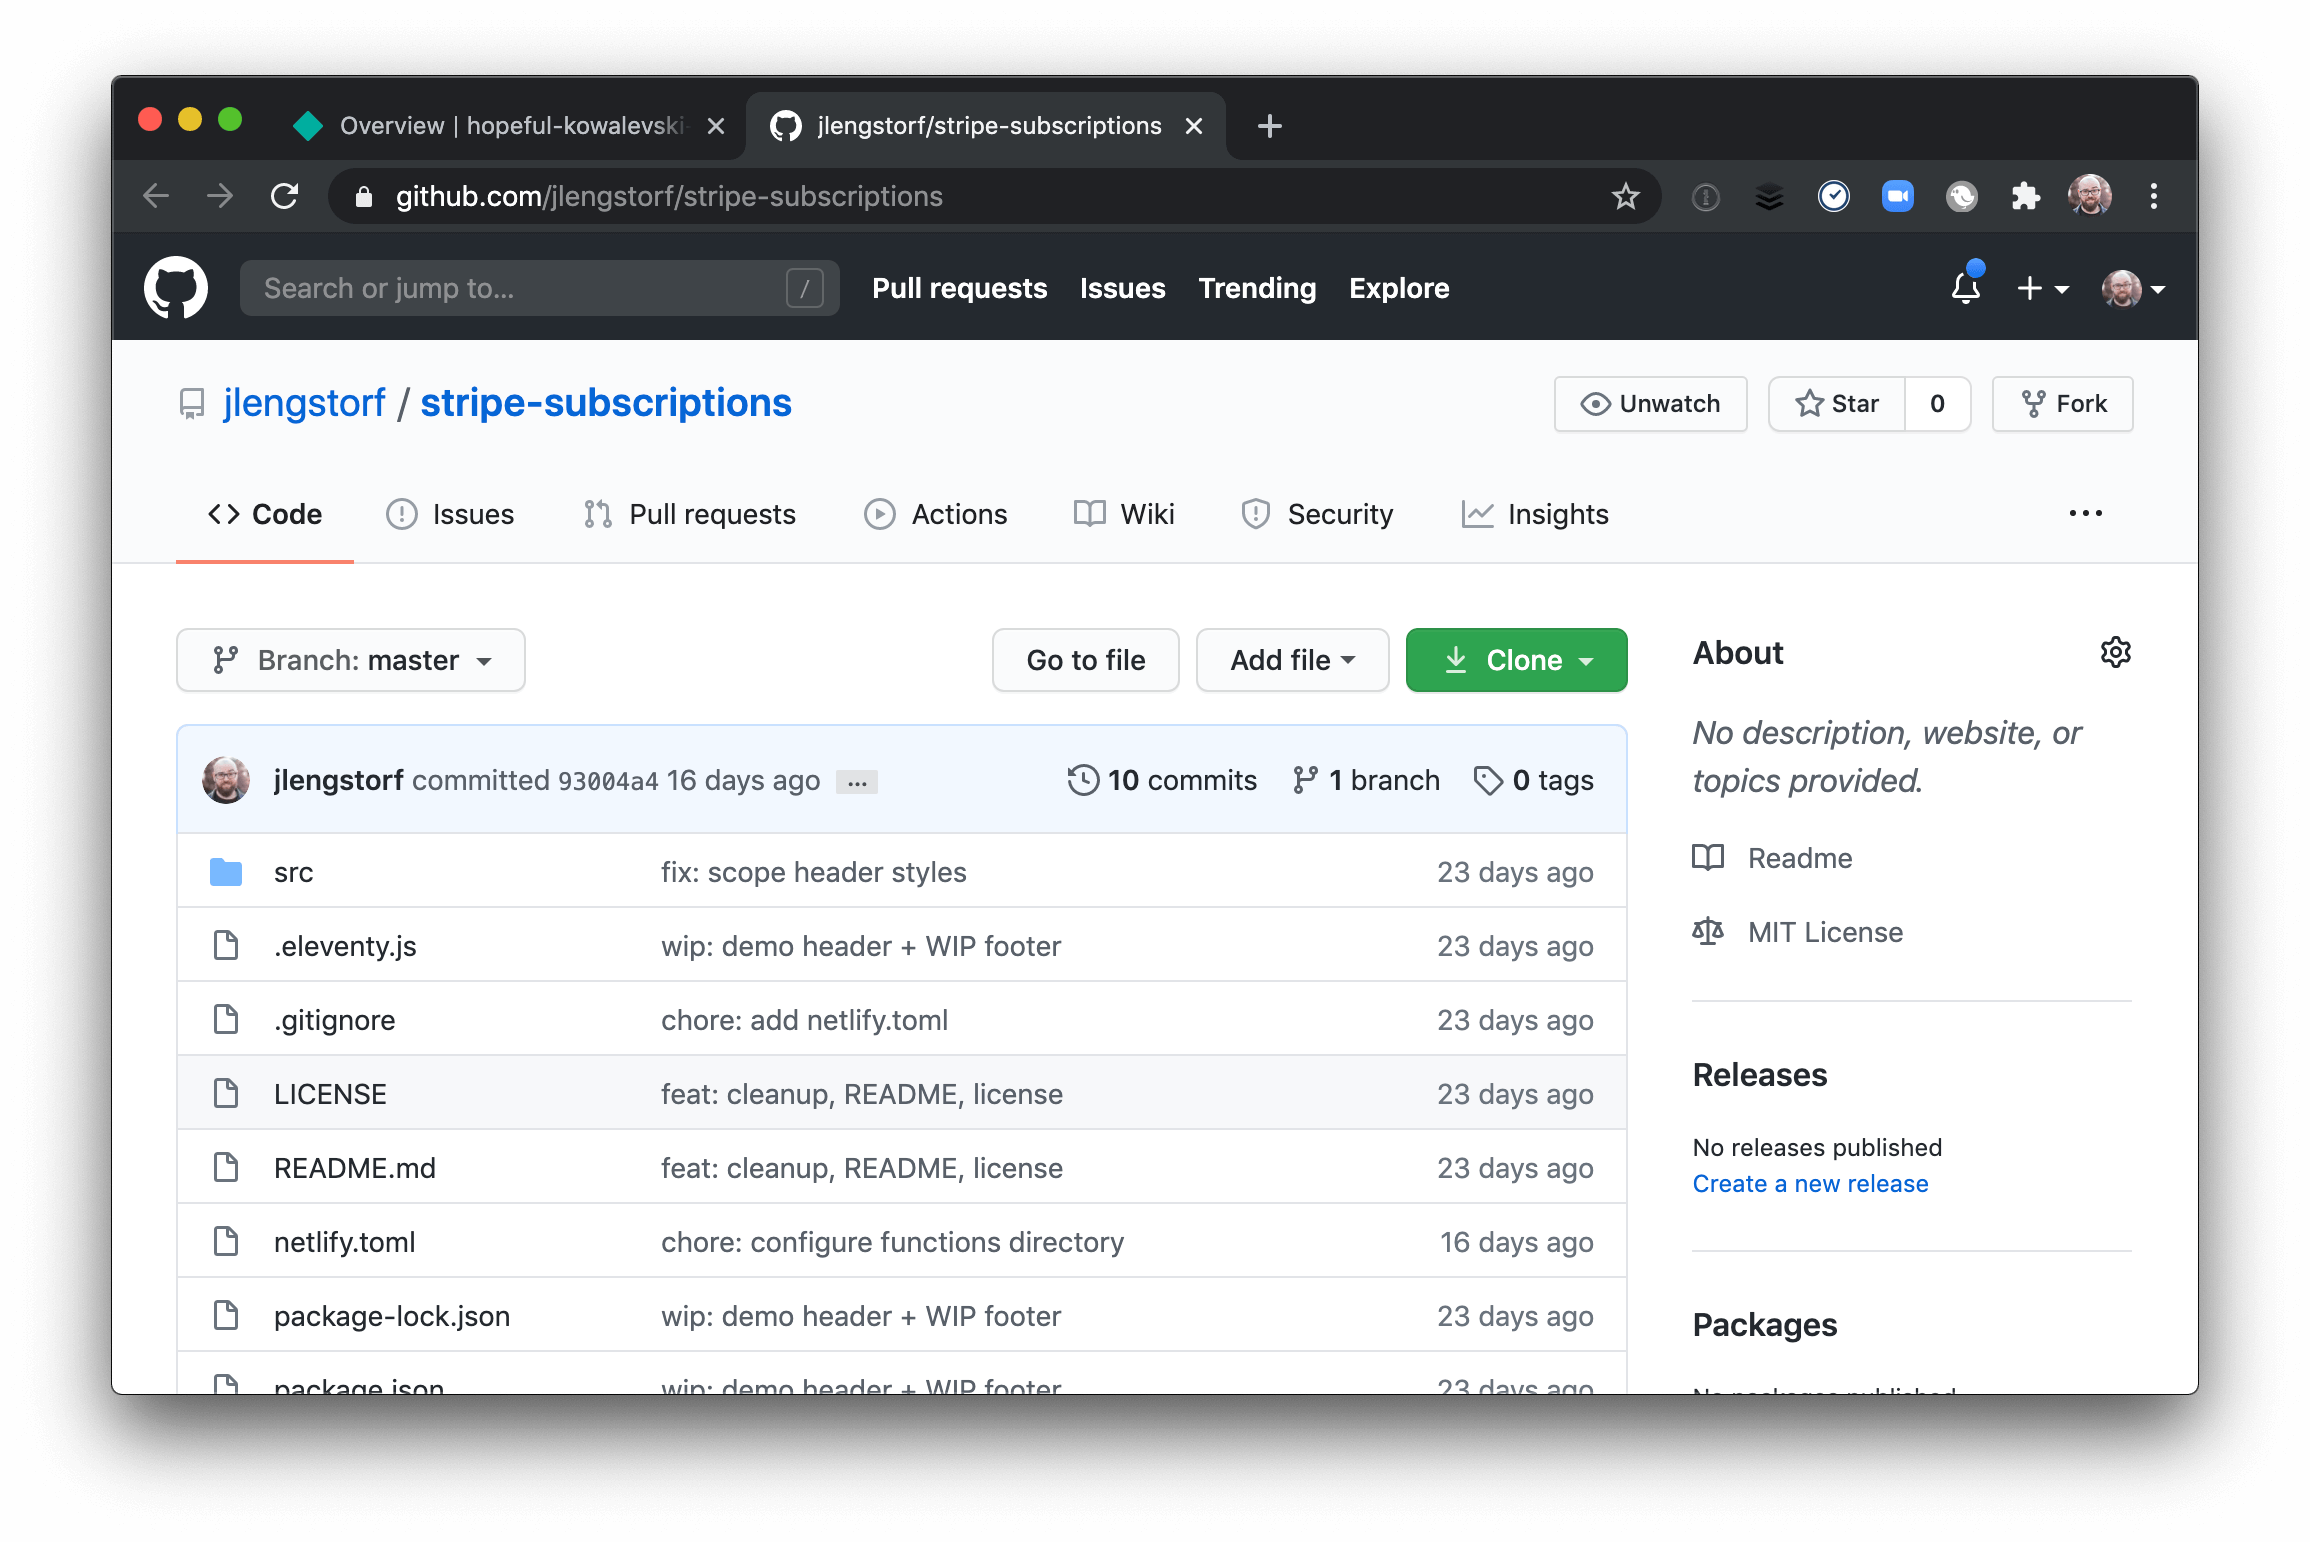
If you don’t already have it, install the Netlify CLI so you can run the site locally with access to Netlify features. This is necessary later on for testing serverless functions, so don’t skip this part!
npm install --global netlify-cliClone the new repo to your machine and link it to the Netlify site so you have access to its environment variables during local development.
# clone your new repo
git clone git@github.com:YOUR_USERNAME/stripe-subscriptions.git

# move into the new folder
cd stripe-subscriptions/

# install dependencies
npm install

# link your local site to the Netlify site
ntl link
Open this new project in your code editor of choice. All of your frontend code for this tutorial — styles, markup, and scripts alike — will be added to src/index.html.
Heads up! The starter code here is only used to give us a pre-styled wrapper that looks nice. You can safely skip the starter and use a plain HTML file instead if you prefer. It’ll work the same; it just won’t look as snazzy.
Build the site foundation
Inside src/index.html, remove all the existing code and replace it with the styles and baseline HTML for the app:
<style>
  h1 {
    text-align: center;
  }

  .user-info {
    align-items: center;
    display: grid;
    gap: 1rem;
    grid-template-columns: repeat(2, 1fr);
    list-style: none;
    padding: 0;
  }

  .user-info button {
    background: var(--dark-gray);
    border: 0;
    border-radius: 0.5rem;
    color: var(--white);
    display: block;
    font-family: var(--font-family);
    font-size: 1.5rem;
    font-weight: 900;
    padding: 1rem;
    text-align: center;
    text-decoration: none;
  }

  .corgi-content {
    display: grid;
    gap: 1rem;
    grid-template-columns: repeat(3, 1fr);
  }

  .content h2 {
    font-size: 1.25rem;
    text-align: center;
  }

  .content-display {
    margin: 0;
  }

  .credit {
    display: block;
    font-size: 0.75rem;
  }

  .content img {
    width: 100%;
  }
</style>

<h1>Sign Up for Premium Corgi Content</h1>

<div class="user-info">
  <button id="left">Log In</button>
  <button id="right">Sign Up</button>
</div>

<div class="corgi-content">
  <div class="content">
    <h2>Free Content</h2>
    <div class="free"></div>
  </div>
  <div class="content">
    <h2>Pro Content</h2>
    <div class="pro"></div>
  </div>
  <div class="content">
    <h2>Premium Content</h2>
    <div class="premium"></div>
  </div>
</div>
Review this code by using the Netlify CLI to start the site:
ntl devThis starts a development server at http://localhost:8888 that will automatically reload as you make changes.
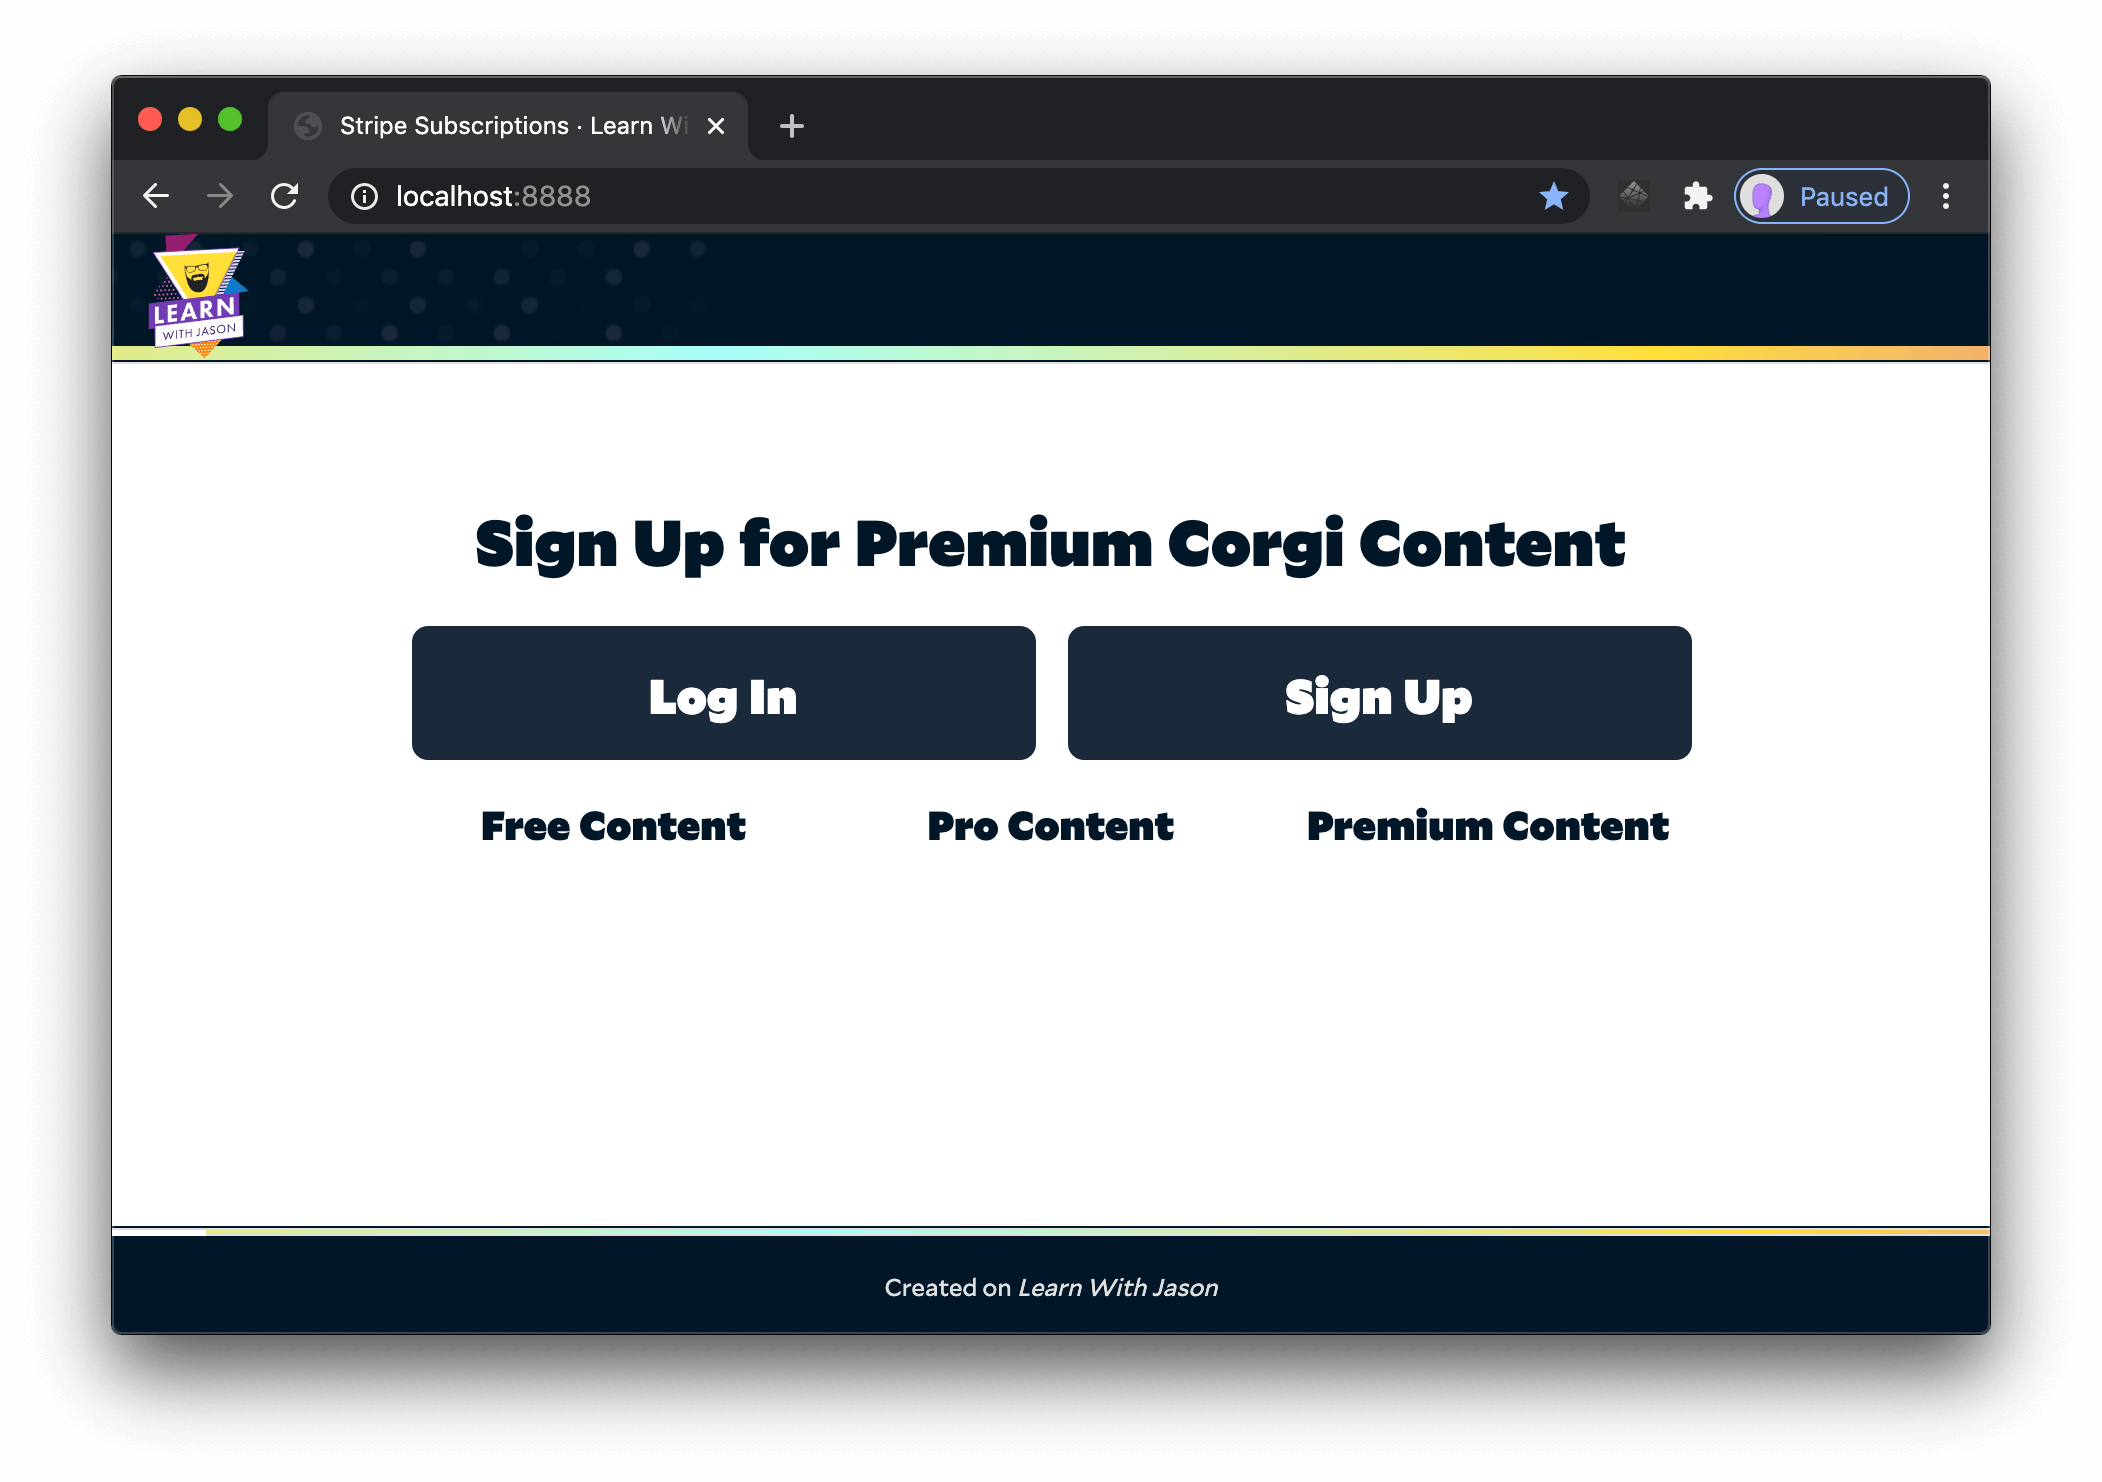
At this point, you’ll see a headline, buttons to log in or sign up, and three headers for different tiers of content. In the next section, you’ll make those buttons work!
Add Netlify Identity
To add Netlify Identity to the site, visit your Netlify dashboard and click the “Identity” tab for the site you just created.
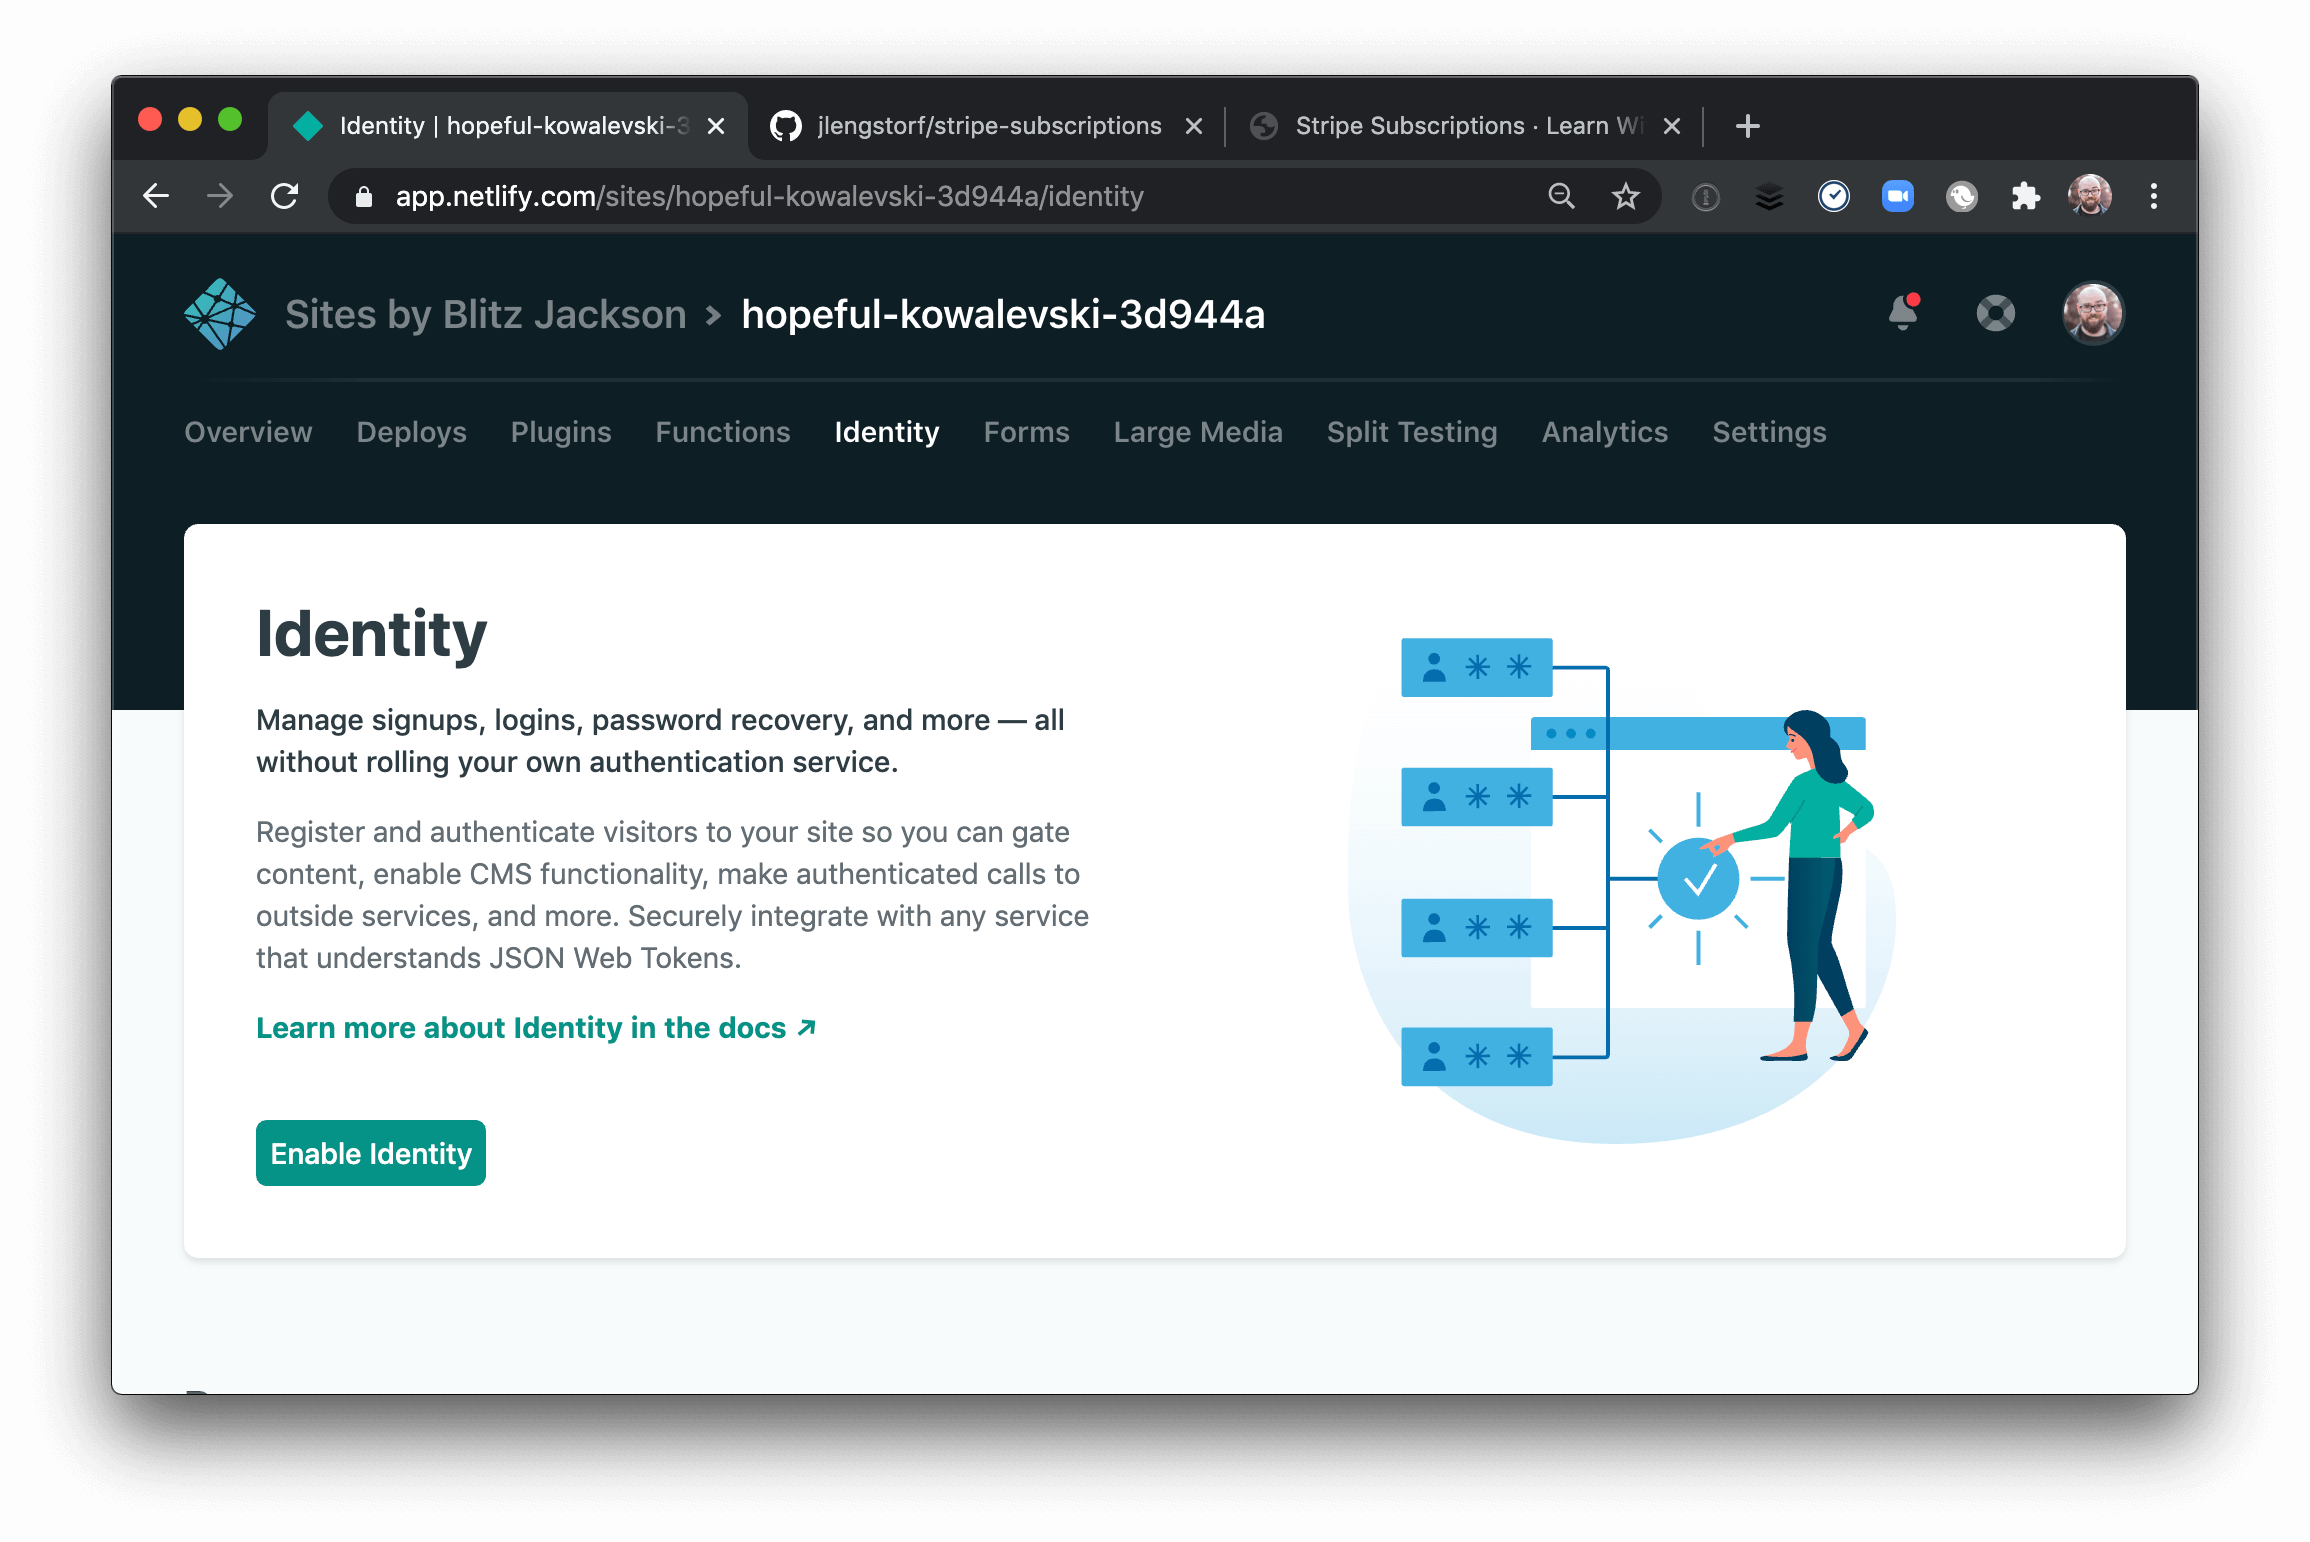
Click “Enable Identity” — all set!
Import and configure the Netlify Identity widget.
Next, import the Netlify Identity widget from the CDN with a script tag. Below that, add JavaScript that selects the two buttons, then add event listeners to open the Netlify Identity widget in the login and signup views, respectively.
  <h1>Sign Up for Premium Corgi Content</h1>

  <div class="user-info">
    <button id="left">Log In</button>
    <button id="right">Sign Up</button>
  </div>

  <div class="corgi-content">
    <div class="content">
      <h2>Free Content</h2>
      <div class="free"></div>
    </div>
    <div class="content">
      <h2>Pro Content</h2>
      <div class="pro"></div>
    </div>
    <div class="content">
      <h2>Premium Content</h2>
      <div class="premium"></div>
    </div>
  </div>

+ <script
+   type="text/javascript"
+   src="https://identity.netlify.com/v1/netlify-identity-widget.js"
+ ></script>
+
+ <script>
+   const button1 = document.getElementById('left');
+   const button2 = document.getElementById('right');
+
+   const login = () => netlifyIdentity.open('login');
+   const signup = () => netlifyIdentity.open('signup');
+
+   // by default, add login and signup functionality
+   button1.addEventListener('click', login);
+   button2.addEventListener('click', signup);
+ </script>
Click the “Sign Up” button and the Netlify Identity widget will show up. For local development, you need to configure the site’s URL so it knows where to look for user information.
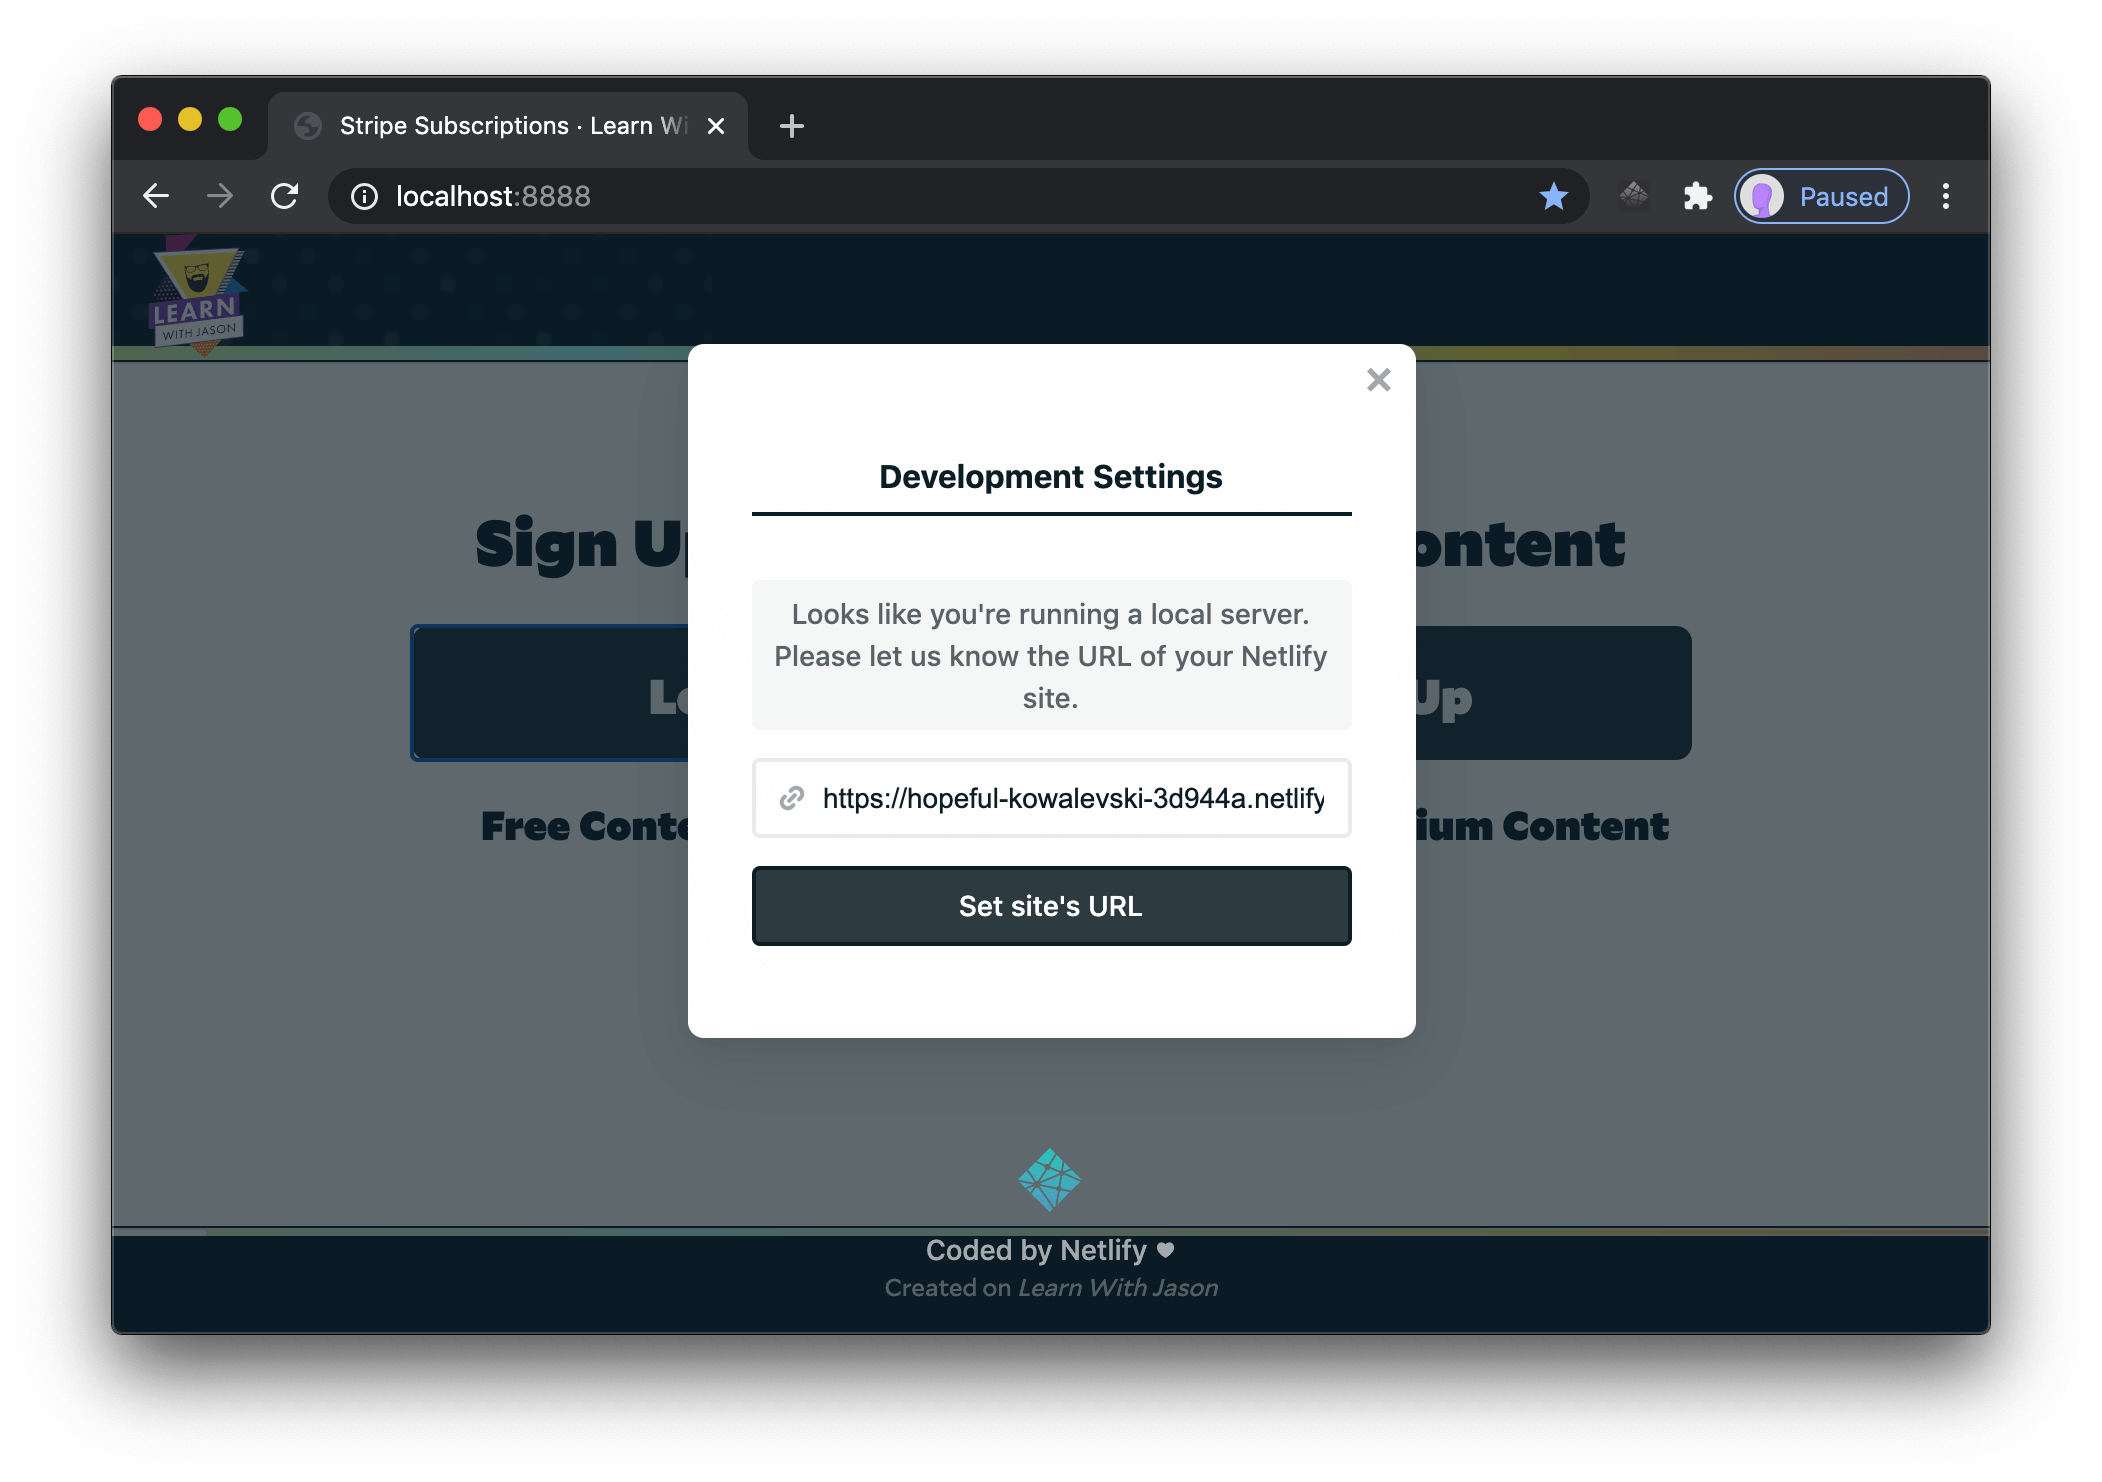
Paste your Netlify site’s URL in the field, then click “Set site’s URL”. The widget will reload and show the “Sign up” view.
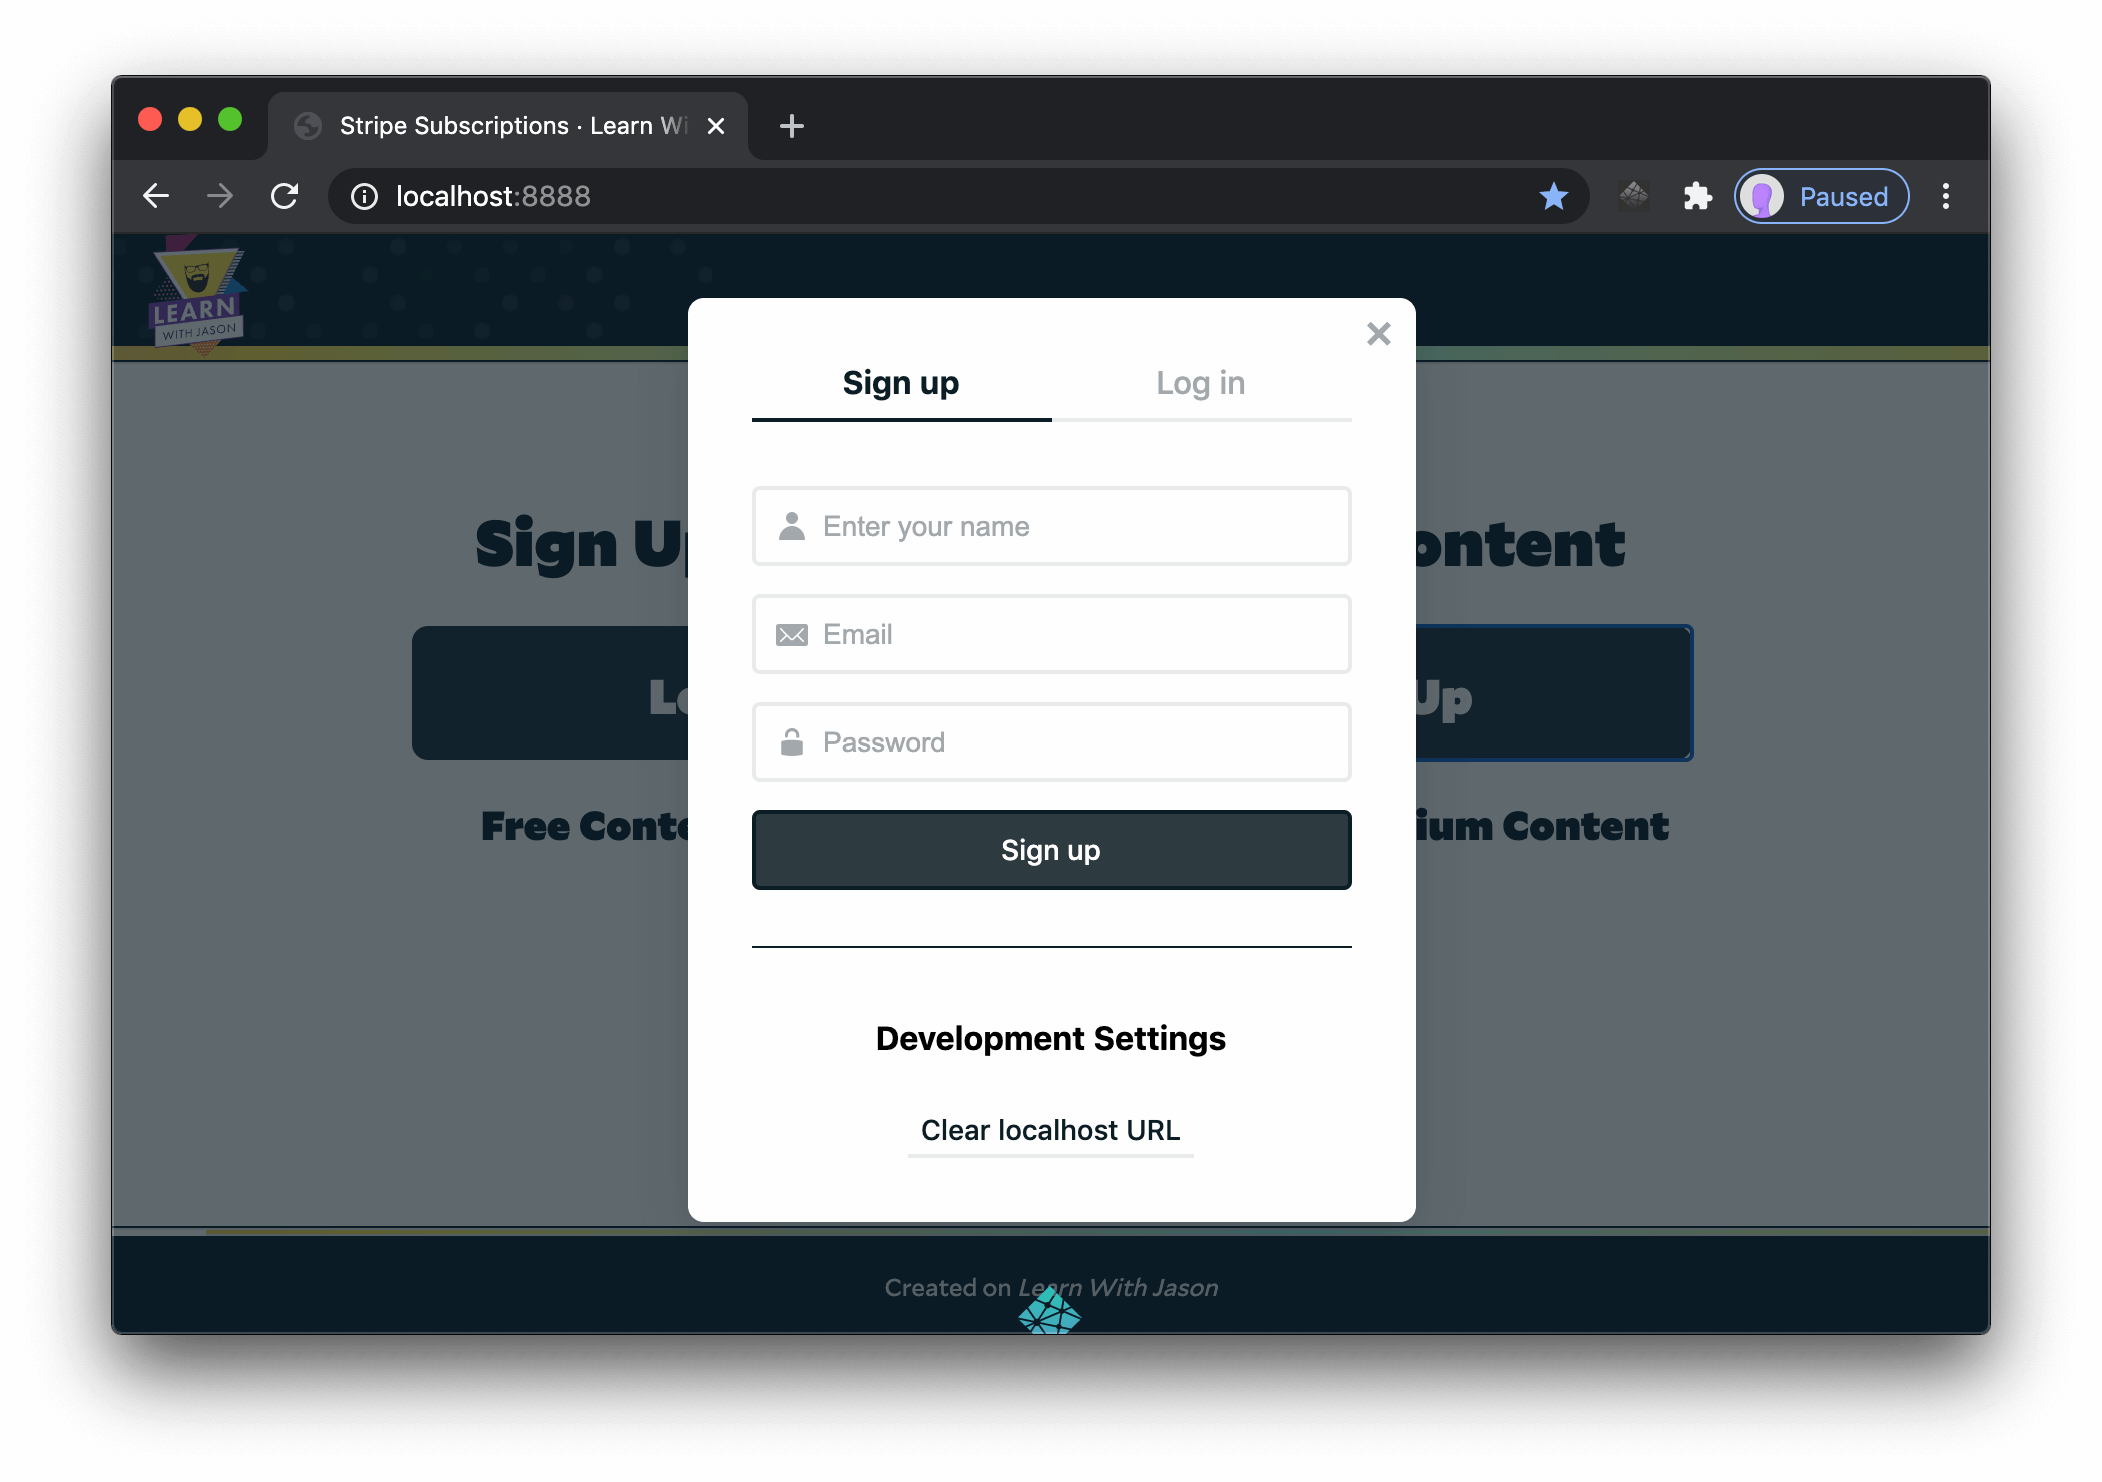
Create a user and click “Sign up”. This will trigger a confirmation email that looks similar to this:
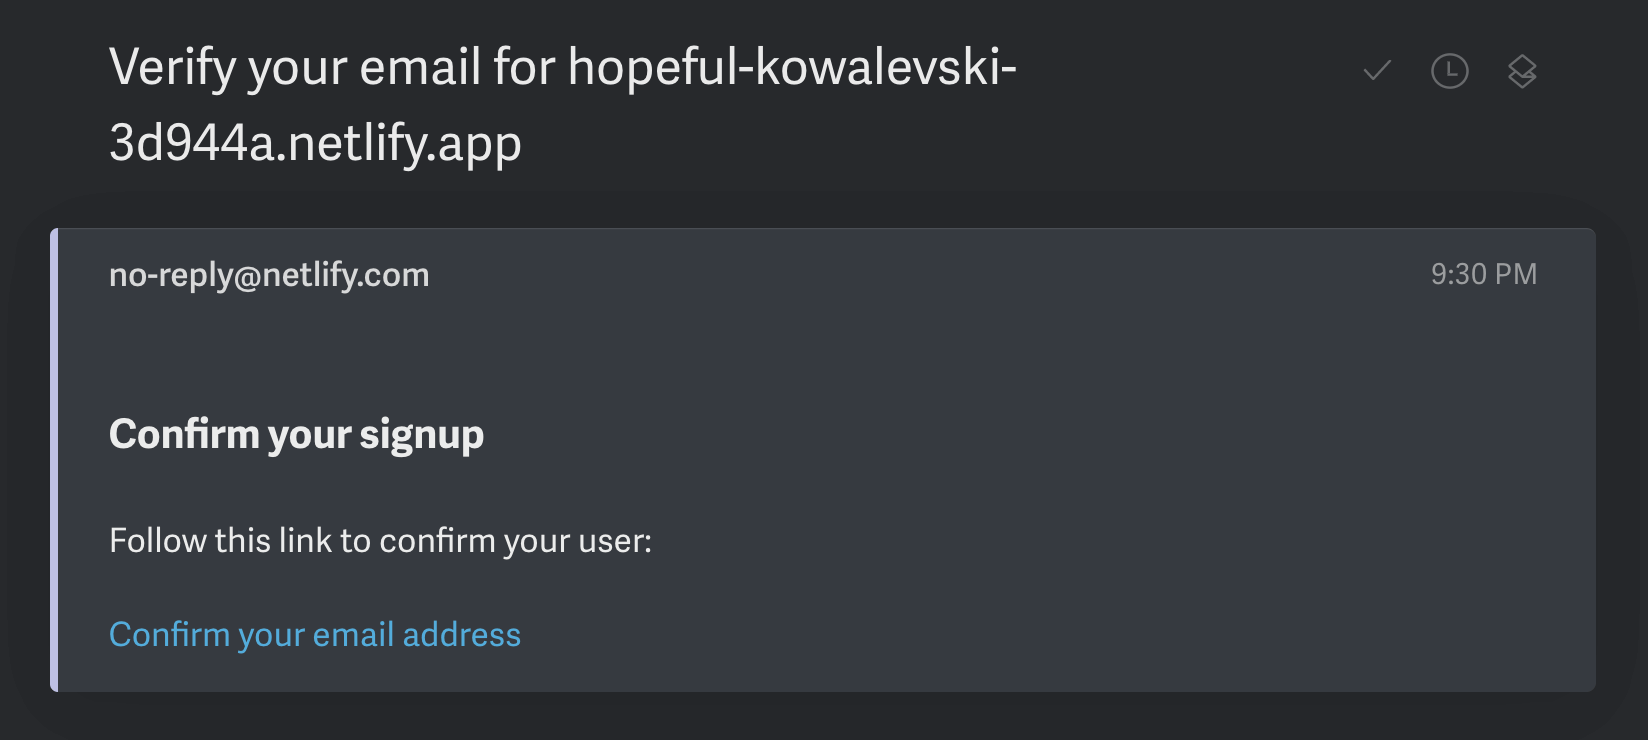
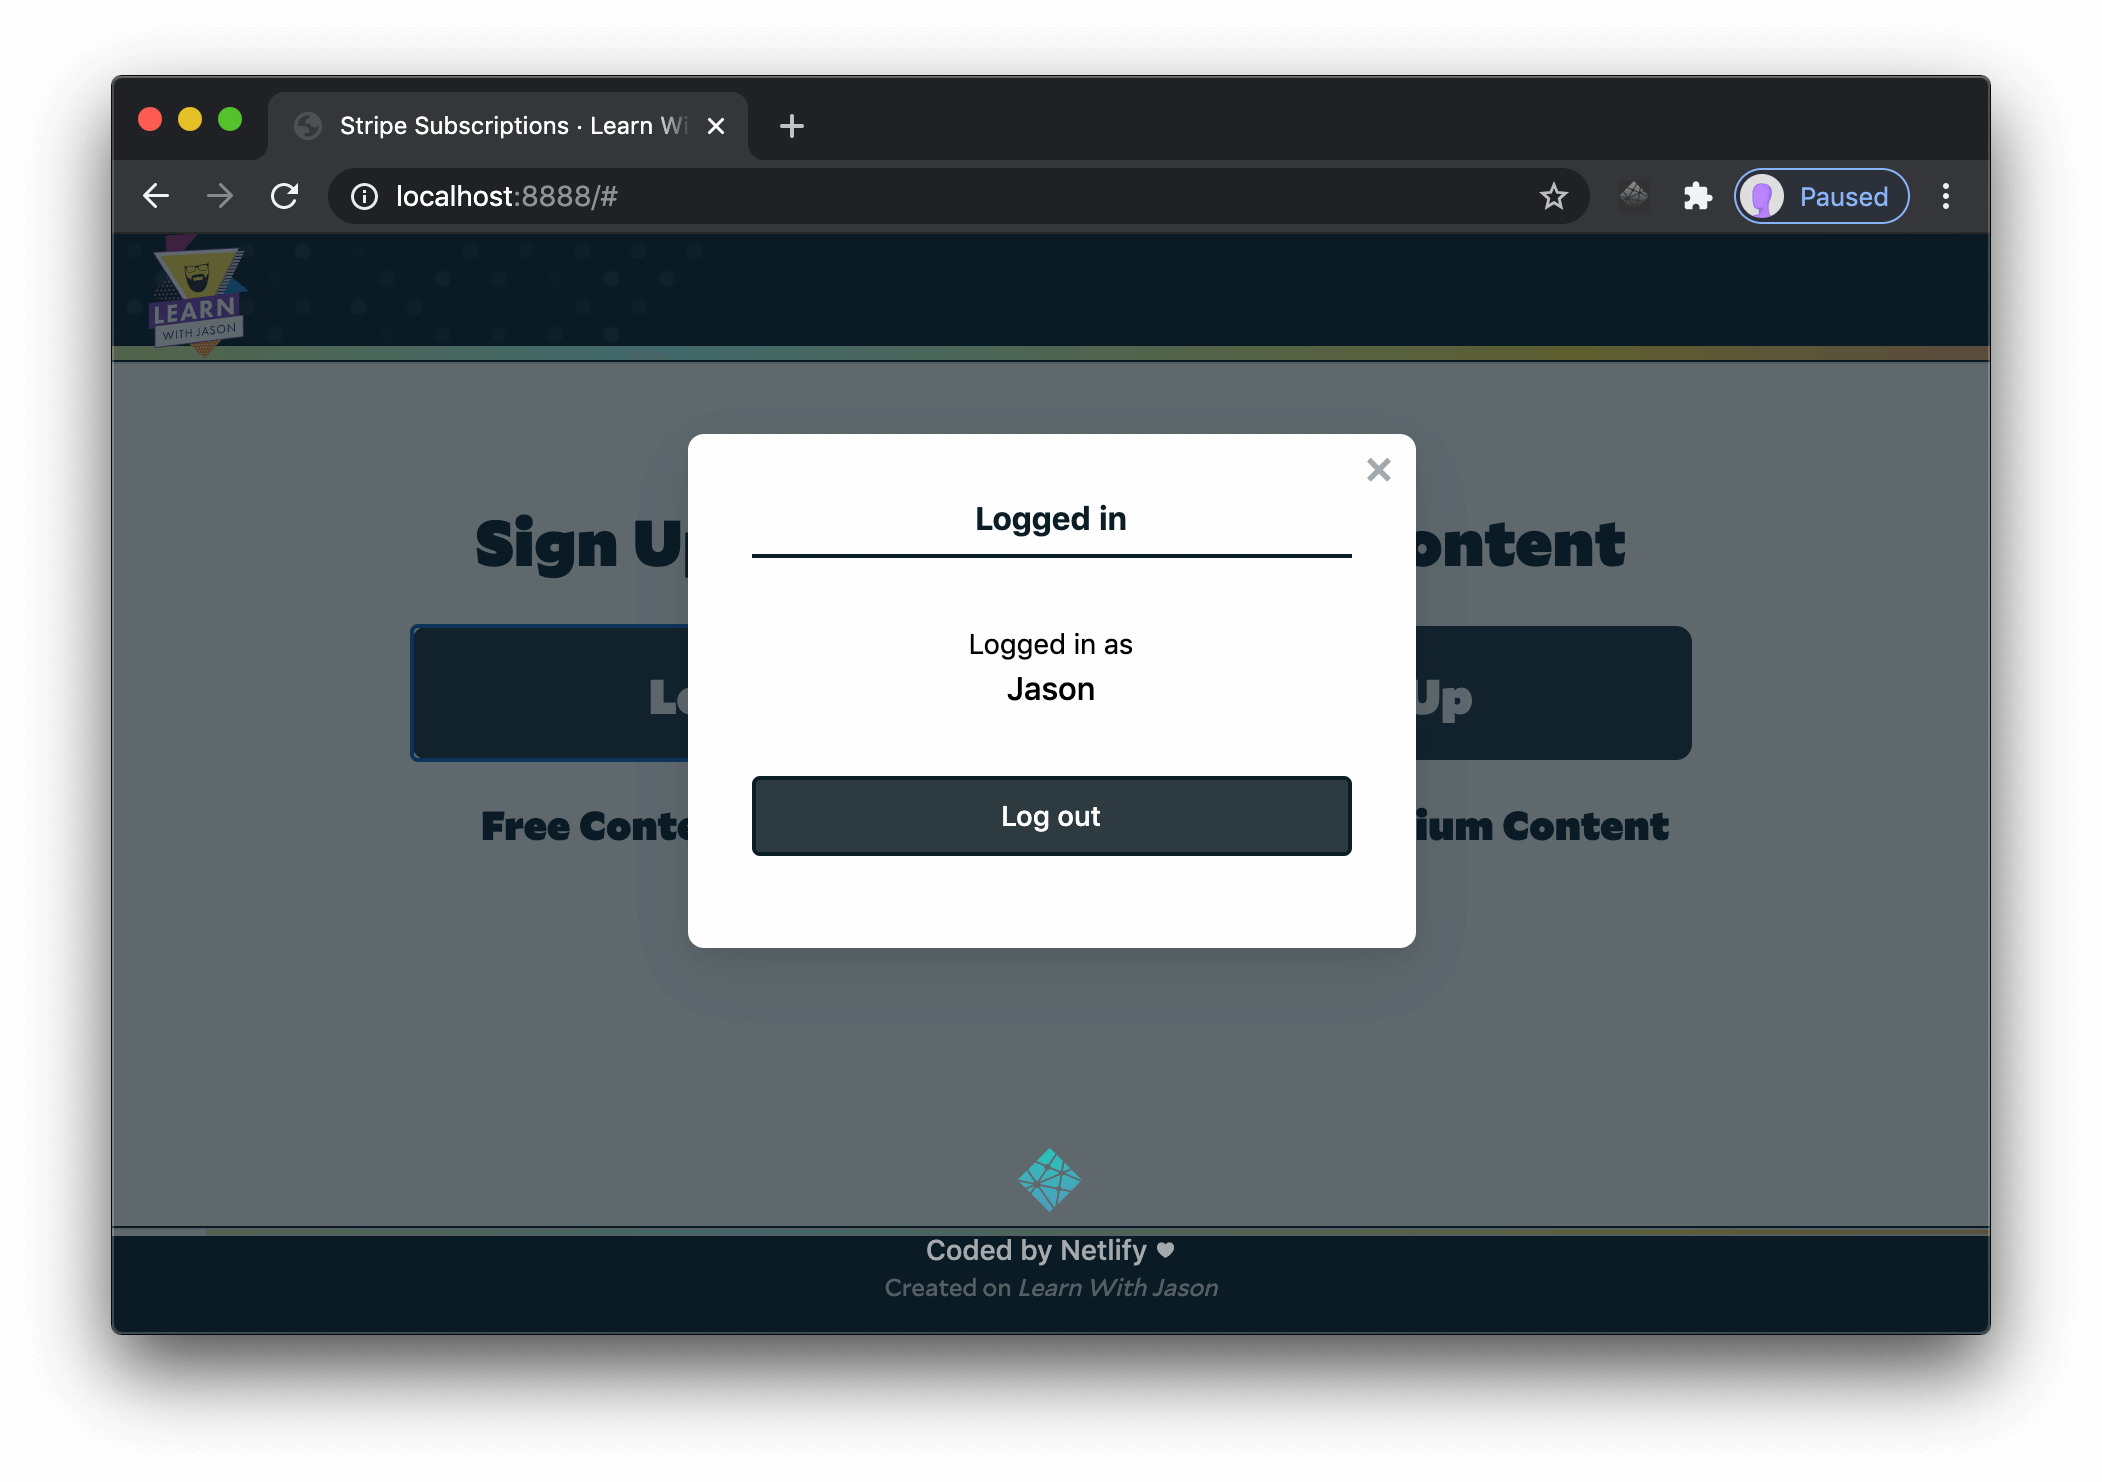
Copy the link address from the email. It contains a hash starting with confirmation_token= — add that hash to the end of http://localhost:8888 and you’ll be able to confirm your user account locally:

After loading that URL in your browser, you’ll see the widget open and confirm that you are, in fact, logged in.
If you look at the Netlify Identity tab in your account, you’ll see the new user created.
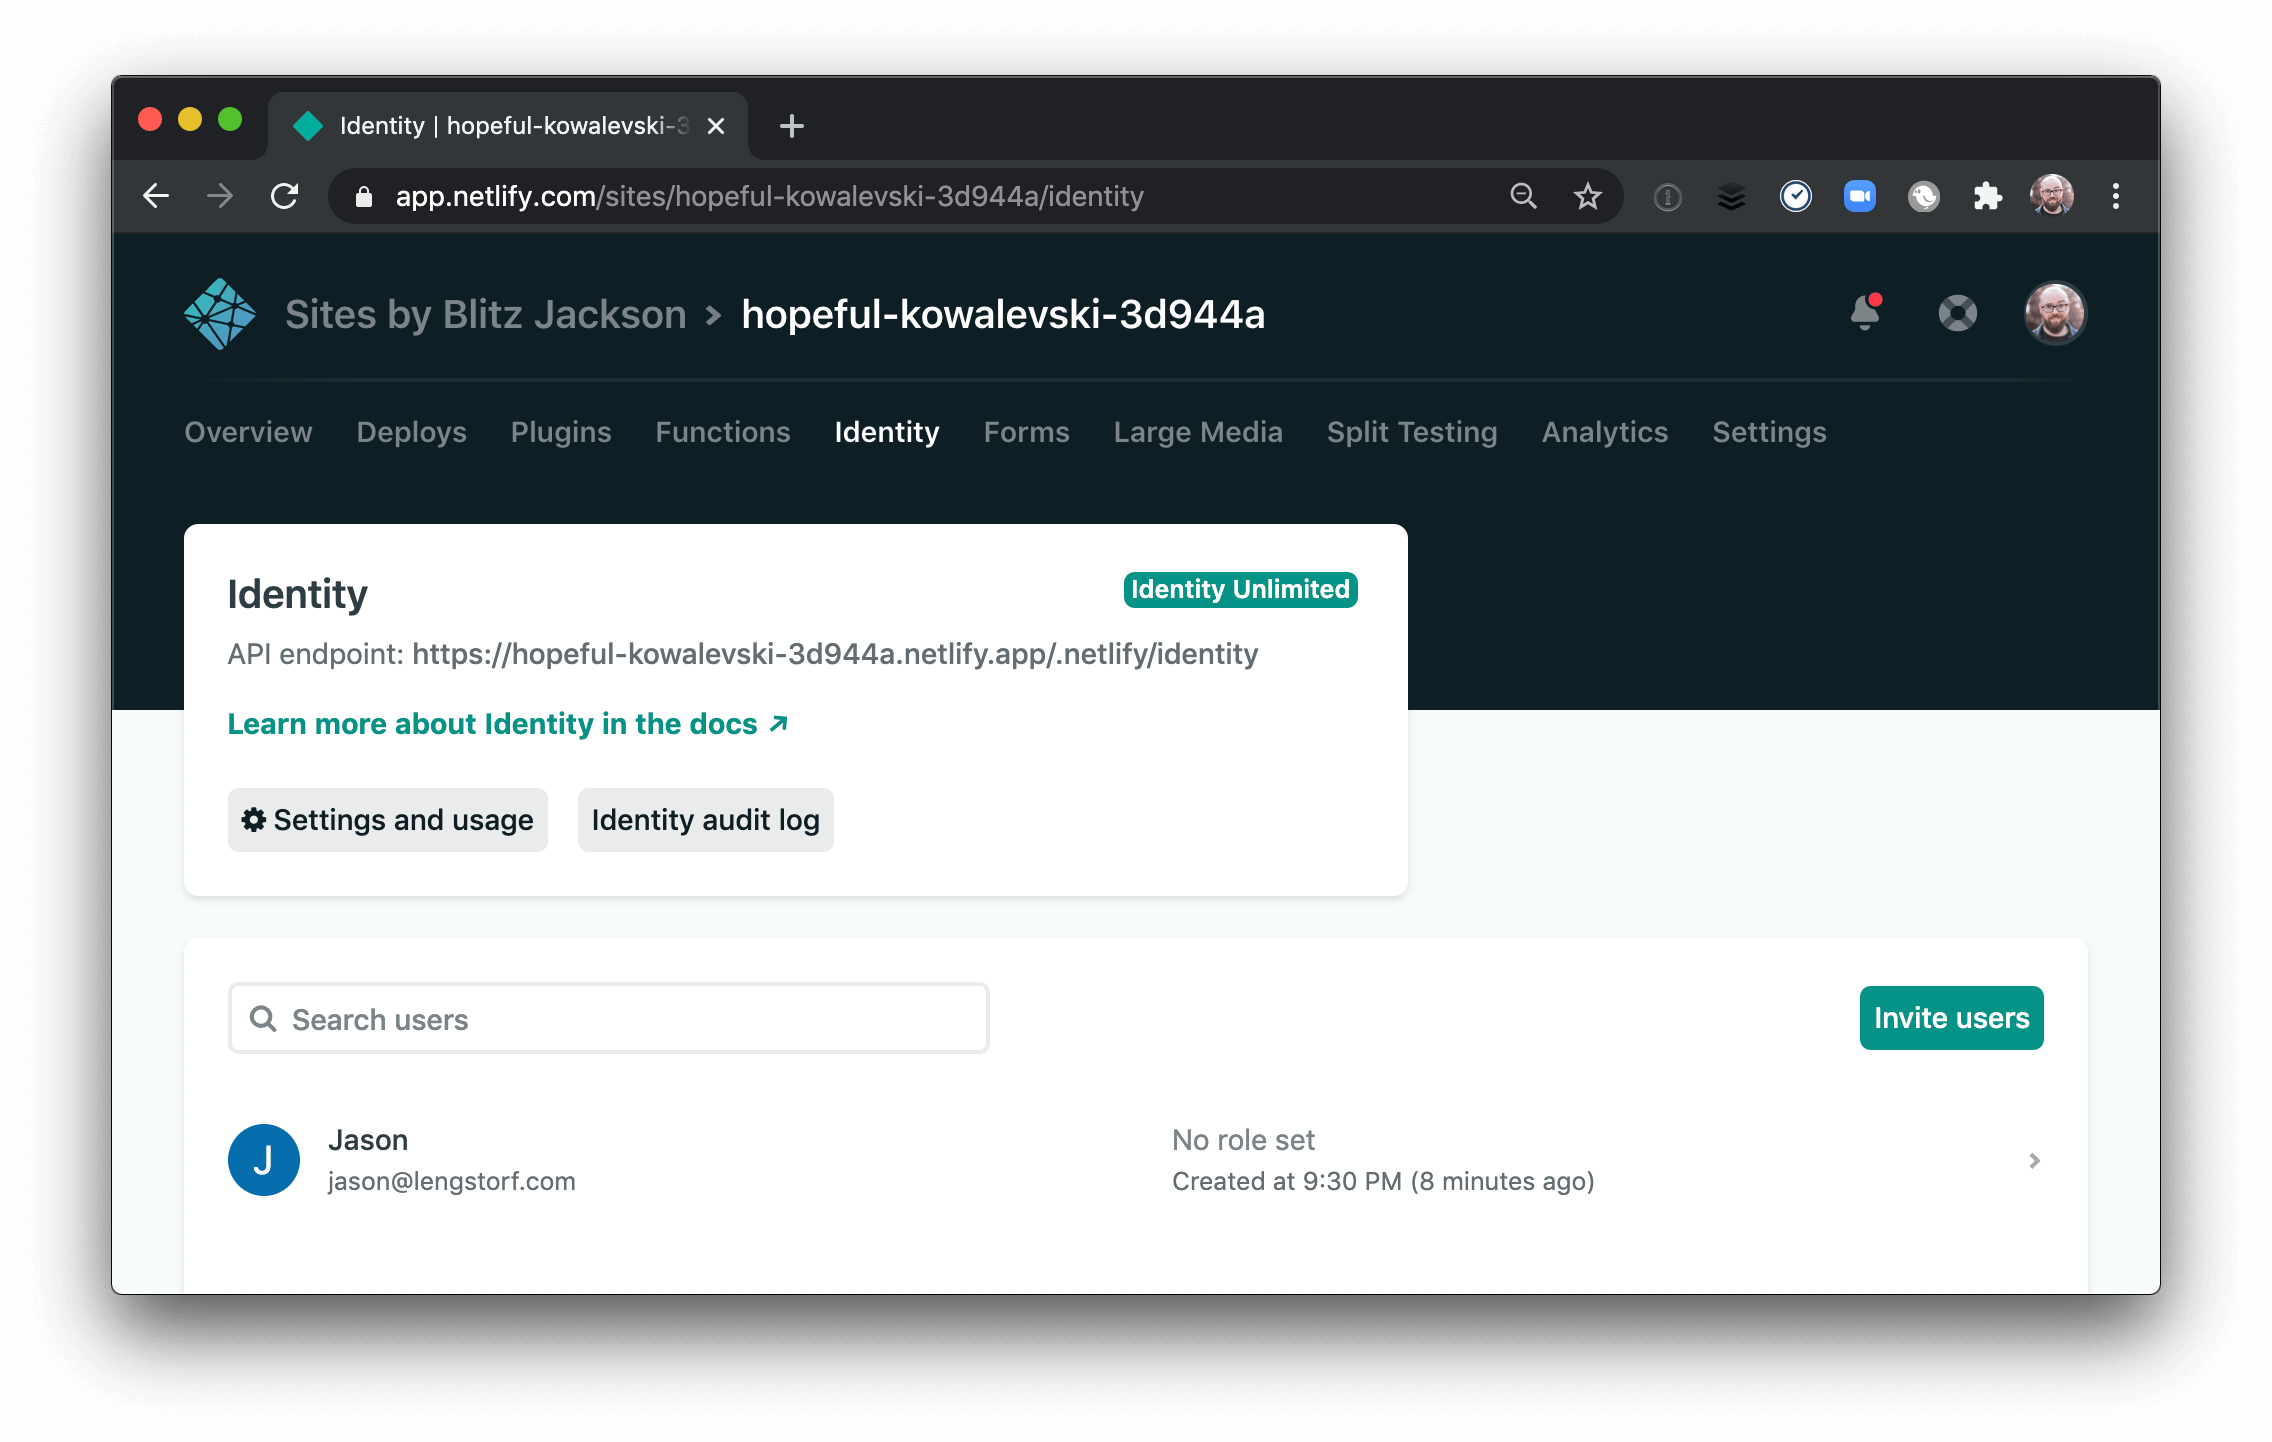
Heads up! If you prefer, you can also deploy the site to sign up and confirm your account without using the local site. This will all feel much more seamless when the site is deployed!
Update the UI based on the user’s state.
Now that you’re able to log in, you can add some additional script to update the buttons whenever Netlify Identity initializes or the user logs in or out.
  <script>
    const button1 = document.getElementById('left');
    const button2 = document.getElementById('right');

    const login = () => netlifyIdentity.open('login');
    const signup = () => netlifyIdentity.open('signup');

    // by default, add login and signup functionality
    button1.addEventListener('click', login);
    button2.addEventListener('click', signup);

+   const updateUserInfo = (user) => {
+     const container = document.querySelector('.user-info');
+
+     // cloning the buttons removes existing event listeners
+     const b1 = button1.cloneNode(true);
+     const b2 = button2.cloneNode(true);
+
+     // empty the user info div
+     container.innerHTML = '';
+
+     if (user) {
+       b1.innerText = 'Log Out';
+       b1.addEventListener('click', () => {
+         netlifyIdentity.logout();
+       });
+
+       b2.innerText = 'Manage Subscription';
+       b2.addEventListener('click', () => {
+         // TODO handle subscription management
+       });
+     } else {
+       // if no one is logged in, show login/signup options
+       b1.innerText = 'Log In';
+       b1.addEventListener('click', login);
+
+       b2.innerText = 'Sign Up';
+       b2.addEventListener('click', signup);
+     }
+
+     // add the updated buttons back to the user info div
+     container.appendChild(b1);
+     container.appendChild(b2);
+   };
+
+   const handleUserStateChange = (user) => {
+     updateUserInfo(user);
+   };
+
+   netlifyIdentity.on('init', handleUserStateChange);
+   netlifyIdentity.on('login', handleUserStateChange);
+   netlifyIdentity.on('logout', handleUserStateChange);
  </script>
The updateUserInfo function checks for a user to be set and, if one is found, updates the buttons to show “Log Out” and “Manage Subscription” options instead.
The handleUserStateChange function is called any time that the Netlify Identity state changes. Right now it only calls updateUserInfo, but you’ll be adding more later in this tutorial.
Finally, your code registers handleUserStateChange as a callback for three Netlify Identity events: init, login, and logout.
After saving this, you’ll be able to sign up, log in, and log out using the buttons on the site.
Display content based on user roles
Now that the site supports users, you can start loading content. To set this up, you’ll be going in two phases:
- Load content asynchronously based on the three content tiers (i.e. free, pro, and premium).
- Check for a user role and return “subscription needed” content instead if the role requirement isn’t met.
Load content asynchronously with a serverless function.
First, create a new folder in the project root called functions. This is where your serverless functions will live.
Inside this folder, create get-protected-content.js and add the following inside:
const content = {
  free: {
    src:
      'https://images.unsplash.com/photo-1550159930-40066082a4fc?auto=format&fit=crop&w=600&h=600&q=80',
    alt: 'corgi in the park with a sunset in the background',
    credit: 'Jacob Van Blarcom',
    creditLink: 'https://unsplash.com/photos/lkzjENdWgd8',
    message: 'To view this content, you need to create an account!',
    allowedRoles: ['free', 'pro', 'premium'],
  },
  pro: {
    src:
      'https://images.unsplash.com/photo-1519098901909-b1553a1190af?auto=format&fit=crop&w=600&h=600&q=80',
    alt: 'close-up of a corgi with its tongue hanging out',
    credit: 'Florencia Potter',
    creditLink: 'https://unsplash.com/photos/yxmNWxi3wCo',
    message:
      'This is protected content! It’s only available if you have a pro plan or higher.',
    allowedRoles: ['pro', 'premium'],
  },
  premium: {
    src:
      'https://images.unsplash.com/photo-1546975490-e8b92a360b24?auto=format&fit=crop&w=600&h=600&q=80',
    alt: 'corgi in a tent with string lights in the foreground',
    credit: 'Cole Keister',
    creditLink: 'https://unsplash.com/photos/cX-KEISwDIw',
    message:
      'This is protected content! It’s only available if you have the premium plan.',
    allowedRoles: ['premium'],
  },
};

exports.handler = async (event) => {
  const { type } = JSON.parse(event.body);

  return {
    statusCode: 200,
    body: JSON.stringify(content[type]),
  };
};
This function defines the protected content as an object, which simulates what a database or API might return. It then returns the piece of content that corresponds to the type passed to the function.
Next, in src/index.html, add a template for content and new function called loadSubscriptionContent that will load the content and use the template to display it.
  <div class="corgi-content">
    <div class="content">
      <h2>Free Content</h2>
      <div class="free"></div>
    </div>
    <div class="content">
      <h2>Pro Content</h2>
      <div class="pro"></div>
    </div>
    <div class="content">
      <h2>Premium Content</h2>
      <div class="premium"></div>
    </div>
  </div>

+ <template id="content">
+   <figure class="content-display">
+     <img />
+     <figcaption>
+       <a class="credit"></a>
+     </figcaption>
+   </figure>
+ </template>

  <script
    type="text/javascript"
    src="https://identity.netlify.com/v1/netlify-identity-widget.js"
  ></script>

  <script>
    const button1 = document.getElementById('left');
    const button2 = document.getElementById('right');

    const login = () => netlifyIdentity.open('login');
    const signup = () => netlifyIdentity.open('signup');

    // by default, add login and signup functionality
    button1.addEventListener('click', login);
    button2.addEventListener('click', signup);

    const updateUserInfo = (user) => {
      const container = document.querySelector('.user-info');

      // cloning the buttons removes existing event listeners
      const b1 = button1.cloneNode(true);
      const b2 = button2.cloneNode(true);

      // empty the user info div
      container.innerHTML = '';

      if (user) {
        b1.innerText = 'Log Out';
        b1.addEventListener('click', () => {
          netlifyIdentity.logout();
        });

        b2.innerText = 'Manage Subscription';
        b2.addEventListener('click', () => {
          // TODO handle subscription management
        });
      } else {
        // if no one is logged in, show login/signup options
        b1.innerText = 'Log In';
        b1.addEventListener('click', login);

        b2.innerText = 'Sign Up';
        b2.addEventListener('click', signup);
      }
      // add the updated buttons back to the user info div
      container.appendChild(b1);
      container.appendChild(b2);
    };

+   const loadSubscriptionContent = (user) => {
+     ['free', 'pro', 'premium'].forEach((type) => {
+       fetch('/.netlify/functions/get-protected-content', {
+         method: 'POST',
+         body: JSON.stringify({ type }),
+       })
+         .then((res) => res.json())
+         .then((data) => {
+           const template = document.querySelector('#content');
+           const container = document.querySelector(`.${type}`);
+
+           // remove any existing content from the content containers
+           const oldContent = container.querySelector('.content-display');
+           if (oldContent) {
+             container.removeChild(oldContent);
+           }
+
+           const content = template.content.cloneNode(true);
+
+           const img = content.querySelector('img');
+           img.src = data.src;
+           img.alt = data.alt;
+
+           const credit = content.querySelector('.credit');
+           credit.href = data.creditLink;
+           credit.innerText = `Credit: ${data.credit}`;
+
+           const caption = content.querySelector('figcaption');
+           caption.innerText = data.message;
+           caption.appendChild(credit);
+
+           container.appendChild(content);
+         });
+     });
+   };

    const handleUserStateChange = (user) => {
      updateUserInfo(user);
+     loadSubscriptionContent(user);
    };

    netlifyIdentity.on('init', handleUserStateChange);
    netlifyIdentity.on('login', handleUserStateChange);
    netlifyIdentity.on('logout', handleUserStateChange);
  </script>
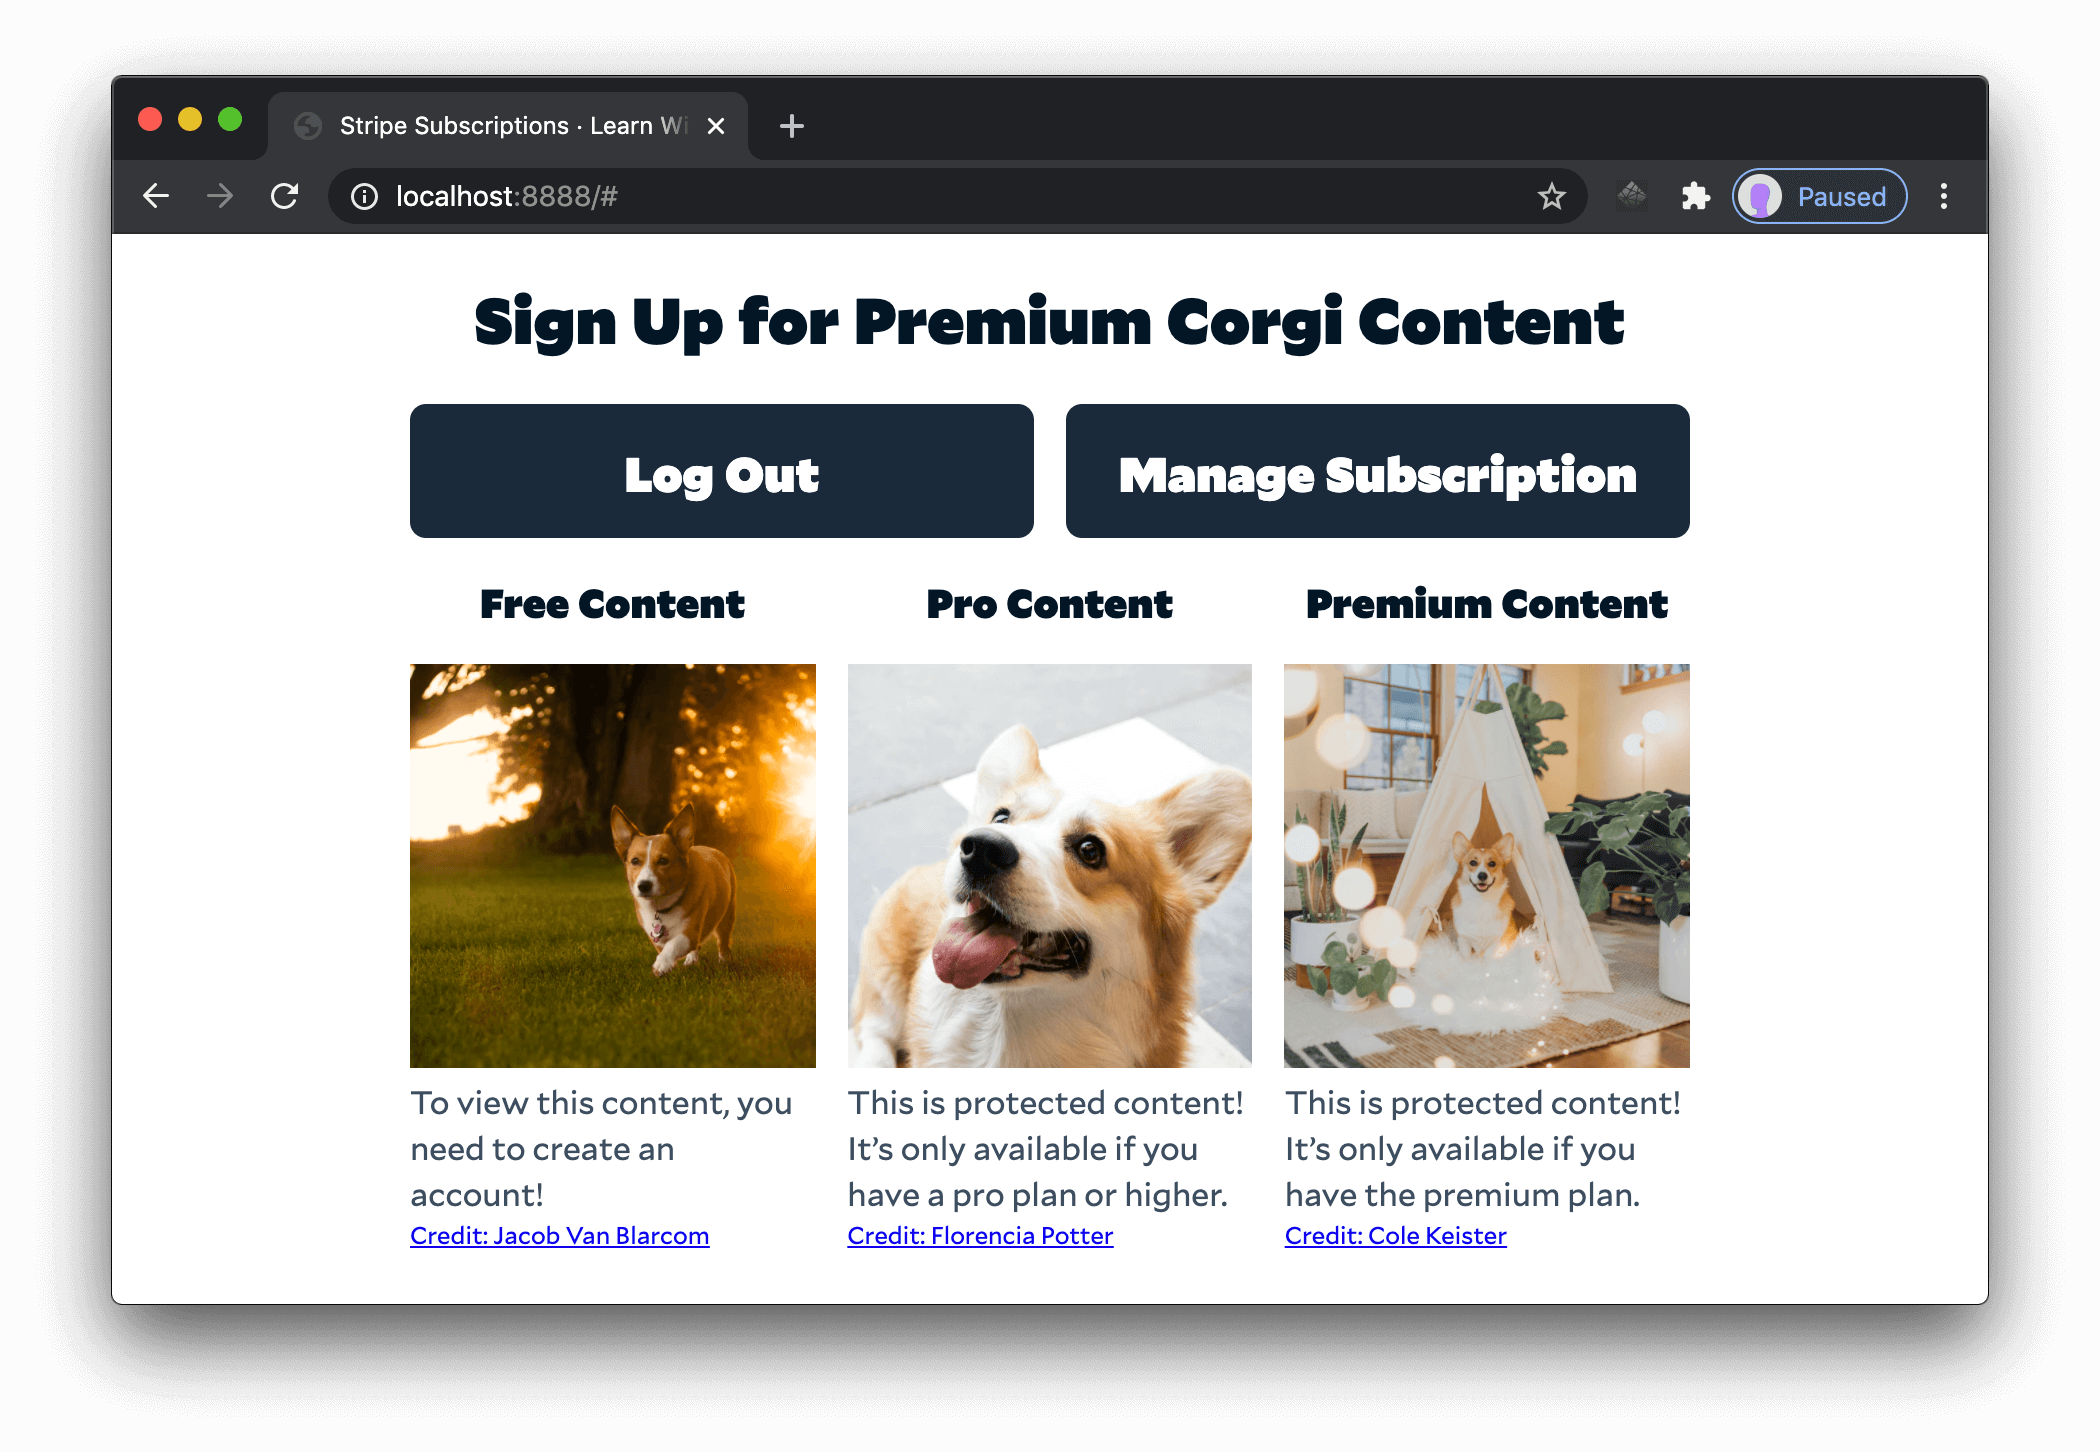
This code sends of an asynchronous request to the get-protected-content serverless function for each subscription level (i.e. free, pro, and premium), then copies the HTML template and inserts the content into the appropriate section. It does not yet control access to the content — we’ll get to that a bit later.
Stop the dev server with control + C, then run ntl dev again to see the loaded content.
Check for the appropriate role before returning content.
When a user logs in, Netlify Identity creates a JSON Web Token (JWT) that contains their user information, include a user ID and their assigned roles. To protect content, grab the JWT for the current user from Netlify Identity and send it in the Authorization header.
-   const loadSubscriptionContent = (user) => {
+   const loadSubscriptionContent = async (user) => {
+     const token = user ? await netlifyIdentity.currentUser().jwt(true) : false;
+
      ['free', 'pro', 'premium'].forEach((type) => {
        fetch('/.netlify/functions/get-protected-content', {
          method: 'POST',
+         headers: {
+           Authorization: `Bearer ${token}`,
+         },
          body: JSON.stringify({ type }),
        })
          .then((res) => res.json())
          .then((data) => {
            const template = document.querySelector('#content');
            const container = document.querySelector(`.${type}`);

            // remove any existing content from the content containers
            const oldContent = container.querySelector('.content-display');
            if (oldContent) {
              container.removeChild(oldContent);
            }

            const content = template.content.cloneNode(true);

            const img = content.querySelector('img');
            img.src = data.src;
            img.alt = data.alt;

            const credit = content.querySelector('.credit');
            credit.href = data.creditLink;
            credit.innerText = `Credit: ${data.credit}`;

            const caption = content.querySelector('figcaption');
            caption.innerText = data.message;
            caption.appendChild(credit);

            container.appendChild(content);
          });
      });
    };
Netlify Functions automatically detect JWTs and place them into a context argument. This means you can quickly validate the user and access their roles with a few lines of code in functions/get-protected-content.js:
  const content = {
    /* omitted for brevity */
  };

- exports.handler = async (event) => {
+ exports.handler = async (event, context) => {
+   const { type } = JSON.parse(event.body);
+   const { user } = context.clientContext;
+   const roles = user ? user.app_metadata.roles : false;
+   const { allowedRoles } = content[type];
+
+   if (!roles || !roles.some(role => allowedRoles.includes(role))) {
+     return {
+       statusCode: 402,
+       body: JSON.stringify({
+         src: 'https://res.cloudinary.com/jlengstorf/image/upload/q_auto,f_auto/v1592618179/stripe-subscription/subscription-required.jpg',
+         alt: 'corgi in a crossed circle with the text “subscription required”',
+         credit: 'Jason Lengstorf',
+         creditLink: 'https://dribbble.com/jlengstorf',
+         message: `This content requires a ${type} subscription.`,
+       }),
+     };
+   }

    return {
      statusCode: 200,
      body: JSON.stringify(content[type]),
    };
  };
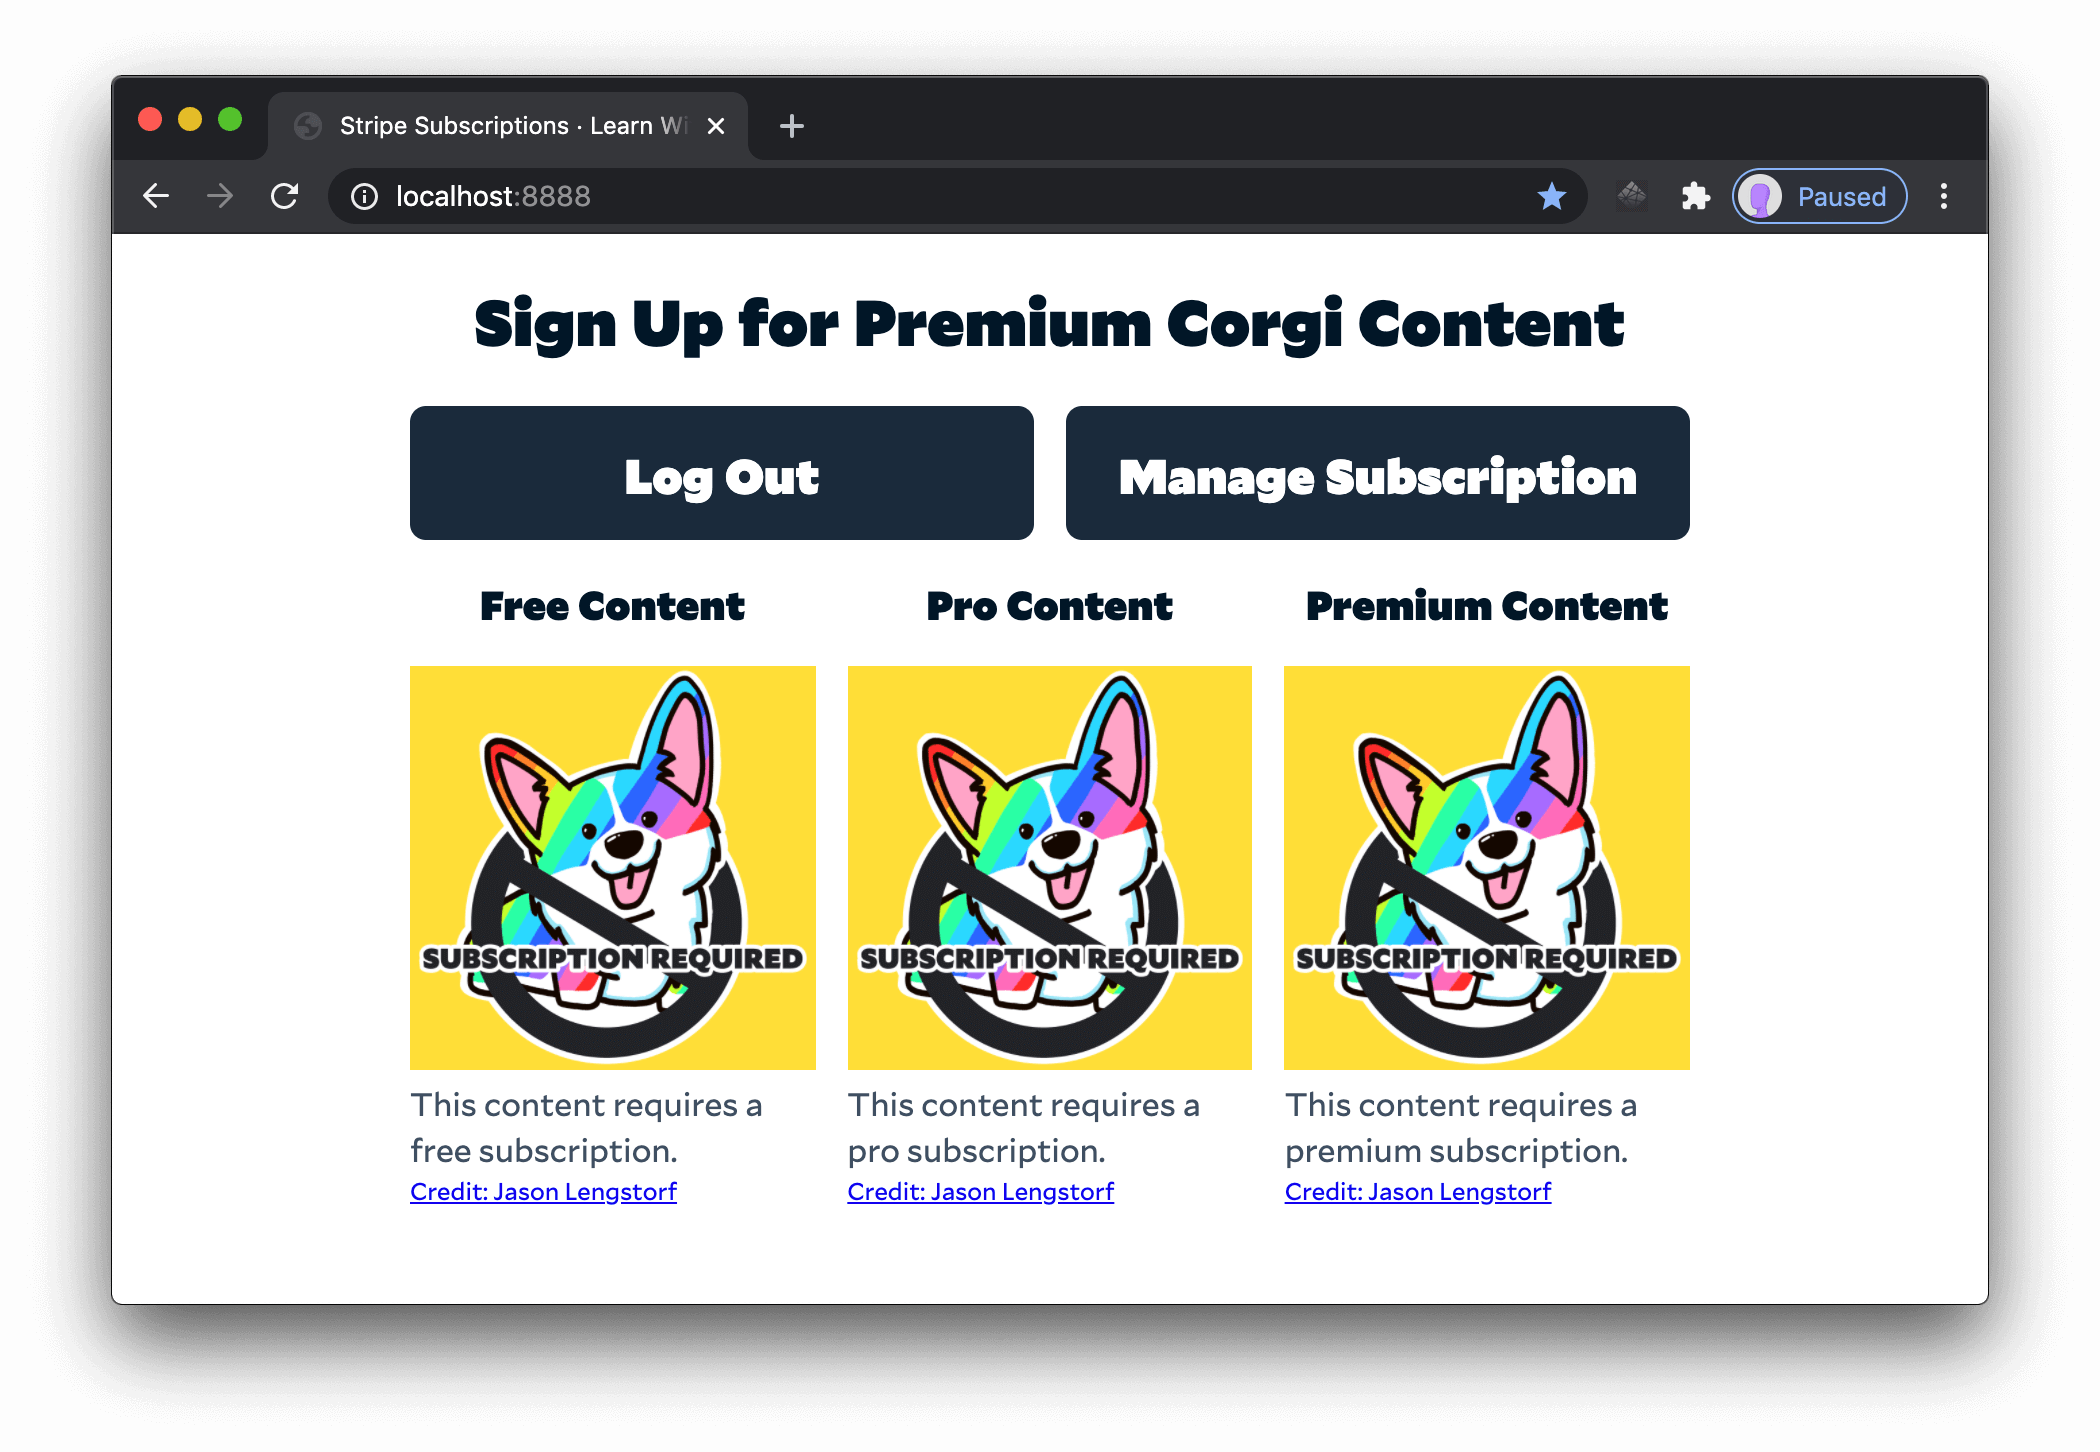
Save and check the browser to see that all of the content is now protected behind a “Subscription Required” notification.
If you go back to your Identity tab in the Netlify dashboard, you’ll see that the reason for this is that no role has been set for the user yet.
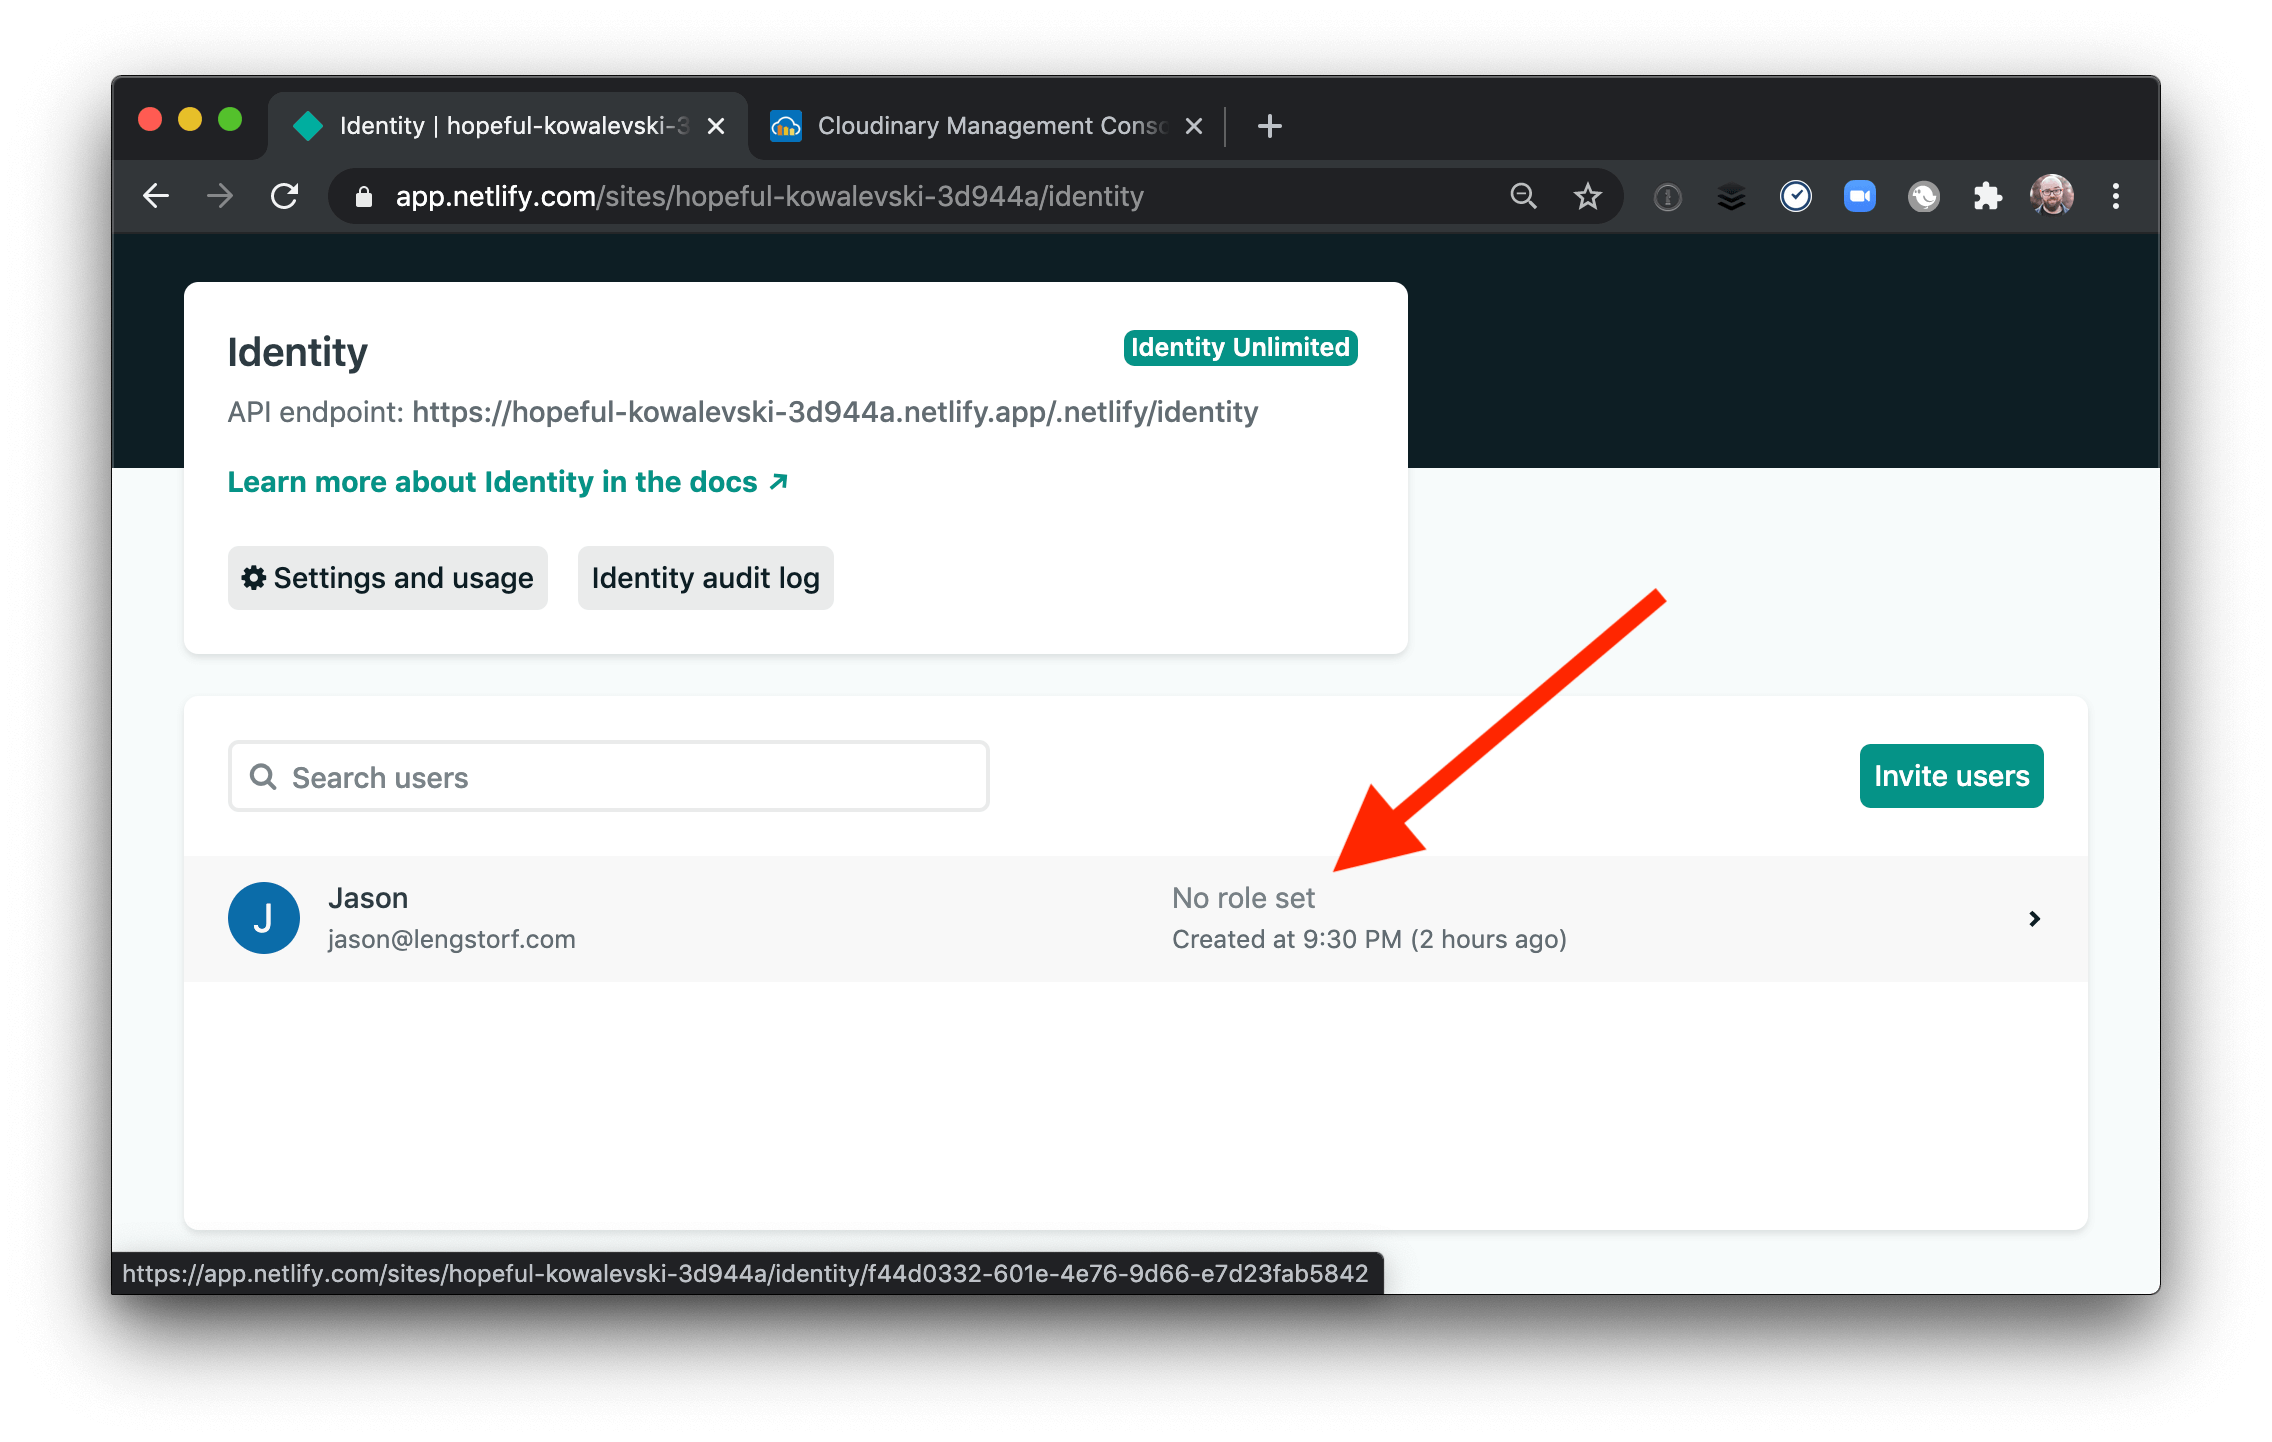
Click the user and edit the role to be “pro”.
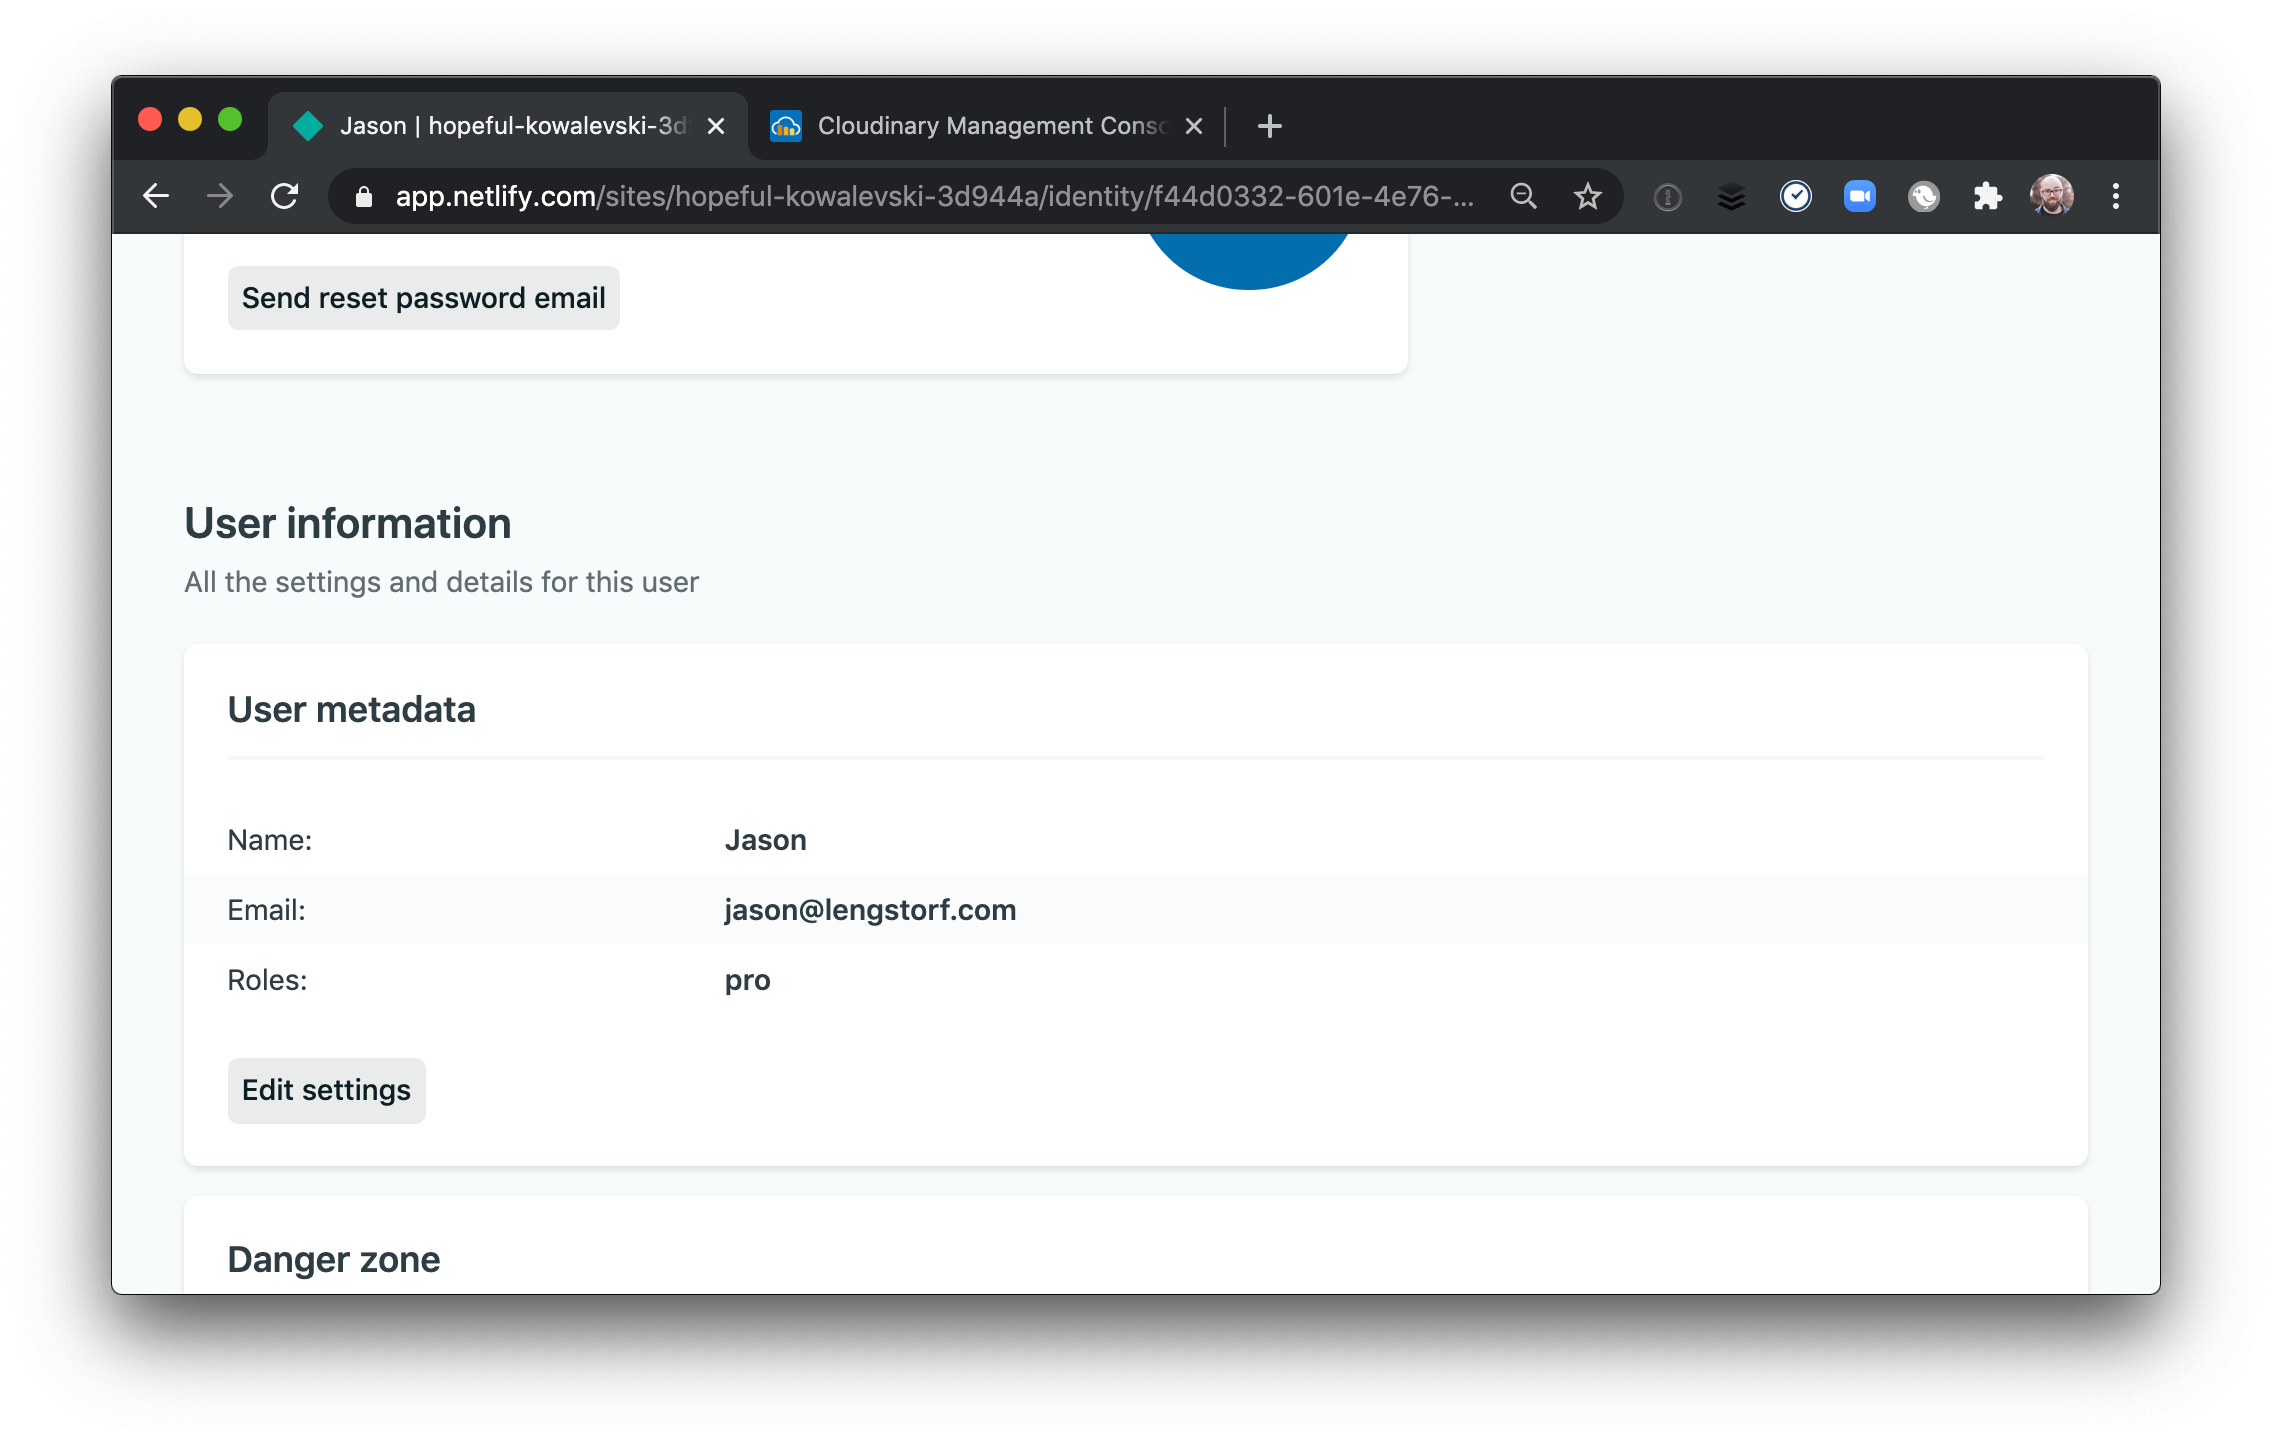
After saving this change, reload http://localhost:8888 while logged in to see that the user now has access to the free and pro content!
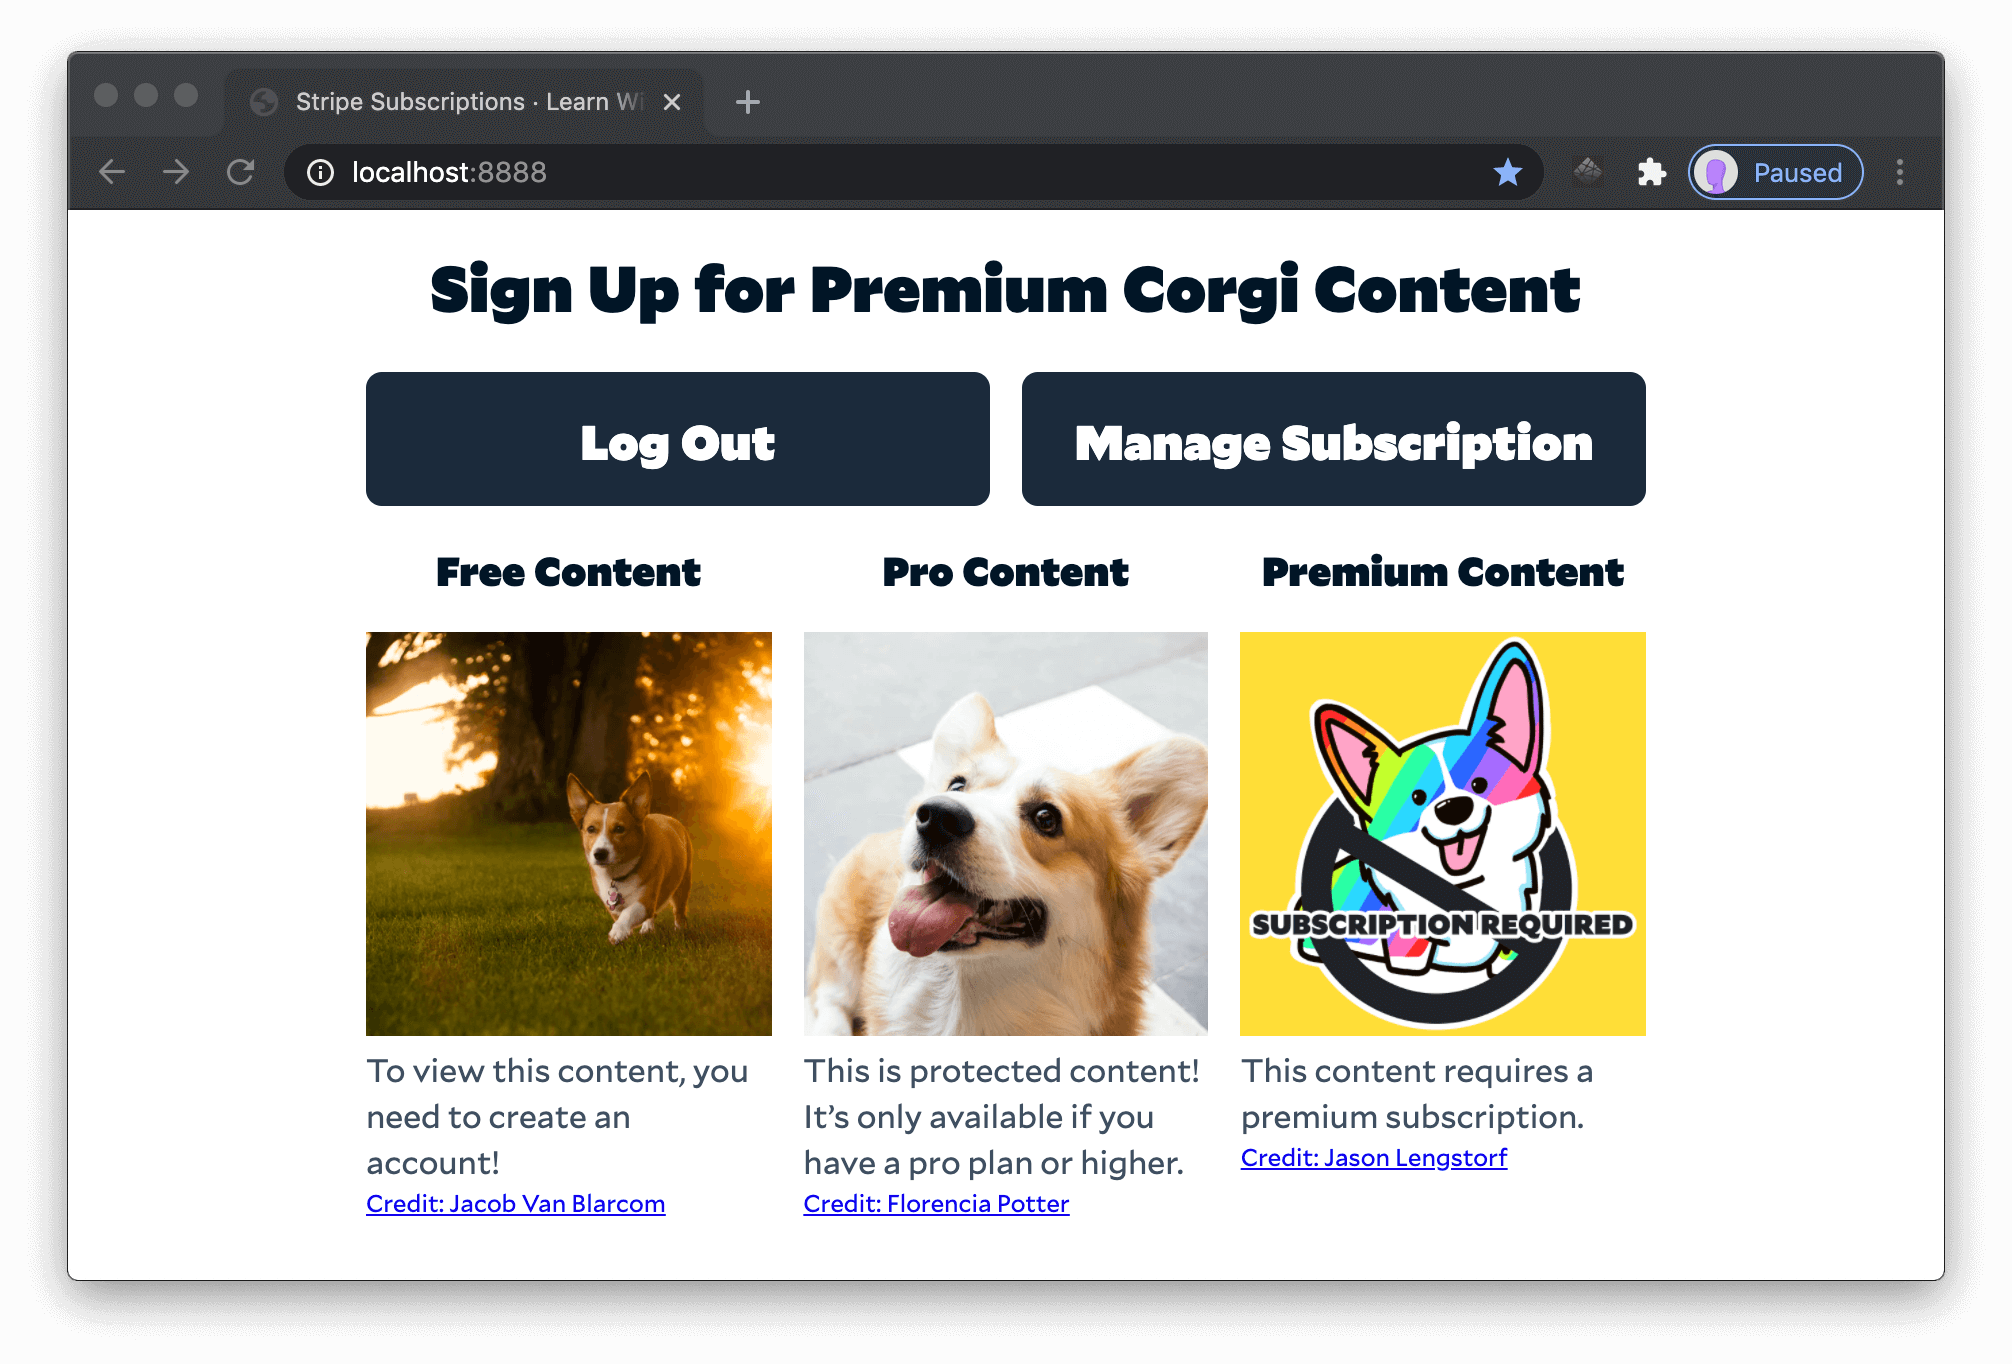
At this point, you’ve successfully set up role-based access management, but it’s managed manually right now — that’s not sustainable. In the next sections, you’ll extend this app to hook up Stripe and automatically manage roles based on the user’s active subscription status.
Store relationships between Netlify Identity users and Stripe customers
In order to keep track of which Netlify Identity user is which Stripe customer, you need a tiny database. All that this database will track is the Netlify user ID and the Stripe customer ID in a table so you can look up one value by the other (more on why this is necessary in the next sections).
To get up and running quickly, this tutorial uses Fauna. You can use any database solution you prefer, so long as it supports read and write operations from serverless functions.
Define a schema for a Fauna database.
Start by creating a schema file. This is only used to set up the database, but it’s a good idea to keep it in source control in case you need to modify it later. Create a new file at db/schema.gql and place the following inside:
type User {
  netlifyID: ID!
  stripeID: ID!
}

type Query {
  getUserByNetlifyID(netlifyID: ID!): User!
  getUserByStripeID(stripeID: ID!): User!
}
This schema defines a User data type that has two fields: netlifyID and stripeID. These fields will store the IDs for Netlify and Stripe, respectively. Next, the schema defines two queries for looking a given user up by either their Netlify or Stripe ID.
Save the schema, then head to https://fauna.com and sign in. If you’re new to Fauna, you can sign up with your Netlify account for free!
Click the “New Database” button, then give your database a memorable name and save it. Do not check the box to pre-populate with demo data — you don’t need that for this project.
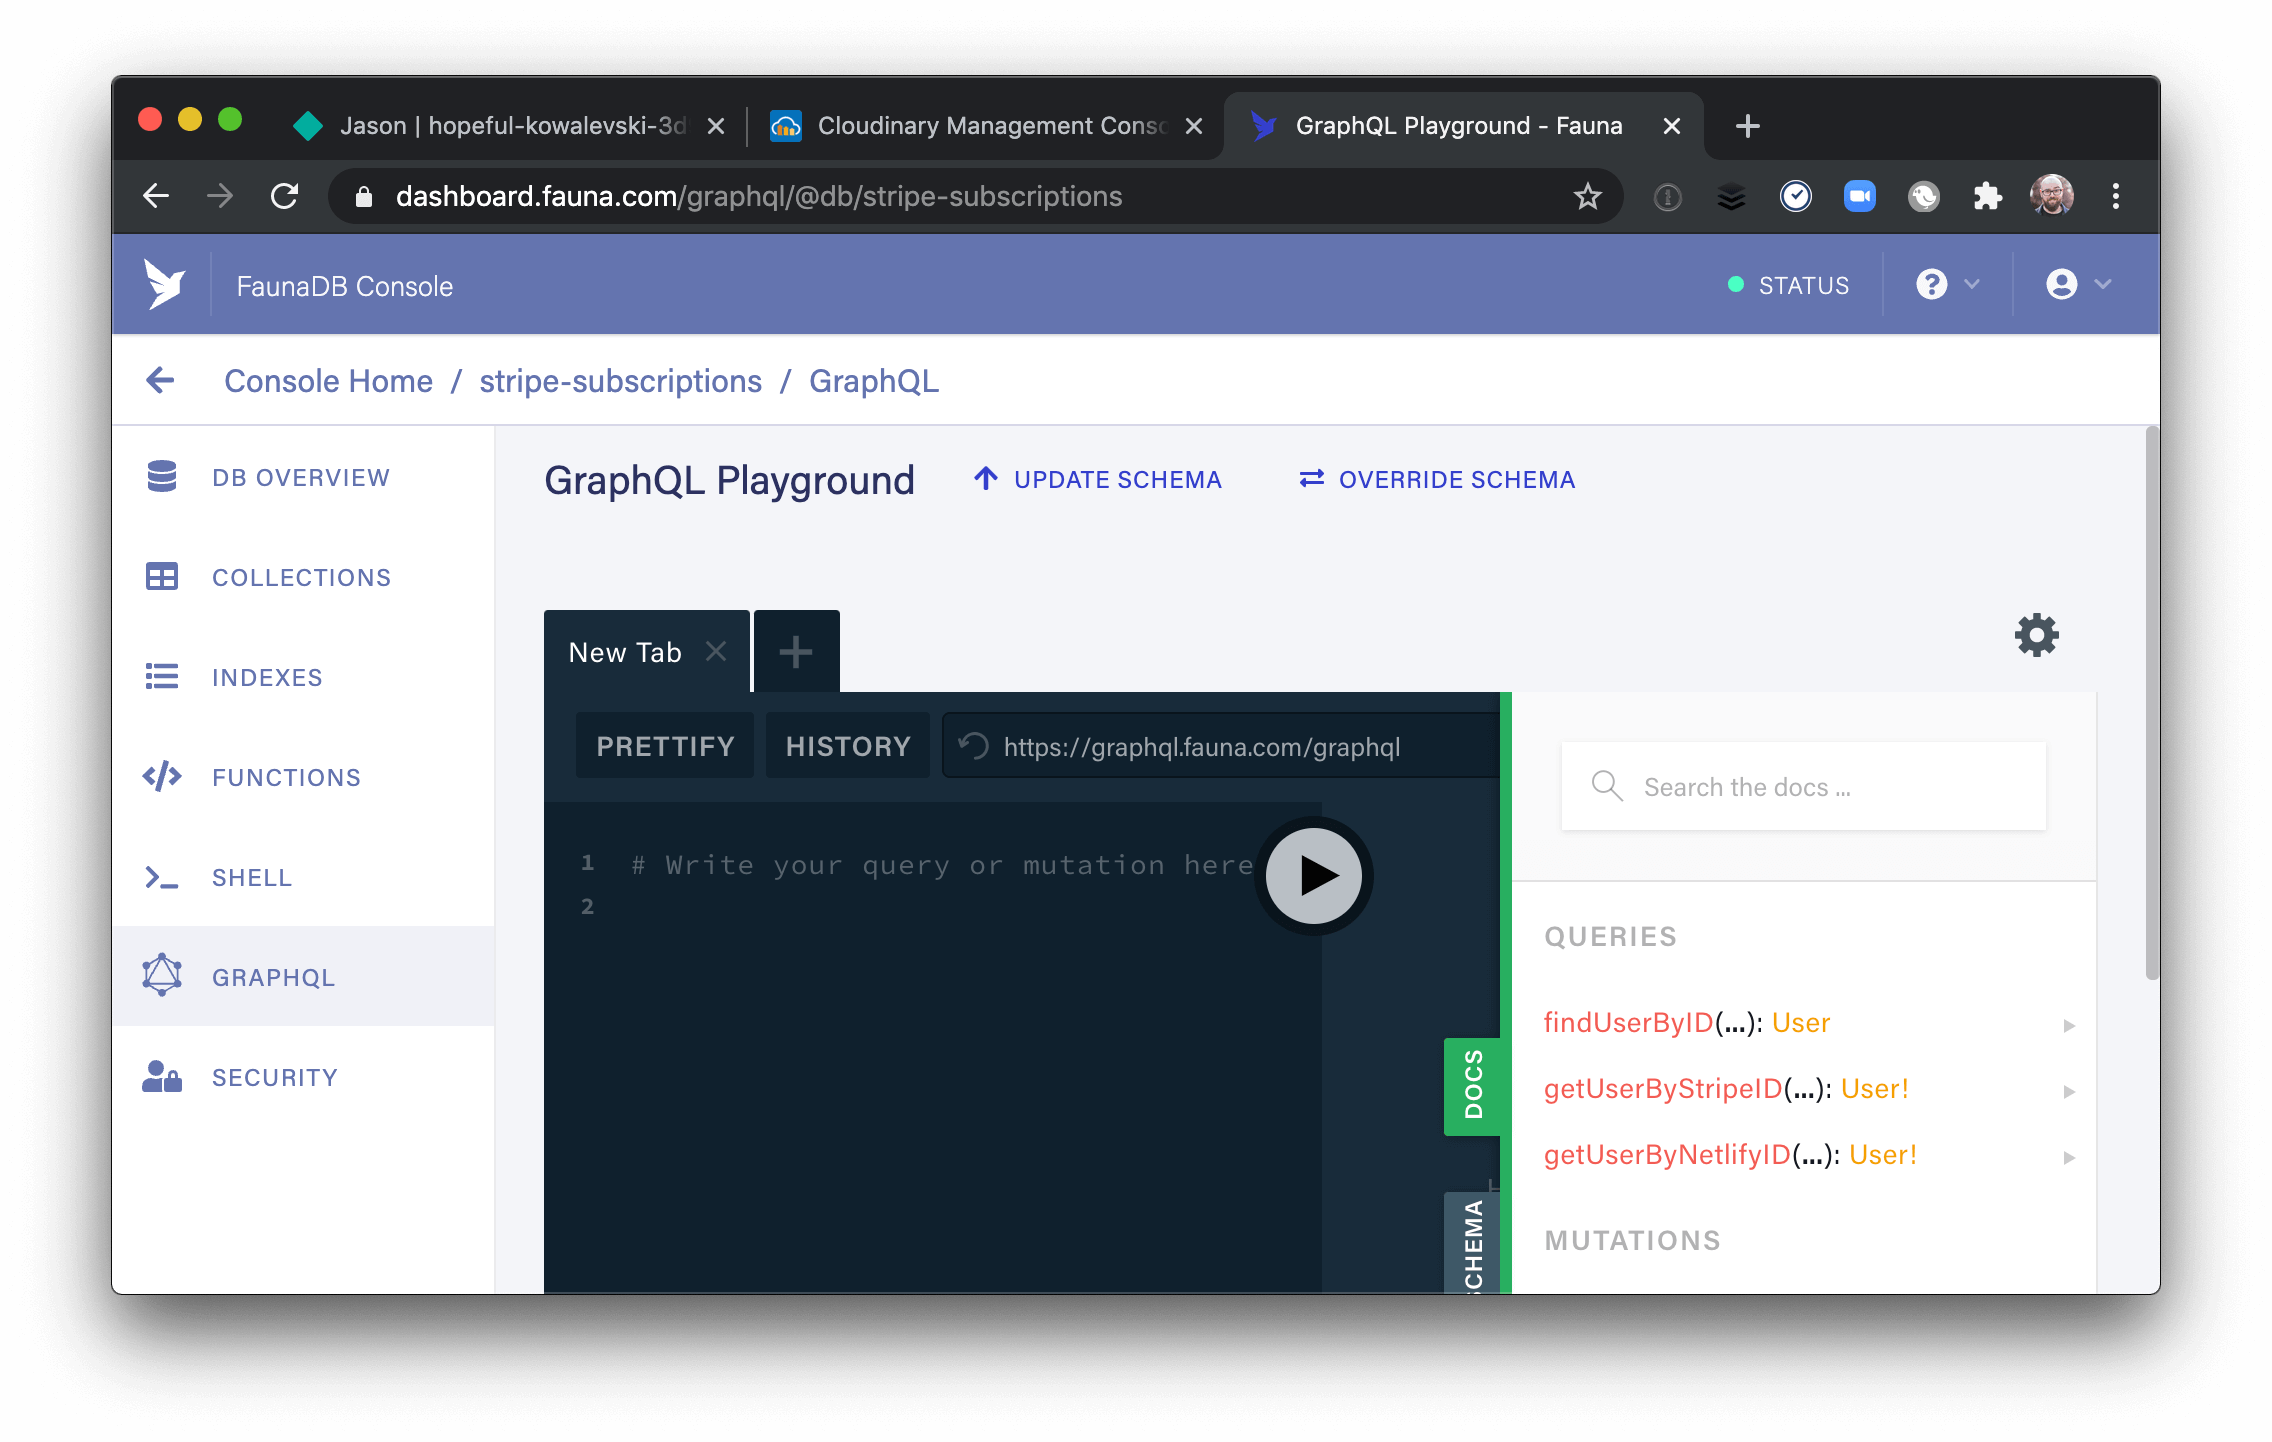
After creating the database, click on the GraphQL option in the left-hand nav, then click the “Import Schema” button and choose the schema file you just created in db/schema.gql. After the upload completes, you’ll see a GraphQL playground, and if you click the “docs” tab you can see the queries defined in the schema.
Generate a server key for your Fauna database.
Next, click the “Security” option in the left-hand nav and click “New Key”. Choose the Server role and click “Save” to generate a secret key that will allow you to read from and write to Fauna from your serverless functions.

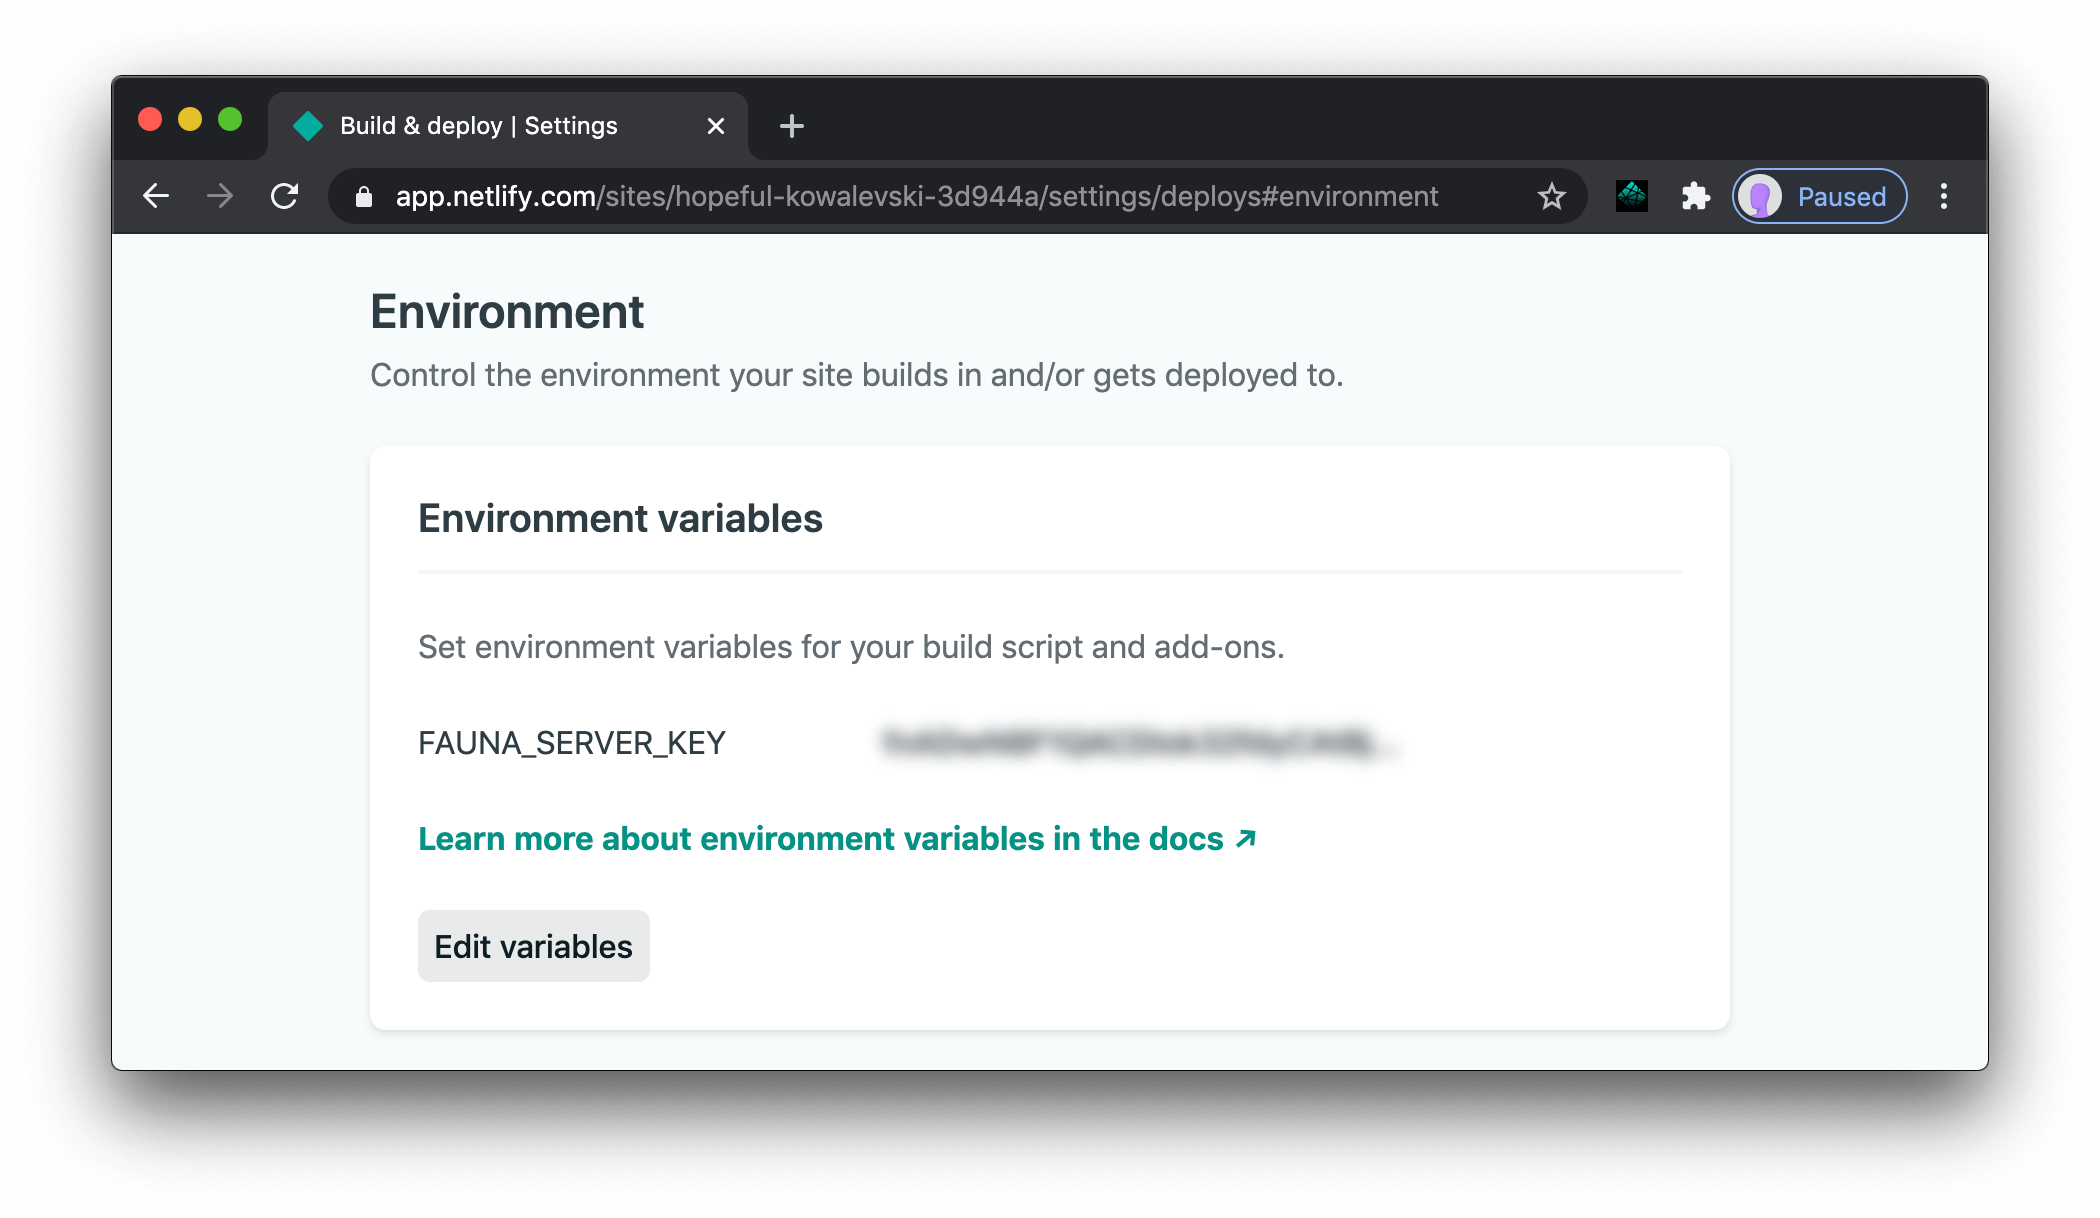
Copy this key, then head to your site admin page in your Netlify dashboard and click Settings, then Deployment. In the Environment section, add a new environment variable called FAUNA_SERVER_KEY and enter the key you just copied from the Fauna dashboard.
Create a Fauna utility function to send authenticated requests.
First, install node-fetch so you can use the same fetch API in serverless functions that you use in the browser.
npm install node-fetchNext, create a new file at functions/utils/fauna.js and add the following inside:
const fetch = require('node-fetch');

exports.faunaFetch = async ({ query, variables }) => {
  return await fetch('https://graphql.fauna.com/graphql', {
    method: 'POST',
    headers: {
      Authorization: `Bearer ${process.env.FAUNA_SERVER_KEY}`,
    },
    body: JSON.stringify({
      query,
      variables,
    }),
  })
    .then((res) => res.json())
    .catch((err) => console.error(JSON.stringify(err, null, 2)));
};
This utility function accepts a GraphQL query and a variables object and sends them to Fauna’s GraphQL endpoint along with the server key you generated in the previous section.
It’s not in use yet, but you’ll end up using this utility in several functions over the coming sections.
Set up Stripe and add subscription tiers
To limit access based on subscription level, you’ll need to have subscriptions created that people can subscribe to.
Head to https://dashboard.stripe.com and sign in. Make sure the account is in test mode with the toggle at the bottom of the left-hand menu. Next, click “Products”, then click the “+ Add product” button at the top right.
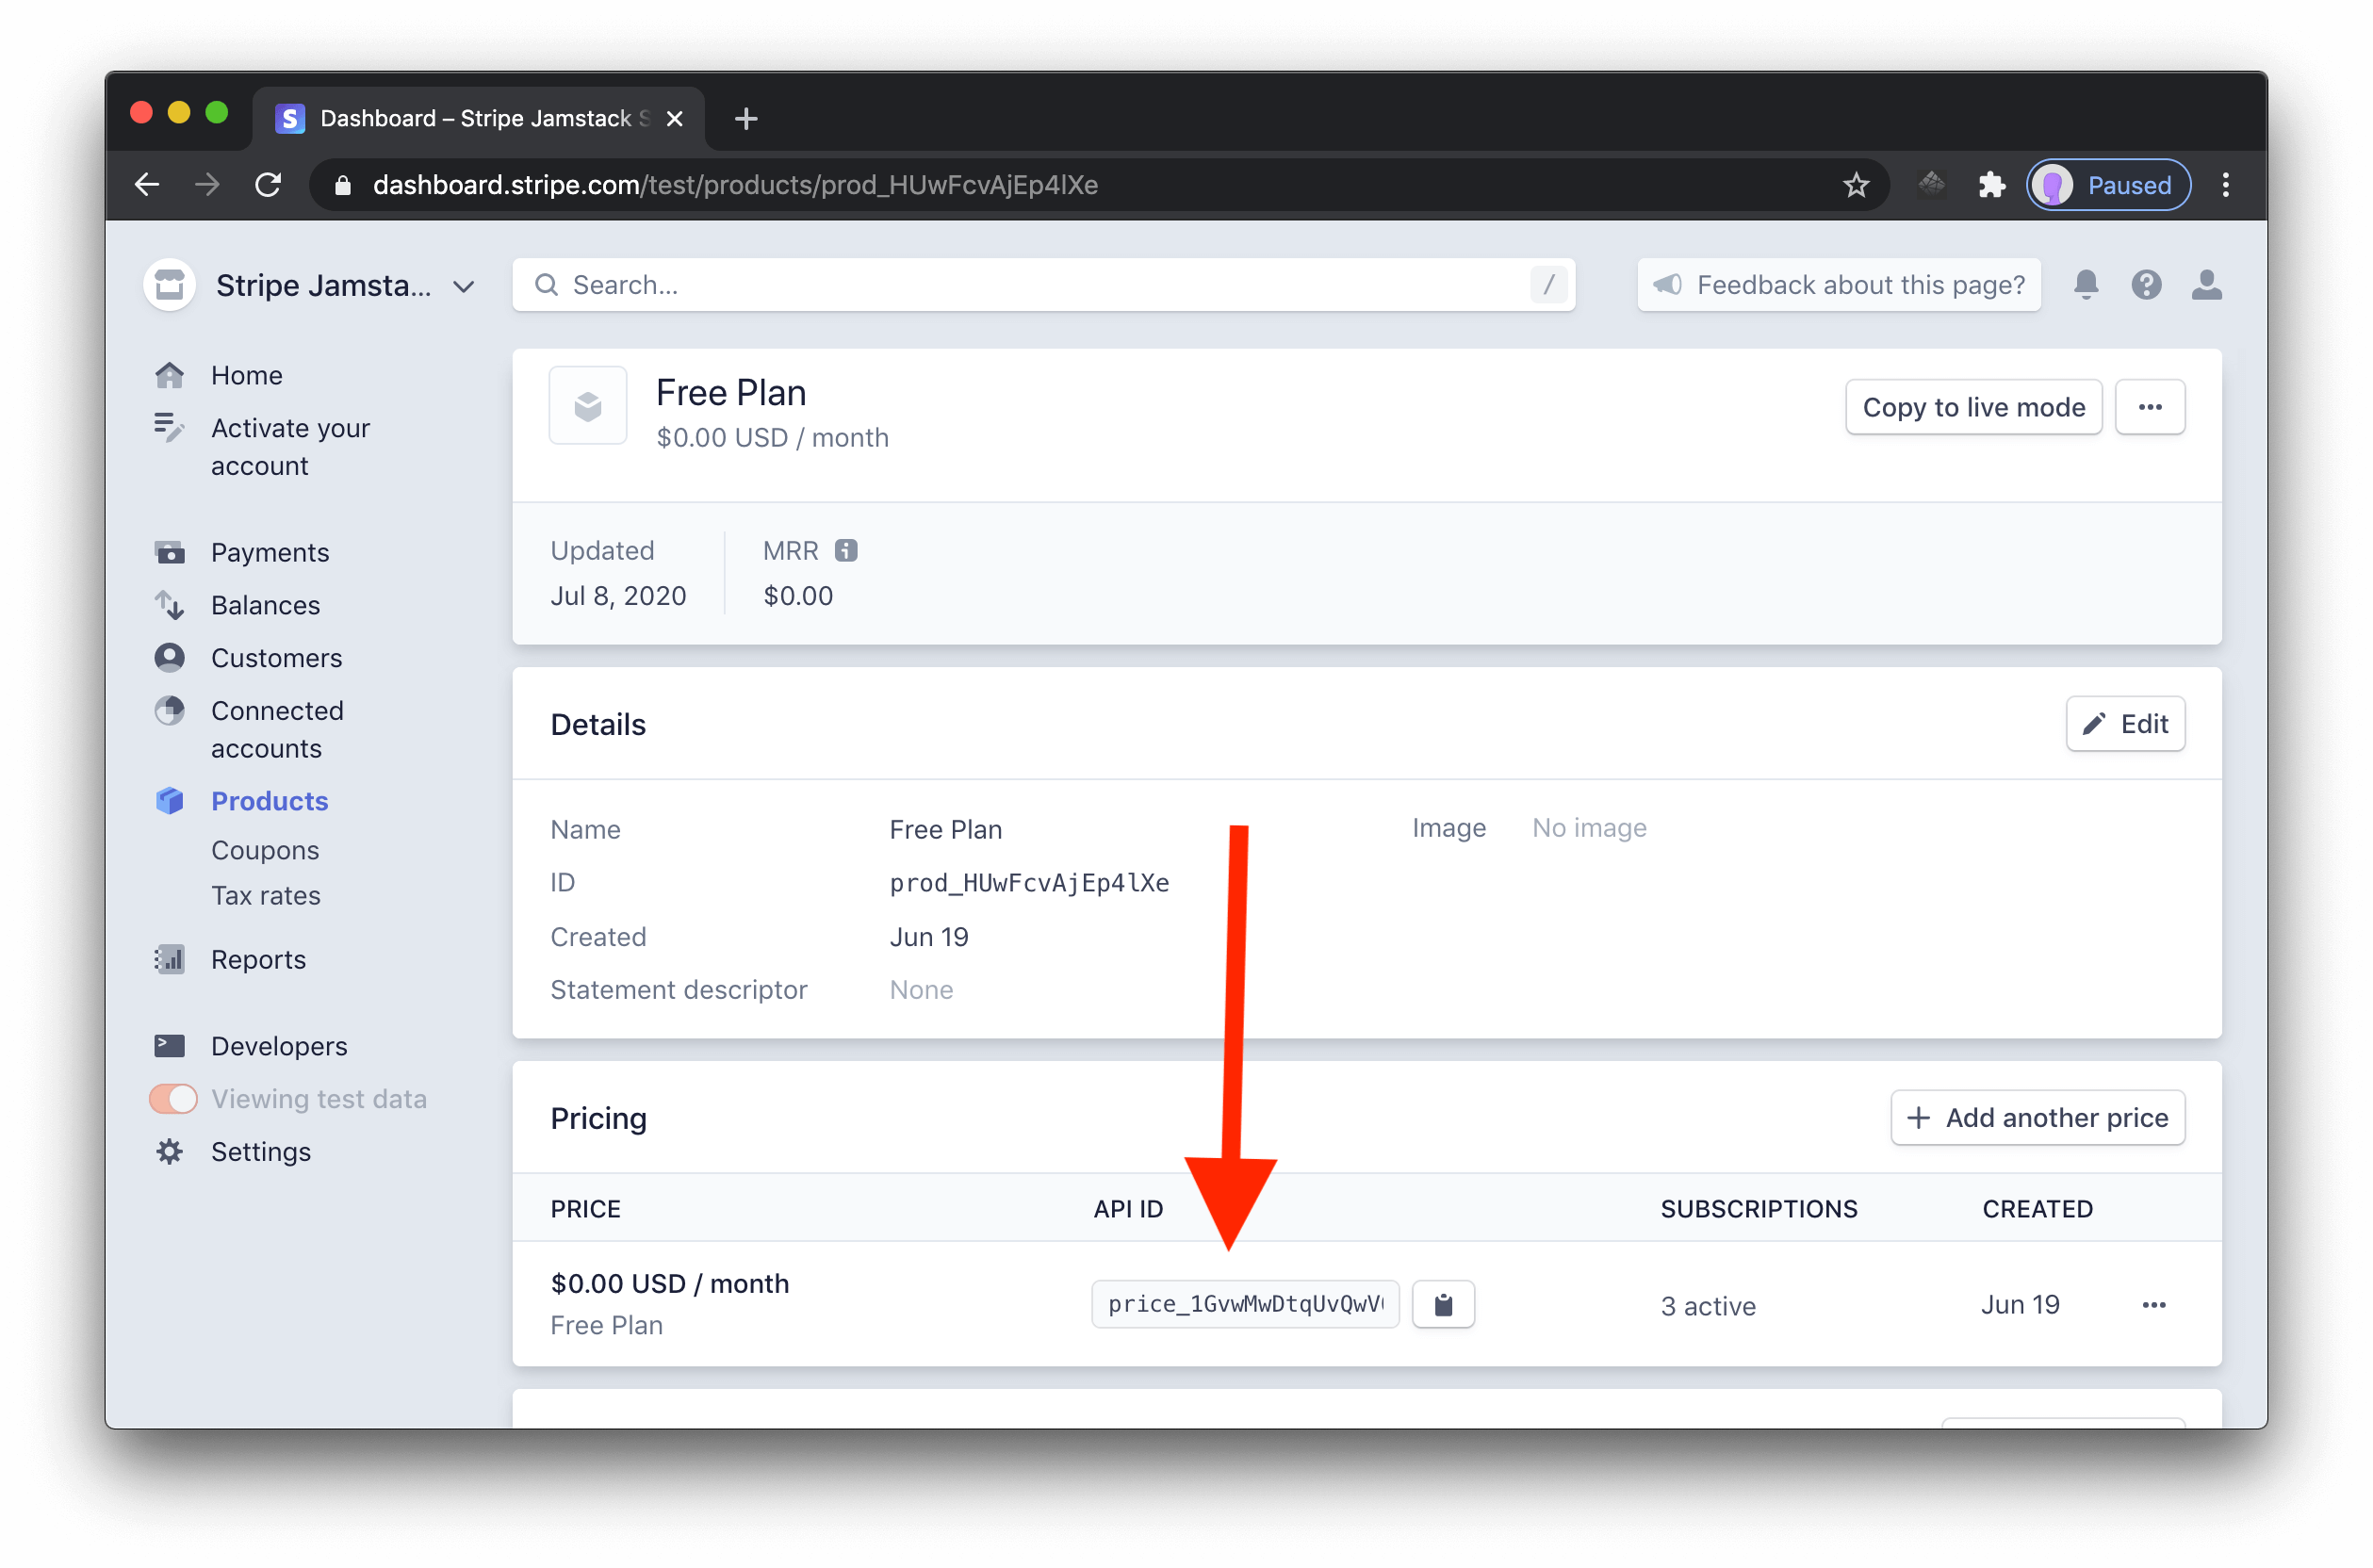
Set the name to “Free Plan”, set the price to $0.00 and click “Save product”. On the next screen, look for the Pricing section and copy the API ID for the price (it starts with price_). You’ll need this later.
Repeat the product creation process to add the following products and prices:
- Pro Plan
- $10.00 monthly plan with the name “Pro plan monthly”
- $100.00 yearly plan with the name “Pro plan annual (2 months free!)”
- Premium Plan
- $40.00 monthly plan with the name “Premium plan monthly”
- $400.00 yearly plan with the name “Premium plan annual (2 months free!)”
Next, get your secret key by clicking “Developers”, then “API keys” in the left-hand menu.
Open your Netlify dashboard and add two new environment variables:
STRIPE_DEFAULT_PRICE_PLAN, which contains the API ID for the Free planSTRIPE_SECRET_KEY, which contains your Stripe secret key
Create a new customer on signup
Whenever someone creates a new account with Netlify Identity, you can use the identity-signup.js handler to automatically create a new customer in Stripe that is subscribed to the free plan, then store the new Netlify and Stripe IDs in Fauna.
To do this, install the stripe package:
npm install stripeNext, create functions/identity-signup.js and place the following inside:
const stripe = require('stripe')(process.env.STRIPE_SECRET_KEY);
const { faunaFetch } = require('./utils/fauna');

exports.handler = async (event) => {
  const { user } = JSON.parse(event.body);

  // create a new customer in Stripe
  const customer = await stripe.customers.create({ email: user.email });

  // subscribe the new customer to the free plan
  await stripe.subscriptions.create({
    customer: customer.id,
    items: [{ price: process.env.STRIPE_DEFAULT_PRICE_PLAN }],
  });

  // store the Netlify and Stripe IDs in Fauna
  await faunaFetch({
    query: `
      mutation ($netlifyID: ID!, $stripeID: ID!) {
        createUser(data: { netlifyID: $netlifyID, stripeID: $stripeID }) {
          netlifyID
          stripeID
        }
      }
    `,
    variables: {
      netlifyID: user.id,
      stripeID: customer.id,
    },
  });

  return {
    statusCode: 200,
    body: JSON.stringify({
      app_metadata: {
        roles: ['free'],
      },
    }),
  };
};
This function will be called whenever someone signs up to the site. It pulls the user info out of the event body, then creates a new Stripe customer using the user email and subscribes that user to the free subscription plan.
Next, it sends a mutation to Fauna that stores the Netlify and Stripe IDs together so you know which user is which.
Finally, it returns an object with app_metadata, which is how you’re able to control user roles.
Heads up! This post isn’t going to cover GraphQL (which is what the
query/variablesin the code above are), but Eve Porcello has created a ton of great content to teach you how it works, including this excellent overview of how GraphQL works.
Save this function, commit your changes, and push them to the site. This hook needs to be deployed to work, since it’s not possible for Netlify to call your localhost remotely.
Once the site is deployed, delete the original user in the Netlify Identity tab and sign up again. This will trigger the new identity-signup function and create Stripe and Fauna entries.
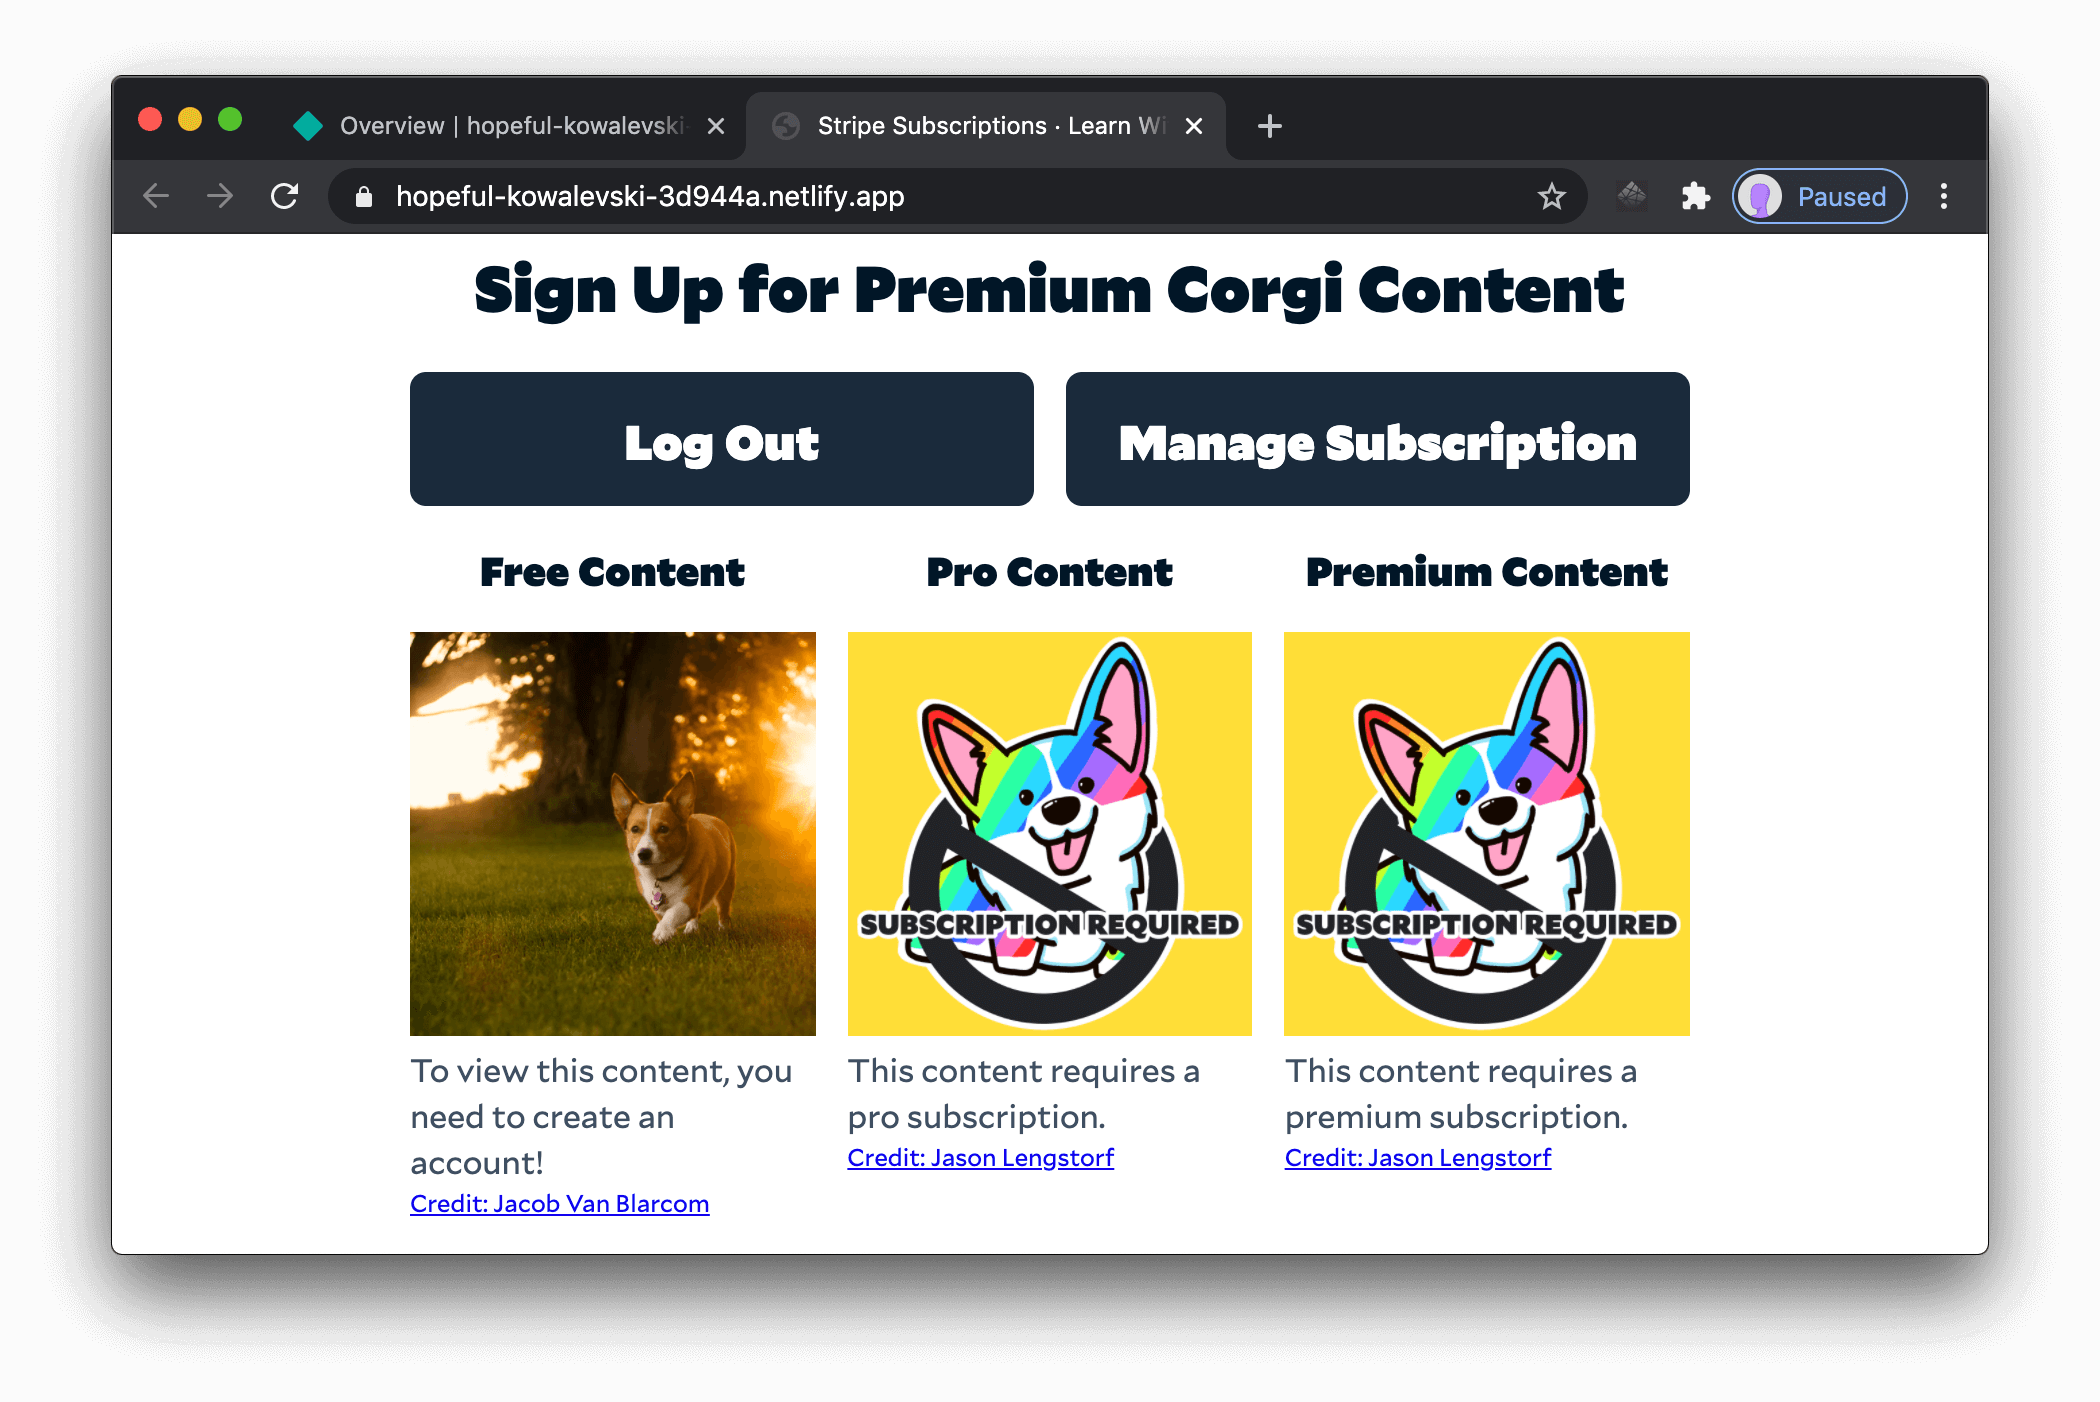
Once you verify your email, you’ll see the free tier content after logging in.
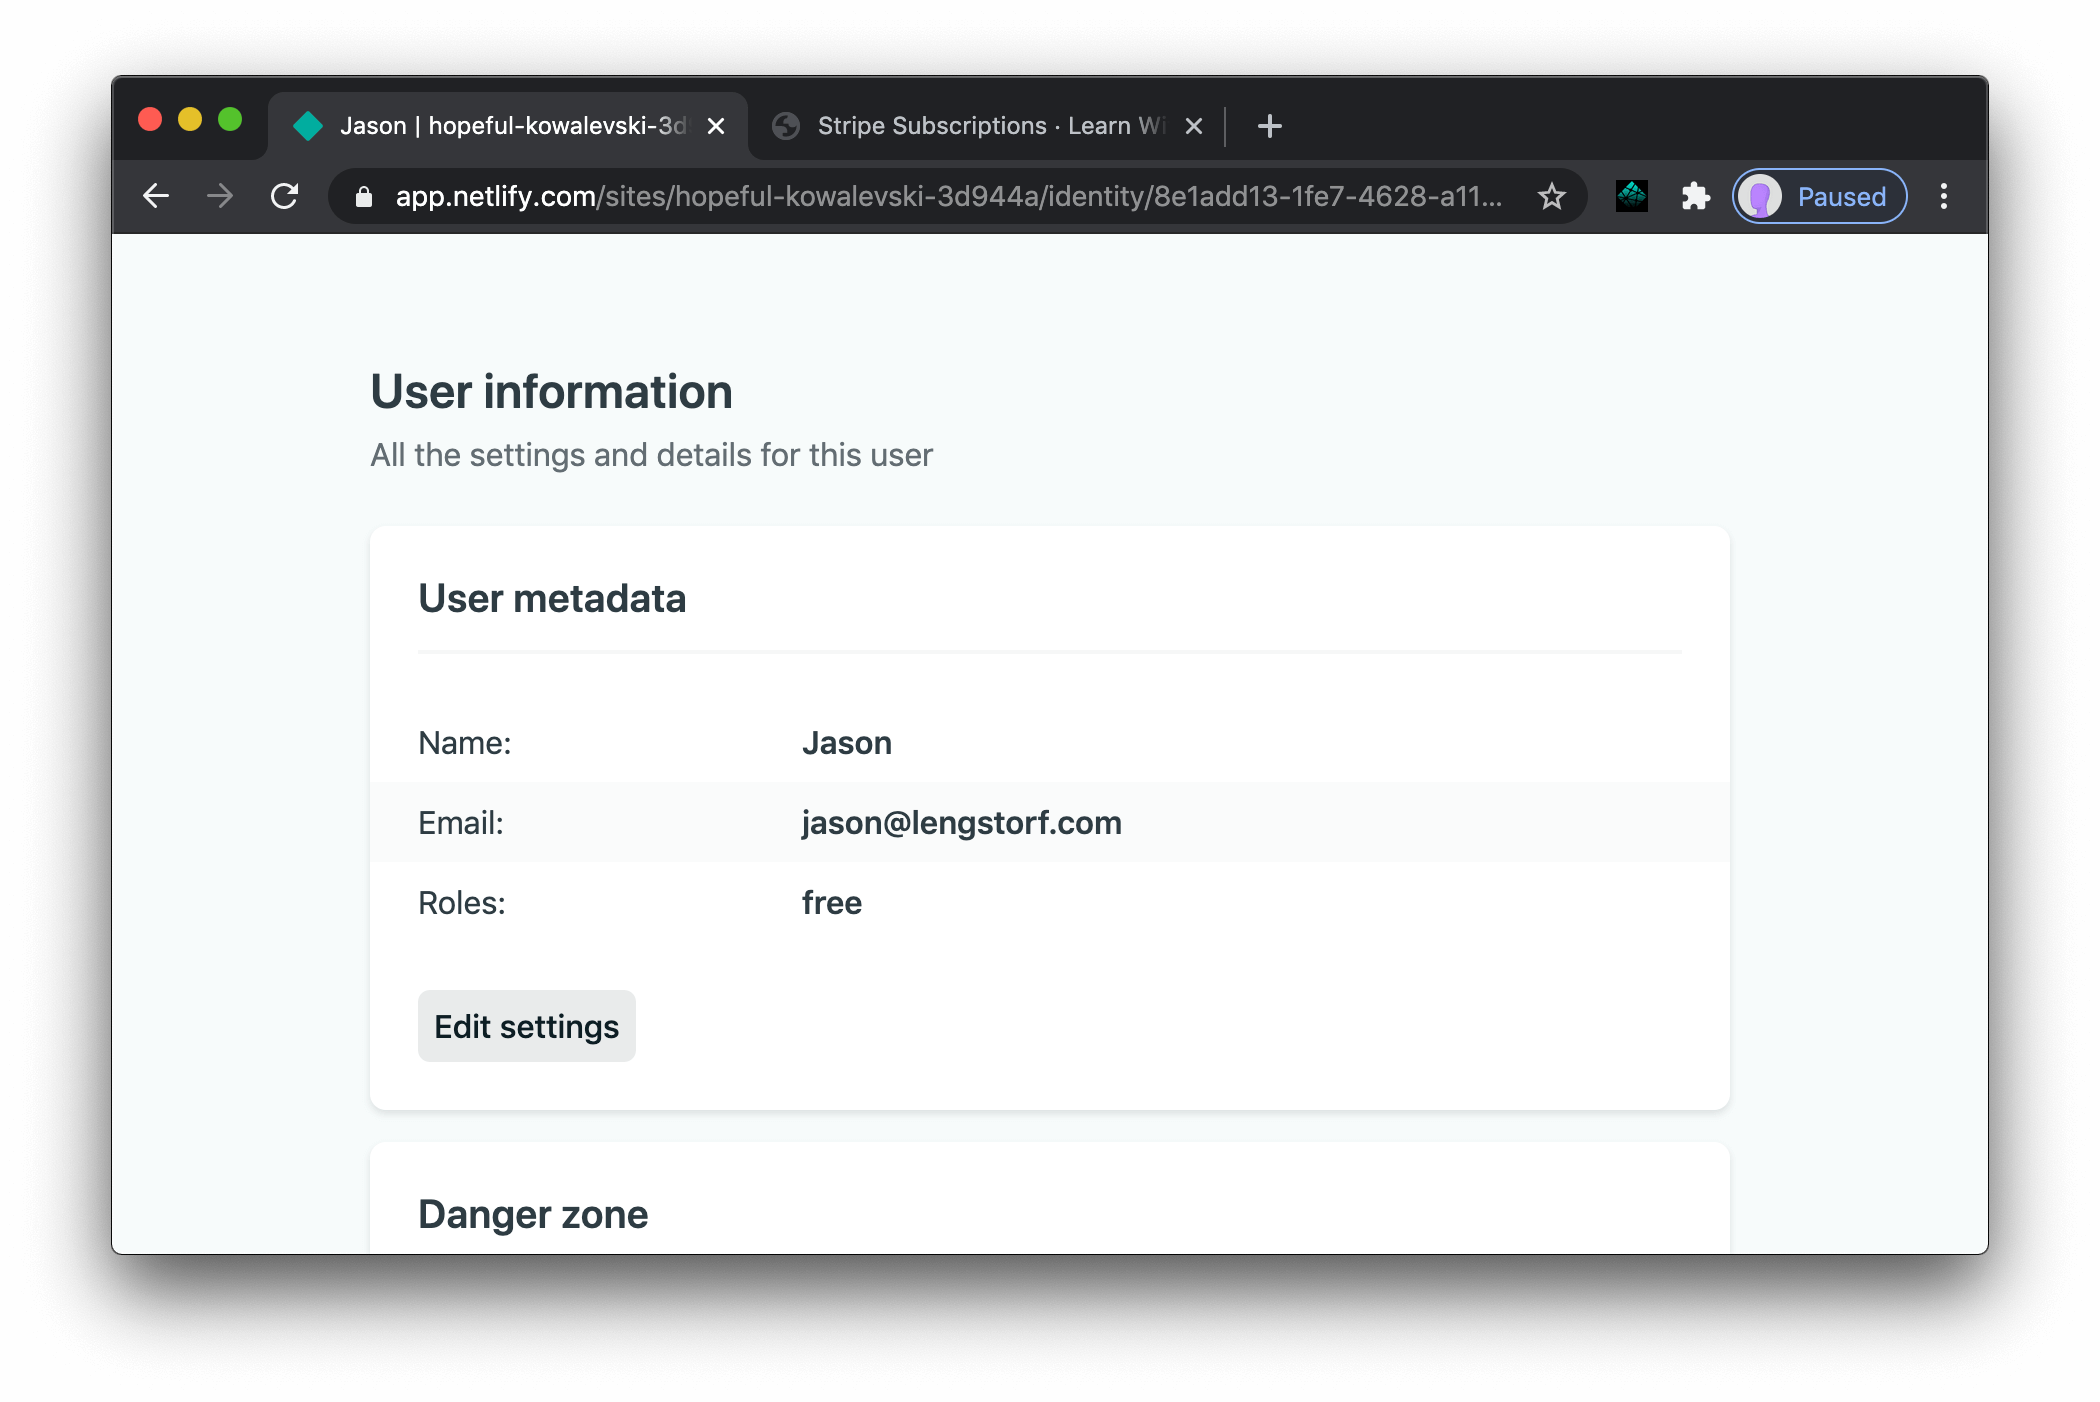
If you check the newly created user in the Netlify dashboard, you’ll see that the free role was automatically added!
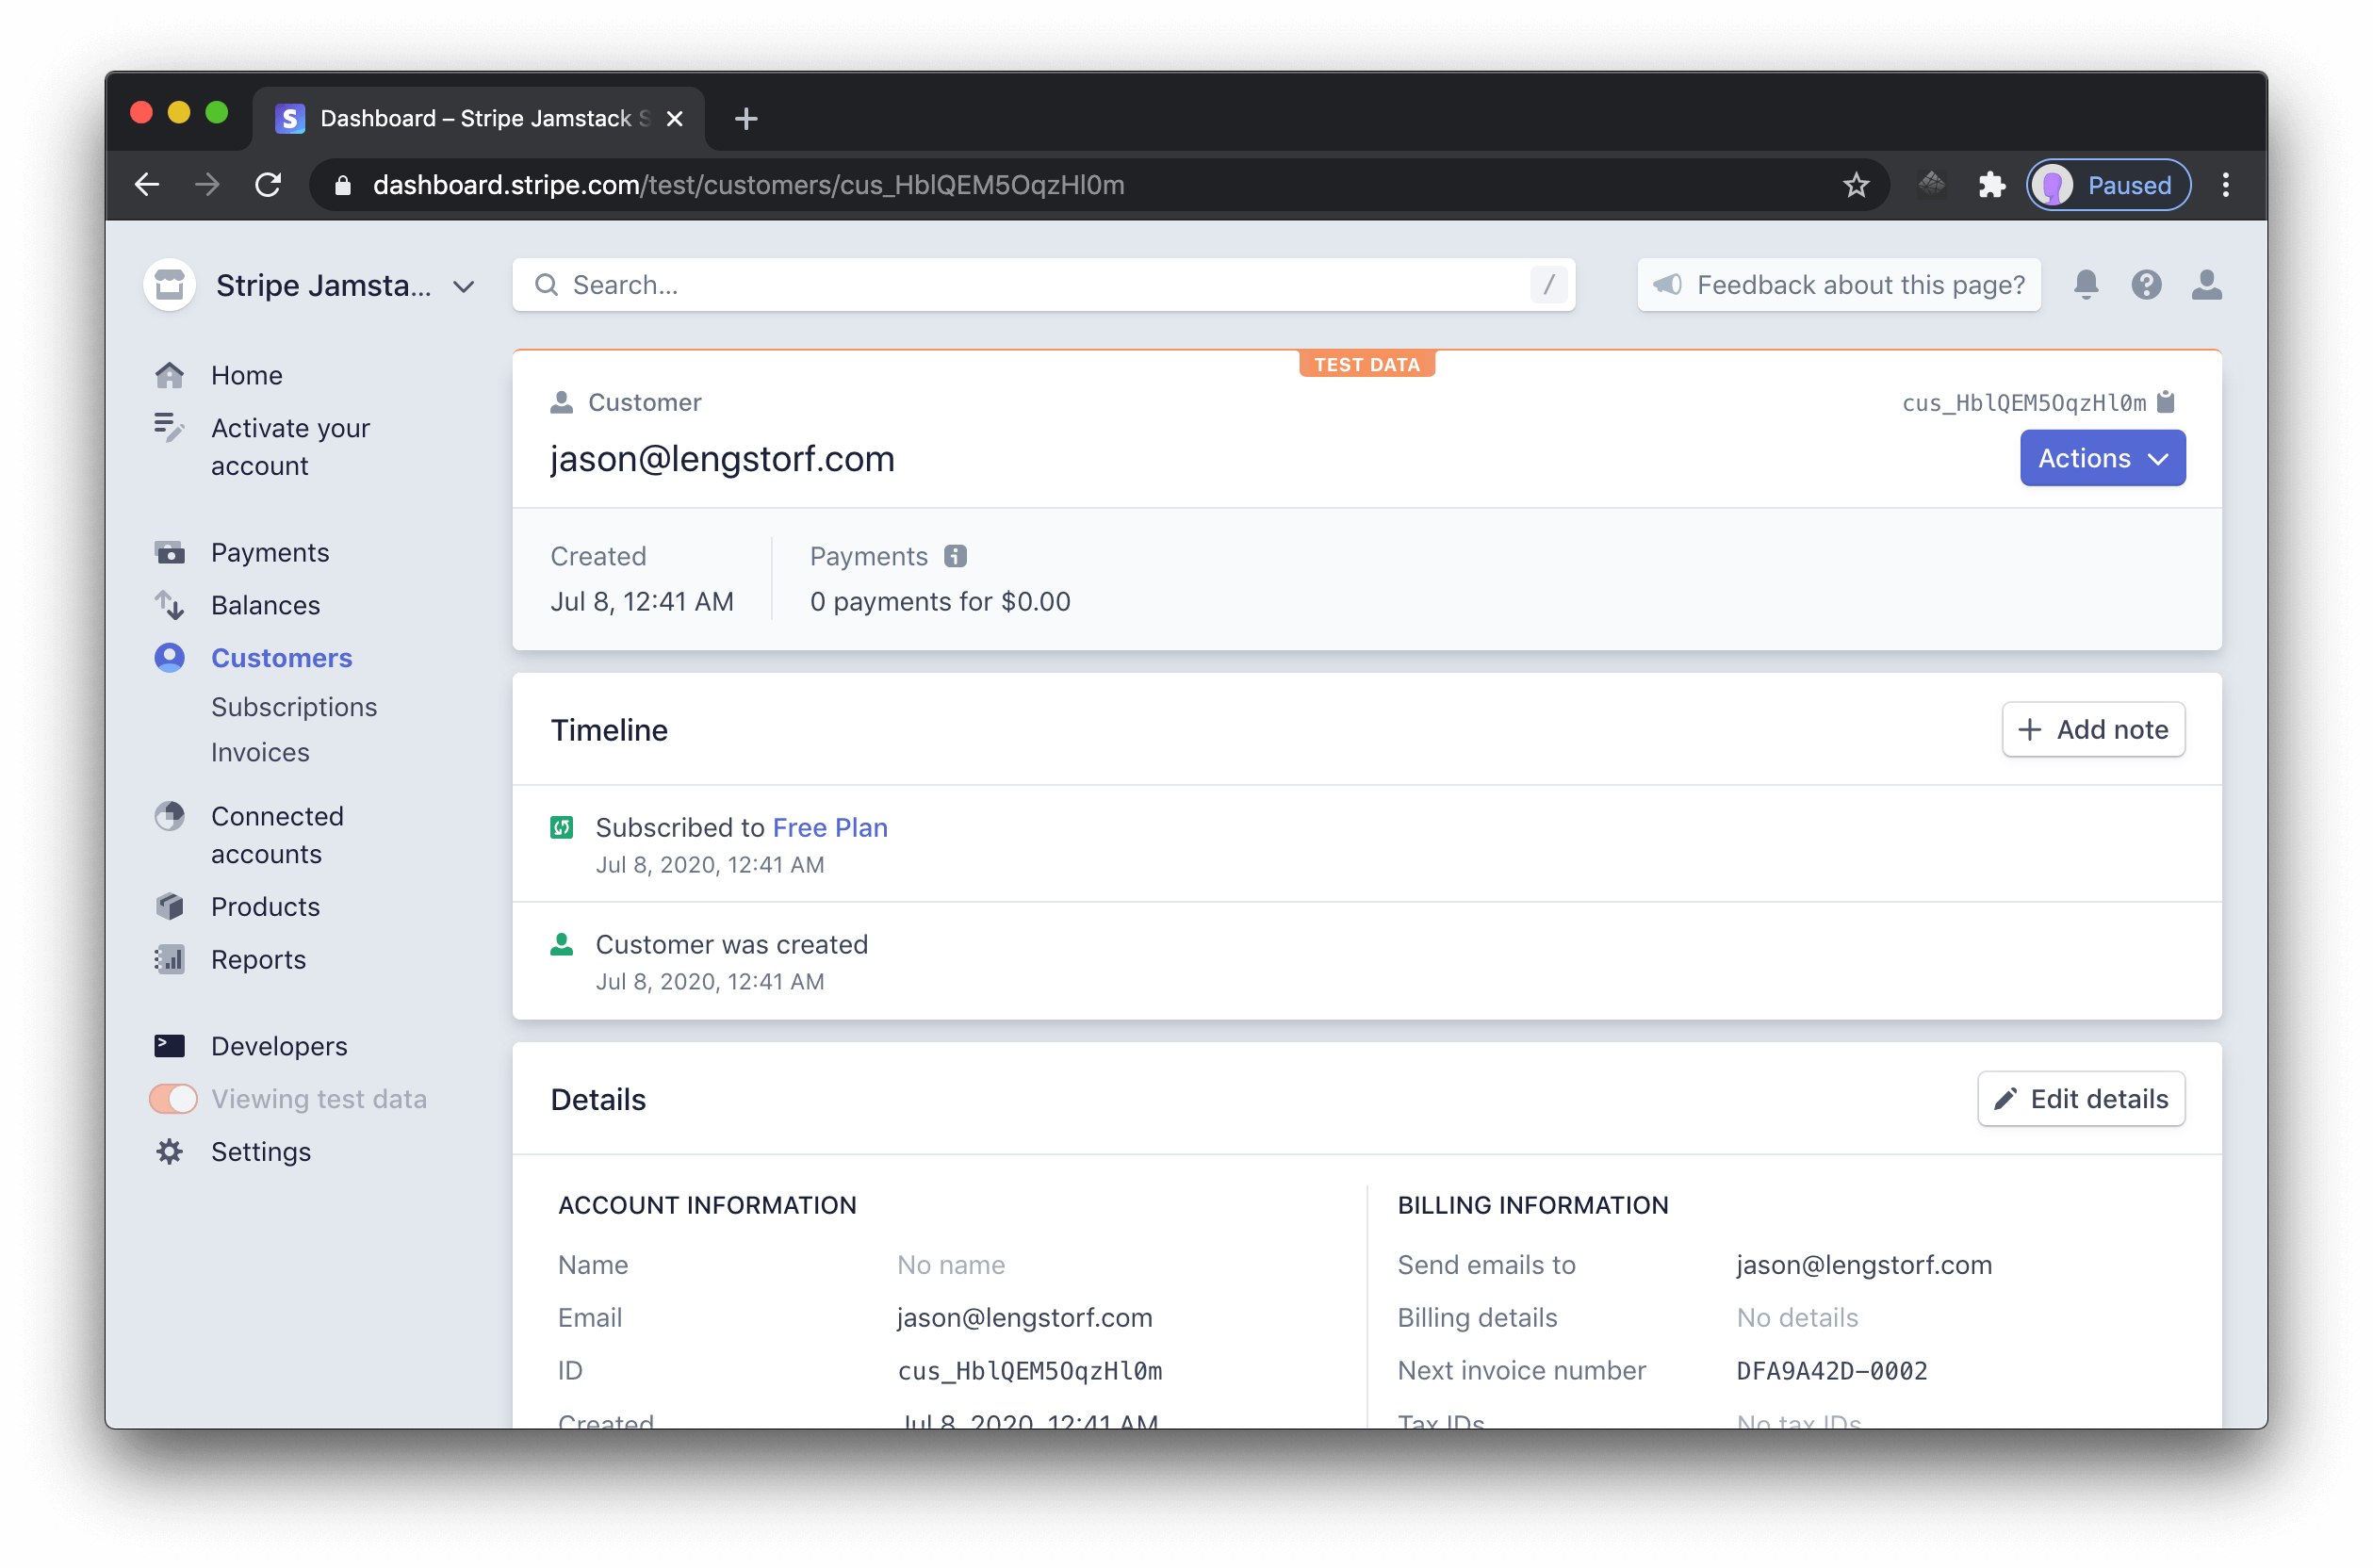
Head to your Stripe dashboard and click “Customers” to see that a new customer with the same email as your user was created in Stripe.
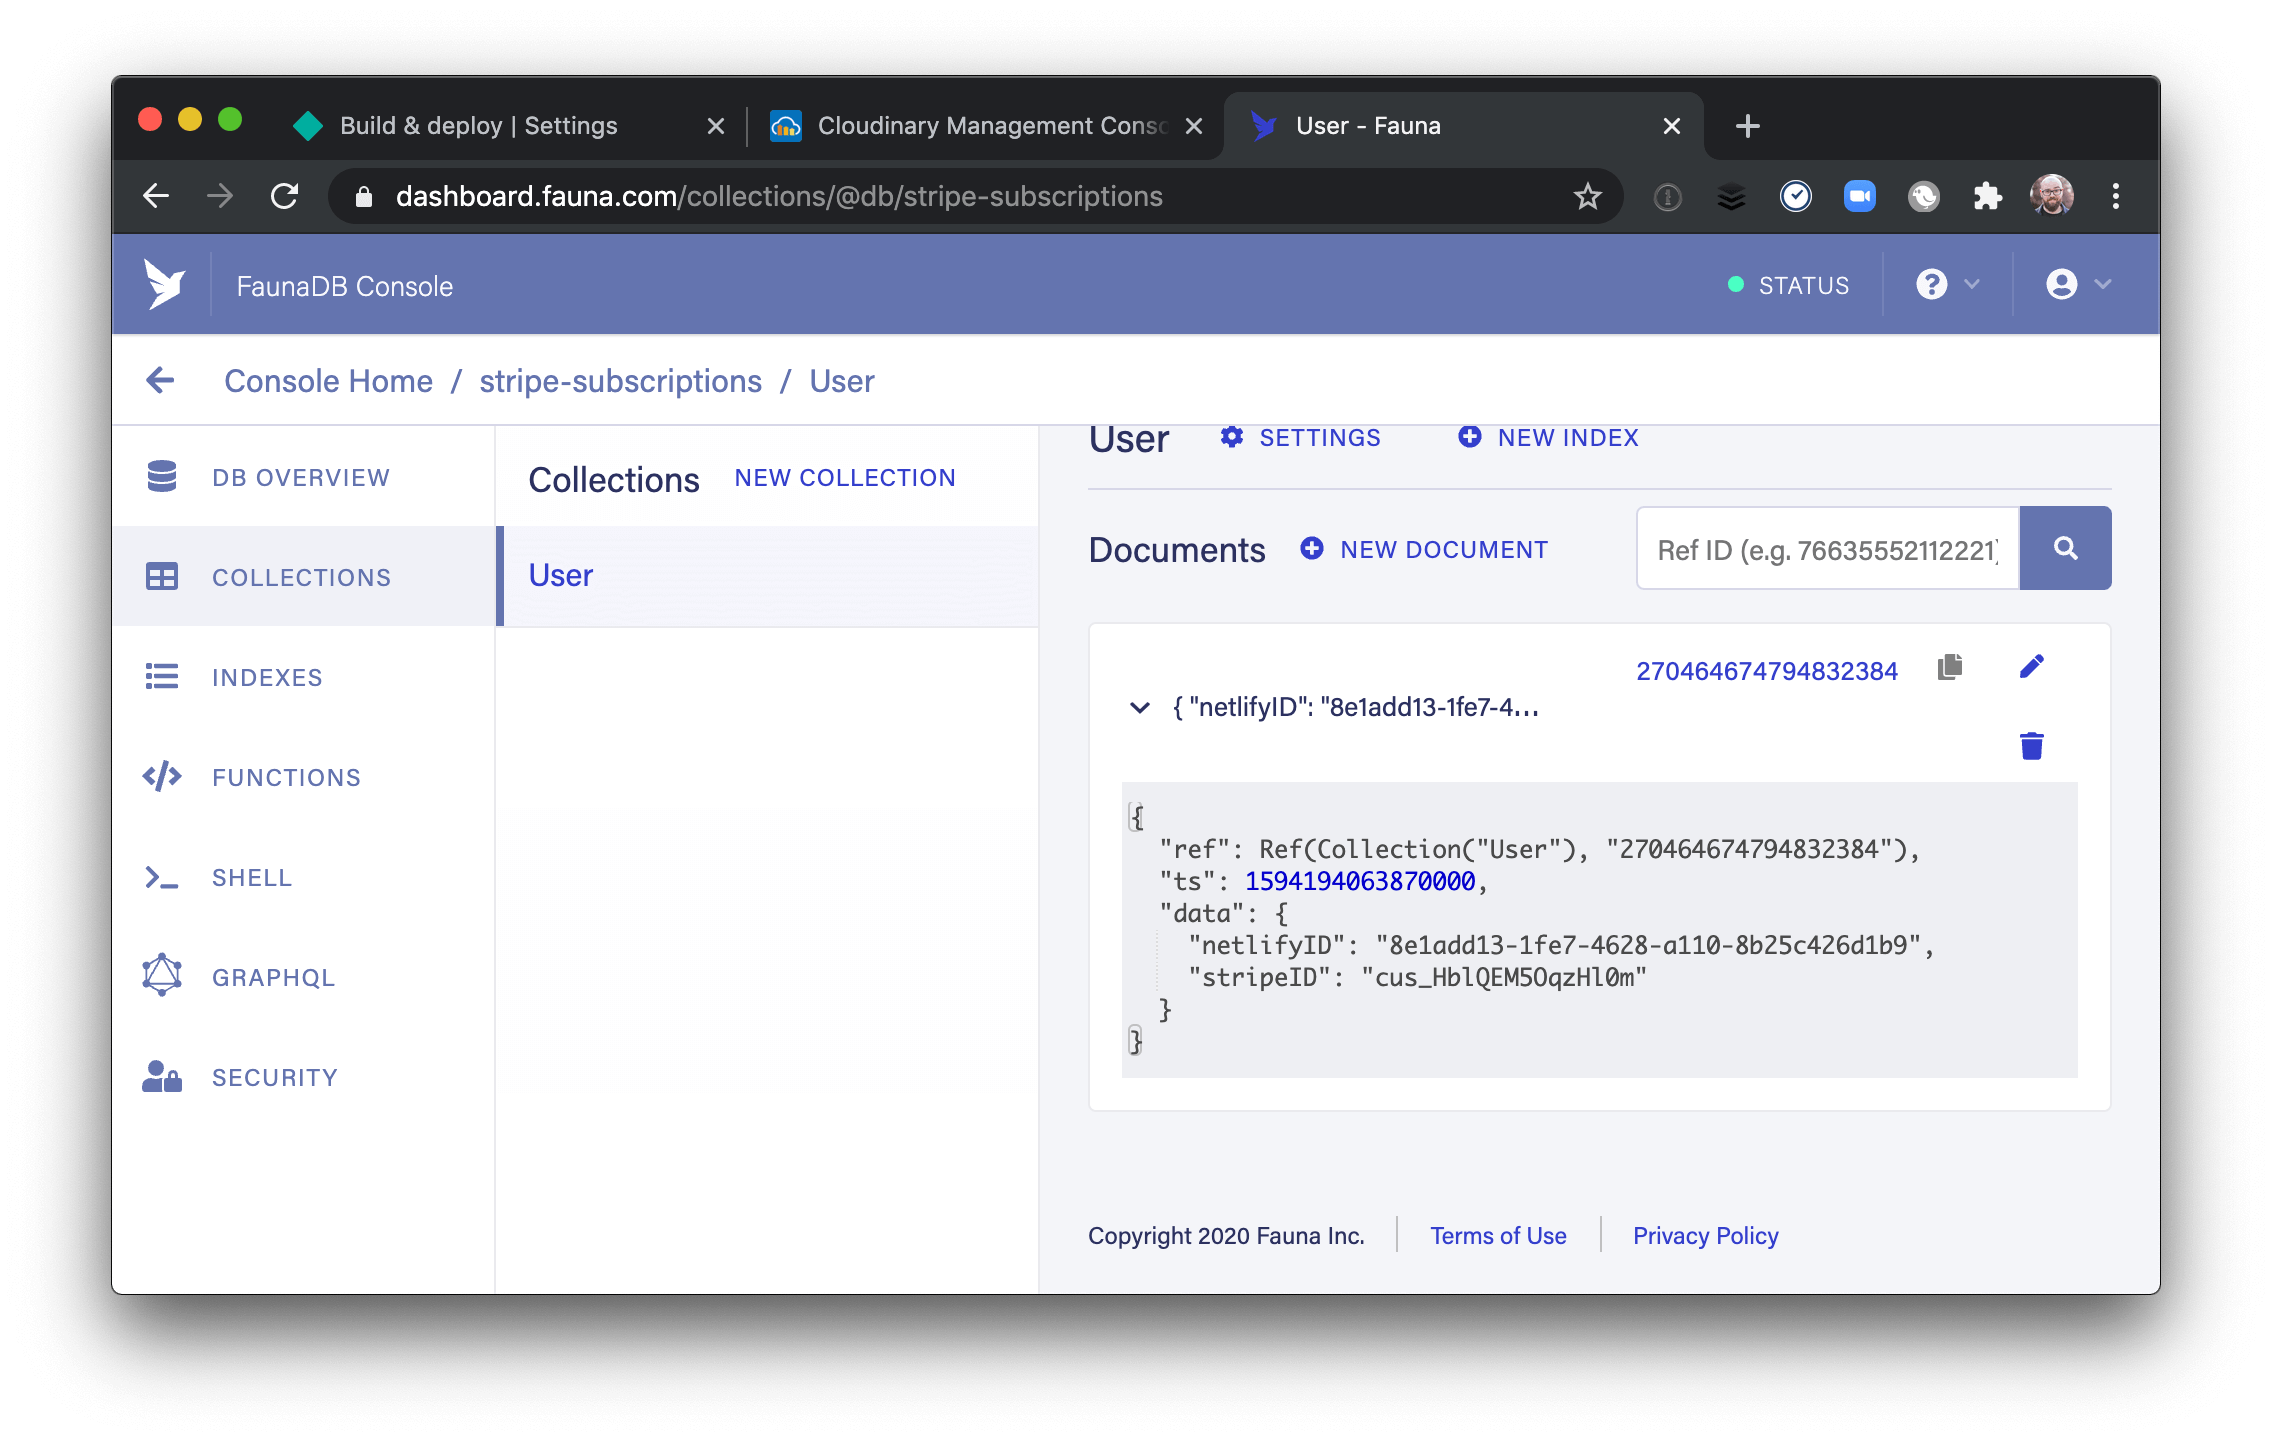
And if you check the Fauna database, a new User entry has been created with the Netlify and Stripe IDs for this user.
At this point, you’ve successfully set up a full integration between Stripe, Fauna, and Netlify! Holy buckets!
In the next section, you’ll add support for allowing users to change their subscription status and write the code to automatically update their role based on the changes.
Heads up! If you don’t want to offer a free plan, you can create a subscription with Stripe Checkout instead.
Allow users to manage their subscription level
To allow your users to modify their subscriptions and access the protected content, you’ll be using the Stripe Billing customer portal, which allows you to avoid all of the complexity, stress, and security overhead of managing user data and payment information — Stripe handles all of the compliance and risk mitigation for you so you can focus on building great web experiences instead!
The billing portal works by creating a unique link for each customer that’s specific to your store. To do this, you’ll need to use your Stripe secret key, which means adding a serverless function — this keeps the key secure by making sure it’s not available in the browser.
Create a new file at functions/create-manage-link.js and add the following inside:
const stripe = require('stripe')(process.env.STRIPE_SECRET_KEY);
const { faunaFetch } = require('./utils/fauna');

exports.handler = async (_event, context) => {
  const { user } = context.clientContext;

  const result = await faunaFetch({
    query: `
      query ($netlifyID: ID!) {
        getUserByNetlifyID(netlifyID: $netlifyID) {
          stripeID
        }
      }
    `,
    variables: {
      netlifyID: user.sub,
    },
  });

  const { stripeID } = result.data.getUserByNetlifyID;

  const link = await stripe.billingPortal.sessions.create({
    customer: stripeID,
    return_url: process.env.URL,
  });

  return {
    statusCode: 200,
    body: JSON.stringify(link.url),
  };
};
This function will:
- Get the current user from Netlify Identity
- Look up the Stripe customer ID by sending a
getUserByNetlifyIDquery to Fauna - Send the
stripeIDand the site’s URL (which Netlify provides inprocess.env.URL) to create a new billing portal link - Return the generated link to the billing portal
To use this function, open up src/index.html and make the following changes to the updateUserInfo function:
  const updateUserInfo = (user) => {
    const container = document.querySelector('.user-info');

    // cloning the buttons removes existing event listeners
    const b1 = button1.cloneNode(true);
    const b2 = button2.cloneNode(true);

    // empty the user info div
    container.innerHTML = '';

    if (user) {
      b1.innerText = 'Log Out';
      b1.addEventListener('click', () => {
        netlifyIdentity.logout();
      });

      b2.innerText = 'Manage Subscription';
      b2.addEventListener('click', () => {
-       // TODO handle subscription management
+       fetch('/.netlify/functions/create-manage-link', {
+         method: 'POST',
+         headers: {
+           Authorization: `Bearer ${user.token.access_token}`,
+         },
+       })
+         .then((res) => res.json())
+         .then((link) => {
+           window.location.href = link;
+         })
+         .catch((err) => console.error(err));
      });
    } else {
      // if no one is logged in, show login/signup options
      b1.innerText = 'Log In';
      b1.addEventListener('click', login);

      b2.innerText = 'Sign Up';
      b2.addEventListener('click', signup);
    }

    // add the updated buttons back to the user info div
    container.appendChild(b1);
    container.appendChild(b2);
  };
By making this change, the “Manage Subscription” button will now send off the user’s token to the new create-manage-link serverless function, then redirect the user to the billing portal.
Restart ntl dev and click the “Manage Subscription” button to see it in action!
Users are now able to modify their subscription level, but their role doesn’t update to reflect the changes. In the next section, you’ll add support for that!
Modify roles in Netlify when the Stripe subscription changes
Stripe has extensive webhook support, which means you can call a serverless function (or any other endpoint) for all sorts of Stripe events. In this case, you’ll be adding a webhook to listen for subscription changes that calls a function in your app to update Netlify Identity roles for the user.
Create a serverless function to handle subscription change events.
To start, create a new file at functions/handle-subscription-change.js and place the following inside:
const stripe = require('stripe')(process.env.STRIPE_SECRET_KEY);
const fetch = require('node-fetch');
const { faunaFetch } = require('./utils/fauna');

exports.handler = async ({ body, headers }, context) => {
  try {
    // make sure this event was sent legitimately.
    const stripeEvent = stripe.webhooks.constructEvent(
      body,
      headers['stripe-signature'],
      process.env.STRIPE_WEBHOOK_SECRET,
    );

    // bail if this is not a subscription update event
    if (stripeEvent.type !== 'customer.subscription.updated') return;

    const subscription = stripeEvent.data.object;

    const result = await faunaFetch({
      query: `
          query ($stripeID: ID!) {
            getUserByStripeID(stripeID: $stripeID) {
              netlifyID
            }
          }
        `,
      variables: {
        stripeID: subscription.customer,
      },
    });

    const { netlifyID } = result.data.getUserByStripeID;

    // take the first word of the plan name and use it as the role
    const plan = subscription.items.data[0].plan.nickname;
    const role = plan.split(' ')[0].toLowerCase();

    // send a call to the Netlify Identity admin API to update the user role
    const { identity } = context.clientContext;
    await fetch(`${identity.url}/admin/users/${netlifyID}`, {
      method: 'PUT',
      headers: {
        // note that this is a special admin token for the Identity API
        Authorization: `Bearer ${identity.token}`,
      },
      body: JSON.stringify({
        app_metadata: {
          roles: [role],
        },
      }),
    });

    return {
      statusCode: 200,
      body: JSON.stringify({ received: true }),
    };
  } catch (err) {
    return {
      statusCode: 400,
      body: `Webhook Error: ${err.message}`,
    };
  }
};
This function, from top to bottom, does the following:
- Validates the webhook using the event headers and a webhook secret provided by Stripe (you’ll generate this secret in the next section)
- Ensures that the function only runs for subscription update events
- Sends a query to Fauna to load the Netlify Identity user ID for the Stripe customer that updated their subscription
- Determines the new role based on the subscription plan name
- Sends a call to the Netlify Identity admin API to update the user’s role to reflect their new plan level
- Sends a confirmation to Stripe that the webhook succeeded
Create a Stripe webhook to call the subscription change handler.
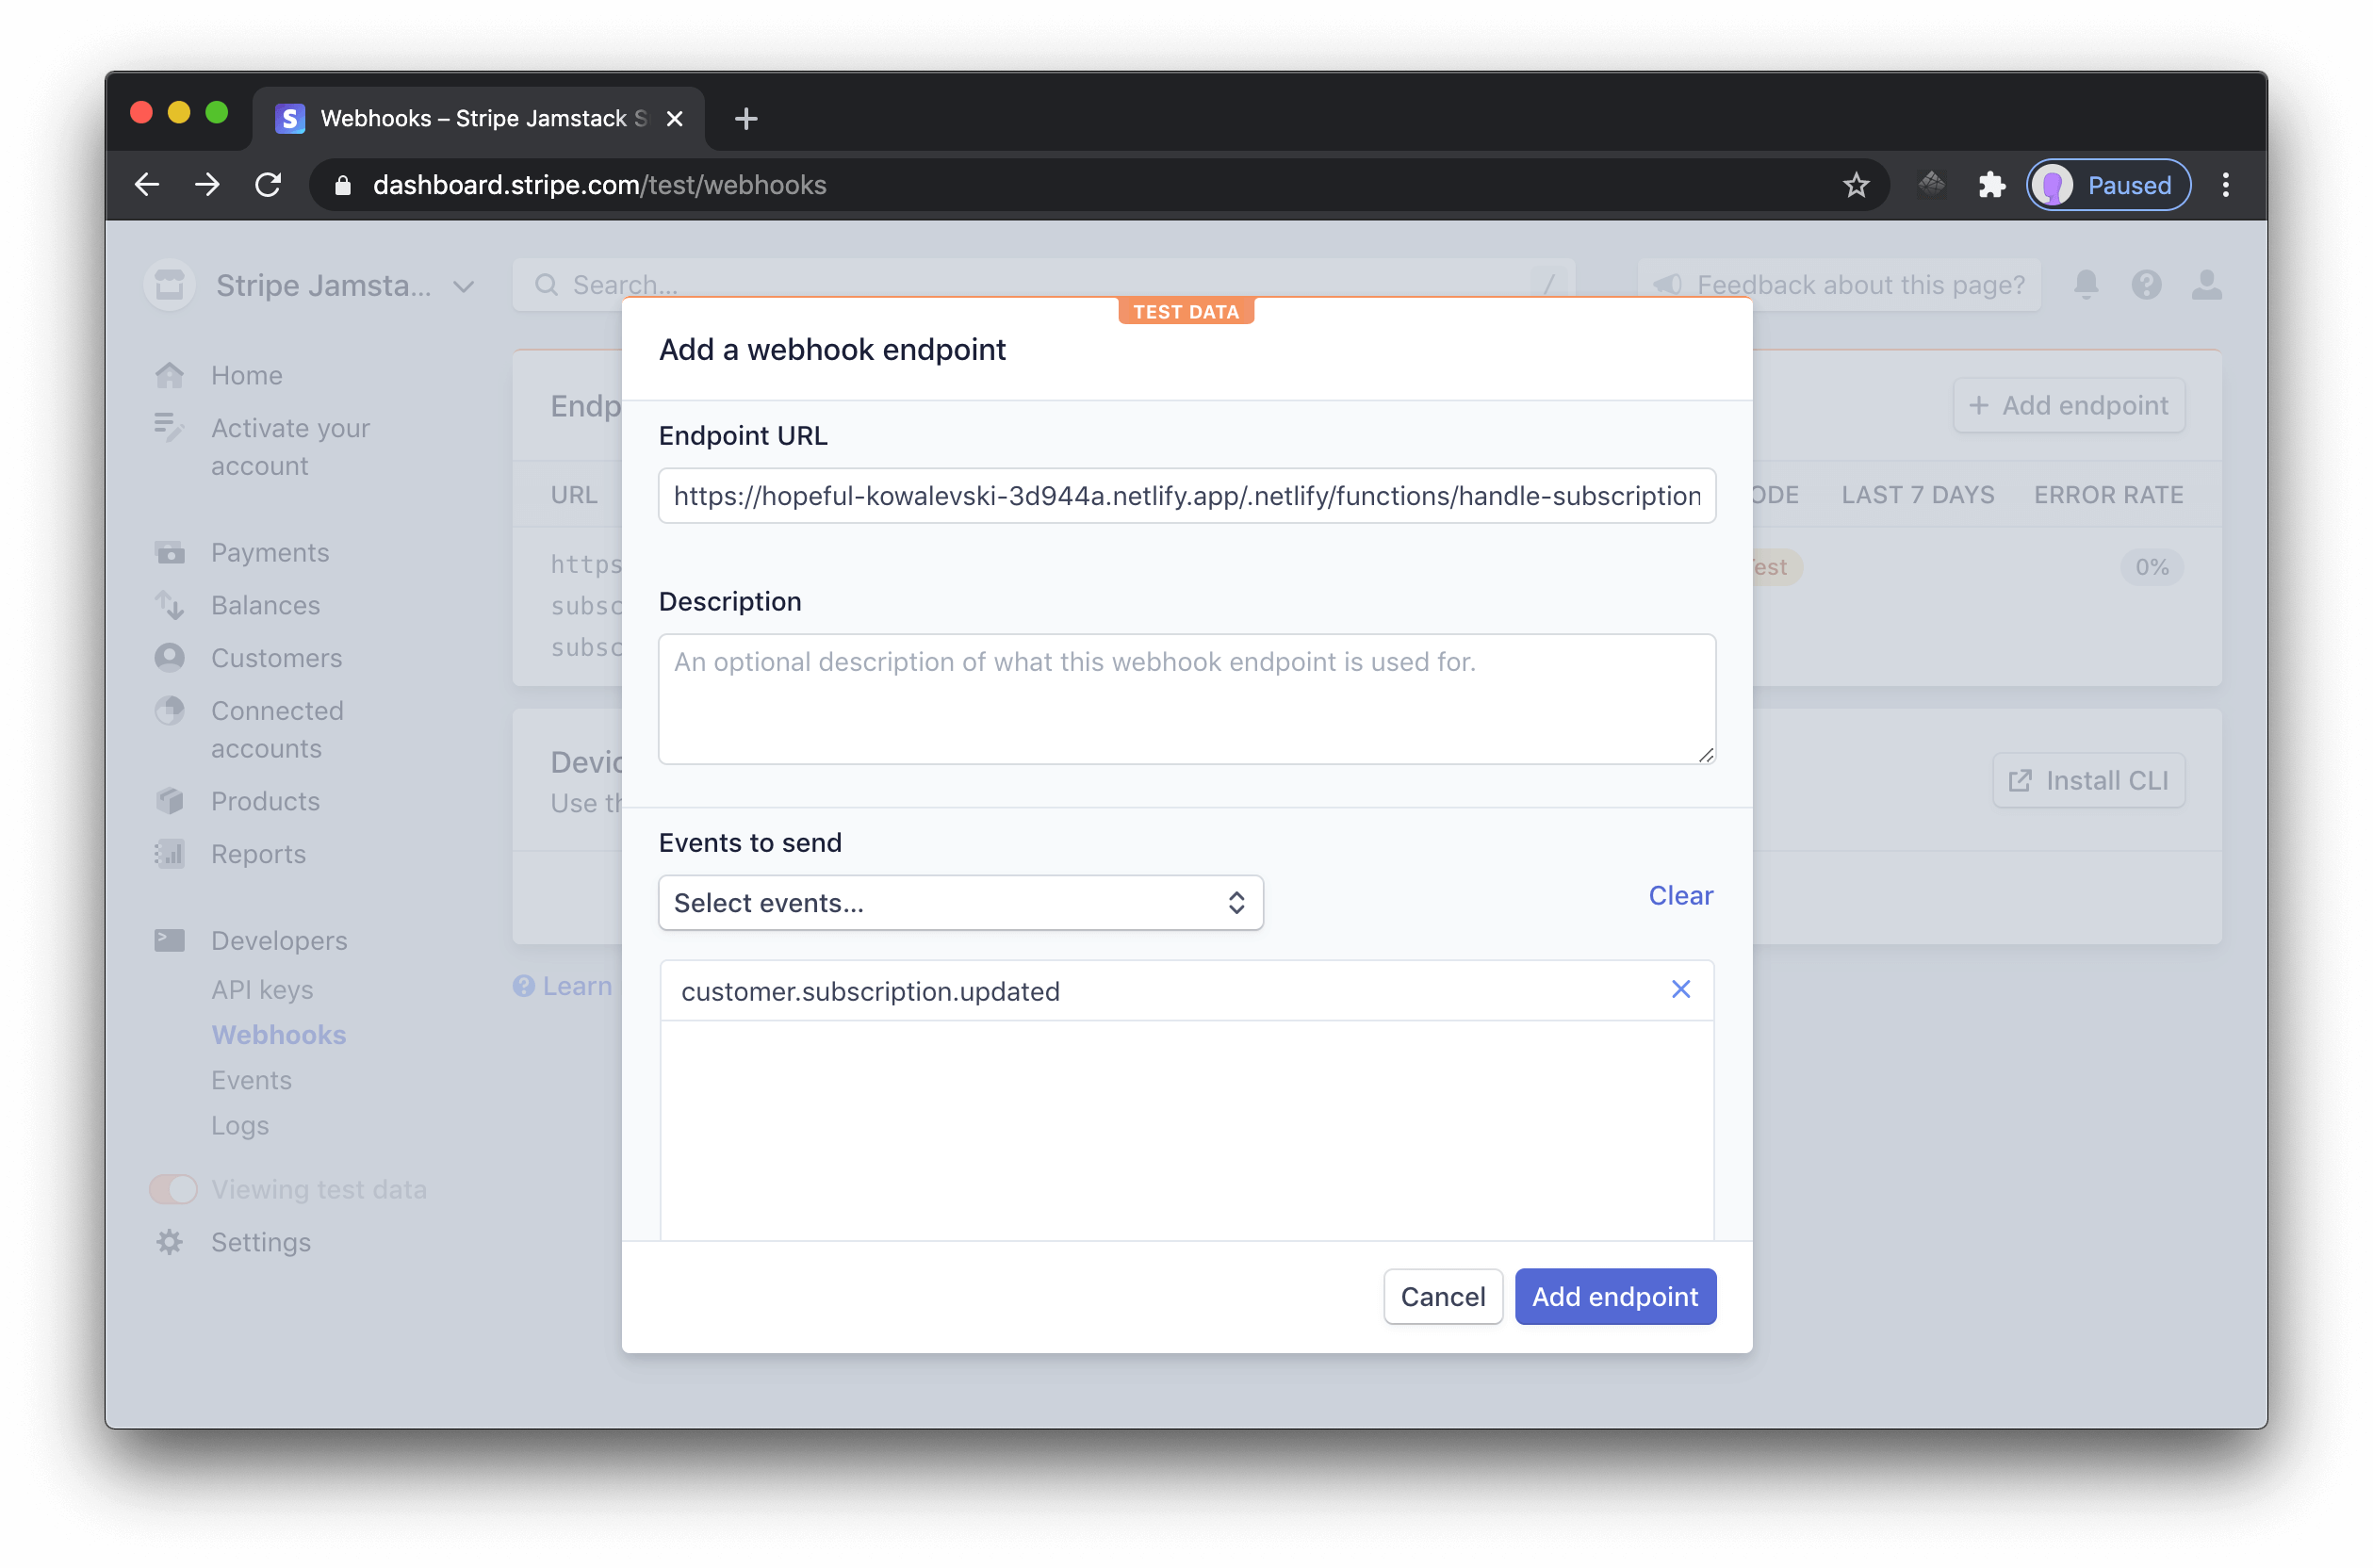
Next, head to your Stripe dashboard and click “Developers” in the left-hand nav, then choose “Webhooks” from the submenu. Click the “+ Add endpoint” button at the top right and add your live site URL and the path to the serverless function, which follows the pattern:
https://<SITE_NAME>.netlify.app/.netlify/functions/handle-subscription-changeIn the “Events to send” dropdown, search for customer.subscription.updated and select it. Once that’s set, click the “Add endpoint” button to save it.
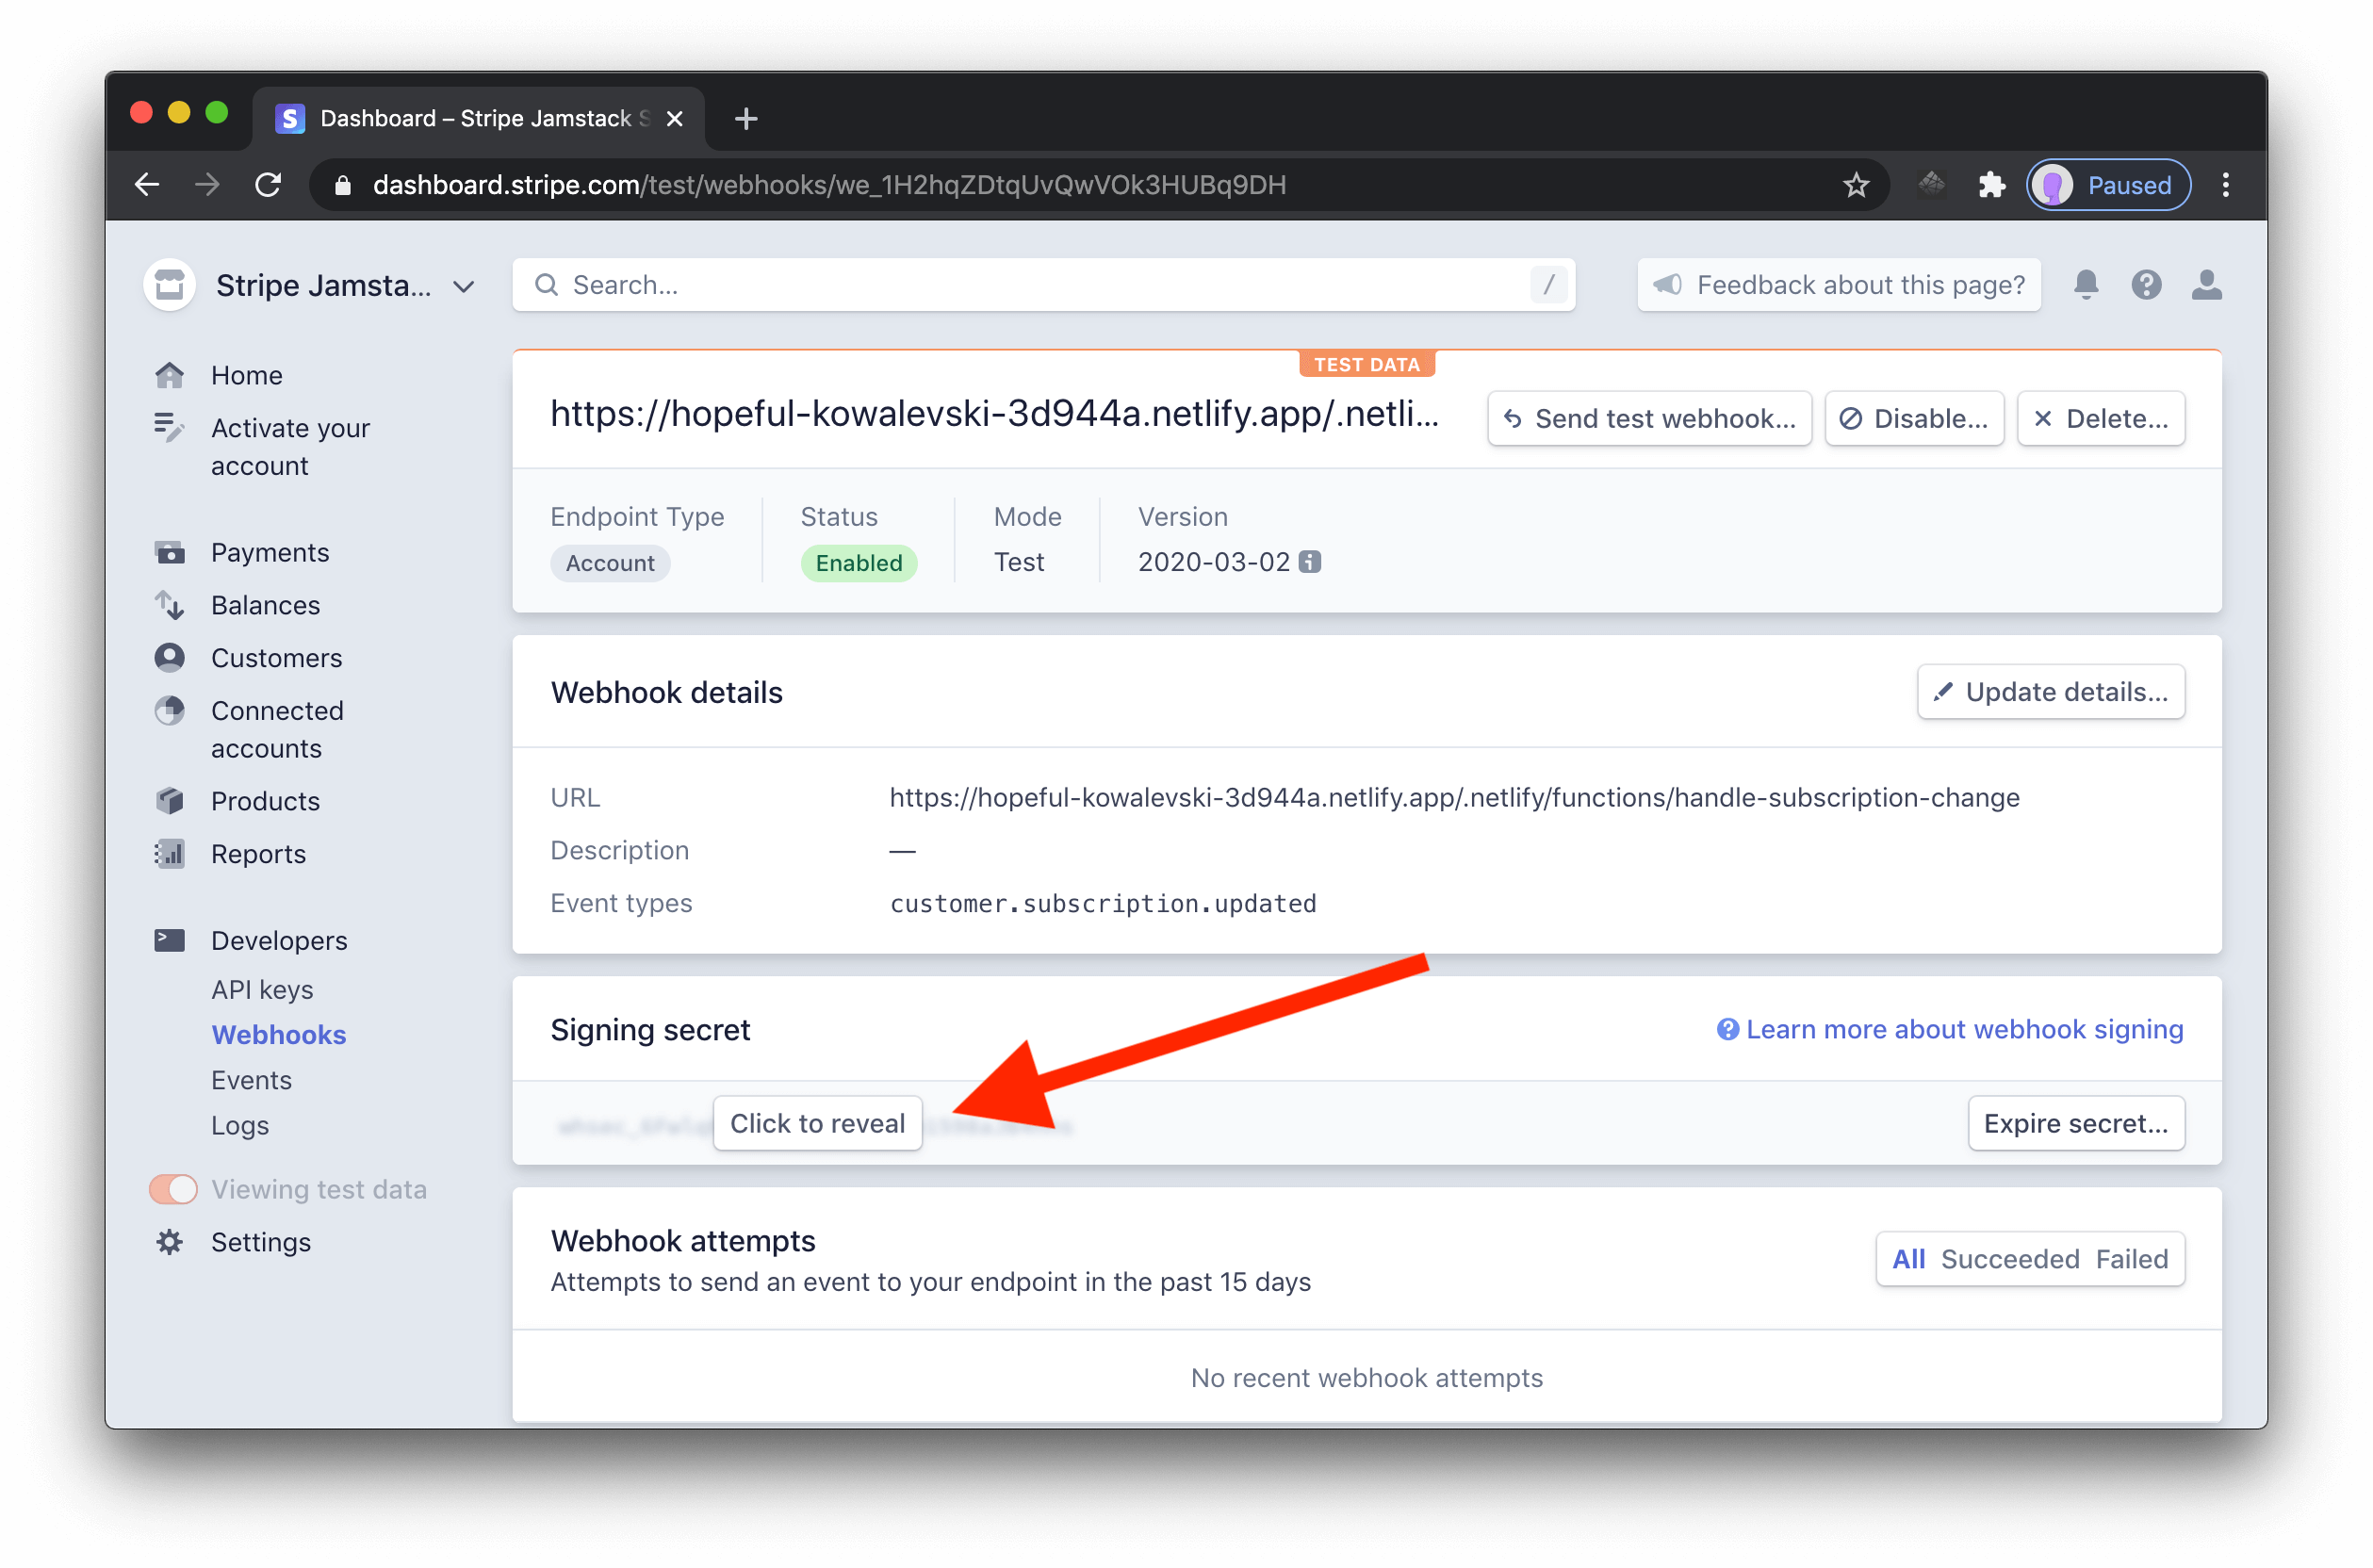
On the next screen, you’ll see a section called “Signing secret”. Click to reveal it, then copy it to your clipboard.
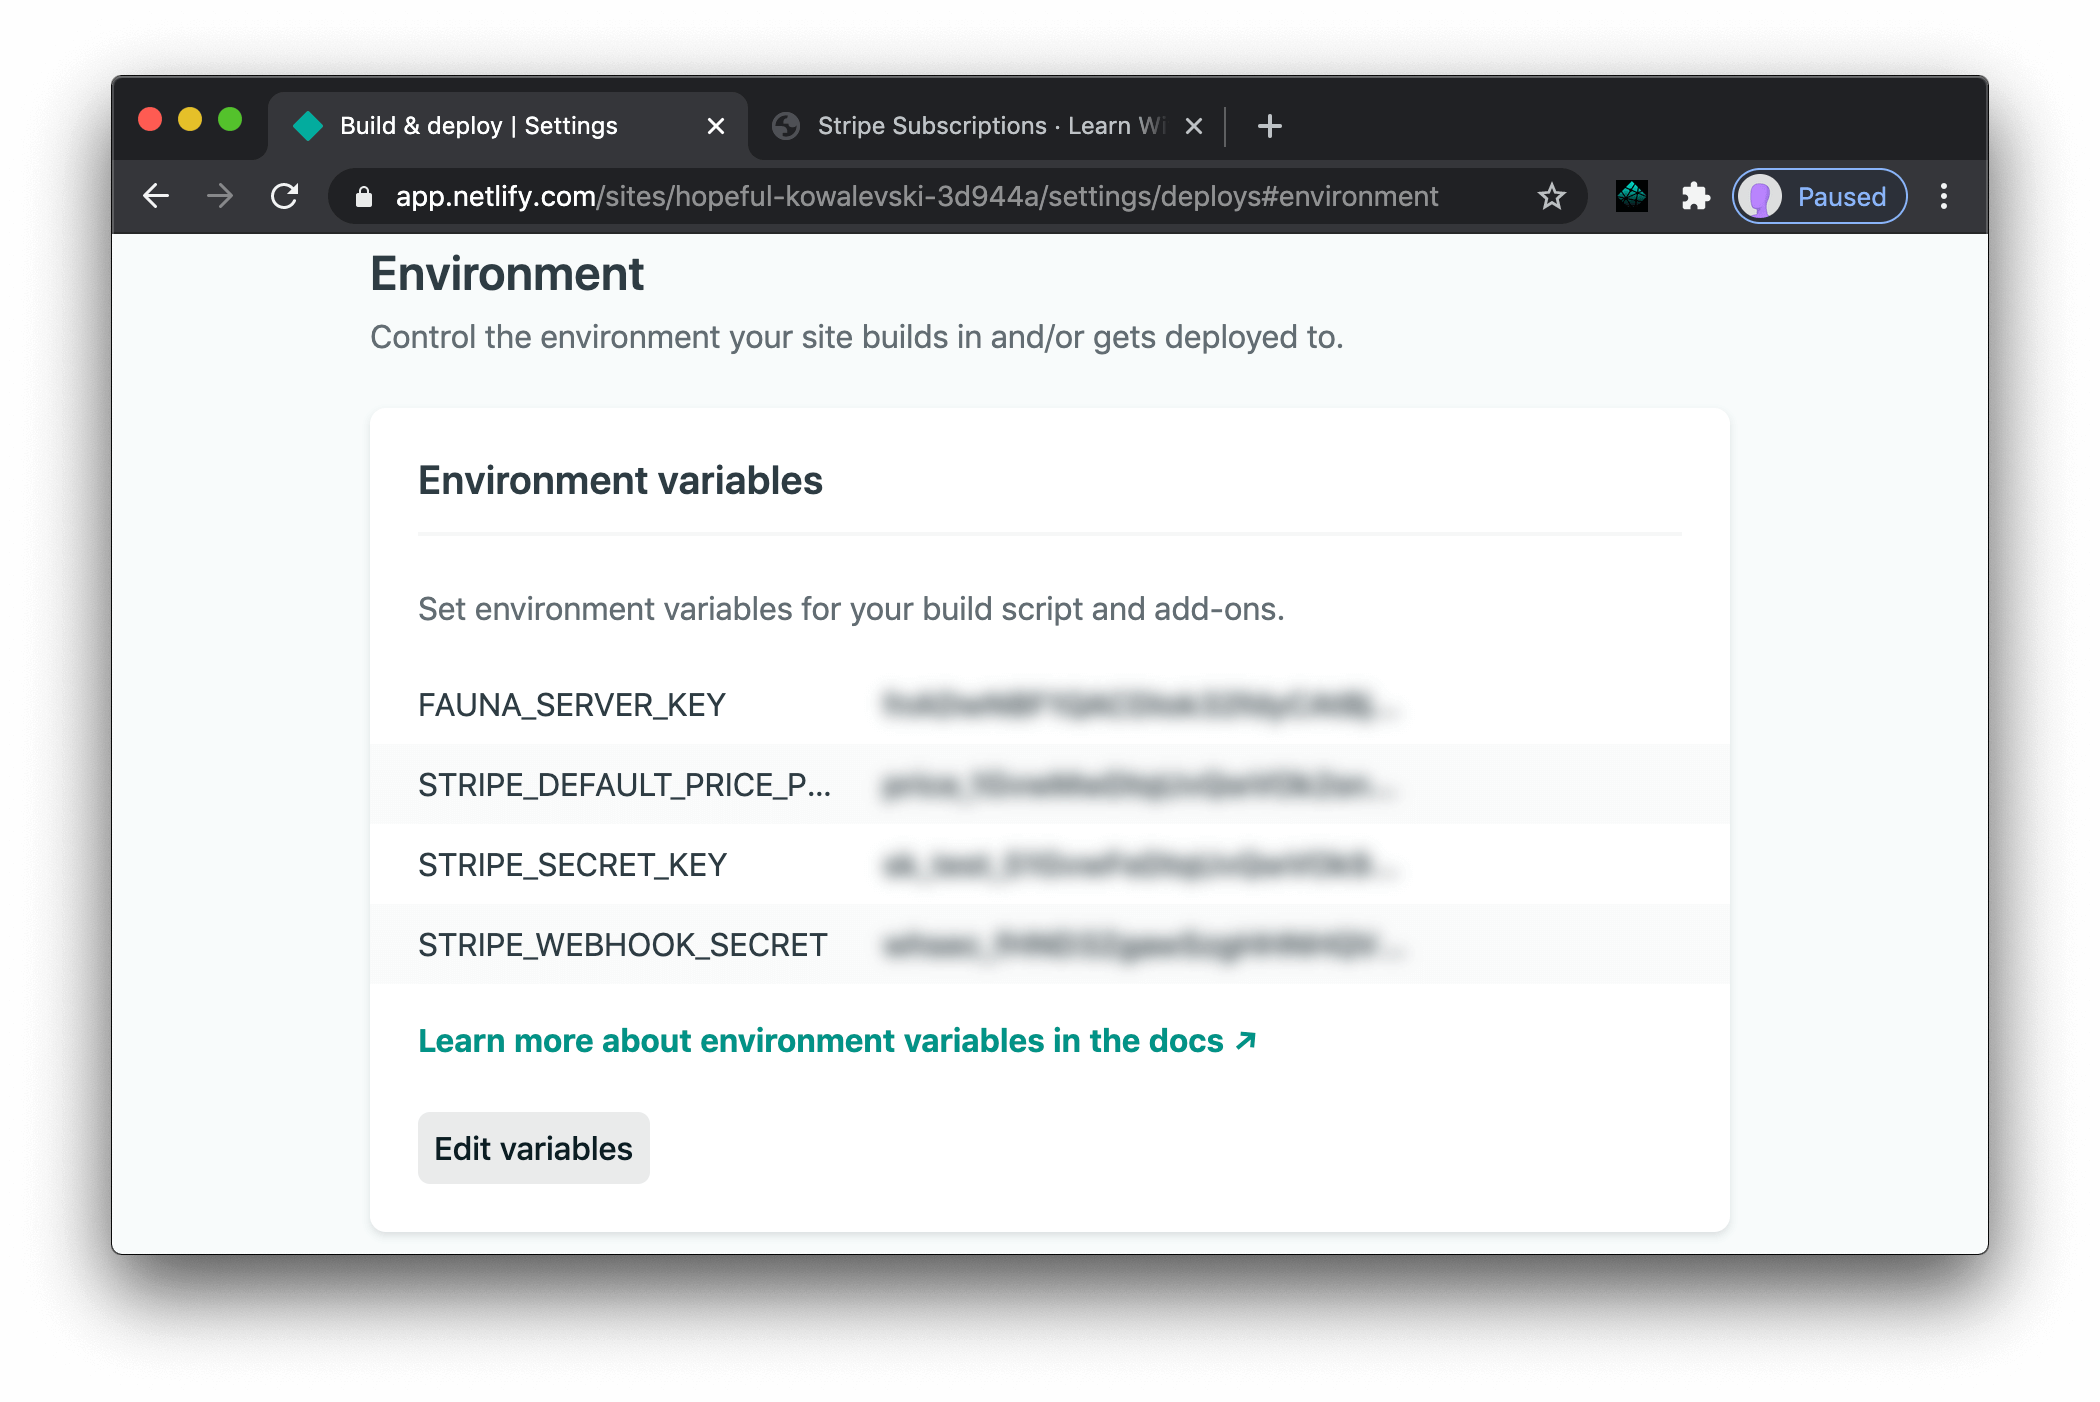
In your Netlify dashboard, create a new environment variable called STRIPE_WEBHOOK_SECRET and add the signing secret you just copied.
Now all that’s left to do is push the changes to Netlify and try it out!
# add all the changes to git
git add -A

# commit the changes
git commit -m 'feat: add a webhook to handle changing subscriptions'

# push the changes up to GitHub
git push origin main

# open the Netlify dashboard to monitor deploy progress
ntl open
Once the deploy is live, visit the live site, log in, and change your subscription to different levels to see the new roles apply and protected content work as designed!
At this point, you’ve successfully created a full-blown subscription app with multiple payment tiers and protected content based on subscription level, all automatically coordinated between Stripe and Netlify Identity.
What’s next
From here, you have everything you need to create full-featured Jamstack apps with subscription e-commerce in place.
- Compare your app to the source code on GitHub
- Try out the live demo to see this in action
To take this further, you may want to look at other tutorials about managing payments, donations, and other e-commerce workflows with Stripe in modern web apps:
- Learn How to Accept Money on the Jamstack in 38 Minutes
- Automate Order Fulfillment w/Stripe Webhooks & Netlify Functions
- Add a Donation Button & Start Accepting Money On Jamstack Sites
Links & additional resources.
- Watch Thor and Jason build this live on Learn With Jason
- Learn more about the Stripe Billing customer portal
- Get more information on developing locally with the Netlify CLI
- Watch Eve Porcello’s introduction to GraphQL


