A blog is a great place to share the inside scoop on your new features with your users or bring new eyes to your site with interesting content. Scully, the Angular Static Site Generator, makes it easier to create a blog using Markdown and the Angular framework we’re familiar with. We’ll dig into this process today when we:
- integrate Scully into an existing Angular application
- generate a blog skeleton
- create content in Markdown
- pre-render all of the content as we go with Scully
- deploy to the Netlify Edge CDN (Content Delivery Network)
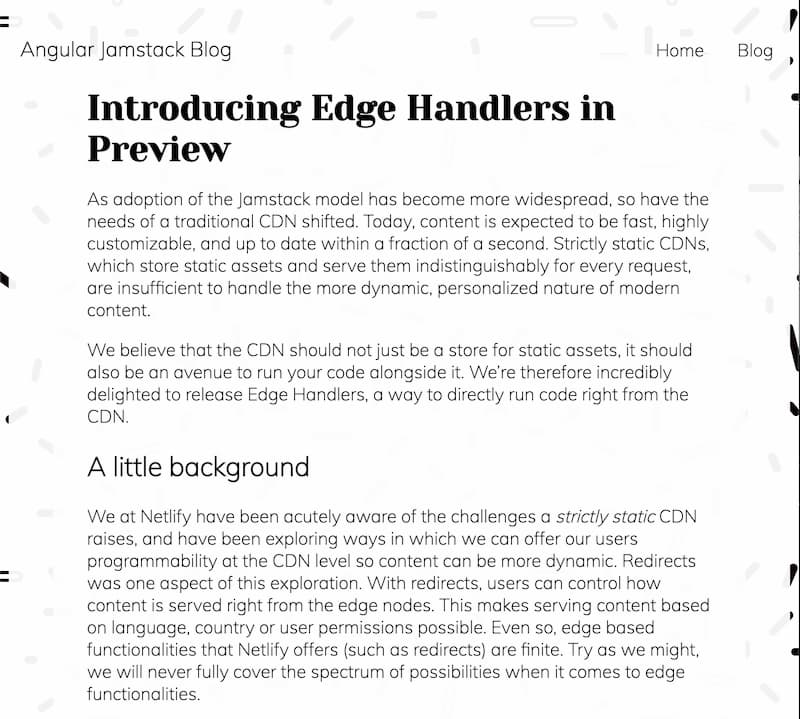
Here is a screenshot of the final project.

You can find the project at https://jamstack-angular-blog.netlify.app and all the code in the 🐙 project repo here. Now, let’s get coding!
The Starting Gate
To begin, we’ll take a project that was created using the Angular CLI with a generated navigation module and home module. The navigation has a header for the title of the site plus a home and blog link. The home page is a quick little info page. You can see what we’re starting with in 🐙 this commit.
If you’re working with a cloned version of the project (by running git clone https://github.com/tzmanics/angular-jamstack-blog in your terminal) you’ll want to remove my GitHub repo as origin and set your own with these commands:
git remote rm origingit remote add origin <url for your repo>This will help you keep track of all the changes you push and help with creating continuous deployment with Netlify (which we’ll cover in the last step).
Scully is Out There; Let’s Put it in Here
Now that we’re set up, we can incorporate Scully by running the Angular CLI’s ng add command and passing in the Scully library’s init command.
ng add @scullyio/initOnce installed we can run ng build and npm run scully to build out the project and have Scully traverse the build project to find all the routes to pre-render.
ng buildnpm run scully🤔 We always want to build out the project before running Scully if there are any changes. Scully always looks at the build output to get its information.
Running Scully creates a new build output folder called static that contains the pre-rendered content in a directory for each route. To see what the pre-rendered content looks like we can use Scully’s serve command.
npm run scully serve
When we create new routes (like we will do with each new blog post) we’ll have to add a --scanRoutes option to the npm run scully command. To save our keystrokes let’s make a new script in our package.json file.
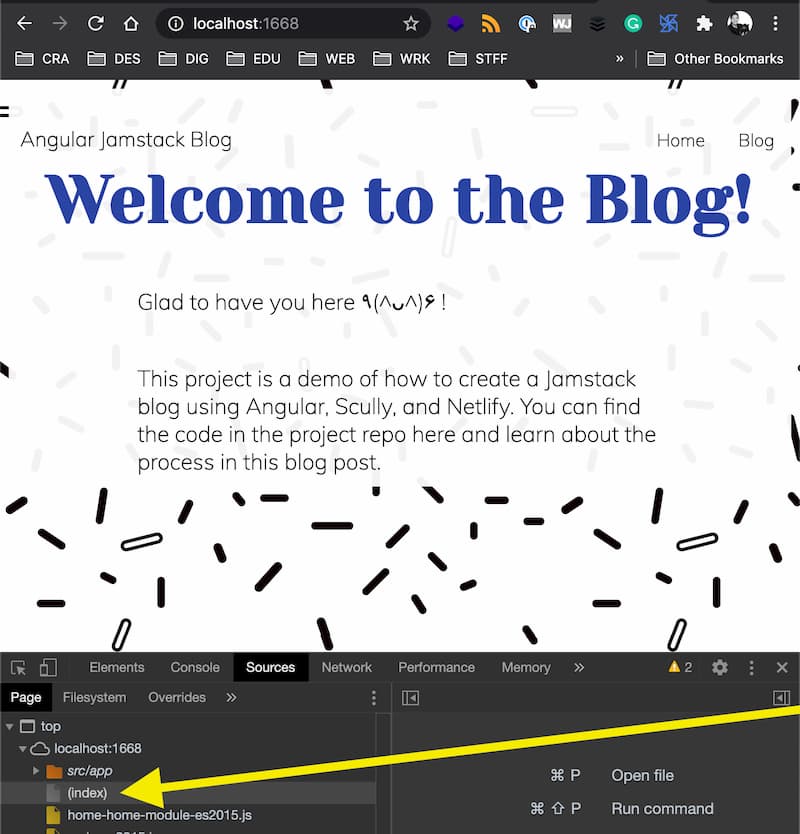
{ "name": "angular-jamstack-blog", "version": "0.0.0", "scripts": { "ng": "ng", "start": "ng serve", "build": "ng build", "test": "ng test", "lint": "ng lint", "e2e": "ng e2e", "scully": "scully", "scully:serve": "scully serve",+ "jam-it": "ng build && npm run scully -- --scanRoutes && npm run scully serve" }This jam-it script will run the build, run Scully with the scanRoutes option to look for new routes, and run the serve option so we can see the pre-rendered content at localhost:1668. If we look at the Sources tab in Developer Tools when we run npm run jam-it, we can see it’s serving the html file.
Build a Blog
We have all the tools we need, so let’s do what we came here to do: eat tacos!

Wait, no, build a blog. Sorry, ‘eat tacos!’ is usually my number one goal, I get confused. Moving on.
To build out all the scaffolding for the blog we can run the Angular generate command passing in the path to Scully’s blog command:
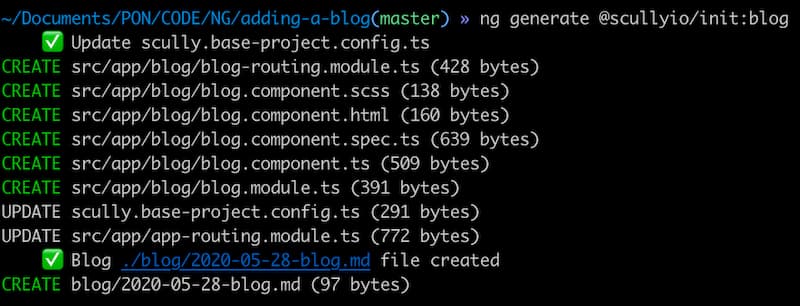
ng generate @scullyio/init:blogThis command will do many things:
- create a
blogdirectory at the project’s root - create a sample markdown blog with today’s date as the title in that directory
- add a
blog/:slugroute to the Scully config - add the
blogroute to the main routing module - add the routes for each post to the blog components routing module
- add a blog module with styling and logic for the posts
It lists all this in the output as well.
Generated Blog Post
There are a few things to note about the blog post this command created. It’s a markdown file that lives in /blog and looks like this:
---title: 2020-07-07-blogdescription: 'blog description'published: falseslugs:  - ___UNPUBLISHED___kccbnalf_mp0V7nFNcfdAGU2VTDhssRwzR2GXxvBL
---# 2020-07-07-blo
At the top of that Markdown file there is some information in YAML, this is the Front Matter. This won’t show up in the blog post but we can use it to store information about the blog post. We can also use this information in a lot of ways but we’ll talk about that when we make our page of all the blog posts.
The slugs listed here is how we can create different routes to this post, since blog/:slug was added to the Scully config (when we generated the blog skeleton). We can assign many and anything (as long as it’s valid url syntax) to slugs to make a new route. In the generated example there is a random, ludicrous route that would be hard to stumble upon. This is made so that before you publish a post you can share a link, like https://jamstack-angular-blog.netlify.app/blog/___unpublished___kccbnalf_mp0v7nfncfdagu2vtdhssrwzr2gxxvbl, with reviewers but your general audience can’t easily find it.
Poppin’ in Posts
To get some content into our blog we can generate a post using yet another generate command. This command will call on Scully’s post generation code and we can pass a name in as well.
ng g @scullyio/init:post --name="The First Post is the Deepest"The CLI will prompt “What’s the target folder for this post?” We’ll go with the default “blog” directory that we created with the generate blog command. In the future we can make specific folders for posts, even nested folders.

🧠 Scully recursively looks for different routes so however far we nests our posts 🕵🏻♀️ Scully will find them.
We can see what was created by going to the /blog directory. We have some Front Matter and an h1 header with the title.
---title: The First Post is the Deepestdescription: blog descriptionpublished: false---# The First Post is the DeepestThis command created a new route so we’ll need to stop the Scully serve command with Ctrl + c and re-run npm run jam-it. There are two things that happened on this run I’d like to point out. The first thing we can see when we revisit the generated blog posts markdown file in blog/. When we run Scully after creating this new post, the slugs variable gets added to your posts front matter.
---title: 'The First Post is the Deepest'description: 'blog description'published: falseslugs:  - ___UNPUBLISHED___kccck9yl_OUGCmLvNfggn315ETkGkbmHRF54OwyNl
---# The First Post is the Deepes
The second thing I want to point out is that we can see the new routes that were created in the output logs:

We can also always see all our routes in dist/static/assets/scully-routes.json. This file has all the routes plus all the Front Matter data saved as a JSON object. Here’s what this new blog post’s route information looks like in that file:
{ "route": "/blog/___UNPUBLISHED___kccbnalf_mp0V7nFNcfdAGU2VTDhssRwzR2GXxvBL", "title": "2020-07-07-blog", "description": "blog description", "published": false, "slugs": ["___UNPUBLISHED___kccbnalf_mp0V7nFNcfdAGU2VTDhssRwzR2GXxvBL"], "slug": "___UNPUBLISHED___kccbnalf_mp0V7nFNcfdAGU2VTDhssRwzR2GXxvBL", "sourceFile": "2020-07-07-blog.md"}We can add this slug to http://localhost:1668 to see what the post looks like. So, with the post above the URL would be http://localhost:1668/blog/___UNPUBLISHED___kccbnalf_mp0V7nFNcfdAGU2VTDhssRwzR2GXxvBL.
That looks not broken! Yay. So, let’s add some more content.
Mark’s Down with Markdown
I don’t actually know anyone named Mark, but chances are if he knows about Markdown he’s for it. I, personally, LOVE writing in Markdown! So, I was very happy that Scully provided a way to add content in this format. To add any other markdown posts we can add them to our /blog folder.
To have some filler, I’ve added posts from some of my stellar teammates. If we take a peak at them in blog/ (also, 🐙 here’s the commit), we can see more detailed posts with more robust Markdown and Front Matter. We will also see many corny jokes, and I am sorry not sorry. When we look at the route information after running npm run jam-it again, we see there is a lot more information in the scully-routes.json file thanks to the Front Matter.
{ "route": "/blog/creating-a-pre-rendered-home-page-with-angular-and-scully", "title": "Creating a Pre-rendered Home Page with Angular and Scully", "description": "Ready to start to transition your Angular site to the Jamstack? Why not start with your homepage where you can pre-render your content using Scully and store your assets on the cloud? This tutorial will get you up and deployed in no time!", "authors": ["Tara Z. Manicsic"], "date": "2020-04-03", "lastmod": "2020-04-03", "topics": ["tutorials"], "tags": ["Angular"], "tweet": "", "format": "blog", "canonical_url": "https://www.netlify.com/blog/2020/04/03/creating-a-pre-rendered-home-page-with-angular-and-scully/", "seo": { "metadescription": "Learn how to start transitioning Angular sites to the Jamstack. In this tutorial, we pre-render homepage content using Scully and store assets on the cloud. Get up and deployed in no time!", "metatitle": "Create Fast, Pre-rendered Pages in Angular using Scully" }, "publish": true, "sourceFile": "creating-a-pre-rendered-home-page-with-angular-and-scully.md"}We have content, let’s make it easy to get to.
Find the Blog
If we serve this up now, we wouldn’t see any changes. What fun is that? We don’t have any links setup to see the blog or the posts. We’ll want to add a root module for all the blog posts to live and then add it to our navigation.
We can run another generate command to add this home for the blog posts:
ng generate module blogRoot --route 'blogRoot' --module blogHere we’re making a module named blogRoot, passing a blogRoot route, and setting the module as the blog module. Once that is generated we’ll actually go change the generated route in blog-routing.module.ts:
{- path: "blogRoot"+ path: "", loadChildren: () => import("../blog-root/blog-root.module").then(m => m.BlogRootModule), pathMatch: "full" }, ...Page of Posts
Now we get to put a summary of all our posts on one page! First, we need to edit the blog-root.component.html. In this file we’ll add a div to hold a list of our posts. Inside that list we’ll call on *ngFor to have it make a list item for each post. We’re grabbing the information that is listed in the Front Matter via the scully-routes.json file. For this list we’ll list each posts title, author and description.
- <p>blog-root works!</p>+<h1 class="title-box">The Latest, Greatest Posts</h1>+<div class="blog-posts">+ <ul>+ <li *ngFor="let post of posts$ | async">+ <a [routerLink]="post.route">+ <div class="post-card">+ <h2>{% raw %}{{ post.title }}{% endraw %}</h2>+ <p>{% raw %}{{ post.authors }}{% endraw %}</p>+ <b>{% raw %}{{ post.description }}{% endraw %}</b>+ </div>+ </a>+ </li>+ </ul>+</div>We need to pass in posts so that we have something to iterate over. We can do this inside the blog-root.component.ts file. Thankfully, Scully gives us ScullyRoutesService that lets us access all of the routes of the site. We can then filter those routes to only get the ones that start with /blog.
import { Component, OnInit } from '@angular/core';+ import { ScullyRoute, ScullyRoutesService } from '@scullyio/ng-lib';+ import { Observable } from 'rxjs';+ import { map } from 'rxjs/operators';
@Component({  selector: 'app-blog-root',  templateUrl: './blog-root.component.html',  styleUrls: ['./blog-root.component.scss']})export class BlogRootComponent implements OnInit {- constructor() { }+  constructor(private scully: ScullyRoutesService) {}+  posts$: Observable<ScullyRoute[]>;
- ngOnInit(): void { }+ngOnInit() {+  this.posts$ = this.scully.available$.pipe(+    map(routeList => {+      return routeList.filter((route: ScullyRoute) =>+        route.route.startsWith(`/blog/`)+      );+    })+  );+}
When Scully creates the list of blog posts it only grabs the posts marked as publish: true. This is another way we can use the frontmatter to do work for us. We can still reach unpublished posts with their slugs but they won’t show up in our lists.
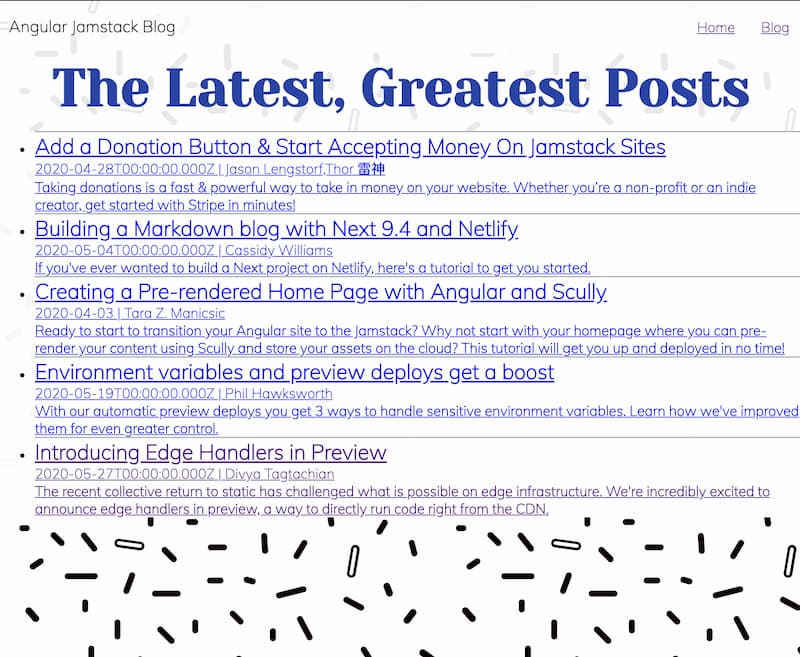
After re-running npm run jam-it, we can open up http://localhost:1668/blog to see we have all the blog posts! And, buddy, do they look silly!
Thankfully, we have CSS to the rescue!
Make it Pretty
Here is the CSS for the list of blog posts:
<!-- src/app/blog-root/blog-root.component.css -- >ul { list-style: none; margin: 0 auto; max-width: 800px; min-width: 500px; padding: 0; width: 90%;}li { background-color: #f6f93c38; border-radius: 20px; box-shadow: 0 7px 20px -6px black; margin: 25px; padding: 15px;}li p { margin: 10px 0;}.post-card h2 { margin-top: 0;}Let’s see what this looks like.
Much better, moving on!
Post Page
With a list of linked, lovely, um, posts. We want to make sure that the posts look great too. Let’s see.
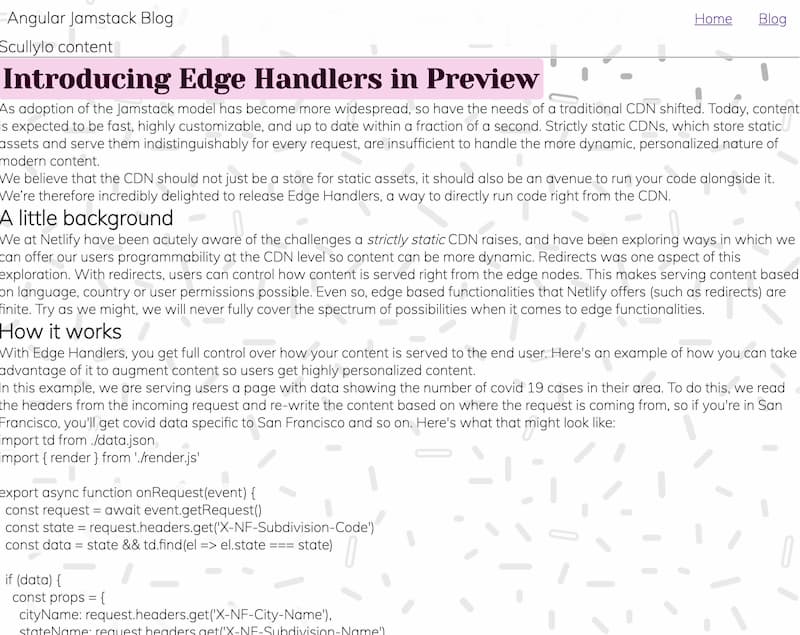
What the what?? Why does it say ‘Scullyio content’ and why is it pink? If we take a look at the blog module that generating the blog via Scully created we get our answers. First off, in blog.component.html we see:
<h3>ScullyIo content</h3><hr />
<!-- This is where Scully will inject the static HTML -->
<scully-content></scully-content><hr /><h4>End of content</h4>
This shows us that there are some hard-coded headers and an <hr> that we no longer need. We can change this by removing the superfluous stuff and adding a div around the scully-content so it’s easier to style.
- <h3>ScullyIo content</h3>- <hr>
<!-- This is where Scully will inject the static HTML -->+ <div class="blog-post">  <scully-content></scully-content>+ </div>
- <hr>- <h4>End of content</h4>
The styling for posts is where we find the pink background.
h1 { color: rgb(51, 6, 37); background-color: rgb(248, 211, 236); padding: 5px; border-radius: 5px; width: fit-content;}We can remove this and add some other styling but the code will still be wrapped in code tags and headers will be in header tags.
h1 {  color:rgb(51, 6, 37);-  background-color: rgb(248, 211, 236);  padding: 5px;  border-radius: 5px;+  font-family: "Yeseva One", cursive;  width: fit-content;}
+.blog-post {+  background-color: rgba(255, 255, 255, 0.8);+  margin: 0 auto;+  max-width: 900px;+  width: 80%;+  padding: 30px;+}
+.blog-post img {+  display: block;+  margin-left: auto;+  margin-right: auto;+  max-width: 800px;+  width: 90%;+}
+.blog-post li {+  list-style-type: disc;+
If you still have jam-it running you may see these style changes. Always try canceling Scully serve (with Ctrl + c) and re-running jam-it if something that should be showing, isn’t. Our blog posts now look like this:
We have a nice-looking, finished blog! Let’s show it to the world!
On Netlifleek
The Scully serve command is nice but I like to see it served up live on Netlify because it’s easier to share with the team no matter their technical know-how. Netlify also makes it super easy to do continuous deployment so that you can just keep pushing code to Git and it deploys our new changes with each push. This is why when making new projects my first two steps are to make a new repo, make a Netlify config file, run netlify init, and forget. I’m best at the ‘forget’ part.
TOML Time
Let’s jump this process off by creating a Netlify configuration file. The file will be called netlify.toml and live in the project’s base directory. For now, we will just add the command we use to build the project and the path to the directory the project builds into.
[build] command = "npm run jam-it" publish = "dist/static"With this file Netlify knows how to buld our project and where to find the files to put onto the CDN. We can now tell Netlify to do its thing.
Initiate Init
To talk to Netlify we’ll need to install the Netlify CLI and run netlify init to hook our project up to a Netlify project.
npm install netlify-cli -gnetlify init🤔 If you don’t have a Netlify account or project this command will walk you through doing all of that either through the command line or taking you to the Neltify UI.
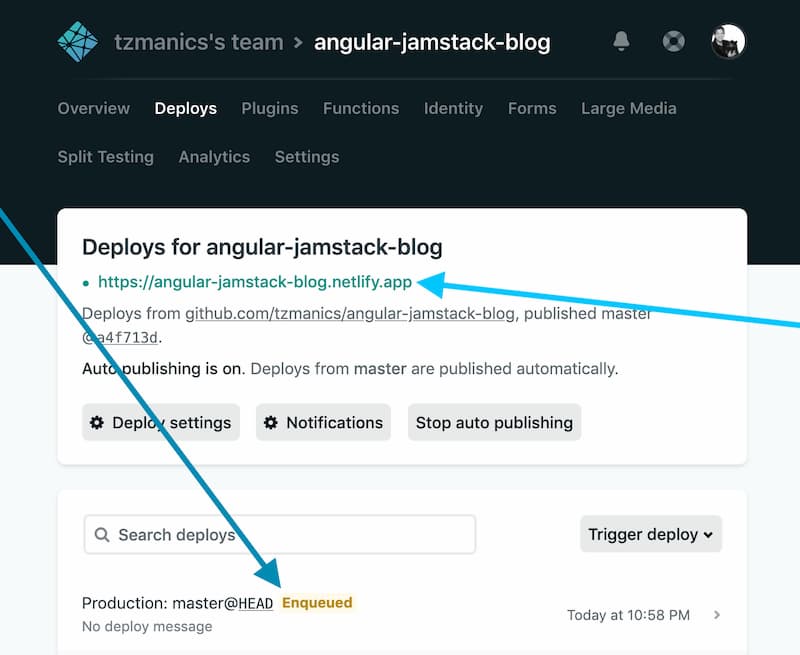
Now, we can run ntl open to see our deployed site’s dashboard. Running netlify init also triggers a build so we can see there is already a deploy running. Once it’s ‘Published’ we can click the link Netlify provides at the top of the site’s dashboard.
With that our blog is live with all our witty, charming, highly-intellectual blog posts. Go us!
We Did it! 🎉
We now have a site with a home page, a list of all our blog posts, and blog post pages. Better still, it is all pre-rendered thanks to Scully and deployed to a CDN thanks to Netlify. I hope you share with us what you’ve created and keep making more content to share! Happy coding 👩🏻💻!