Feature flags are a great way of giving developers more control over the features they create. With just a bit of JavaScript, they eliminate the need to maintain multiple feature branches within your source code. But how do feature flags work when the many of the assets that you are deploying are static? Do you need to flip a flag and then manually trigger a rebuild to have any changes reflect?
The good news is, no, the whole process can be automated.
In this post, we’ll explore a solution that can enable you to directly connect any LaunchDarkly feature flags that impact the build with your build process in Netlify.
Why Use LaunchDarkly with Netlify?
Feature management offers a ton of flexibility in terms of how you code, when and how you launch features or even how you empower your internal stakeholders. These capabilities are definitely useful in a Jamstack app as they are in any app, but, the key point for this post is, they are useful even if the content is static. Here’s just a couple reasons you might want to use feature management within statically generated pages:
- Enable/disable new functionality from the site, allowing you to launch features publicly only when they are fully ready and with the flip of a switch. You can even enable functionality in a branch deploy but disable it in the production deploy.
- Give marketing the ability to launch new pages aligned with the timing of their campaigns without requiring developer intervention. For instance, they could flip all the content and assets related to a rebrand using a flag.
Let’s explore how to integrate Netlify’s continuous deployment process with LaunchDarkly. There’s a lot of material on integrating LaunchDarkly in client-side web applications, and nothing about deploying to Netlify needs to change for that. Rather, the question we’ll answer is what to do when flag changes impact the static build and assets of a Jamstack site.
Connecting Flag Changes with Netlify Builds
Let’s lay out some requirements for connecting our LaunchDarkly flags with our Netlify builds:
- We want this to work automatically, without the need for developer intervention to deploy a change triggered by a flag.
- We want new builds to only be triggered by flags that have an actual impact on the build – we do not want to trigger a new build on every flag change for flags that don’t require a rebuild (for example, a flag that impacts functionality on the frontend of the site) because build time is money.
- We want to be able to connect multiple environments in LaunchDarkly with multiple deploys on Netlify, this way a flag change in testing does not impact or trigger a build on the production deployment that runs the public facing web site.
First, let’s dig into how to set up LaunchDarkly to achieve this.
Setting Up LaunchDarkly
LaunchDarkly provides projects and environments that allow you to organize and structure your flags to meet the needs of your development and production environments. For this example, we have a project that matches our production site being deployed to Netlify. Within that project we have two environments, Production and Testing, which are the defaults. These align with our deployment on Netlify, which has a staging deploy and a production deploy.
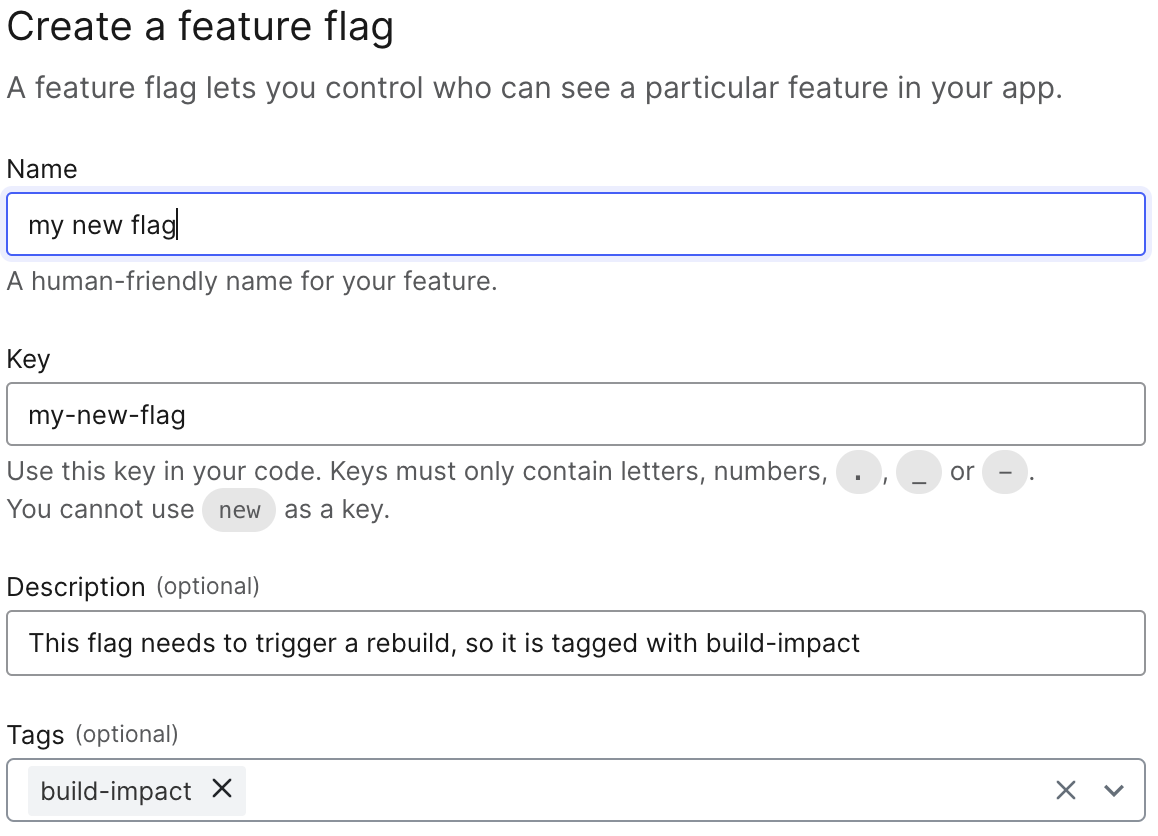
LaunchDarkly also allows us to tag a flag when we create it. This can help you organize and find flags within large projects but we’re going to leverage this feature to allow us to determine whether a flag should trigger a new build or not.
When we create a flag, we can tag it with a tag that indicates that it should trigger a new build. We’ve chosen to name the tag build-impact but you can choose whatever name you prefer. It’s best to choose a name that is easy to understand and consistent across the project.
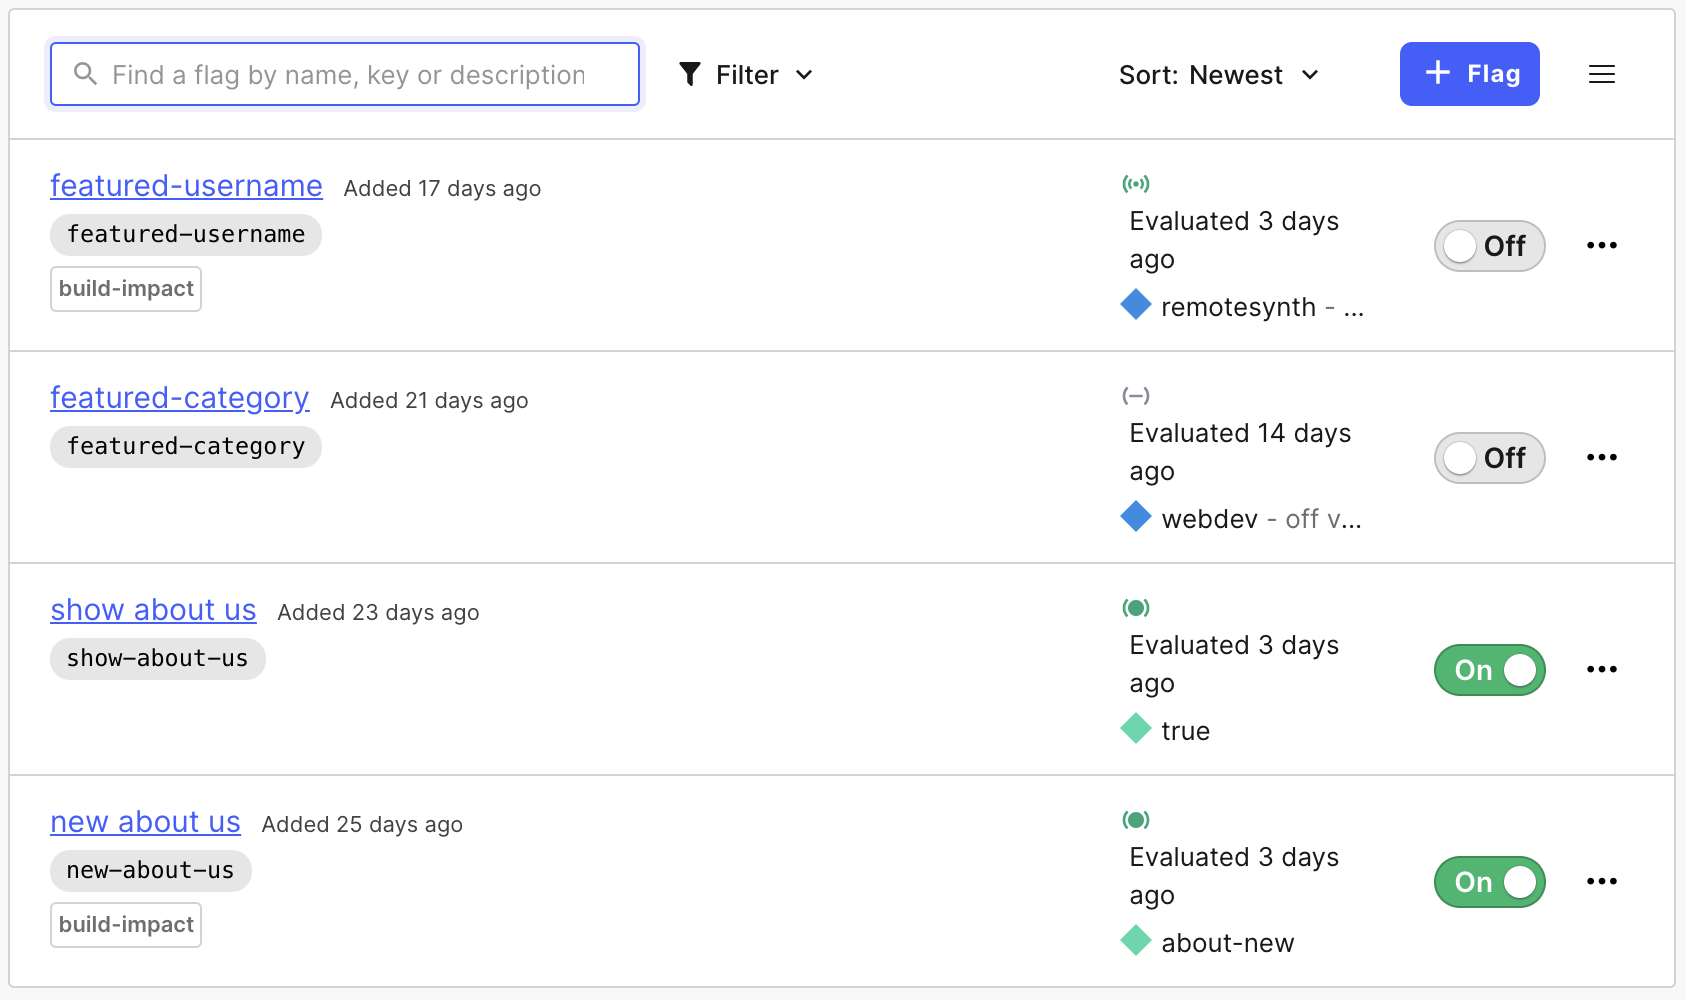
Ultimately, we will end up with a number of flags, some of which are tagged with build-impact and others that are not. The ones that are not may be used in Netlify functions, server-side rendering of specific pages or within client-side JavaScript. In each of these cases, a rebuild is not necessary, so no additional integration is required to utilize the flags.
Before we can connect these to Netlify’s build process, we’ll need to do a little set up in Netlify first.
Setting Up Netlify
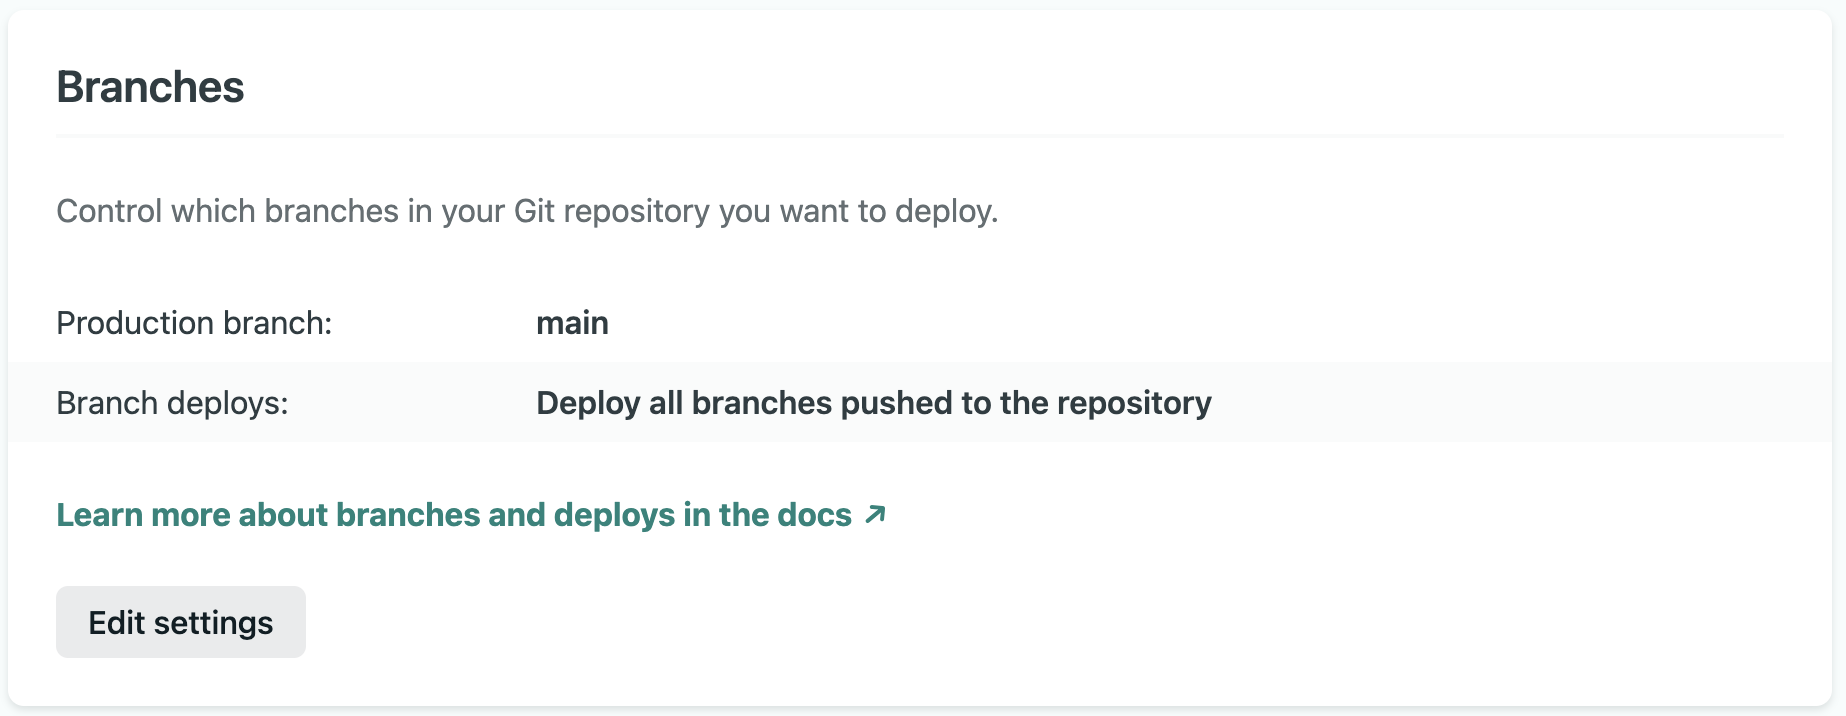
Netlify offers the capability of automatically publishing not just our main branch but also any or all of our other branches to a “branch deploy”. This deploy will not be accessible via our primary URL but instead has a special URL. This is extremely useful for deploying a staging/testing branch. (Note that this is different from Deploy Previews which publish a preview of pull requests.)
To enable branch deploys, go to Site Settings > Build & Deploy > Branches within your Netlify dashboard. You can choose to publish only your production branch, all branches or only specific branches that you specify. In our example, we only have two branches, so we’ll publish all of them.
Per Context Environment Variables in Netlify
Next, we need to set up our two branches (i.e. production and staging) to use the appropriate SDK keys for the project. This enables the production deploy to use the Production environment flags in LaunchDarkly and the staging deploy to use Testing environment flags.
Environment variables can be set in Netlify via the Netlify dashboard at Site Settings > Build & Deploy > Environment. However, this sets the variables on every branch whereas we want to use different variables per environment. To do that, we’ll need to use a build plugin that will choose the appropriate variable for each environment (or “context” as Netlify refers to them).
Within our Netlify site dashboard, go to Plugins and then click the button that reads “Go to plugins directory”. In the search box, search for “Contextual Env”. This is a build plugin created by Chris Ball that will replace the value of environment variables on a per context basis. Click the “Install” button and then choose the site to install it to.
The way this plugin works is by replacing the value of an environment variable like LAUNCHDARKLY_SDK_KEY, which contains our Production environment SDK key, with the value of an environment variable prefixed with the name of the deploy context. In this case, our deploy context is branch-deploy, so the environment variable containing our Testing environment SDK key should be named BRANCH_DEPLOY_LAUNCHDARKLY_SDK_KEY.
Now we can go to Environment variables via the Netlify dashboard at Site Settings > Build & Deploy > Environment and set four environment variables:
LAUNCHDARKLY_SDK_CLIENTcontains the client-side ID for our Production environment that will allow us to access LaunchDarkly via one of the Client-side SDKs.LAUNCHDARKLY_SDK_KEYcontains the server-side SDK key for our Production environment that will allow us to access LaunchDarkly via one of the Server-side SDKs.BRANCH_DEPLOY_LAUNCHDARKLY_SDK_CLIENTcontains the client-side ID for our Test environment. This will replace the value ofLAUNCHDARKLY_SDK_CLIENTon any of our branch deploys, including our staging deploy.BRANCH_DEPLOY_LAUNCHDARKLY_SDK_KEYcontains the server-side SDK key for our Test environment. This will replace the value ofLAUNCHDARKLY_SDK_KEYon any of our branch deploys, including our staging deploy.
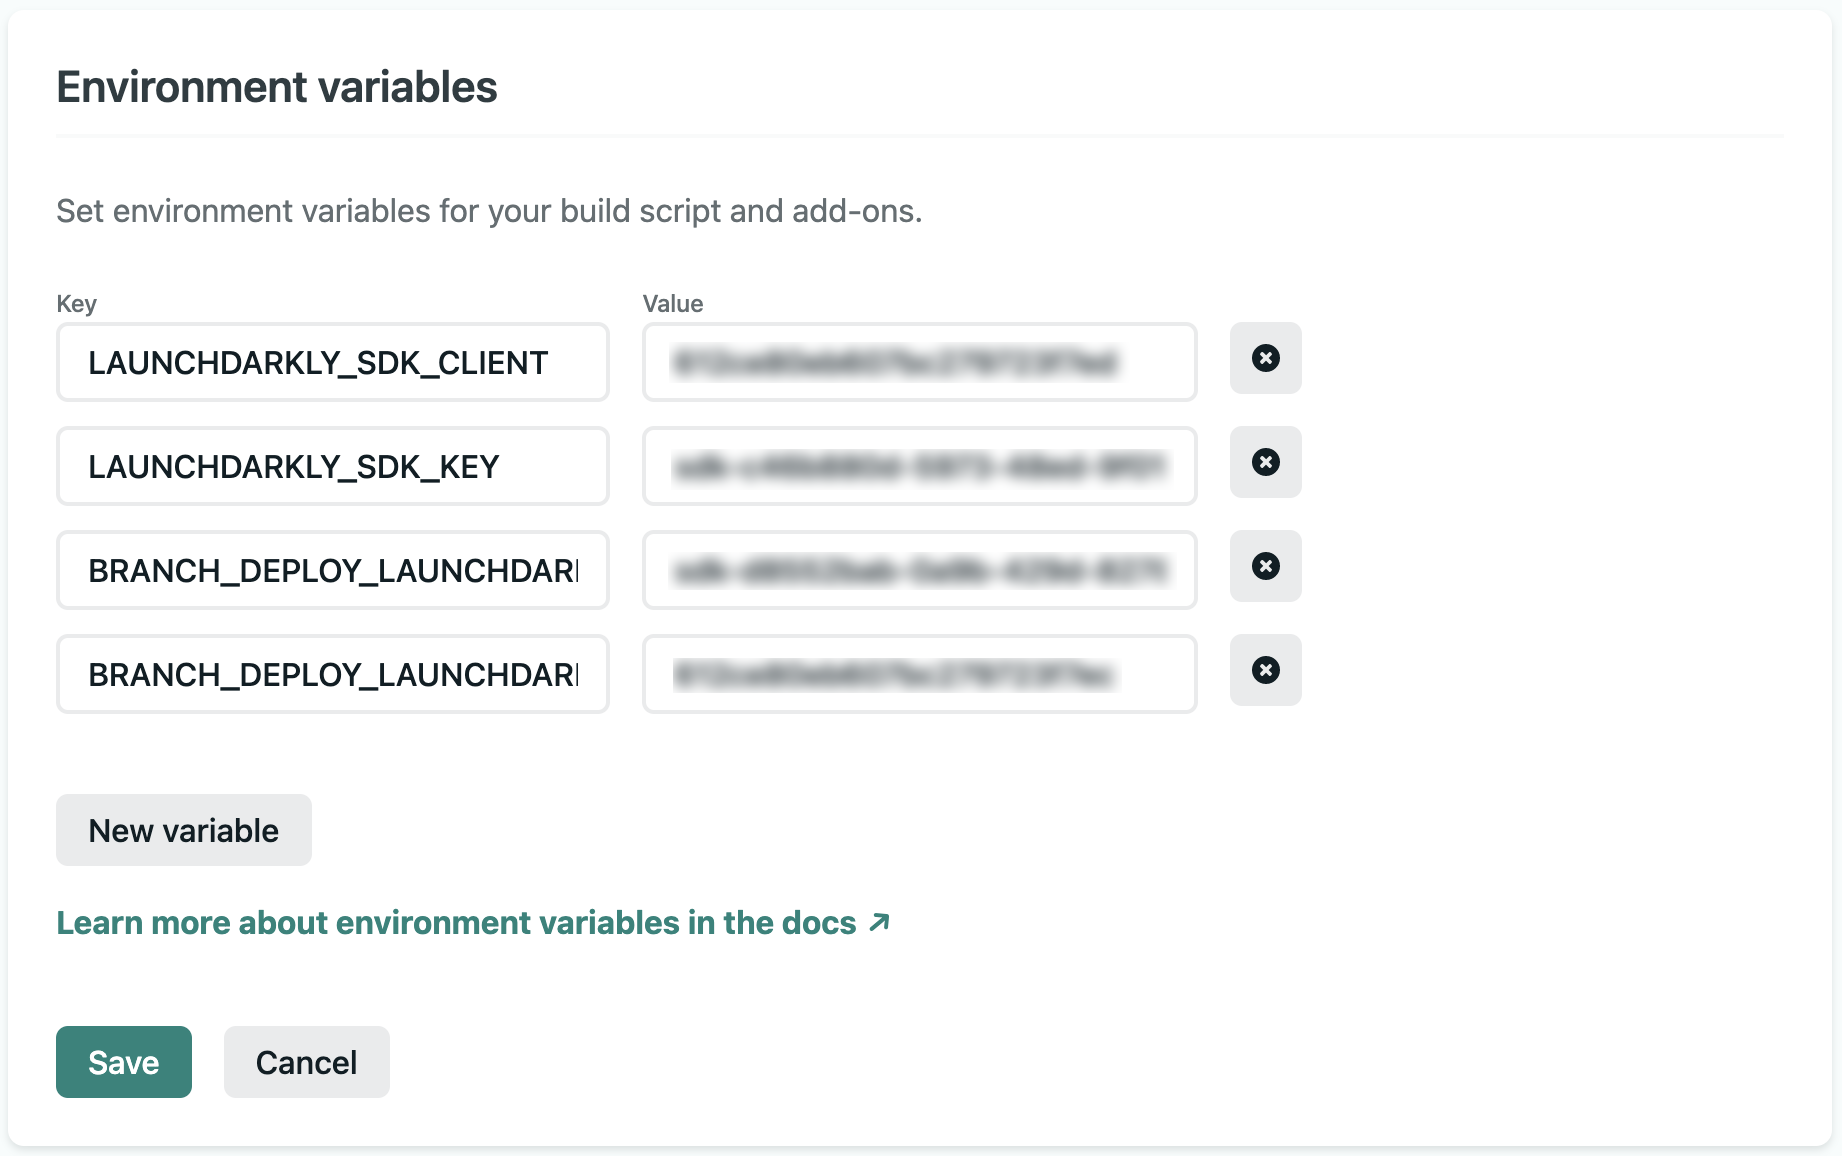
Once these values are all in, click the “Save” button. When a branch is deployed, all references to either the LAUNCHDARKLY_SDK_CLIENT or LAUNCHDARKLY_SDK_KEY will use the appropriate Test environment variables.
Deploy Hooks on Netlify
Deploy hooks are HTTP endpoints that Netlify provides to allow us to programmatically trigger a build. This is extremely useful if you want to trigger a new build when content is published on a headless CMS, for example. For our example, we want to trigger a new build whenever a flag that we’ve determined impacts the build is changed.
We need to set up two deploy hooks: one for our production deploy; and one for our staging deploy. Within your Netlify dashboard, go to Site Settings > Build & Deploy > Build Hooks and click the “Add build hook” button. Give the build hook a name (for example, “LaunchDarkly Production”) and then choose the main branch for our production deploy. Repeat this process, choosing the staging branch.
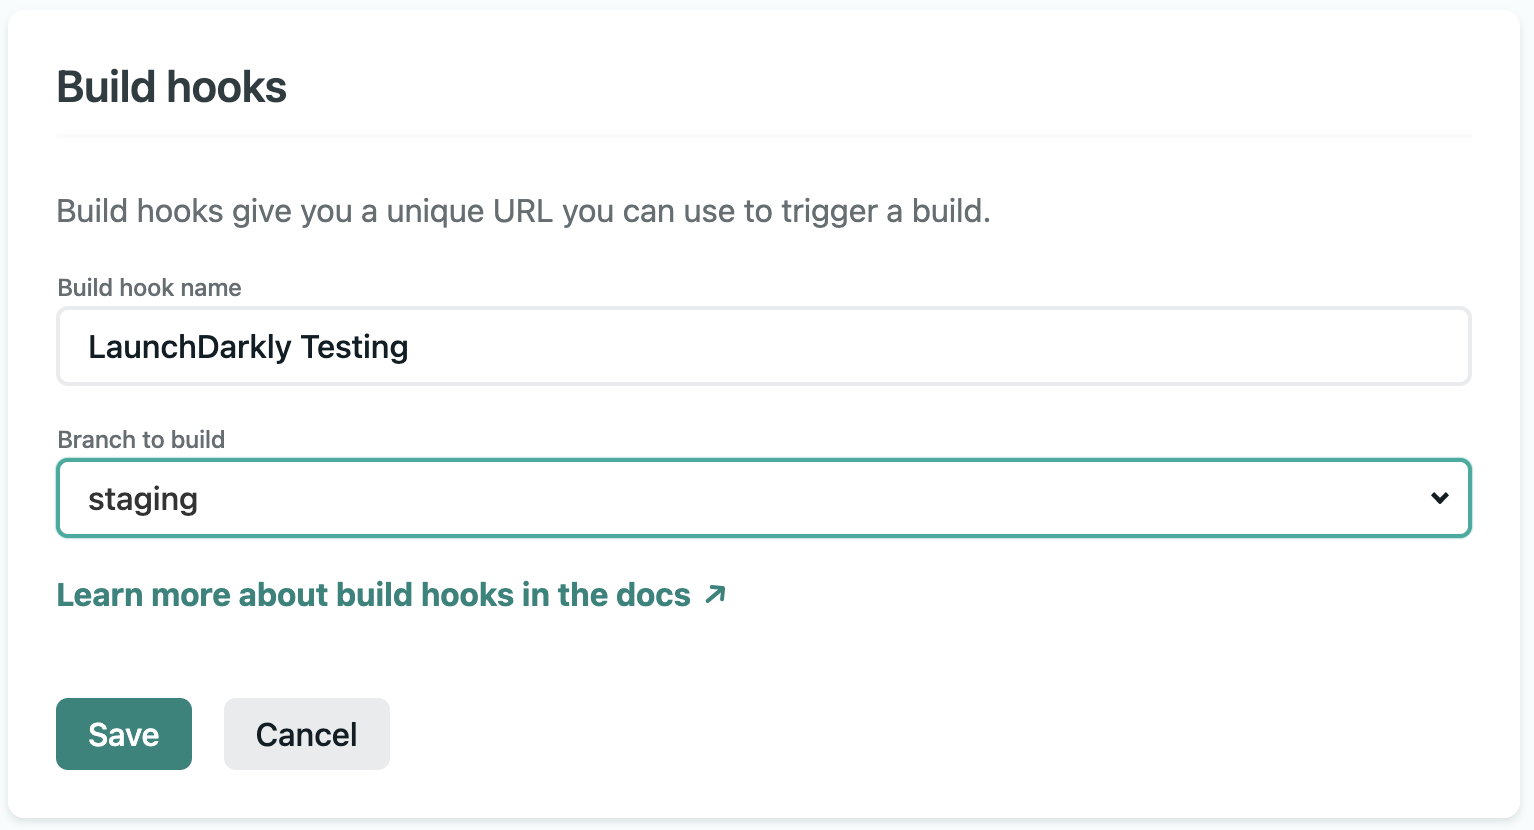
Once they are saved, Netlify will give us a build hook URL we can copy. We’ll need those in a moment when we set up the webhooks in LaunchDarkly.
Using Webhooks on LaunchDarkly to Trigger a Build
We’re going to use LaunchDarkly’s webhook integration to call the Netlify build hook and trigger a build. We’ll connect one webhook from our Test environment to our staging deploy on Netlify and our Production environment to our production deploy. We’ll also set up a security policy on the webhook to ensure that only those flags tagged with build-impact will trigger a rebuild on Netlify.
Within your LaunchDarkly dashboard, go to Integrations, search for “webhooks” and then click the ”+ Integration button”. Name the webhook to make it easier to identify (for example, “Netlify Production”) and then place the build hook URL for our production deploy from Netlify in the URL.
Creating Advanced Security Policies
Next, we need to add a security policy to this webhook so that it only triggers rebuilds when flags from the proper environment that are tagged with build-impact are changed. All other changes should not trigger a rebuild. In the “Policy” section, click on the “Advanced editor” link and then paste the below policy into the editor. This policy says that for our project (this is proj/netlify-test in the below code but be sure to replace netlify-testwith your project key) on the production environment (env/production) call this webhook for all flags tagged with build-impact (flag/*;build-impact).
[ { "resources": [ "proj/netlify-test:env/production:flag/*;build-impact" ], "actions": [ "*" ], "effect": "allow" }]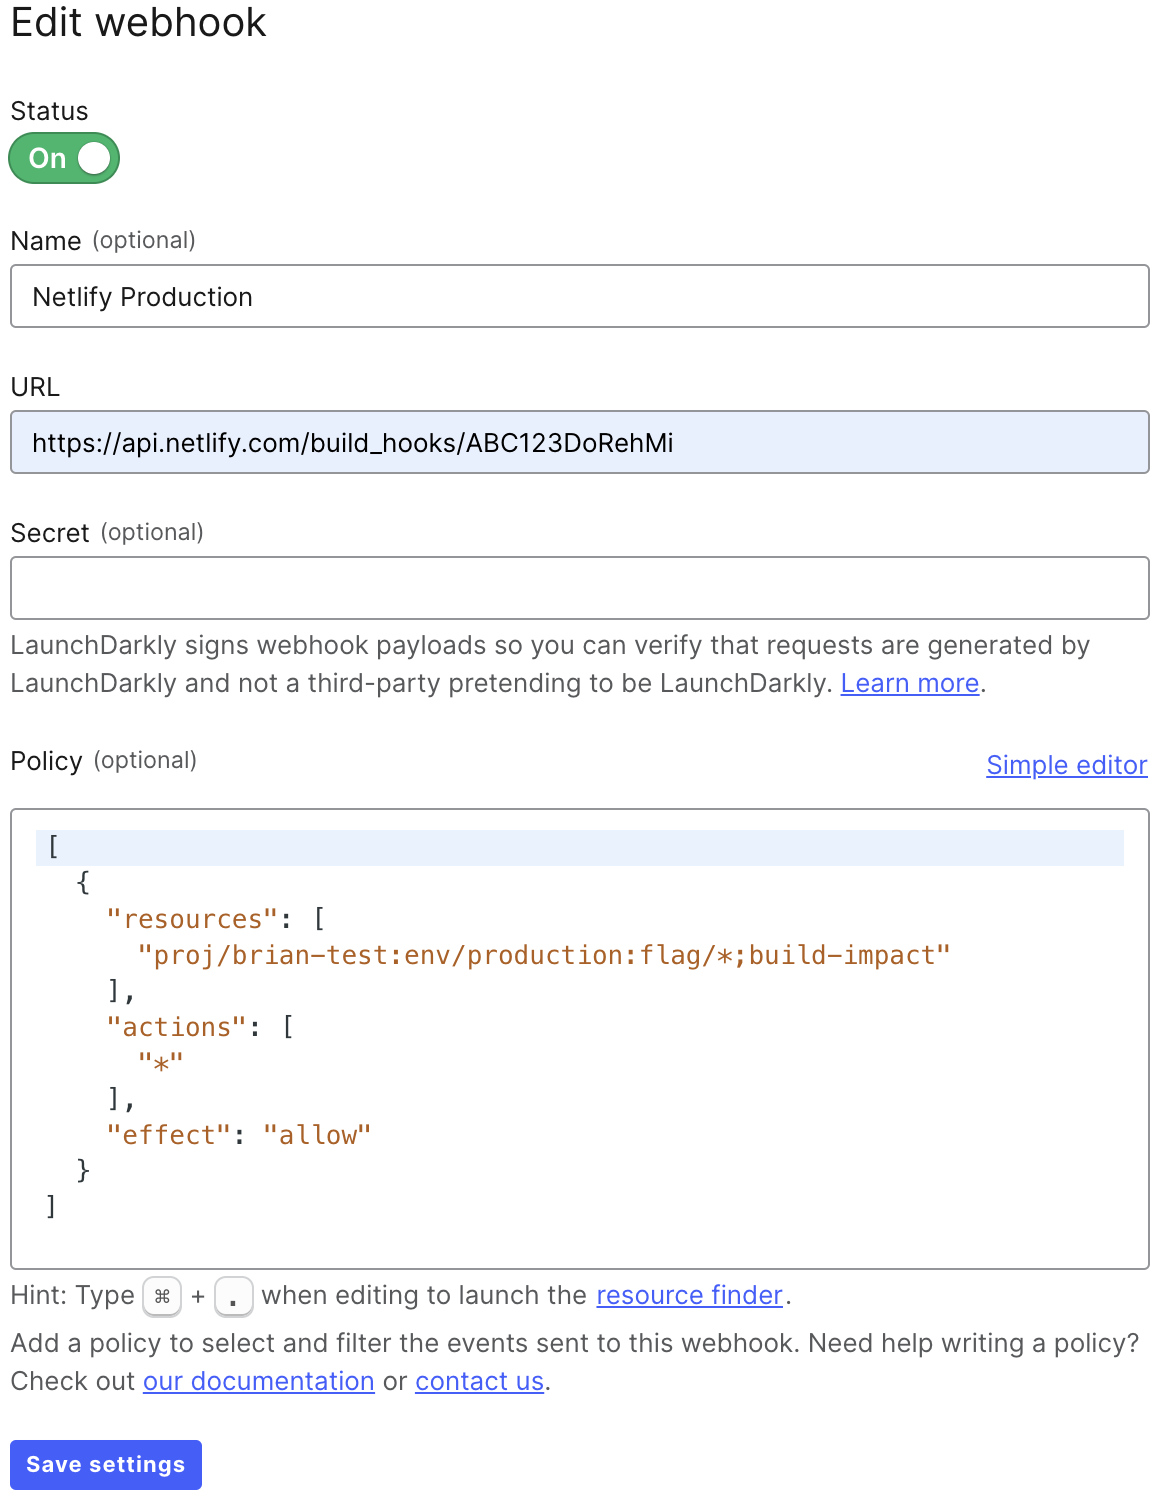
Repeat the same process, creating a webhook for the Test environment that calls the URL for the staging deploy on Netlify. The only difference besides the URL for the webhook will be changing env/production in the security policy to env/test.
Considerations
At this point, our Netlify and LaunchDarkly are connected but there is a caveat that you need to consider. Flags that have build impact are unable to take advantage of percentage rollouts, experiments or other user-specific targeting. This is because the assets in these cases are prerendered (also known as statically rendered) and deployed as part of the build. Regardless of any rollout or targeting, all users are served the same statically generated version of the page. This is just the nature of prerendered content.
Nonetheless, there are some potential solutions that can overcome this limitation involving the use of edge computing. This would entail running a function at the edge (meaning on a CDN) that evaluates flags and alters the content or redirects users depending on the flag value for that user. For example, Netlify’s own Edge Handlers (which are currently only available in private beta) could allow a solution that leveraged prerendered page content while also allowing rollouts and experiments.
We’re Ready to Go!
That’s all that we need to do to get everything hooked up. At this point, we should be able to do the following in LaunchDarkly and see the appropriate actions on Netlify:
- Change a flag that is tagged with
build-impacton the Test environment in LaunchDarkly and see the staging deploy triggered within Netlify. - Change any other environment setting or flag on the Test environment in LaunchDarkly and no Netlify build should be triggered.
- Change a flag that is tagged with
build-impacton the Production environment in LaunchDarkly and see the production deploy triggered within Netlify. - Change any other environment setting or flag on the Production environment in LaunchDarkly and no Netlify build should be triggered.
Since we’ve also aligned the correct environment variables for each deploy context in Netlify, we’ll also see that when the build runs for your staging deploy, our Test environment variables called. While the production build will call the appropriate Production environment variables.
If you’d like to explore how this all fits within a real Jamstack application deployed to Netlify, check out the guide to Using LaunchDarkly with Next.js, or read our tutorial on adding feature flags to your React app.