Throughout December we’ll be highlighting a different Netlify feature each day. It might just be the thing you need to unlock those creative juices, and dust off that domain you registered but never deployed! Keep an eye on the blog and on Twitter for each feature!
“Authenticating users is a no-brainer”, said no one ever. Managing user data, creating a login process, setting roles, gating content, these things are hard. One of my favorite strategies in web app development is getting a leg up by having someone else do the hard part. After all, you can’t spell ‘delegation’ without ‘leg’.
Netlify Identity lets us delegate a ton of authentication functionality:
- the setup and infrastructure of storing user information, as well
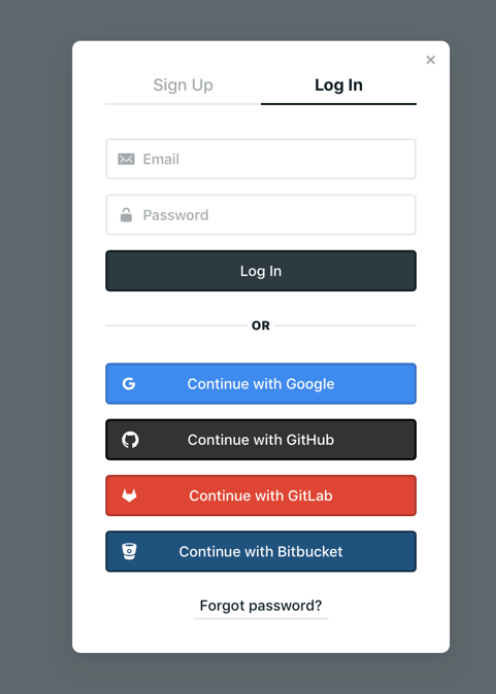
- login using external OAuth providers like GitHub, Google, GitLab, and Bitbucket
- trigger serverless functions on validation, signup, or login events
- generate custom emails
- access and edit user information and roles
- and more!

Leveraging the open-source GoTrue API, Netlify Identity can be added to your site with the Netlify Identity widget by adding this <script> tag:
<head><script type="text/javascript" src="https://identity.netlify.com/v1/netlify-identity-widget.js"></script>
</head>
then including the widget in the site template, like so:
 <!-- Add a menu:
   Log in / Sign up - when the user is not logged in
   Username / Log out - when the user is logged in
  -->
  <div data-netlify-identity-menu></div>

  <!-- Add a simpler button:
    Simple button that will open the modal.
  -->
  <div data-netlify-identity-button>Login with Netlify Identity</div>
Put it all together and you get this lovely pop-up modal window where users can login or sign up!

Check out the Netlify Identity docs to learn more about everything you can do. I can’t wait to see (or not see if I’m not logged in) all the authentication functionality you create! Happy coding 👩🏻💻!


