Make and Deploy an Astro Project in Minutes
Whether you are looking to try Astro or deploy an existing Astro app you can follow these steps to get the job done quickly. We made this template to give you a way to spin up an Astro app and have it ready to be deployed to Netlify.
- Here is the repo: https://github.com/netlify-templates/astro-quickstart
- you can check it out live here: https://astro-quickstart.netlify.app/
- & watch the walkthrough video on Youtube!
Oh, hey, check out this button:

It will walk you through the process of creating a new repo using this template and deploying it to Netlify.
Click 'n' Go
There are a few ways to use and deploy this template so I thought I'd walk you through the clickiest (not a word but come on how cute is it).
-
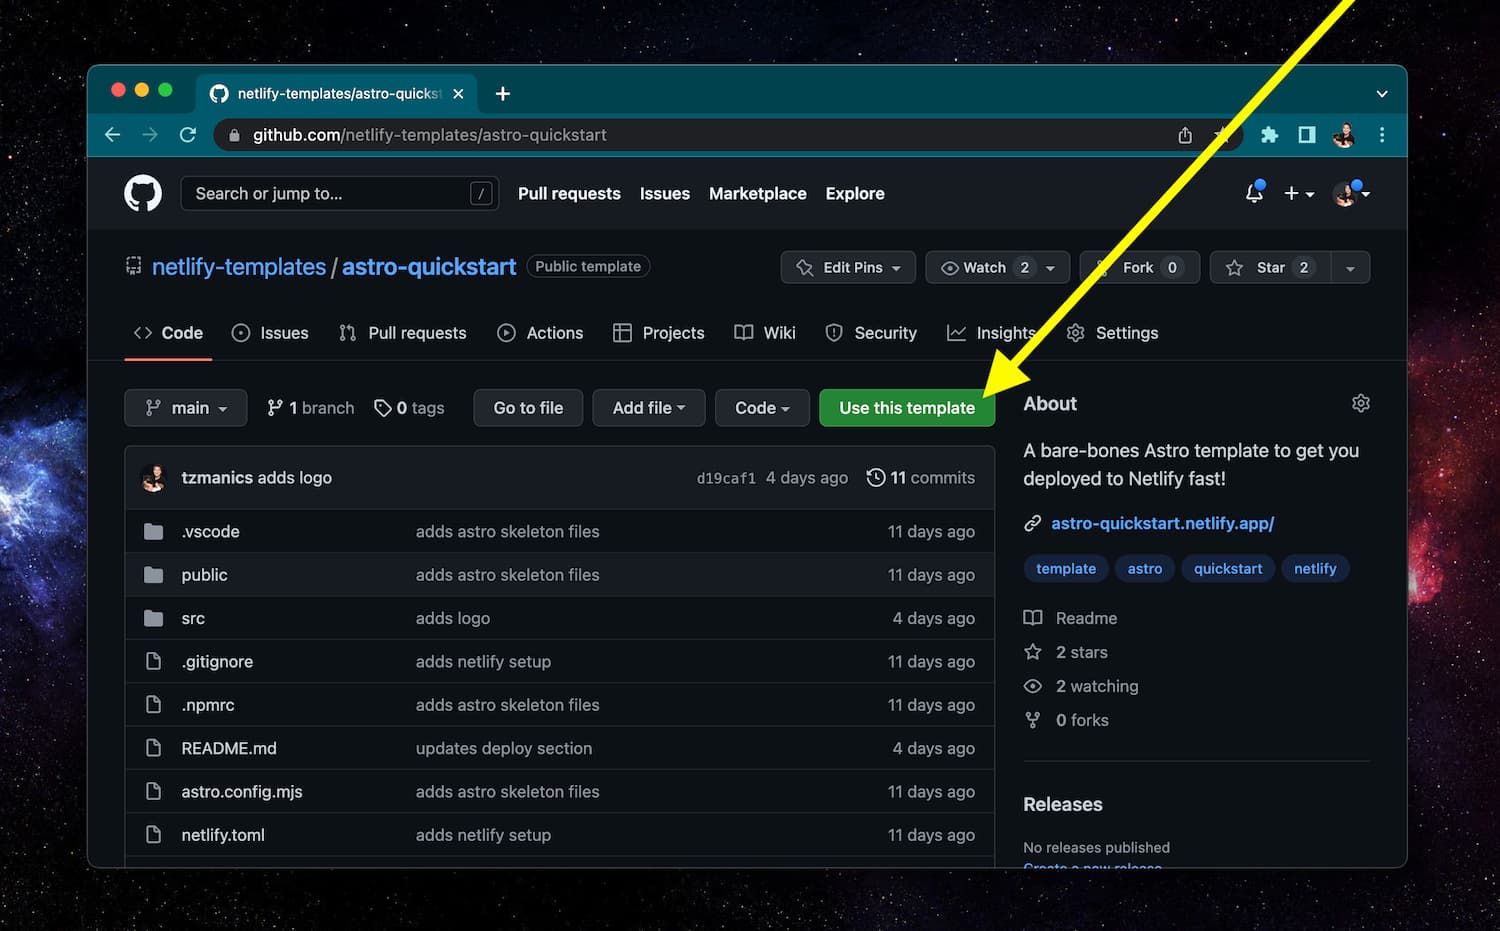
Copy the template repo by clicking the 'Use this template' button towards the top-right of the repo page.
-
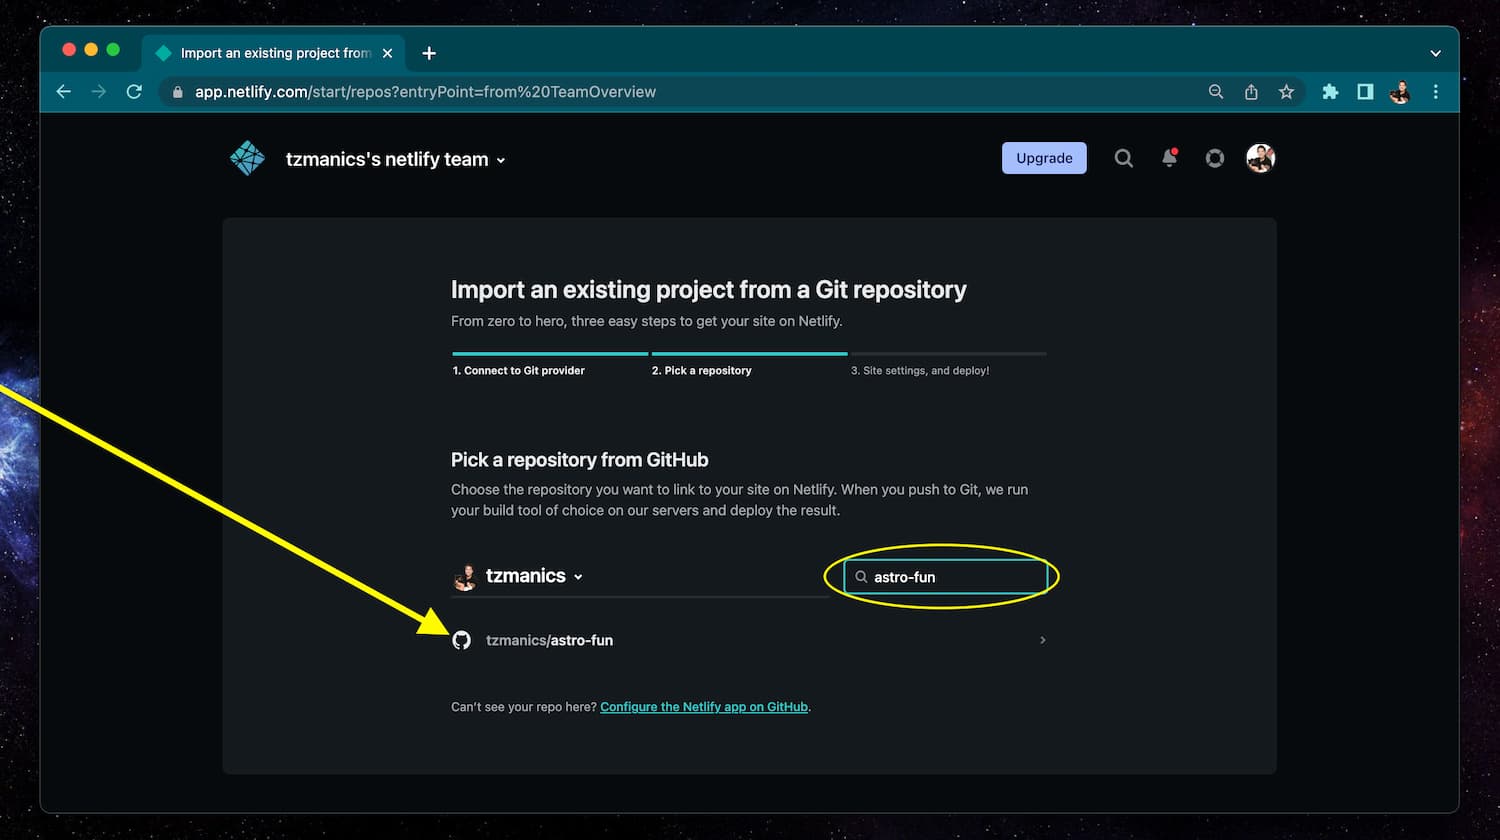
Head to your Netlify dashboard and click the 'Add new site' dropdown menu and click the 'Import an existing project' option.

This will take you to a place to sign in to GitHub and find the new repo just created in step 1.

-
Check the site settings (coming in from the template's
netlify.tomlconfig file) and click 'Deploy site'

-
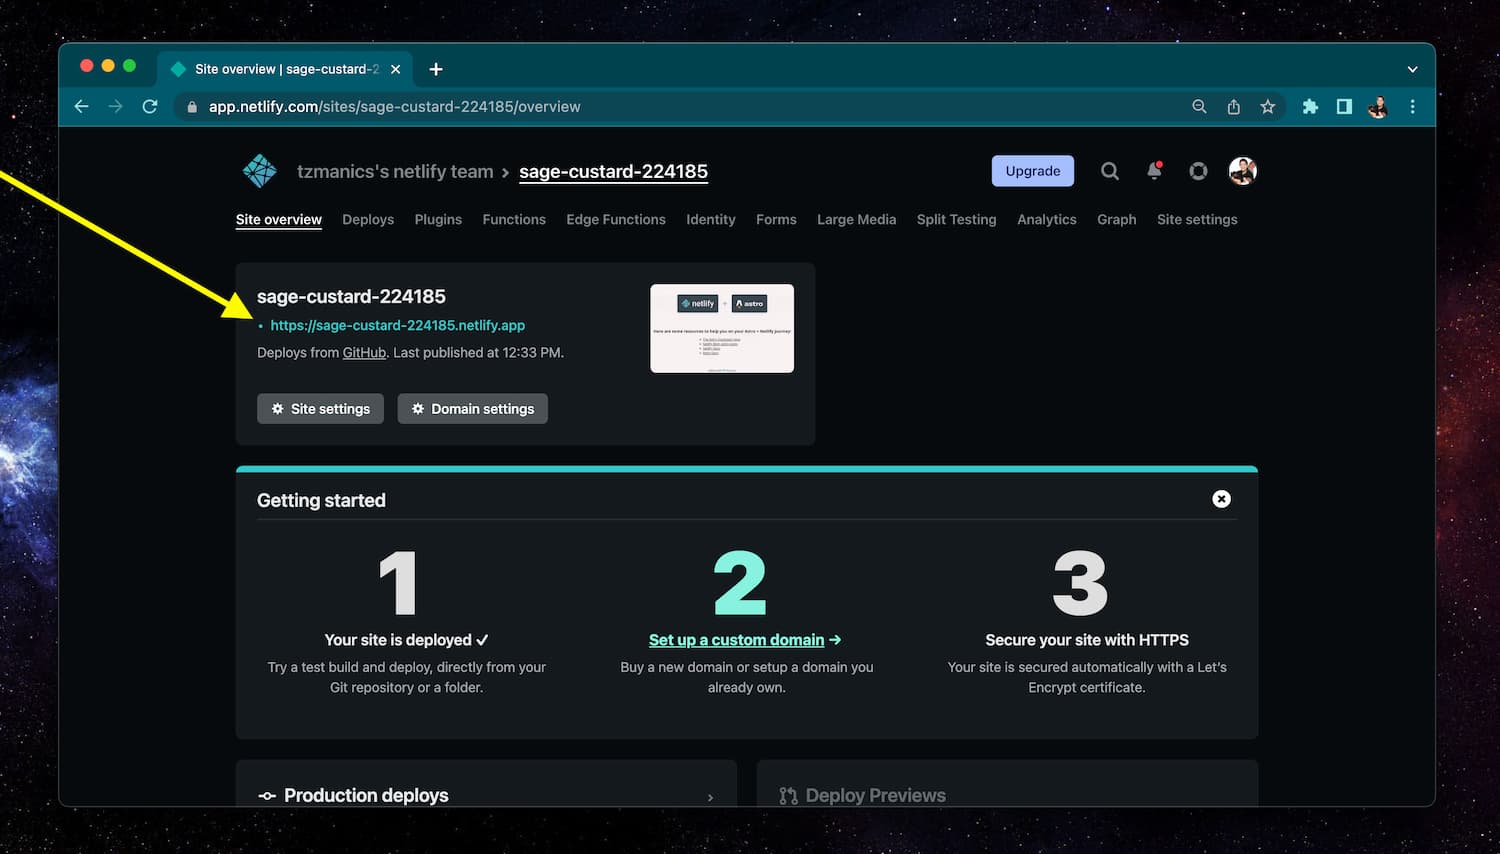
Click the site url and look at your amazing, live site!
If you already had an existing Astro site you could start at step 2 and choose your site from your list of repos.
Rest Your Clicker, You're Done!
With a couple clicks and a few keystrokes you have an Astro site and it's deployed for all the world to see. We're excited to see what you create! Have an idea for another quickstart template? Let us know templates@netlify.com. Happy coding 👩🏻💻!