
Web applications and websites are common targets of malicious attacks. Firewall functionality, including blocking and allowing requests from specific IP addresses and geographic locations, is one of the powerful industry-standard principles of zero trust to help ensure only the appropriate visitors can access your web properties.
Mitigate web application vulnerabilities with Netlify Firewall Traffic Rules
Today, we are excited to announce the release of Netlify Firewall Traffic Rules. This new feature empowers Enterprise customers with Netlify High-Performance Edge to proactively control who can access their Netlify web properties based on the geographic location and IP address of the requestor, in real-time, to align with your business and security policy requirements.
With Firewall Traffic Rules, Netlify Team owners can now create and manage IP and geo restriction rules for their websites, directly from within the Neltify platform. These rules can be set at the team level for all sites, or per-team. Furthermore, discrete rules can be set for published and non-published site contexts, which means your team can combine level-3 traffic rule protection with level 7 site protection and apply it to unpublished content from unauthorized access easily from the Netlify UI. This means your team can now apply a layered approach to securing your Netlify infrastructure, tailored to your unique business needs.
Watch the 1-minute demo video
Configuring traffic rules is quick and easy, starting with simple, high-level “Allow All” and “Block All” traffic options that can be fine-tuned for more advanced needs with granular IP and geo restrictions and exceptions. These access controls enable your team to easily implement and maintain rules that fit your unique business policies.
Benefits of Netlify Firewall Traffic Rules
Netlify Firewall Traffic Rules offer your team an added layer of protection against malicious web attacks. By limiting access to your web properties, you can:
- Protect non-published website updates from unwanted visitors prior to publication
- Grant explicit website access for vendor and contractor networks
- Block malicious traffic to production sites
- Prevent visitors from accessing your sites from countries that do not adhere to your organization’s business policies
- Control infrastructure bandwidth spend by blocking unwanted traffic from specific IPs, IP ranges, and countries.

Use cases and configurations for IP and geo blocking
Prevent visitor access from countries where you cannot conduct business
With Netlify Firewall Traffic Rules, you can easily and proactively restrict access to your website based on your visitors’ geographic location for all of your sites at the team level, or individually by site. For the purposes of this example, we’ll set this rule at the team level.
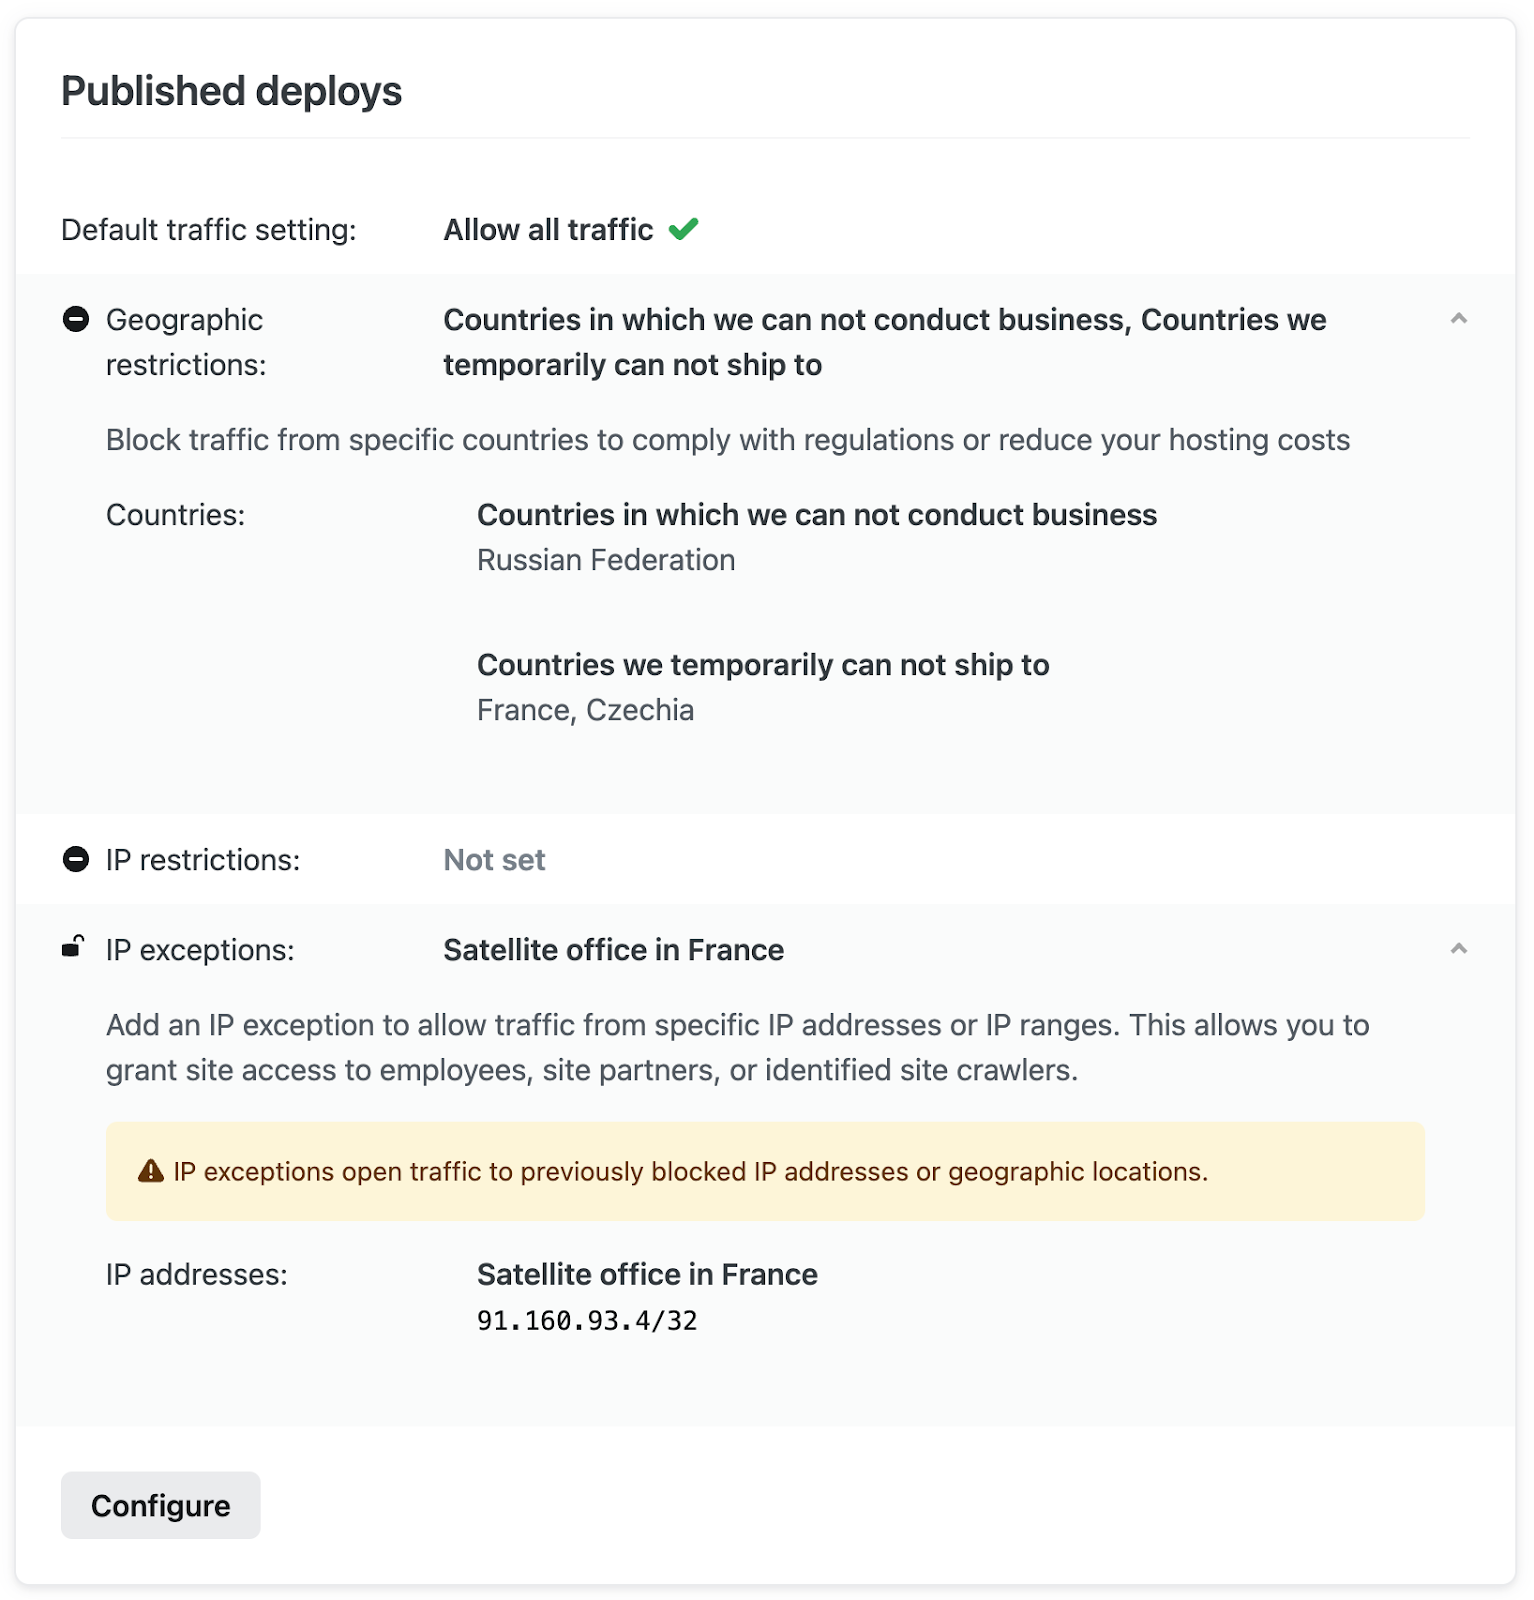
To configure, navigate to Team settings > Firewall > Traffic rules. Under Traffic rules, click “Configure” under Published deploys. With the “Allow all traffic” setting selected, expand the Geographic restrictions section and select “Add another geographic restriction”.
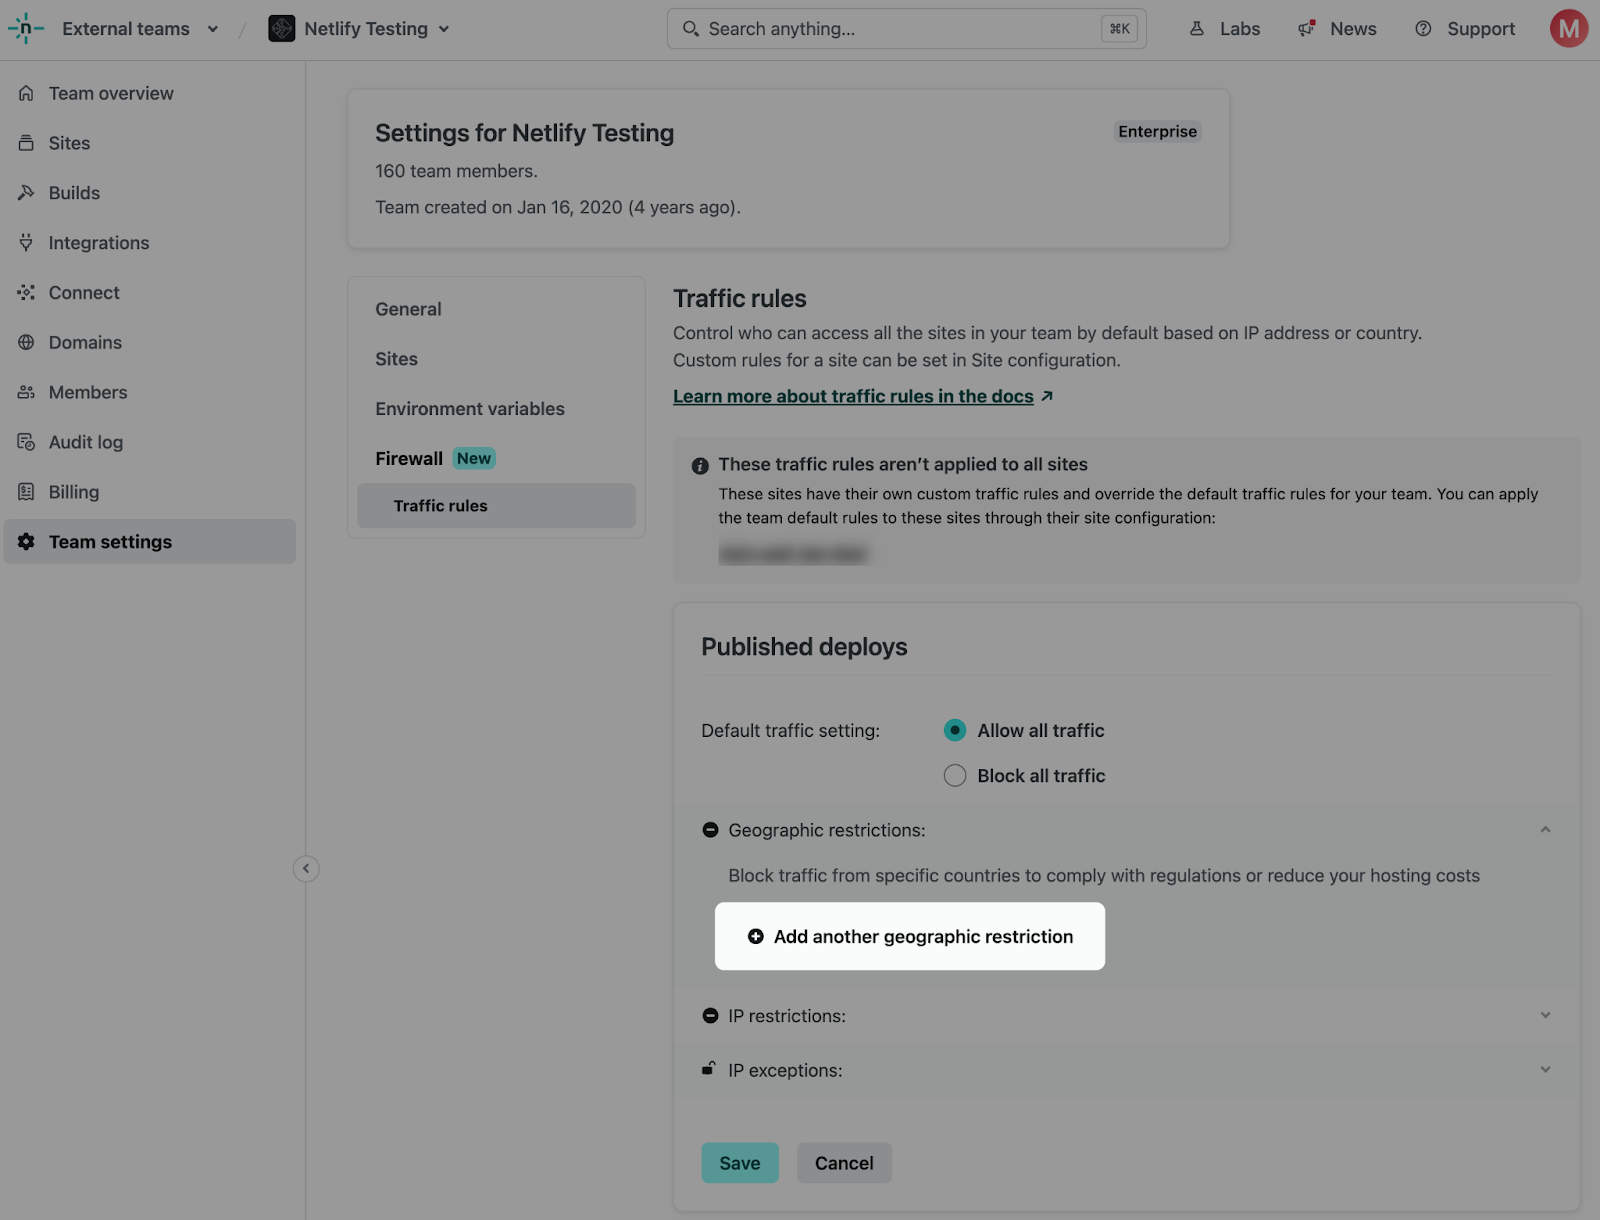
You can then select the country or countries which you wish to restrict traffic from.
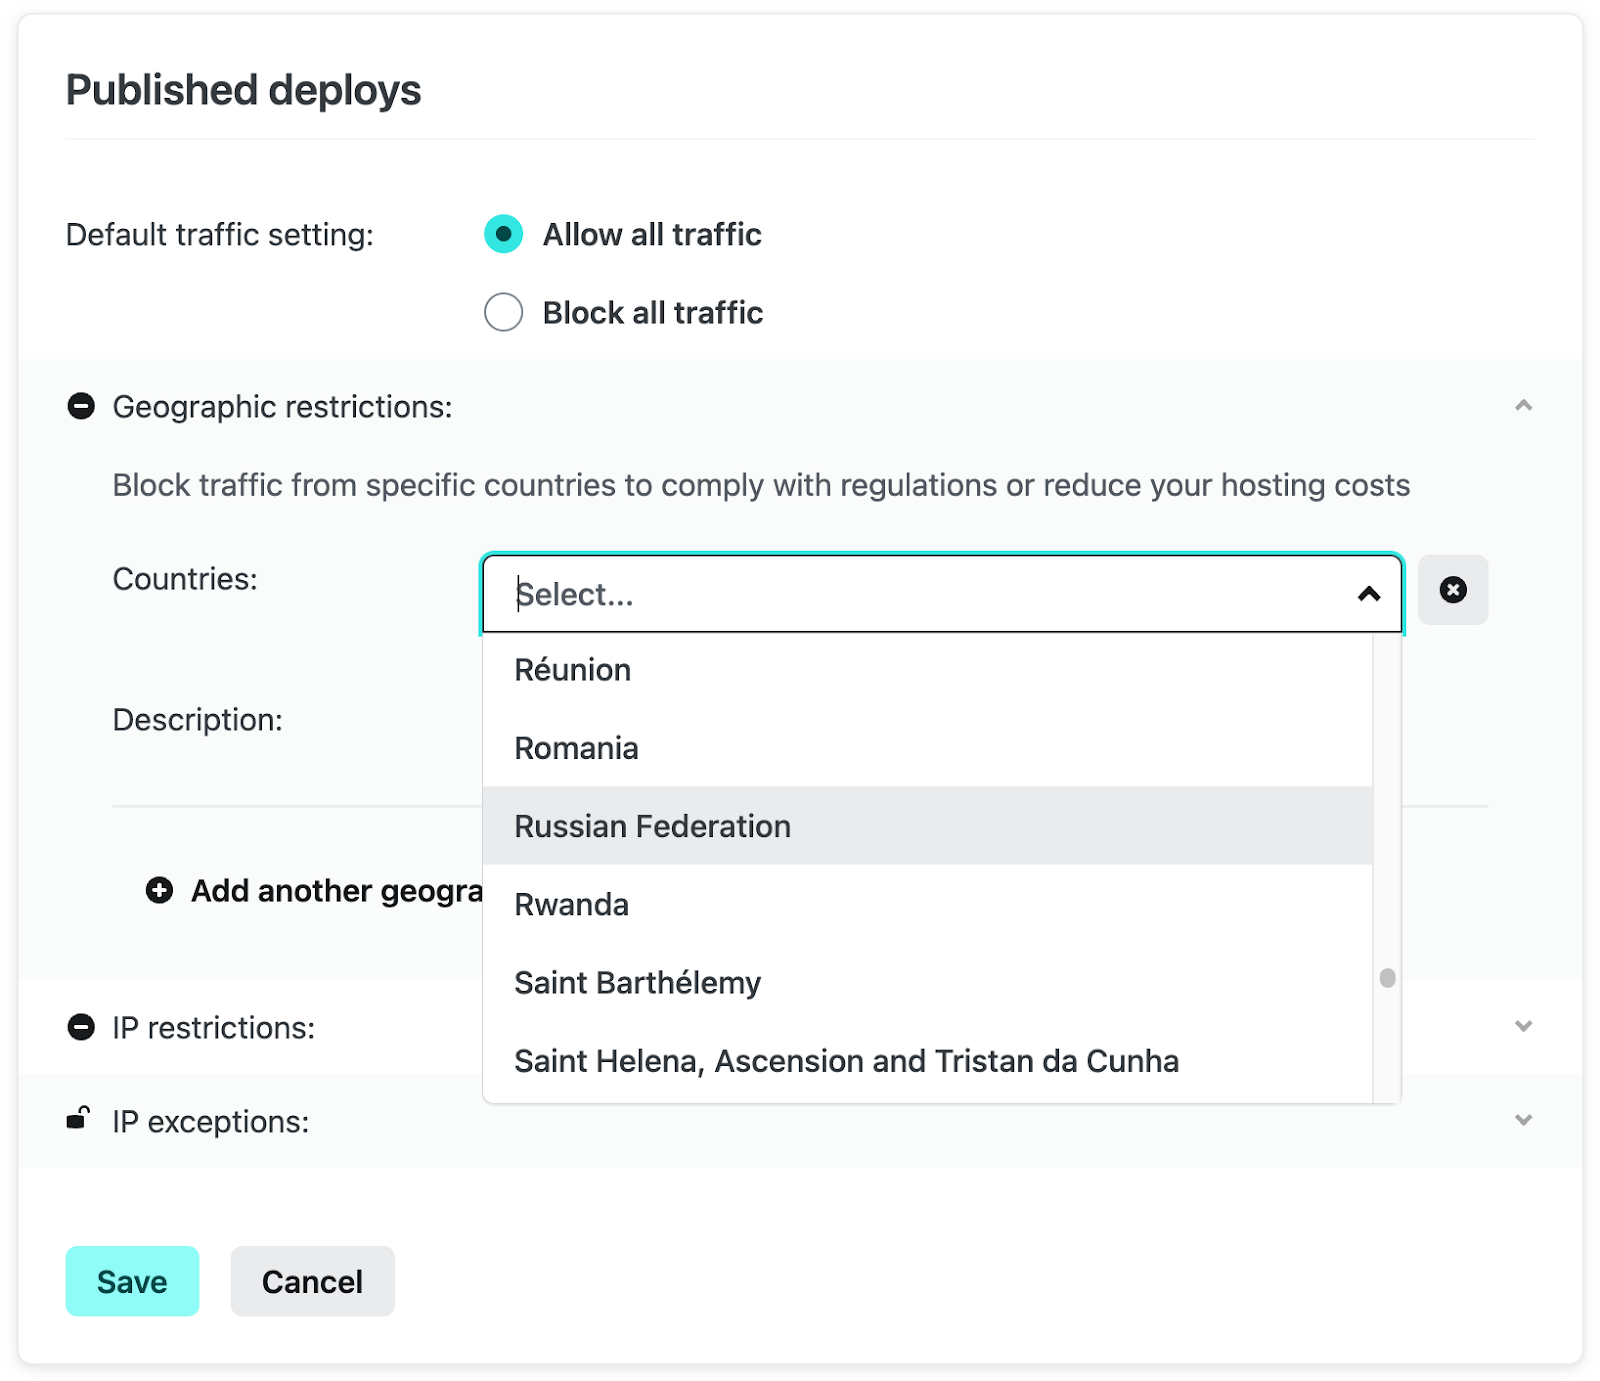
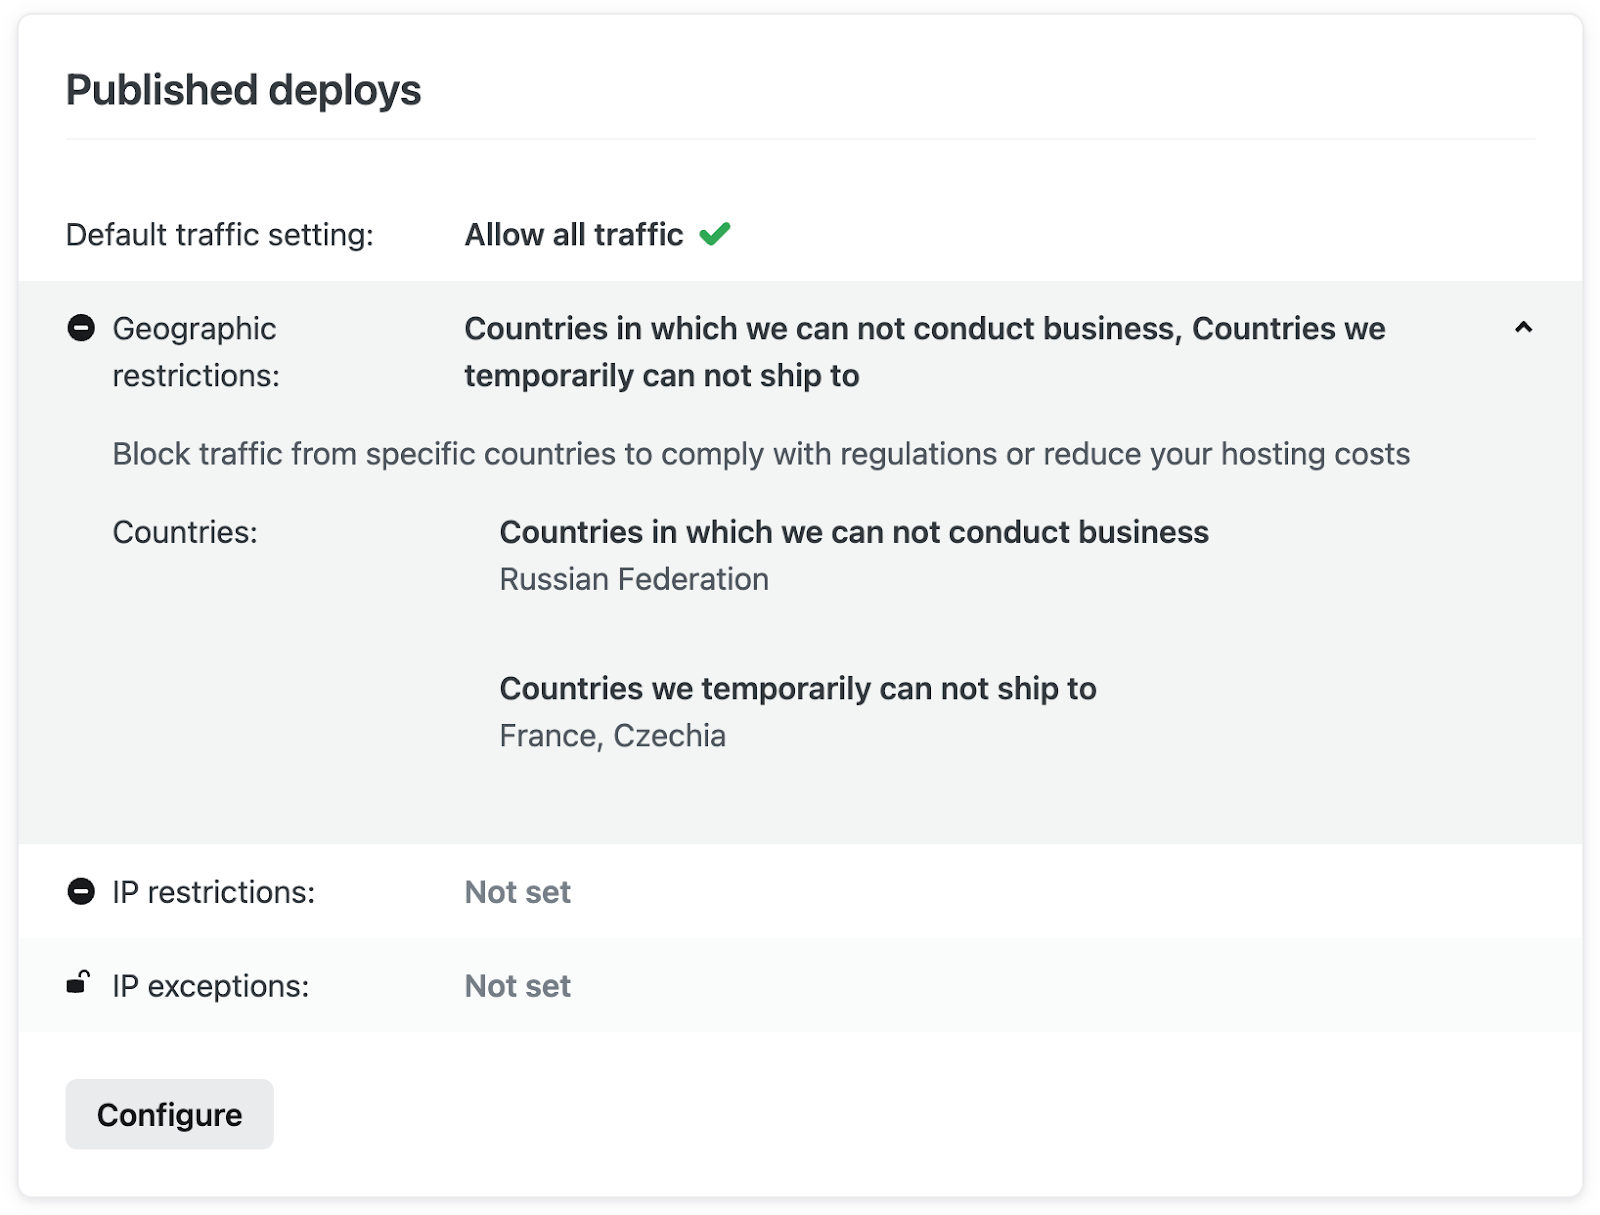
You can also provide a short description to the rule before saving to make it easier to review the geo blocking rules you have in place at a quick glance.
Grant IP exceptions for visitor access from within blocked countries
Let’s say you have a contractor in one of the blocked countries that needs to access your sites. You can easily provide access to their IP address in the rules we configured above.
Click “Configure” under Published deploys and expand the IP exceptions section. Then select “Add another IP exception”.
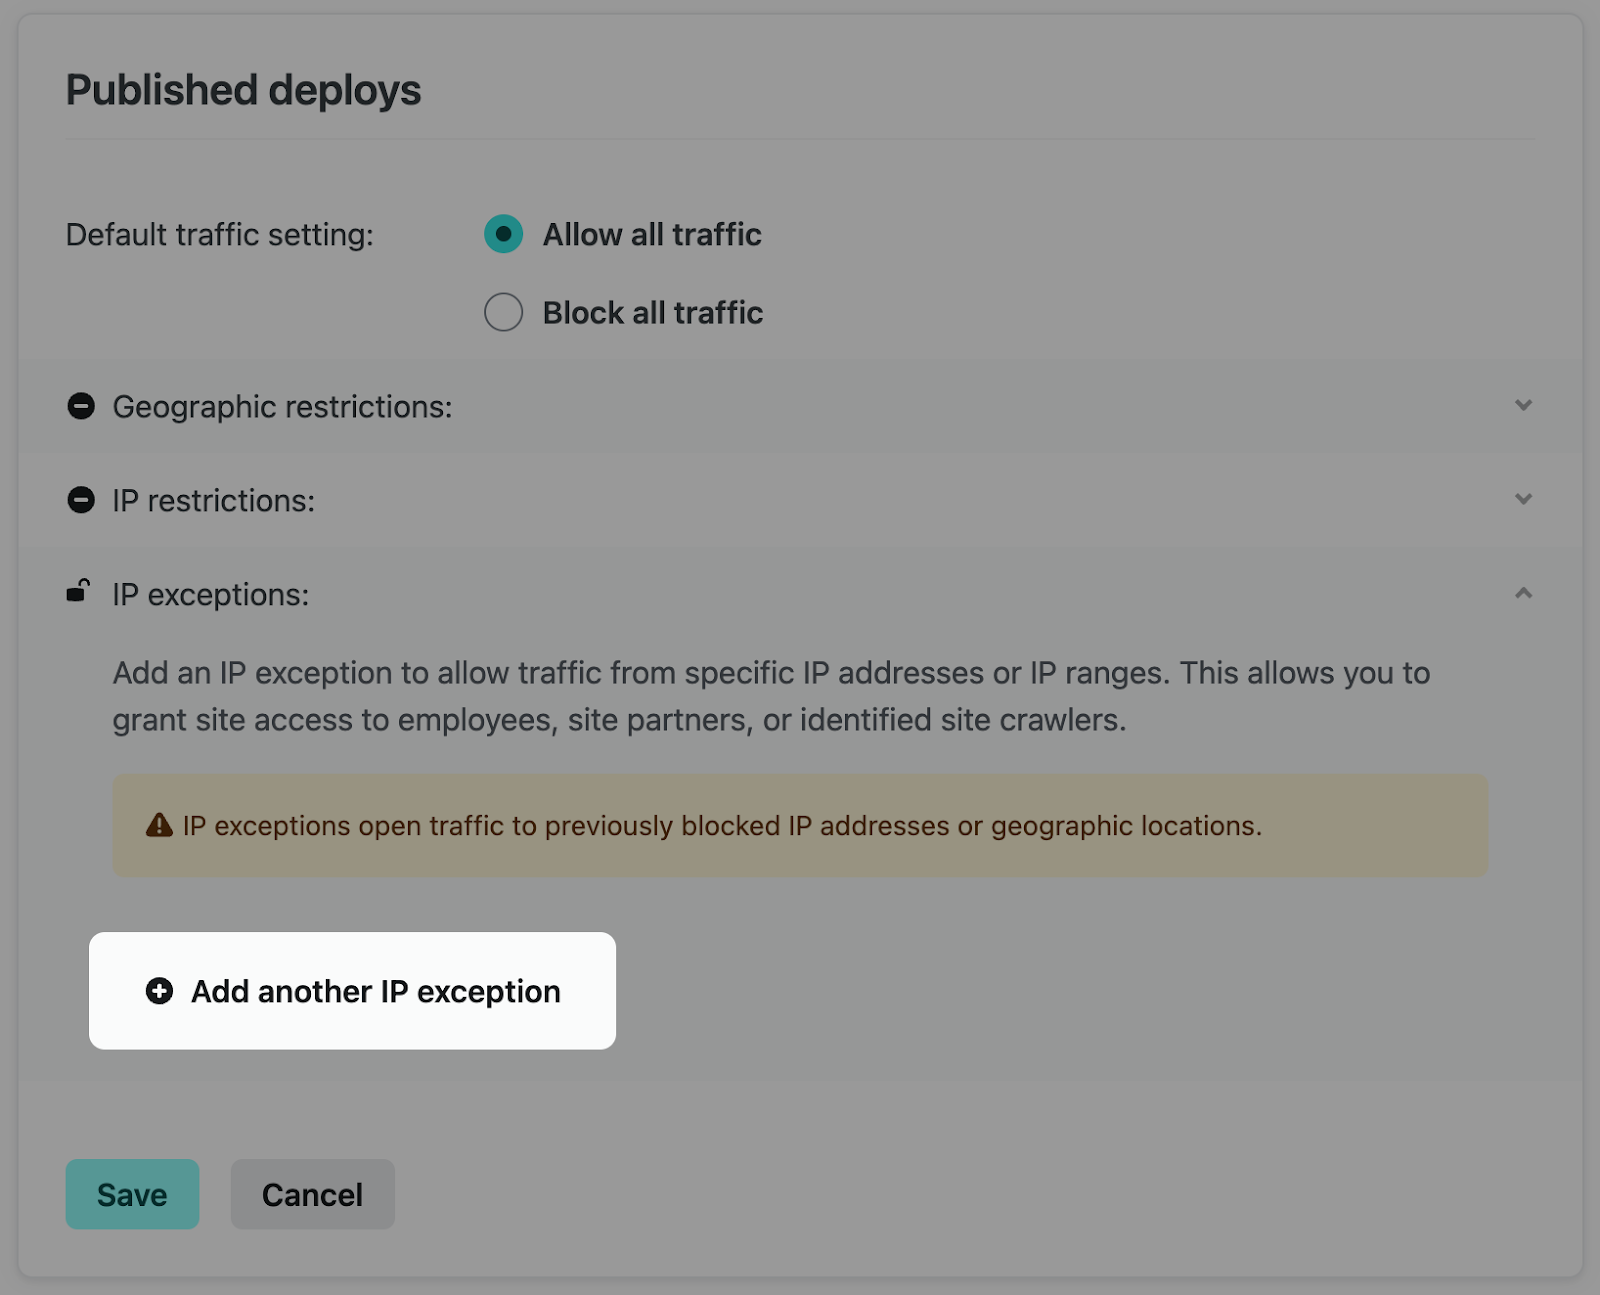
You can then add the IP address for the user, or network, within one of the restricted countries to grant access to your site.
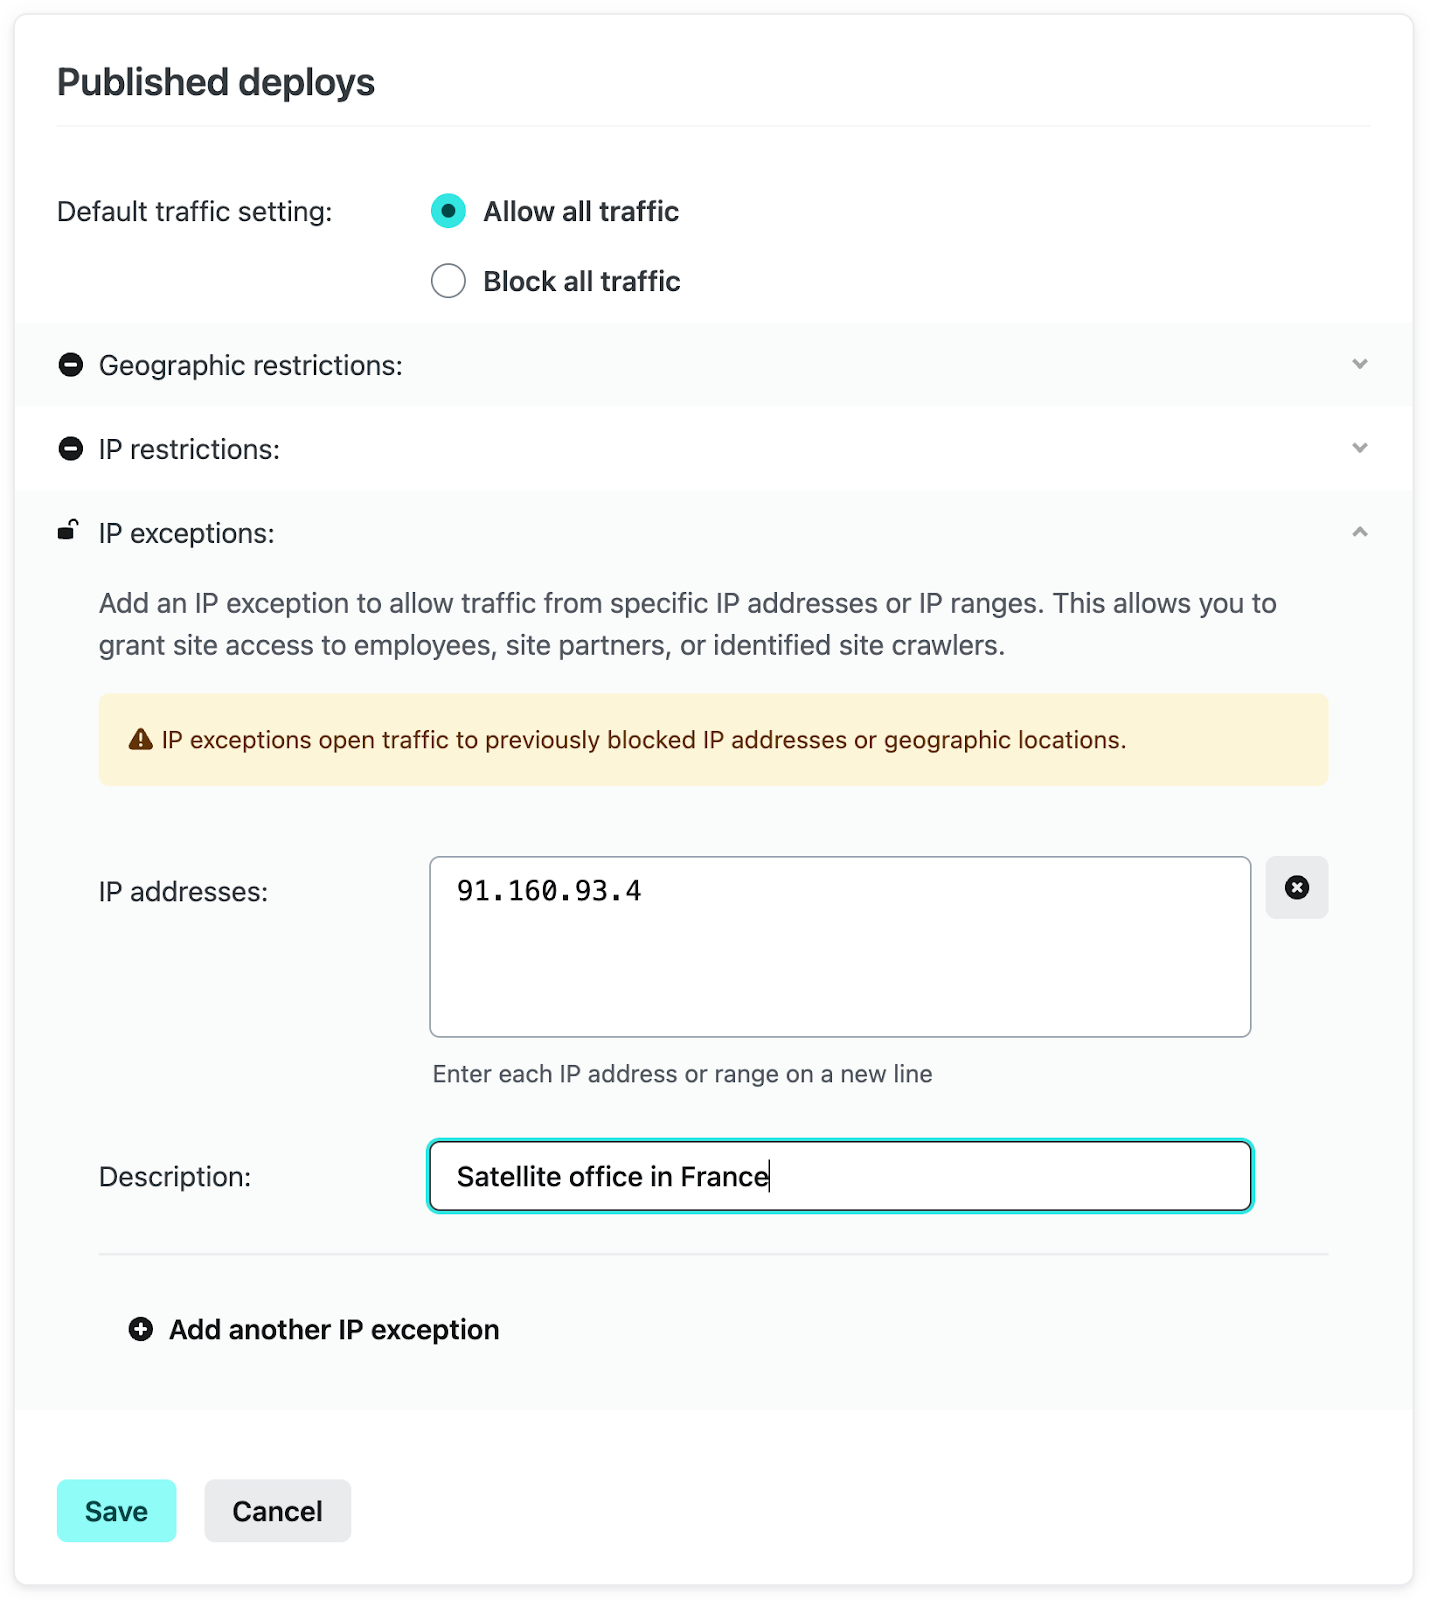
Providing a brief description makes it easy to see the purpose of the exception as well as provide other team members clear context for this traffic rule.
Restrict access to only requests routed through your external firewall
If your organization has requirements to protect all of its web properties behind an existing firewall, an easy way to help guarantee that only authorized traffic can make its way to your Netlify websites is to prevent traffic requests that originate from outside of your trusted network.
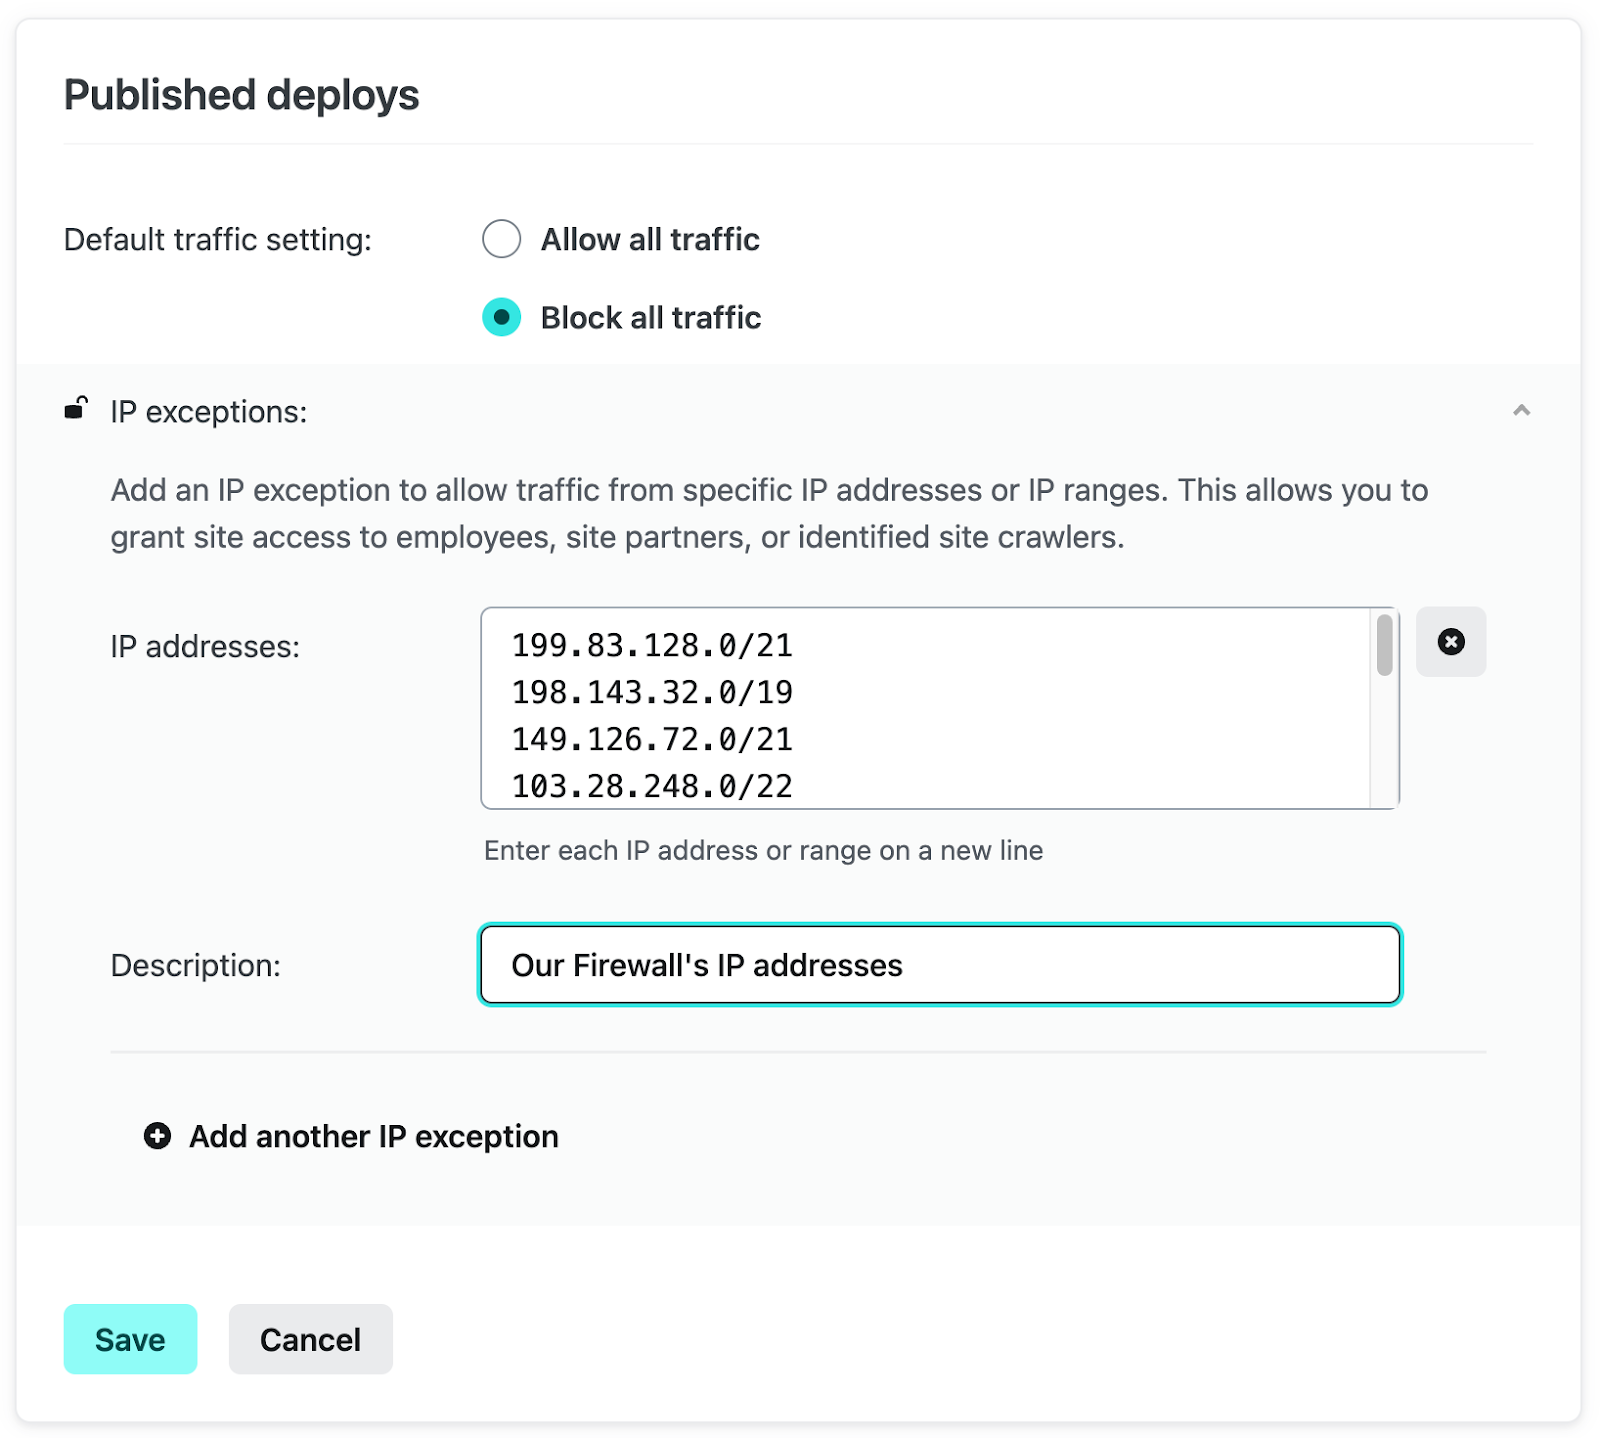
To do this, start by selecting “Configure” under Published deploys on the Firewall Traffic Rules view. From here, select “Block all traffic”, then expand the IP exceptions selection, and select “Add another IP exception”.
Add your Web Application Firewall (WAF) IP addresses here, give it a brief description, and click “Save”.
Once configured, only traffic that comes through your firewall will be able to access your sites.
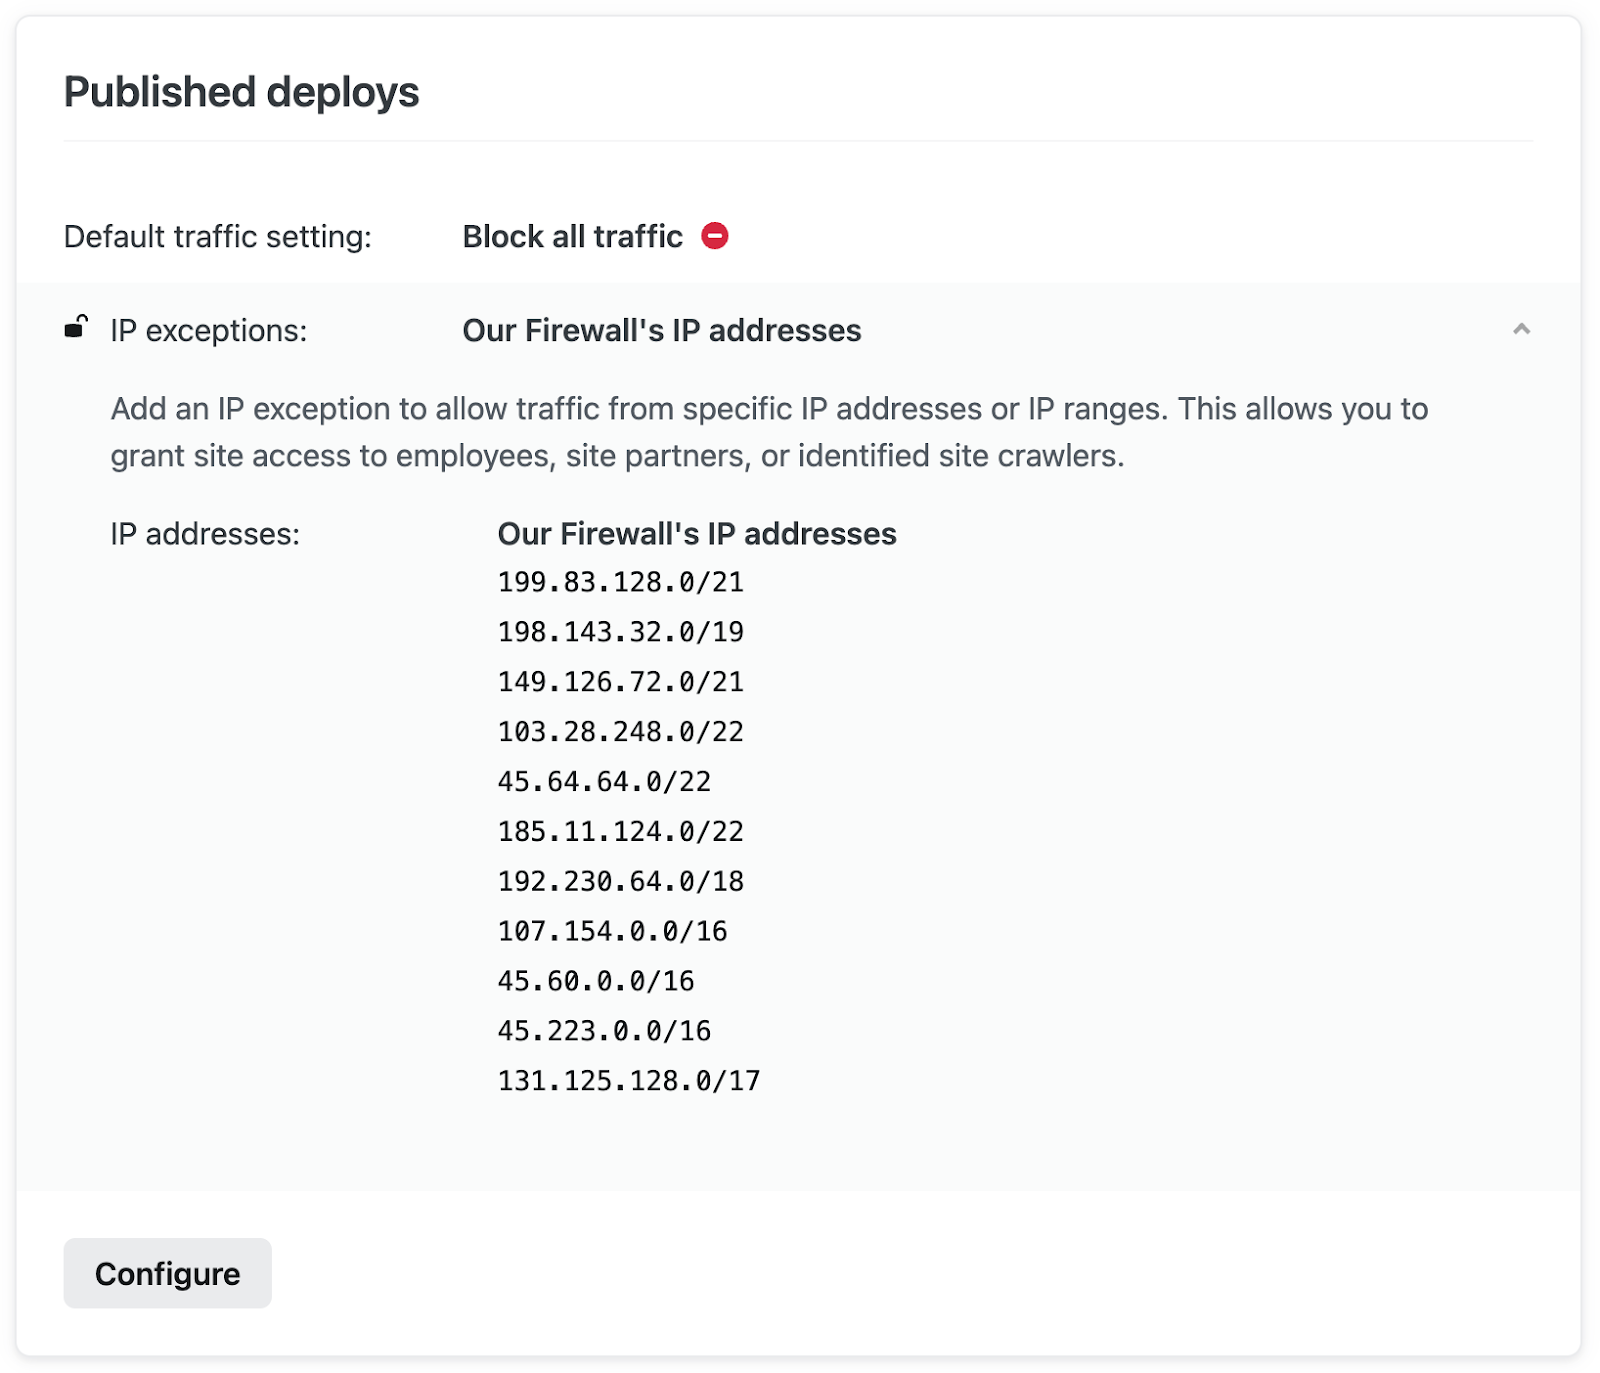
Please note: We recommend using caution when using the “Block all traffic” setting, especially on published and/or production sites. With no exceptions defined, it will render your site(s) inaccessible to all requests.
Secure non-published deploys with default traffic rules
Another powerful capability of Firewall Traffic Rules is to prevent unwanted access to all of your non-published deploys (or even your Published deploys before officially launching).
To accomplish this, start by selecting “Config” under Unpublished deploys, then select “Block all traffic”. Click “Add another IP exception”, then add your team’s IP address and a brief description, then click “Save”.
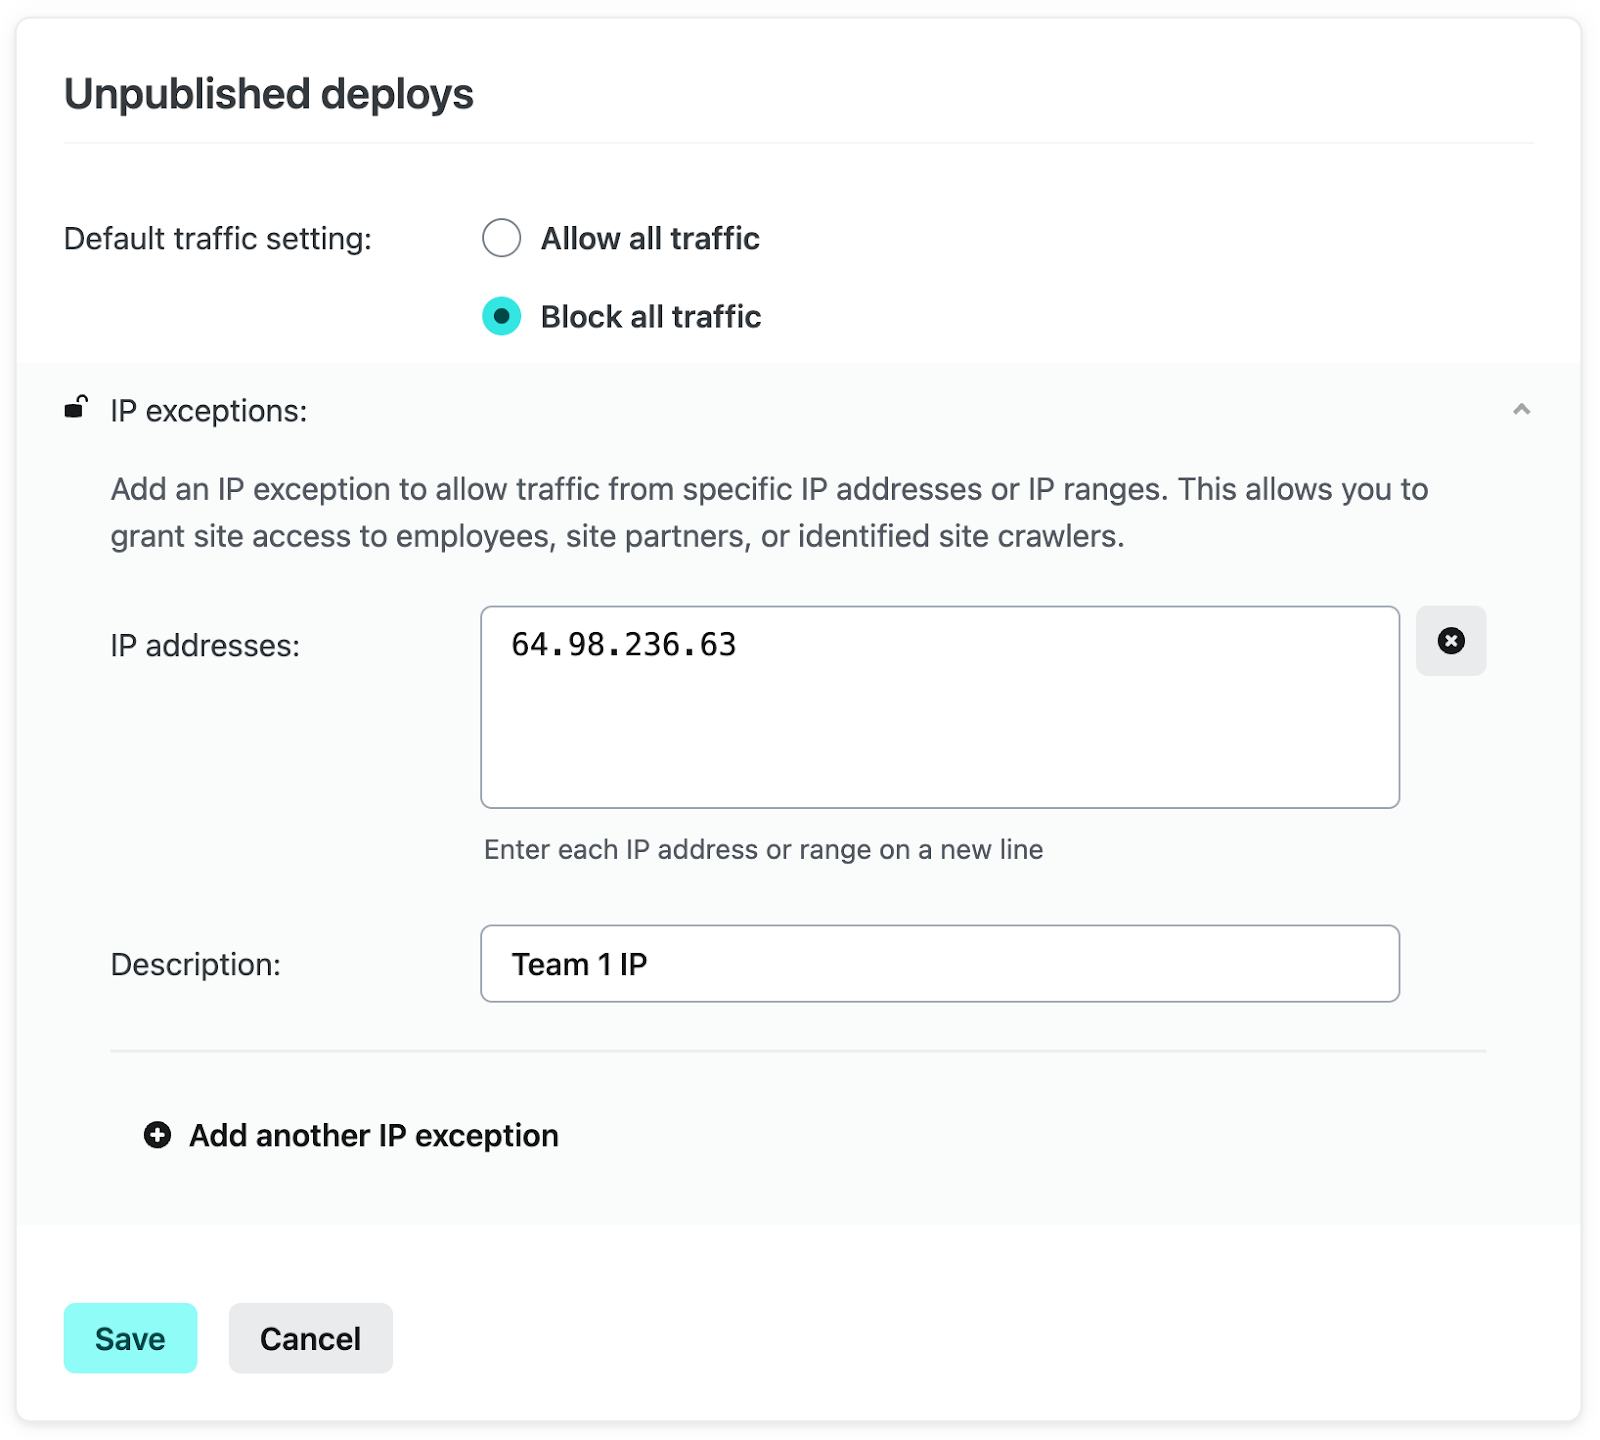
Once saved, only requests from the configured IP exception will be able to access your non-published deploys.
This is only the beginning of Netlify’s Firewall functionality
Current Netlify customers can learn more about how to implement and take full advantage in the Netlify Firewall Traffic Rules docs.
Already a Netlify customer? Tell us about other Firewall needs you’d like to see offered on our platform.
Not yet on Netlify? Talk with a Netlify team member and get a complimentary tailored walkthrough of the platform.