If you know me, you know that a large part of what informs my craft is my Spanish roots. I’m keenly aware of the challenges of localizing and translating content, especially since my dialect isn’t the most popular, so I’ve set off to prototype a solution to this that’s been bouncing around in my head recently.
It all revolves around Next.js middleware, software that lies between some operating system (like a web server) and its applications (like a web client). Essentially functioning as a hidden translation layer, it lets distributed applications communicate and manage their data. Next.js has always provided efficient ways to deliver localized and translated content, so how does middleware make our lives easier? Well, by using Next.js advanced middleware on Netlify, we can use the new abstractions set in Next.js since version 12.2.0, like intercepting and modifying requests-in-progress, rewriting, redirecting, adding headers, or setting cookies to your content.
This will work great for my idea of building a prototype website that says “hi, what’s up?” to visitors from different Spanish-speaking regions in their native dialects.
Let’s use this prototype to show you how to easily use the Next.js localization middleware on Netlify’s servers so you can deliver localized content based on the visitor’s geolocation. Let’s first dive into the details of how middleware works so we’ll know how to get the most out of it.
What is Next.js middleware?
Middleware is code that runs before an HTTP request is completed. Based on the incoming request, you can change the response by rewriting, redirecting, adding headers, or setting cookies.
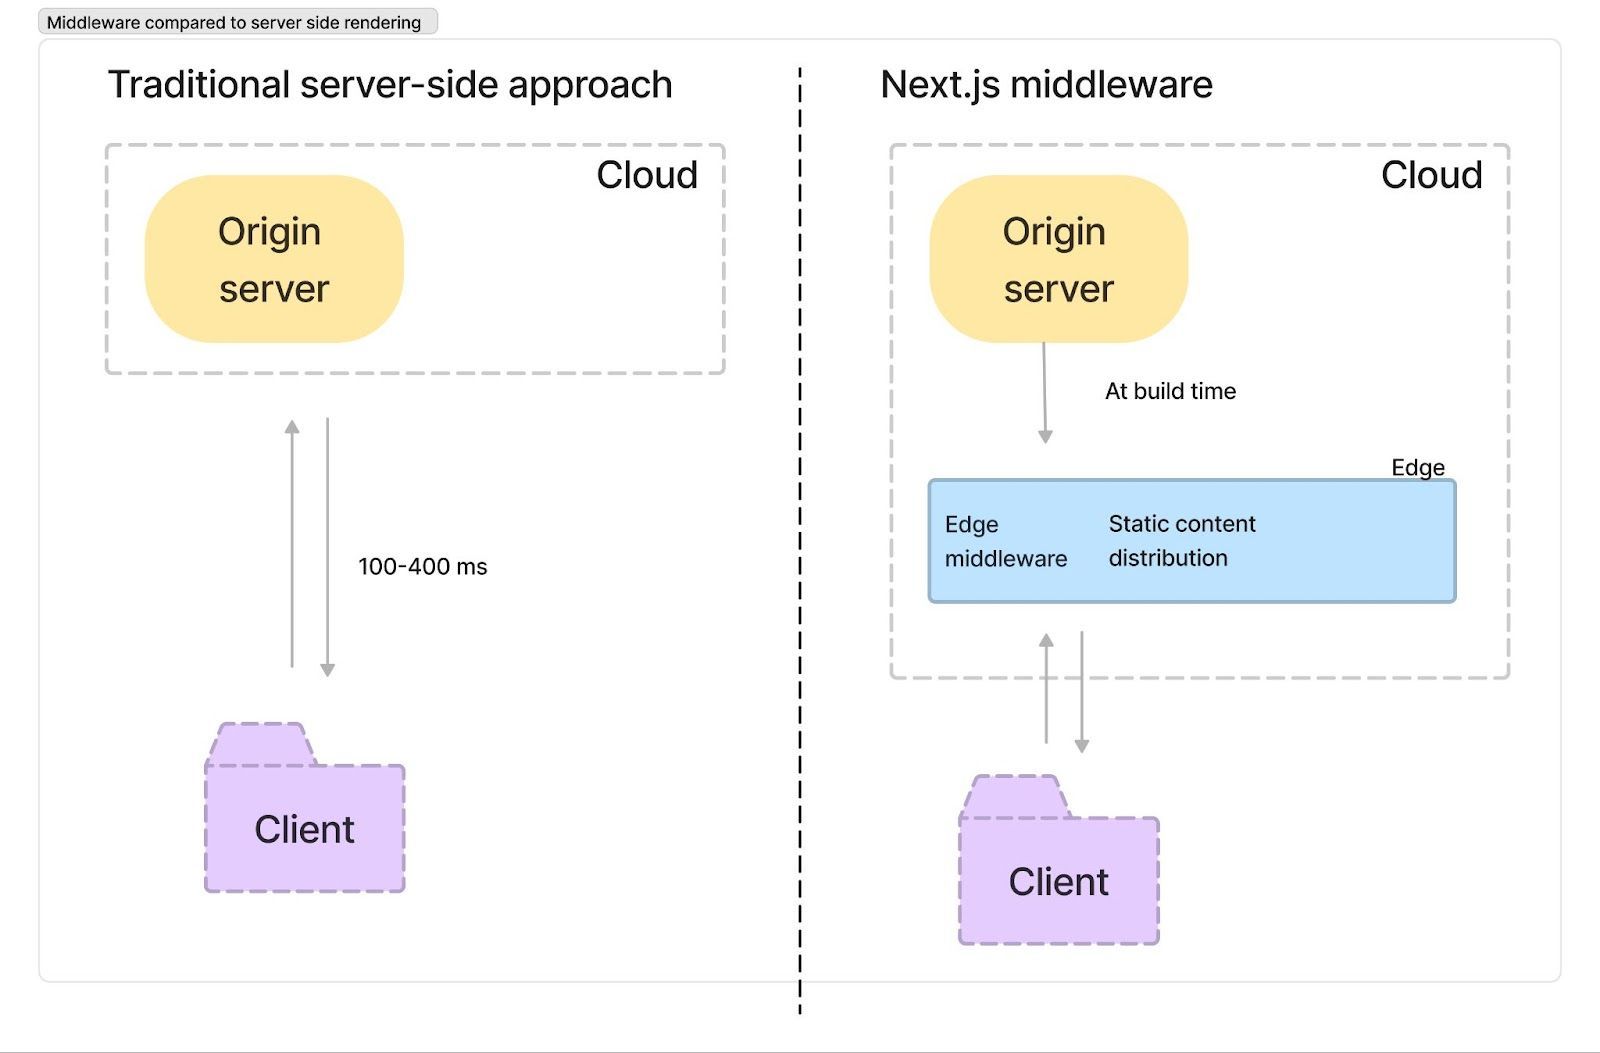
This diagram shows the difference between Next.js middleware and a traditional server side approach:
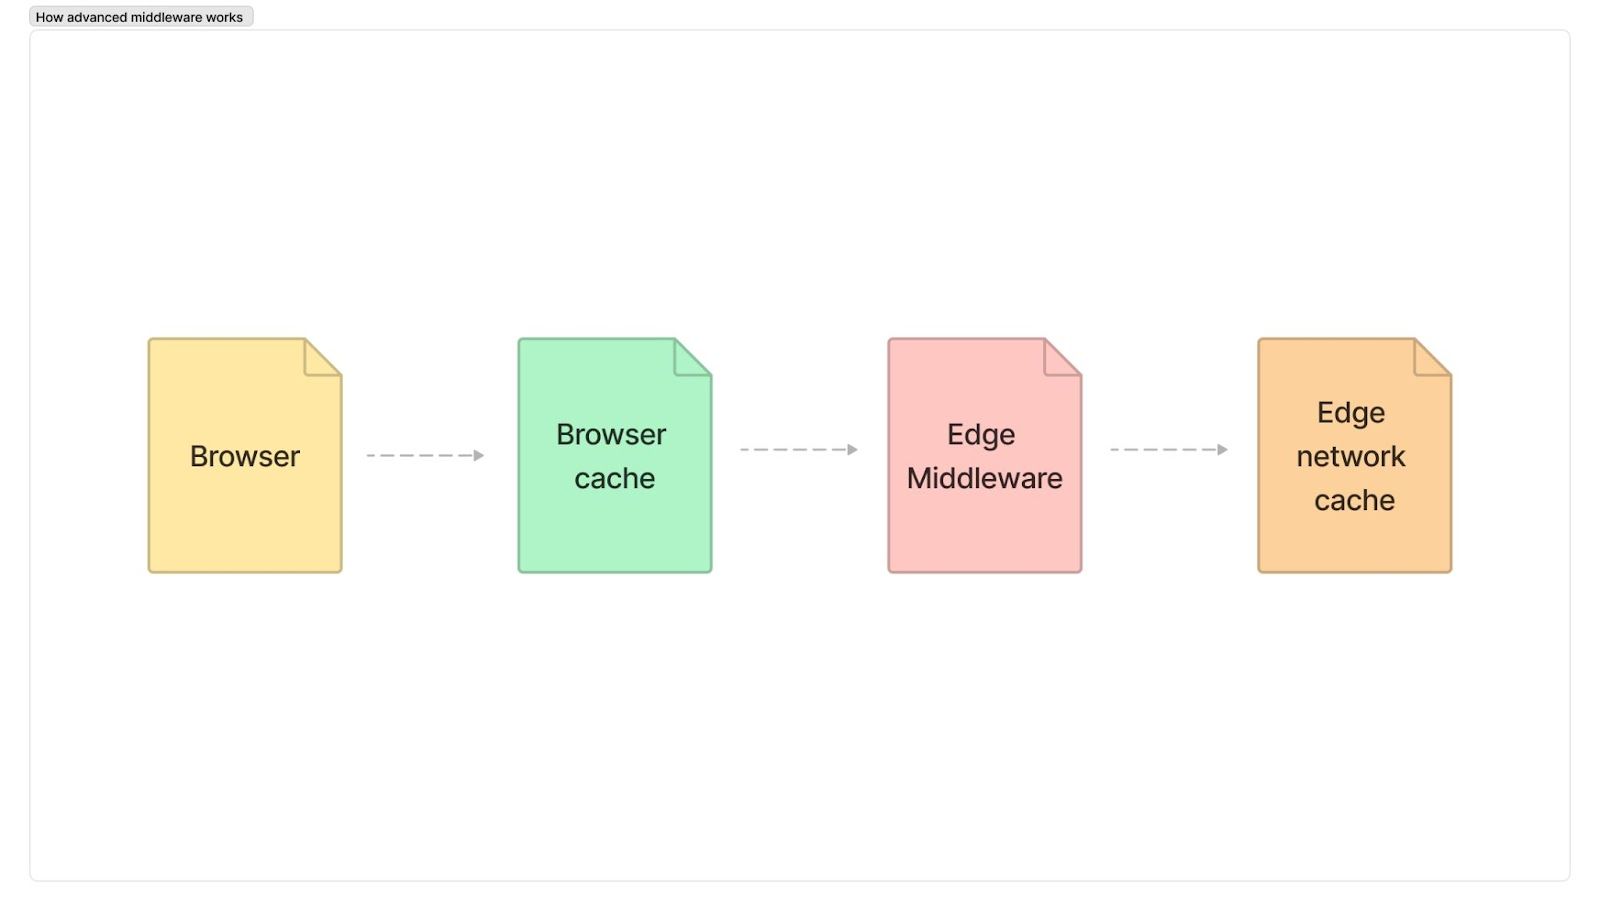
Compare this to Netlify’s Advanced Middleware:
Before Edge middleware was released, many developers in the Next.js ecosystem (and the Jamstack ecosystem at large) had to choose between a speedy static site or a dynamic, personalized experience. If you’ve been there, you know it’s a pretty tough spot to be in because both options take opposite extremes in the performance-to-functionality spectrum. Luckily for us, middleware gives us the tools to create a flexible site at the same speed as a static, edge-cached HTML file. Because it runs before your cached content, you can start with static files and pages and personalize them in-transit. It reads data and intercepts the user’s request before it reaches the page, runs some custom logic, and returns to the client. Think about what you can do with that:
- A/B testing for eCommerce stores
- Change sections of the website whether a customer is subscribed or not subscribed
- Personalized localized content on the screen
… just off the top of my head! Let’s run with the last idea.
Using Next.js Middleware With Netlify
In this tutorial, we will use Next.js middleware to intercept a request to a statically pre-generated page and rewrite the HTML response to change some text and page props based on geolocation data. This project will live on Netlify (you’ll see in a bit how Netlify’s hosting platform actually makes this all possible).
What do you need?
- A Netlify account
- Beginner-level JavaScript
- Node.js installed on your CLI
- Basic experience with Github
- Beginner knowledge in Next.js and React
Before we start, I wanted to thank Jaden Baptista, Tuomo Kankaanpää, and Aatu Väisänen. Without their help, I don’t think I would’ve been able to do this as quickly and easily. Now, without further ado, let’s get cooking!
Step 1. Install Netlify in your terminal
Let’s go to our terminal (I’m using VSCode) and type the following:
npm install netlify-cli -g(The letter g stands for global installation on your machine.)
Wait for a bit until every dependency is installed and then run netlify login to authenticate with Netlify.
Step 2. Spin up a Next.js app
Head on over to your terminal, run npx create-next-app and give your project a name. I’m going to name mine nextjs-netlify-middleware-localization. It should look like this:
npx create-next-app nextjs-netlify-middleware-localizationNow let’s cd into our project nextjs-netlify-middleware-localization using the terminal and install Netlify’s Next.js package by typing the following command:
cd nextjs-netlify-middleware-localization && npm install @netlify/nextStep 3. Start a Netlify development server
Once we’ve set the foundations of our app, it’s time to start a development server on Netlify by running the following command:
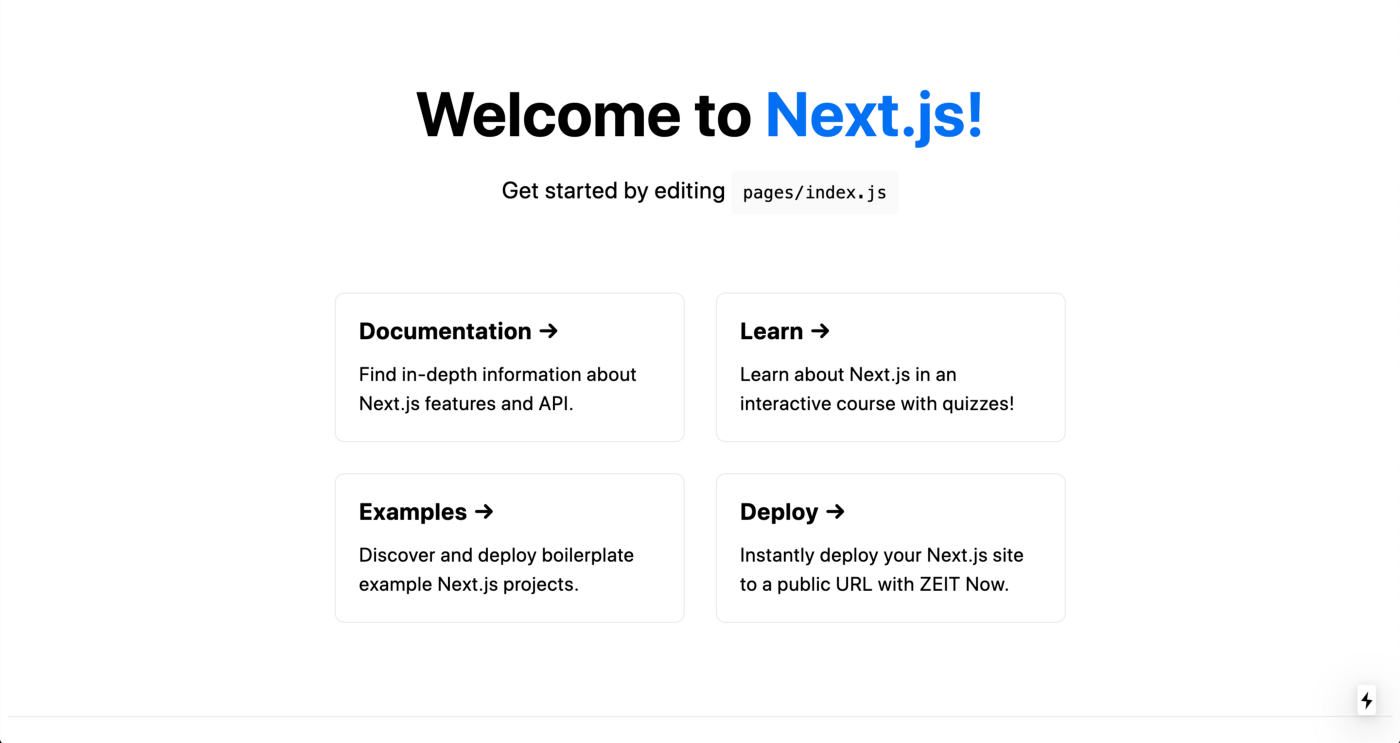
netlify devThis should open our dev server at http://localhost:8888. If everything is right, you should get a page like this:
Step 4. Set up Next.js middleware
For this tutorial, we will create the middleware file in TypeScript, but you can also do it on JavaScript. Navigate to the root folder of your project and create a file called middleware.ts. There, write the following code:
import { NextResponse } from 'next/server'import {MiddlewareRequest} from '@netlify/next';
export async function middleware(*req*) {  const { nextUrl: url, geo } = *req*  url.searchParams.set('country', geo.country)  const MiddlewareRequest = **new** MiddlewareRequest(nextRequest);  return NextResponse.rewrite(url)}
We then will need to import NextResponse from next/server:
import { NextResponse } from `next/server`As the NextResponse object is an extension of the Node.js’ Response interface, it’ll allow us to modify the response, creating a new personalized message using geolocation data using nextRequest. For example, if you were creating a site for a global restaurant chain, you could show a different menu depending on the user’s location. Each middleware file needs to export a function named middleware that Next.js will run on request. Similar to the NextResponse object, this request object that Next passes into our exported function is an extension of the Node.js’ Request interface. It’ll give us information about the client’s request. Lastly, the exported function needs to return a response. In this case, we’re using the rewrite method to rewrite your existing response.
Step 5. Edit our index.js page to work with middleware
For our example, since we’re using geolocation, we want our index page to be able to render data at request time, so it delivers the right content to the visitors. This means we’ll need to use the getServerSideProps function. Copy the following code, and then we’ll unpack how it works.
export function getServerSideProps(props) { let query = props.query
let country = query.country; let messages = { 'AR': "¿Qué hacés, wachx?", 'MX': "¿Qué onda, wey?", 'VE': "¿Qué pasó, mi pana?", 'CO': "¿Quihubo parce?", 'CR': "Pura vida.", };
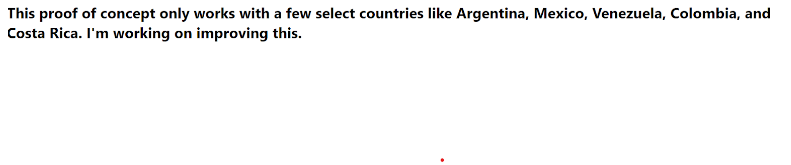
// default message if you're not from one of the countries covered in this tutorial let msg = "This proof of concept only works with a few select countries like Argentina, Mexico, Venezuela, Colombia, and Costa Rica. I'm working on improving this :)"; if (messages[country]) { msg = messages[country]; }
return { props: { message: msg }, };}
const Page = ({ message }) => { return ( <main> <h1 id="message">{message}</h1> </main> );};
export default Page;To get access to the message from the DOM in the middleware function, we add an ID to the message we want to transform in the static page so it shows the right message to the right visitor based on their country code. Feel free to change the country codes and messages as you see fit.
Now, let’s go to http://localhost:8888, and you should see something like this:
 I get the response a visitor from Argentina would get (’cause I’m in Argentina), but if you’re not from one of the supported countries, you should get something like this:
 This is just a prototype, but you could implement a system like this into a large site and extend my little mock schema into a full-on localization database with as many languages as you can think of.
Step 6. Deploy to Netlify
You’re probably wondering, “where does the geolocation data even come from? Why couldn’t I access that before without middleware?” You’re right that this seems like a common sense addition in hindsight — but the real obstacle before was the hosting provider. Really, it’s not Next.js that knows where your user is, but the hosting platform. Next.js is just surfacing that information when the hosting provider makes it available. The reason this is all such a big deal now is that Netlify now supports passing that information into Next.JS. In other words, our whole tool stack is working together to make the developer’s job easier, and that’s something we can all get behind 😊
Let’s initialize a new site on Netlify by running netlify init in your terminal and choose to create and configure a new site. Choose your team and pick a site name. The CLI will ask for your build command, but you can use the default next build, so press enter, wait a few seconds, and that’s it! Your site is deployed. Feel free to check out my prototype in action here.
Closing words
While this example is short and relatively simple, it shows how versatile middleware can be. Just by intercepting requests and changing them quickly, it gives you the power to deliver different content to visitors across the world, achieving even granular localization options like I did for different Spanish variants. Without a doubt, I can’t wait to see how this promising technology continues to improve and develop for even more use cases.
Feel free to clone my repo here, and here are some additional learning resources to help you make the best use of middleware in your next project:


