Guides & Tutorials
Create a Blog with Contentful and Nuxt
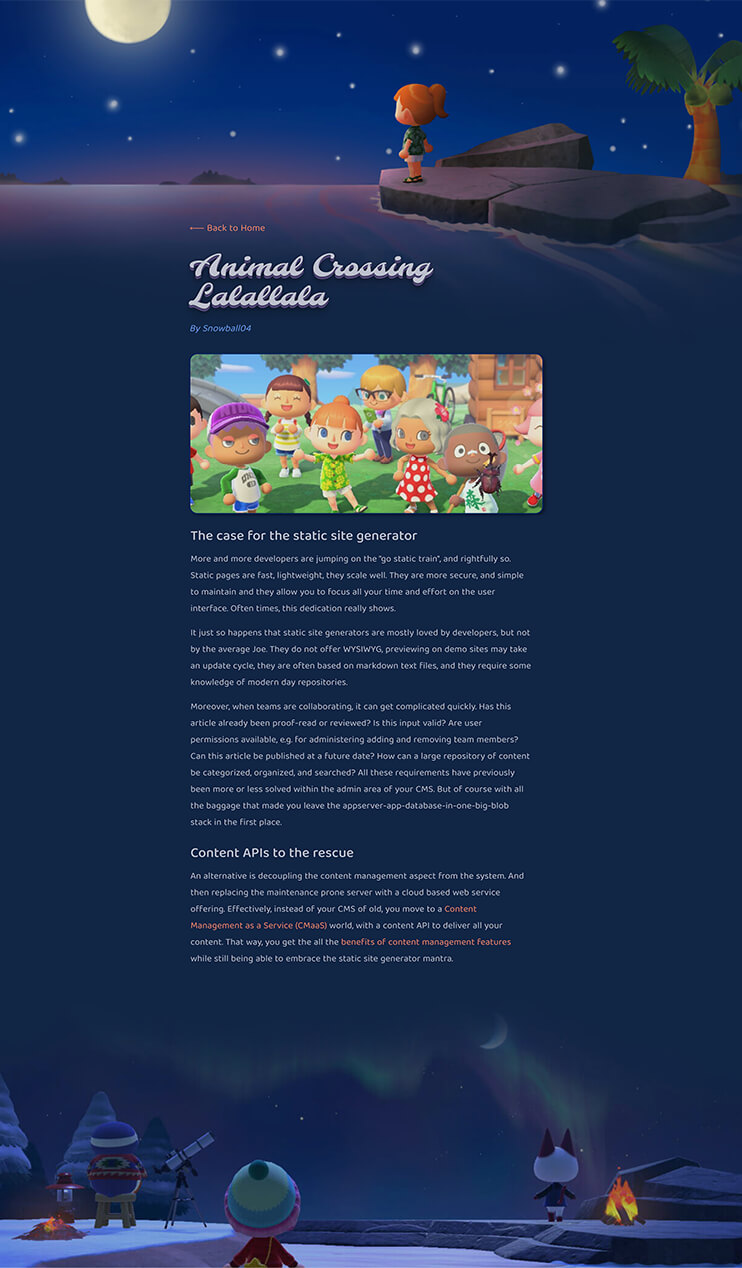
In this tutorial, we’ll pair Contentful with Vue by using the metaframework Nuxt — pulling in the posts from our application via an API. The demo is here, and the open-source repo is here.
If you wish to skip all the steps below, I’ve prepared a template for you- technically I set up a blog for my stepdaughter about Animal Crossing and turned it into a template, which is why it’s fairly fanciful-looking. You can hit the deploy button below and modify it to your needs, most of the styles live in the main.css file so you can ditch or update that file if you wish to reskin it. There are also a few steps necessary to wire it up properly to your own content, let’s go over that now.

Immediately following is a comprehensive tutorial of how we set this all up, in case you want to understand where everything is and how to modify it. Let’s dig in!
How to Set up Contentful
If you haven’t already, set up an account with Contentful- as of this writing, this meant clicking the ‘get started’ button and ‘try for free’ in the developer panel. Once you’ve logged in, select 'I develop content-rich products'
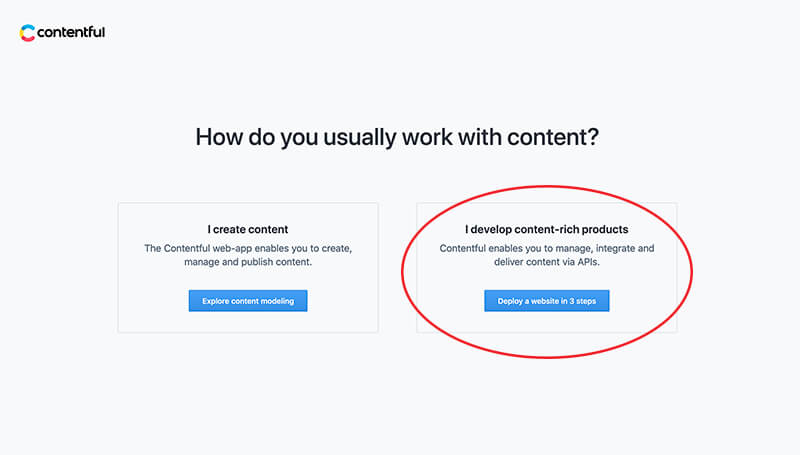
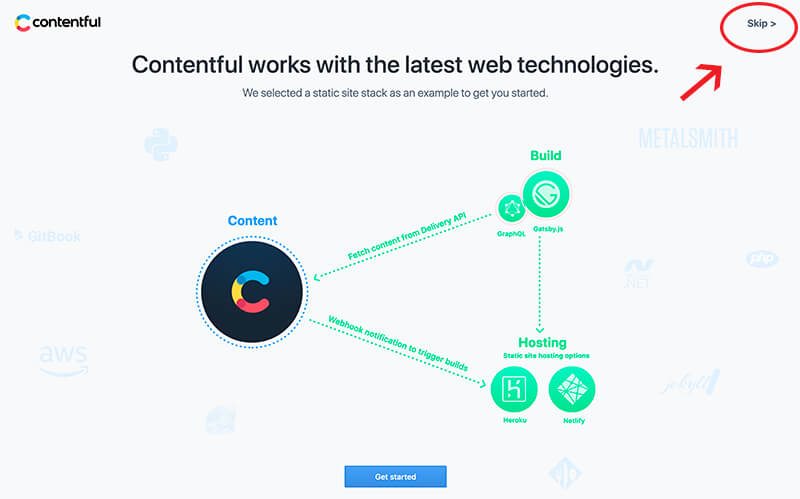
When you select this, it will prompt you to deploy, but this setup with work with Gatsby, not Nuxt, so, select ‘skip’
After this, select ‘create a new space’ then click on the highlighted free tier (unless you plan on working with more folks).
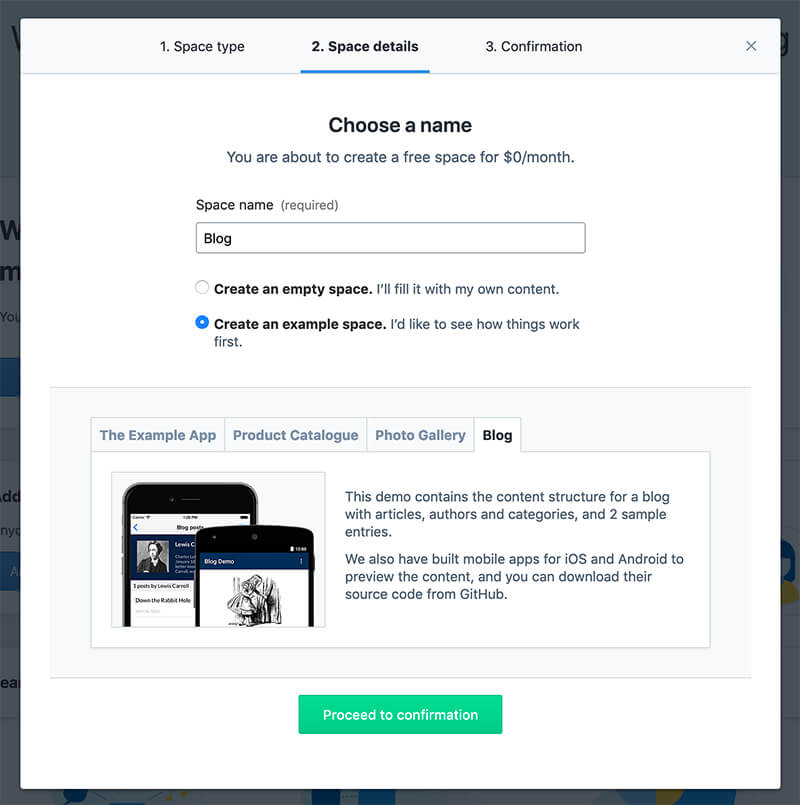
The next step will ask you if you want to create an empty space, instead select ‘create an example space’ and select the ‘blog’ template.
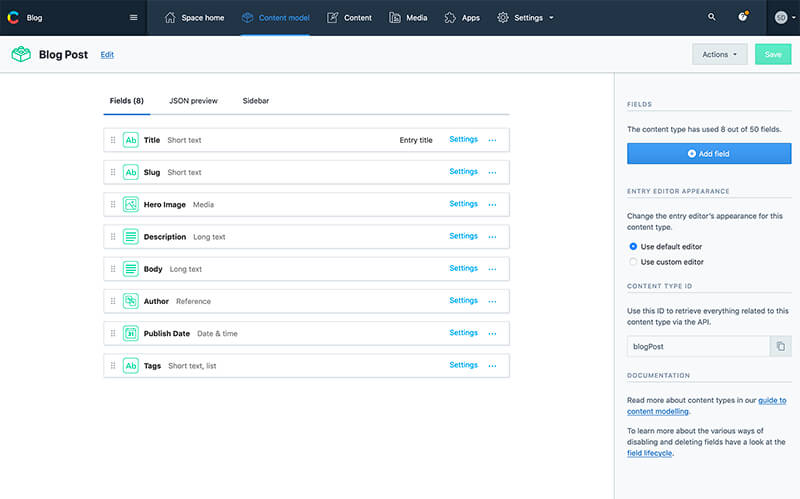
Once that’s set up, if you go to the top bar, you’ll see 'Content Model' where you should now have two types- Blog Posts and Authors. This is where we define the API structure and fields, and in the Content tab, as you might expect that's where we'll create our content. :)
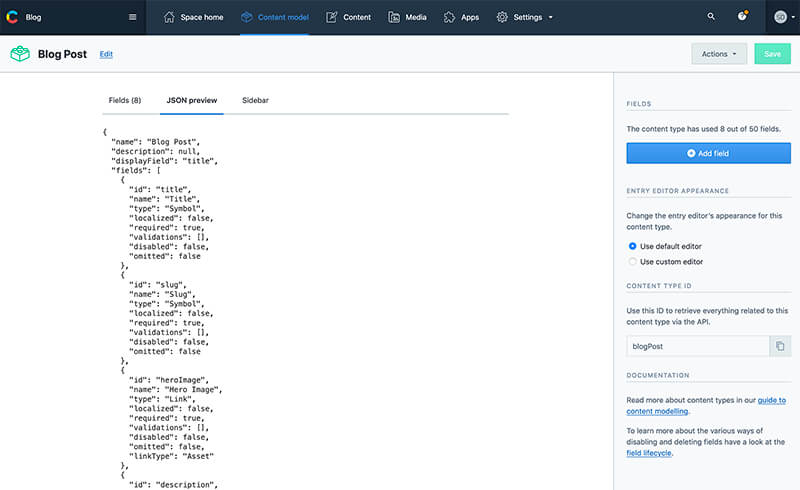
You can click the JSON preview pane to see the structure of the data you'll receive from the API:
From here, if you go to Settings > API Keys, you will find an example token all set up for you. It’s probably worthwhile to rename this and add a good description. From here, we will copy the Space ID and Content Delivery API- access token, we will use those in the next section.
Set up with Netlify
If you click the deploy to netlify button on this very post, you will be prompted to sign in and we’ll deploy the site for you!
If you prefer going through the steps with a Nuxt application from scratch, you can set the build command to be npm run generate or yarn generate and our directory for deployment to be dist, and you’re on your way!
From here, within the site dashboard, go to Settings > Build & Deploy, and set a few environment variables:
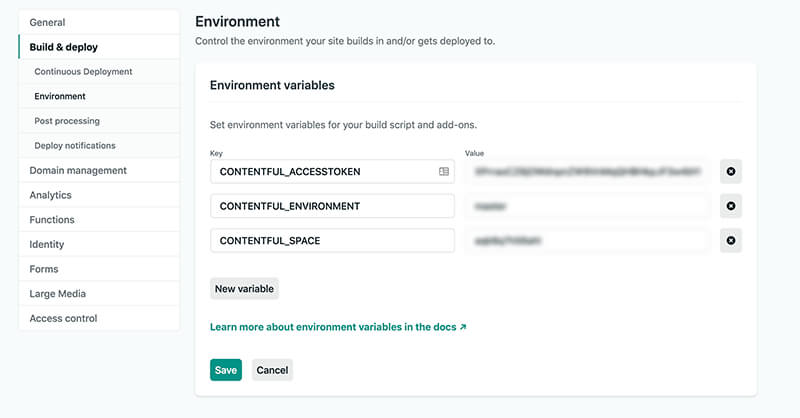
CONTENTFUL_ACCESSTOKEN– this will be the Content Delivery API- access tokenCONTENTFUL_SPACE– this will be the Space IDCONTENTFUL_ENVIRONMENT(optional, it will default to master)
Add the Local Environment Variable for Nuxt
When we deployed from the button earlier in the article, Netlify will have added a the whole template as a repo to your GitHub/GitLab account. Inside that codebase, we will need create a file called .env. This file is .gitignored by Nuxt, so it won’t be committed to your repo, we need to add these values so that you can develop locally.
CONTENTFUL_ACCESSTOKEN=your_token_here
CONTENTFUL_ENVIRONMENT=master
CONTENTFUL_SPACE=your_space_here
Ta-da!
You should be all set up! Now every time you make a change and push to master, you can deploy your site. You can also add more content within the Netlify dashboard, or alter all the blog content and users on your blog.
Project Setup
The following section isn’t required reading, but if you choose to set up this project from scratch or want to get to know all the pieces in order to best use it, this section will guide you.
Bringing in Contentful
We just talked about how we’re using that .env file to use our environment variables locally, let’s talk a bit about how we’re bringing in data from the Contentful API and using those environment variables.
We install a few packages:
dotenv: allows you to use those environment variables locallycontentfulnode-sassandsass-loader: allows us to use scss in our project@nuxtjs/markdownit– A Nuxt module that allows us to take a string of markdown and parse it into HTML
In our nuxt.config.js file, we’ll import dotenv and use the .config method. From there, we’ll also designate the environment variables with Nuxt’s env property.
import dotenv from "dotenv"; dotenv.config();

export default {
...
  env: {
   CONTENTFUL_SPACE: process.env.CONTENTFUL_SPACE,
   CONTENTFUL_ACCESSTOKEN: process.env.CONTENTFUL_ACCESSTOKEN,
   CONTENTFUL_ENVIRONMENT: process.env.CONTENTFUL_ENVIRONMENT
 },
}
We will create a plugin for Contentful. It will require the Contentful package plugins/contentful.js
const contentful = require("contentful");

module.exports = contentful.createClient({
  space: process.env.CONTENTFUL_SPACE,
  accessToken: process.env.CONTENTFUL_ACCESSTOKEN
});
Back in nuxt.config.js:
plugins: ["~/plugins/contentful", "~/plugins/posts"],and that plugins/posts.js file is responsible for kicking off an action on in the store to get the posts
export default async ({ store }) => { await store.dispatch("getPosts"); };In store/index.js, the Vuex store, we’ll bring in the client from our Contentful plugin, and in state, we’ll have a placeholder for posts. We’ll also create a mutation to update the posts. We’ll create an action to commit a mutation- it will use a getEntries method from the Contentful API, and gather the content via the content_type of blogPost (if you remember, we also have the option to gather author data as well).
import client from "~/plugins/contentful";

export const state = () => ({
 posts: null
});

export const mutations = {
 updatePosts: (state, posts) => {
   state.posts = posts;
 }
};

export const actions = {
 async getPosts({ commit }) {
   try {
     if (!client) return;
     const response = await client.getEntries({
       content_type: "blogPost"
     });
     if (response.items.length > 0) commit("updatePosts", response.items);
   } catch (err) {
     console.error(err);
   }
 }
};
Using the Contentful Data in our Application
Any .vue component in the pages directory is automatically routed for us. You’ll see in the index.vue file, we can create a home page. We’ll want to bring the posts on to this page, so we’ll gather them from the store as a computed property.
<script>
export default {
 computed: {
   posts() {
     return this.$store.state.posts;
   }
 },
 head: {
   title: "Paw Waves, Latest Posts"
 }
};
</script>
The head property here allows us to set per-page metadata, such as what we’d like the page title to read.
From there, we can loop through our posts and expose what we like in that first view. That preview page within Contentful’s dashboard in the JSON panel before is the data that will be exposed here, you can also see what’s available in the Vuex tab in devtools.
<template>
 <main>
   <div class="container">
     <h1 class="title">Paw Waves</h1>
     <section v-for="post in posts" :key="post.fields.slug">
       <div
         class="image"
         :style="
           `background: url(https:${post.fields.heroImage.fields.file.url}) center center no-repeat`
         "
       ></div>
       <h2 class="title">
         <nuxt-link :to="post.fields.slug">{{ post.fields.title }}</nuxt-link>
       </h2>
       <p class="author">By {{ post.fields.author.fields.name }}</p>
       <p class="description">
         {{ post.fields.description }}<br />
         <nuxt-link :to="post.fields.slug" class="more">Read more ⟶</nuxt-link>
       </p>
     </section>
   </div>
 </main>
</template>
Dynamic Posts from Contentful Data
Nuxt has a certain configuration for dynamic pages, you add an underscore for the filename, and use the property you would like to use to identify the page, in our case the slug, so we’ve created a _slug.vue page. The way that we access what page we’re currently on is through this.$route.params.slug.
data() {
   return {
     slug: this.$route.params.slug
   };
 },
 computed: {
   post() {
     let post = this.$store.state.posts.filter(
       el => el.fields.slug === this.slug
     );
     return post[0];
   }
 },
 head() {
   return {
     title: this.post.fields.title
   };
 }
First, we’ll store the slug in our data, and in our computed property, we’ll grab the post whose slug matches, and store that so we can use all of its data within the page.
<template>
 <section class="container">
   <p class="back">
     <nuxt-link to="/">⟵ Back to Home</nuxt-link>
   </p>
   <h1>{{ post.fields.title }}</h1>
   <p class="author">By {{ post.fields.author.fields.name }}</p>
   <div
     class="image"
     :style="
       `background: url(https:${post.fields.heroImage.fields.file.url}) center center no-repeat`
     "
   ></div>
   <article v-html="$md.render(post.fields.body)"></article>
 </section>
</template>
Now, like before, we can format and choose what we want to show for any individual post.
You might notice this line:
<article v-html="$md.render(post.fields.body)"></article>The post body comes in a long string of markdown, so here’s where we’ll use that Nuxt module mentioned earlier called @nuxtjs/markdownit to display our content properly. We’ll also have to register it in the nuxt.config.js file in order for it work properly, like so:
modules: ["@nuxtjs/markdownit"],
markdownit: {
  injected: true
},
Finally, we’ll have to let Nuxt know to create some dynamic routes for us. It’s expecting a data structure that looks like this:
export default {
  generate: {
    routes: [
      '/post1',
      '/post2',
      '/post3'
    ]
  }
}
So we’ll make that programmatically. We don’t have easy access to the store in the config file, but we have access to the plugin we made and the environment variables, so we can create dynamic routes this way:
Above the export statement we authenticate:
const contentful = require("contentful");
const client = contentful.createClient({
 space: process.env.CONTENTFUL_SPACE,
 accessToken: process.env.CONTENTFUL_ACCESSTOKEN
});
Then we can generate our routes. I’ve used a promise.all here so that you can easily add more fields like authors if you like, without a refactor:
export default {
  ...
  generate: {
   routes() {
     return Promise.all([
       client.getEntries({
         content_type: "blogPost"
       })
     ]).then(([blogEntries]) => {
       return [...blogEntries.items.map(entry => entry.fields.slug)];
     });
   }
  }
}
Now you’re off to the races! You can create more static pages, or more content types and content within Contentful and more dynamic content from here, and everything will deploy quickly every time you push to master.