A/B testing is an experimentation technique used to split website traffic between two versions of a page or user journey to determine which performs better in terms of a predefined goal, such as click-through rate, sign ups, or conversion. By showing a different version of a page to different groups of users at random and measuring the results, A/B testing can provide valuable insights into user behavior and preferences, helping you make data-driven decisions about design and content in a controlled environment.
A/B testing can be implemented in a number of ways, and often involves using third-party tools to modify pages using client-side JavaScript. This usually results in an undesirable “flash of unstyled content” (FOUC) — or flash of the original page — before the JavaScript has loaded, and often means the browsing experience is slower, which can skew your test results.
At Netlify, we have a more robust way for you to run A/B tests, using no third party tools to split users into test buckets and show different test variants, and no extra client-side JavaScript which, although is a common technique from other popular services, can impact performance and invalidate your results.
A/B testing with Netlify Edge Functions
Using Netlify Edge Functions, you can run A/B tests by setting browser cookies to assign users to test buckets, and modifying page requests on the fly according to those cookies — before they get to the browser. The benefits of this approach include:
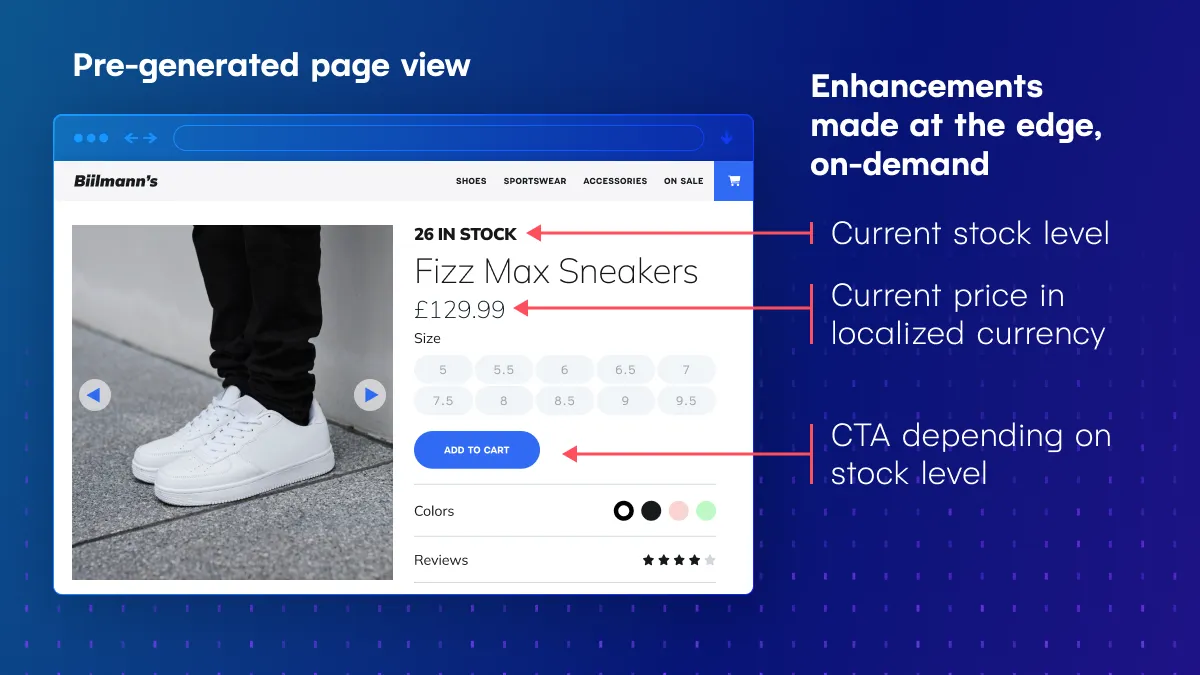
- The ability to modify statically pre-generated pages at the time of the request;
- The test variants (pages, components etc) and code to split traffic are stored with your code repository — not in a third party tool without version control;
- Users in the test bucket see no FOUC in the browser or experience any degraded rendering performance that can influence test results;
- Variant affinity — users will be shown a consistent experience throughout their browsing sessions and returning visits whilst an A/B test is active;
- The ability to use this approach with any front end framework or no framework at all! (If you’re using Next.js, we recommend using Netlify’s Next.js Advanced Middleware as described in this tutorial.)
In this post, we’ll use Netlify Edge Functions to run an A/B test on different page layouts served from the same user-facing URL. To read up on Netlify Edge Functions before getting into the example use-case, check out the Edge Functions documentation, or the benefits of enhancing your pages at the edge.
Split testing product page layouts on your e-commerce site
A/B testing in e-commerce is a great way to find out what works best for your customers, ultimately helping to boost sales. Perhaps you want to test which messaging reduces bounce rates, or maybe you want to experiment with how innovative you can be with your page layouts without compromising on conversion.
Let’s A/B test a new product page layout by using an edge function to split traffic using browser cookies, while maintaining the original user-facing URL. The following code examples assume:
- Your product page URLs follow the format
/product/{productId}/; - Your site is hosted on Netlify;
- You are using any front end framework (apart from Next.js as described above);
- You’ve built a new page layout that you’d like to test against an existing layout.
At the root of your project, create a netlify directory if you don’t already have one, and inside that, create an edge-functions directory. Inside that, add a new file called abtest.ts. You can write Edge Functions in JavaScript or TypeScript; in this example we’ll be using TypeScript.
.└── netlify └── edge-functions └── abtest.tsAdd the following code to abtest.ts. This imports the required types, and exports the edge function and a config object, specifying on which path the code will run. Given the assumed format of the URL (/product/{productId}/), we’re using a wildcard (*) to instruct the edge function to run on any child paths of /product.
import { Config, Context } from "https://edge.netlify.com";
export default async (request: Request, context: Context) => {}
export const config: Config = {  path: "/product/*",};
Assign users to test buckets using browser cookies
The following code lays the foundations for using a cookie named layout_test to split traffic to different product page layouts. First, look for the cookie by using the Netlify Context API — context.cookies.get(). If there’s no existing cookie, assign one using context.cookies.set(), based on the desired weighting using a random number between 0 and 1.
This basic example demonstrates a 50/50 weighting combined with a random number generated by JavaScript. You may want to configure your weighting or random number generation to your specific needs.
import type { Config, Context } from "https://edge.netlify.com";
export default async (request: Request, context: Context) => {  // look for existing "layout_test" cookie  const bucketName = "layout_test";  const bucket = context.cookies.get(bucketName);
  // return here if we find a cookie  if (bucket) {   //...  }
  // if no "layout_test" cookie is found, assign the user to a bucket  // in this example we're using two buckets (default, new)  // with an equal weighting of 50/50  const weighting = 0.5;  // get a random number between (0-1)  const random = Math.random();  const newBucketValue = random <= weighting ? "default" : "new";
  // set the new "layout_test" cookie  context.cookies.set({    name: bucketName,    value: newBucketValue,  });
  // ...};
export const config: Config = {  path: "/product/*",};
Split traffic between different page layouts on the same URL
Next, use the layout_test cookie to decide which page layout is served to customers. Given the assumed format of the URL (/product/{productId}/), the code example below contains some code to parse the productId from the URL, and your method may vary.
If a cookie with the value new is found, return a new URL with the path to a new layout page. This rewrites the HTTP response of the original request behind the scenes, so that customers see the new product page layout on the original URL.
If a cookie with a value of default is found, return an empty return to bypass the current function and continue the request chain. This serves the user the original and unmodified HTTP response. For more information, take a look at the Netlify documentation on URL rewrites.
  import type { Config, Context } from "https://edge.netlify.com";
  export default async (request: Request, context: Context) => {    const bucketName = "layout_test";    const bucket = context.cookies.get(bucketName);
+     // get productId from URL+     // assuming URL format is https://domain.tld/product/productId+     const url = new URL(request.url);+     const pathParts = url.pathname.split('/');+     const productId = pathParts[2];
    if (bucket) {+     if (bucket === "default") {+       // better performance than returning context.next()!+       return;+     }++     // rewrite to a new page behind the scenes+     // browser URL stays the same+     return new URL(`/new-product-page-layout/${productId}/`, request.url);    }
    const weighting = 0.5;    const random = Math.random();    const newBucketValue = random <= weighting ? "default" : "new";
    context.cookies.set({      name: bucketName,      value: newBucketValue,    });
+   if (newBucketValue === "default") {+     return;+   }++   return new URL(`/new-product-page-layout/${productId}/`, request.url);  };
  export const config: Config = {    path: "/product/*",  };
Track your test variants in your analytics tool
In order to track which product page layout customers are viewing when they click that add to cart button, you’ll need to add some extra information to your analytics tooling. Ultimately, there will be a number of ways this can be achieved depending on your architecture and tooling, but if you’re using Google Analytics (GA), you can use client-side JavaScript to check for a browser cookie (e.g. layout_test) and pass the relevant information to your GA tracking script.
<!-- install Google Analytics’ JS tracker before using this code --><script>  // get all cookies from document as a string separating cookies with ;  // eg: `layout_test=new; another_cookie=value;`  const cookies = document.cookie;
  // search cookies string for the "layout_test" string  // split and grab the value  const pageLayout = cookies  .split("; ")  .find((row) => row.startsWith("layout_test="))  ?.split("=")[1];
  ga('send', 'add_to_cart', {    // ...    'Layout': pageLayout  });</script>
Split testing doesn’t have to be a stress test
With just one edge function and a tiny addition to your analytics configuration, you can effectively split traffic to A/B test different page layouts without the overheads of managing third-party tools. Using the above methods, this type of split test could also be implemented across entire user-journeys from landing page to checkout.
For more information on how Netlify is helping businesses like yours increase conversions through the tooling we provide, check out our Composable Commerce resources. Happy testing!