Even if you’re new to the world of Static Site Generators, chances are you’ve heard of Hexo, one of the top five most popular web site generators as of writing and for a good reason.
Hexo prides itself on being not only fast and simple, but also easy to write, while having plenty of extensibility. Hexo is powered by the node.js framework and in this guide we’ll look at how to set up your very own Hexo Netlify CMS Template, from getting a clone online, to connecting it to Netlify and beyond.
We previously presented similar articles with the Jekyll version of our template here and the Pelican version of our template here
If you’re not interested in the template, but solely in setting up Hexo with continuous deployment on Netlify, please see this informative article by Mr. Aaron Autrand and otherwise continue reading.
Please note that this guide assumes you have node.js and npm installed.
Deploying Locally
We’ll start by preparing the netlify-git-api CLI tool to enable us to deploy locally and then we’ll clone the hexo-netlify-cms repository to our local environment and set it up.
1. The netlify-git-api CLI tool
Browse to the netlify-git-api page and download the relevant version of the tool. As I’m demonstrating this on a Linux machine, I will download the linux.zip file, but if you’re using OSX, the osx.zip file and if you’re using a Microsoft OS, download the windows.zip file.
Once the download is done, unpack the netlify-git-api executable from the zipped file and place it in your PATH. There are many methods for doing so and they differ somewhat depending on your operating system.
We will use the following commands in a terminal window:
cd 'downloads'unzip linux.zipcd linuxsudo mv netlify-git-api '/usr/local/bin'We enter the downloads folder (substitute with the location of your downloads) and use the unzip command to unpack the file. Next, we enter the new directory created by unpacking and in the final line we move the file to the ‘/usr/local/bin’ folder, as this directory is in the PATH.
If you’re unsure of where to move the file, you can run the following command to see which directories are in the PATH on your computer:
echo $PATHFor convenience sake, keep the terminal window open throughout this guide.
2. Fork and Clone the Template
We’ll begin by forking our own copy of the hexo-netlify-cms template on GitHub and then we rename it — we simply named ours hexo-netlify-cms-demo.
Before we can make a local clone, we need to get the remote GitHub URL from the repository we created. The button looks like this:

The commands below first take us to the location where we want to put our new hexo based site and the second command uses Git to create the clone:
cd 'my-site-folder'git clone https://github.com/github_account/my-repo-name.gitSubstitute my-site-folder with your location and the address with the address of your repository and account. Please note that you need a repository that you own!
Note that you don’t need to create a folder for the project, as it comes inside a folder structure already.
3. Setup the Netlify CMS server
To start the Netlify CMS server, we need to add users by running the following command for each user, we wish to add to the system (you will be asked for an email, a name and a password):
netlify-git-api users addAlternatively you can create a user, including the information necessary, in a one liner like this:
netlify-git-api users add --name='User Name' --email=my@email.com --password=mypasswordYou need to create at least one user, to be able to test the system.
To start the Netlify CMS server, we then use the following command:
netlify-git-api serveKeep the Terminal Window open to keep the server running!
4. Install the Hexo CLI
Open up a new Terminal Window to the site root (cd hexo-netlify-cms-demo in our example) and install the hexo client. To install Hexo, make sure you already have node.js and npm installed and updated and then run the following command:
cd my-site-rootnpm install -g hexo-clinpm installThis will install the hexo command line client globally, followed by the package depencies found in the package.json file in the root (since you cd to your site root in the first line).
Once the application has finished installing, it’s time to test it out.
5. Test Hexo and Netlify CMS
While still with the terminal window opened to the root of our new demo site, use the following command to build and serve your hexo site:
hexo serverIn a browser, open up localhost:4000 to browse the newly generated site.
Next, try out the Netlify CMS system, by visiting localhost:4000/admin and while there, test your login and password and try to create and save an article.
As is obvious (if everything is working as it should), this template comes with a bit of extra content, as it is based on Brian Rinaldi’s great Static Site Samples. This makes it easier to instantly get an idea of how it will look and feel, when it’s up and running with actual content and a default theme.
Deploy to Production Environment
Once you’re happy with the site and ready to deploy for production, it’s time to push our content back up to GitHub, before connecting to Netlify and setting up your production environment.
First things first.
1. Web Configuration
To make sure that the site works properly in production environment, we need to first open up and correct some settings in the file here:
/my-site-root/source/admin/index.ejs
Change the directory path according to your site location, open the file in a text editor and scroll down to line 35-40 or so, where you’ll find the following:
# Make sure to change this for productionproduction: backend: name: github-api repo: GitHub-username/repository-name branch: masterGitHub-username/repository-nameSimply exchange to your GitHub username and the name of your repository.
2. Add & Commit Files
Optional: To check that our local environment is set up correctly and will push the files to the correct repository we can use this command:
git remote -vWe need to add the new files from our local directory to our repository with the following line in Terminal:
git add .Next we’ll commit the files we just staged in our local repository by entering the following line:
git commit -m 'First commit'3. Push to GitHub
The final task before we’re done setting up and ready for Netlify, is to use the push command with git, as in the following line in Terminal:
git push -u origin masterOnce it’s done uploading the files (pushing them to GitHub), take a look at the repository online to check if everything looks correct. If you’re happy with the result, it’s time to connect with Netlify.
Connect to Netlify
We’re ready to start a new project at Netlify’s to host our Hexo Netlify CMS template.
If you haven’t made one already, create an account and login at netlify.
1. Create Site
Creating a new site on Netlify is intuitive and quick.
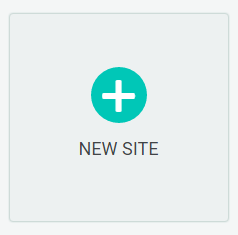
Once your account is created and you’re logged in, you’ll be taken to https://app.netlify.com/sites. Click the “New Site” button to get started (depicted above).
Next, select Link to GitHub and you’ll be shown a list of your GitHub repositories, as seen in the screen shot below. We’ll select the hexo-netlify-cms-demo repository we made earlier. 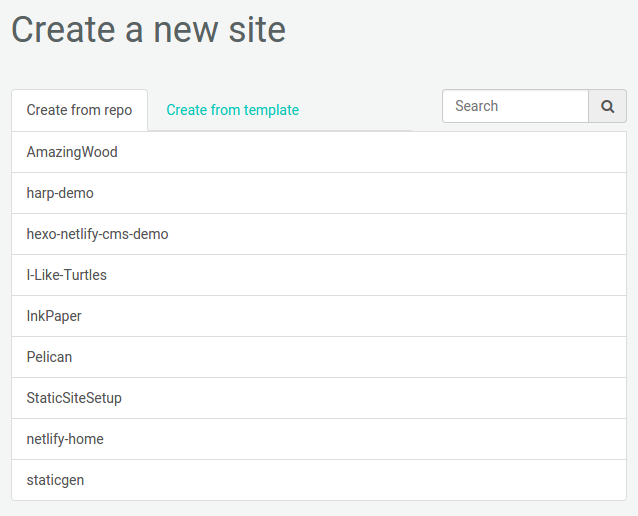
2. Configure Build
Netlify will auto-detect the correct settings as seen in the screen shot below: 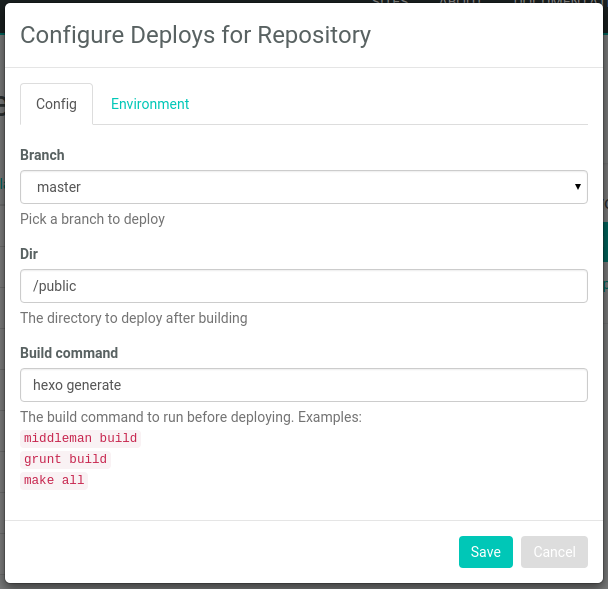 Hexo deploys to the /public folder and the command we use to build with is
 hexo generate.
To make sure the production environment builds properly you need to set an environment variable like this: 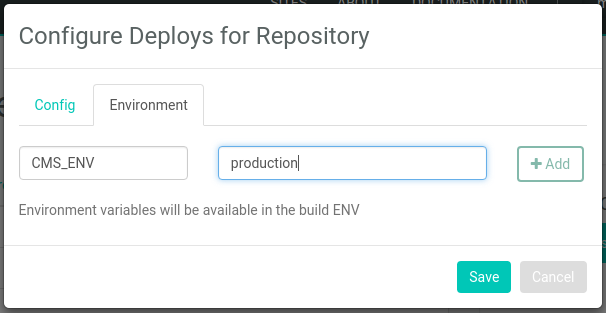 Take care that it’s spelled exactly like shown, with capital letters on the left and normal letters to the right or use the following (copy/paste):
CMS_ENV = production3: Build Your Site
Once you click save, Netlify will step in and take over, though it will let you know what’s happening along the way, as seen in this screen shot: 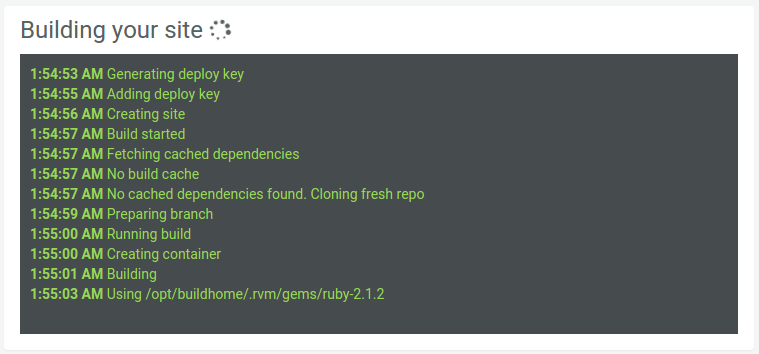
Taking a short break now might make sense, as the next step may take as much as a few minutes (depending on how much content you’ve added). Don’t worry — Netlify will do the work while your attention is elsewhere and if there are errors or warnings, it’s easy to look in the log file, as Netlify saves your previous builds, along with their log files.
4. Register new Application
Open up the GitHub developer application screen and select register a new application. Next fill out the application information as seen in the screen shot below — you can name and describe it however you want, but it is important that you use the exact URL for the Authorization callback like this: https://api.netlify.com/auth/done Use the screen shot below as an example:
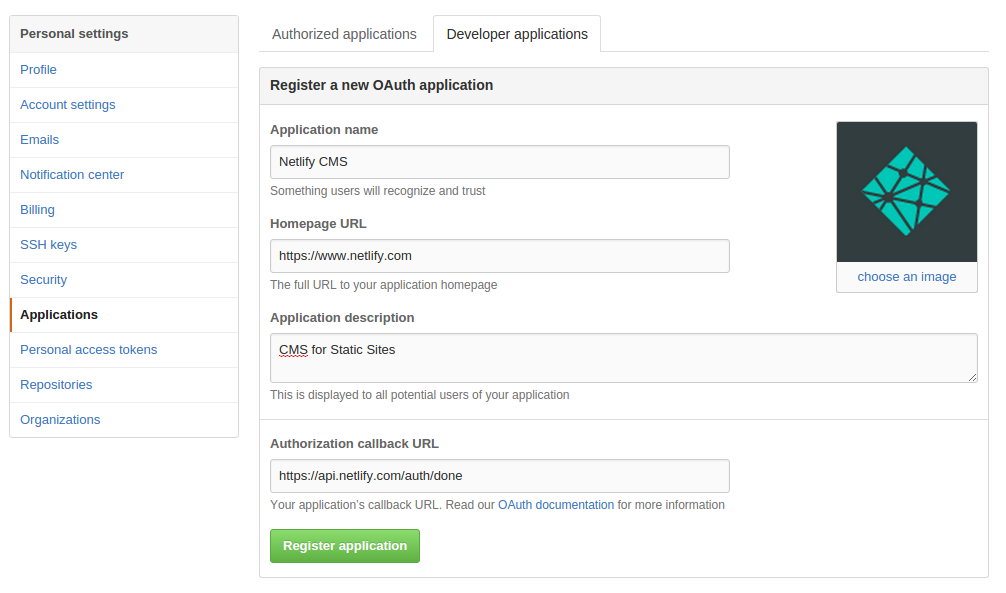
You can disregard choosing an image, though we did, to help distinguish the application. Just remember to tick enable GitHub.
Once you’re done filling out, simply click the green Register application button and you will get to the following screen shot (well, it will be similar at least):
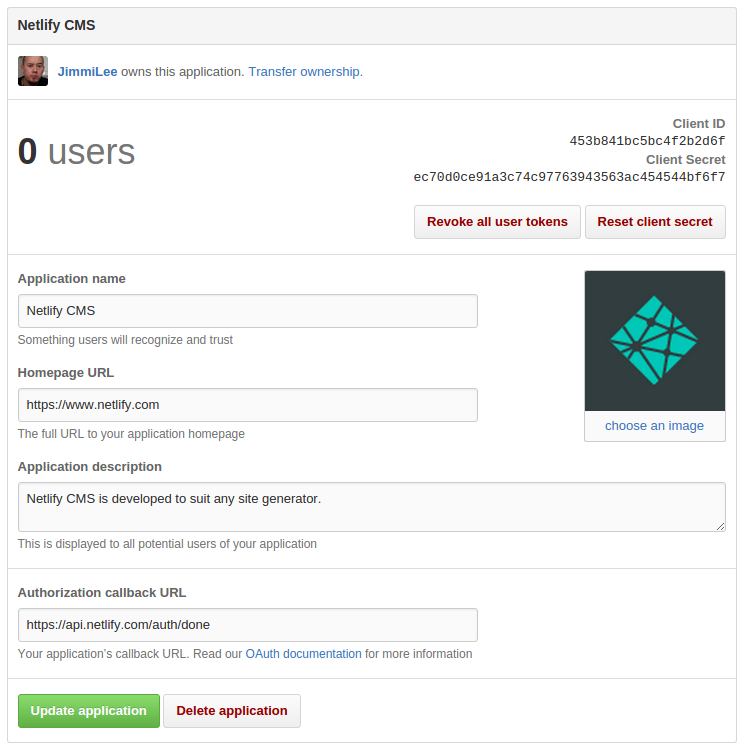
What you need to take note of here, is the Client ID and the Client Secret in the upper right corner. You will need to provide both in the next step!
5. Setup GitHub API Access
Return to Netlify and the site you just build and in the control panel select the Access panel.
This is where we give the GitHub Api access to our site with the application we just registered and you need to enter the Client ID and the Client Secret from above, as seen in the screen shot below:
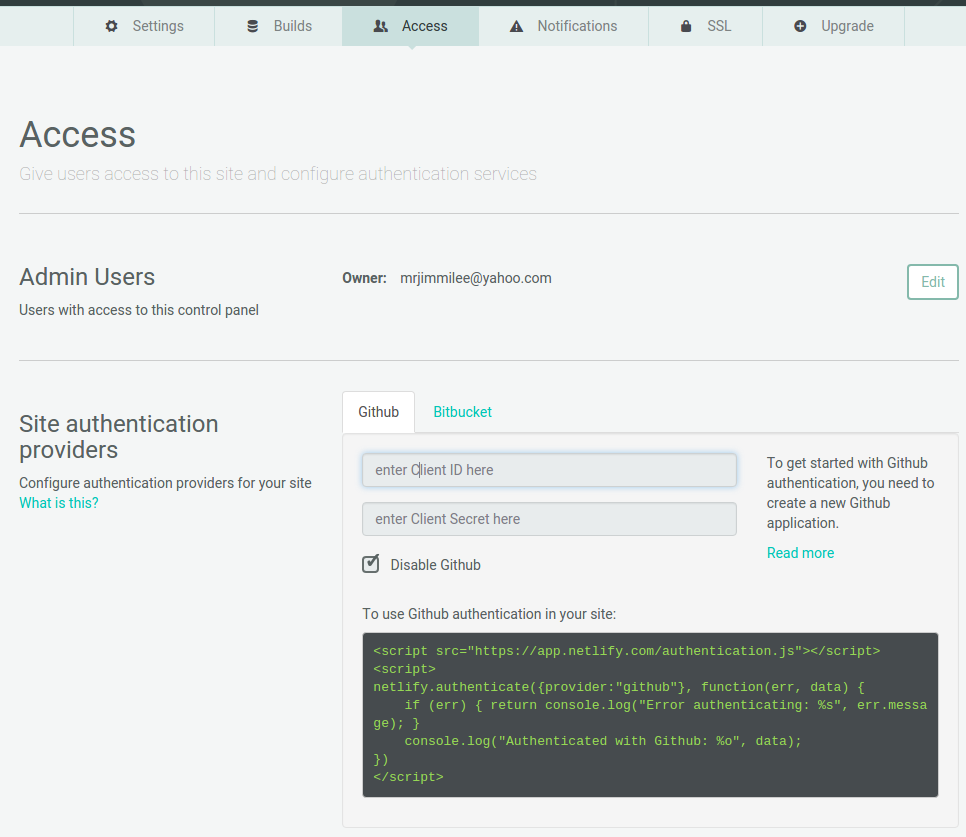
Simply paste them into the windows where it says enter Client ID here and below where it says enter Client Secret here and you’re good to go. Remember to tick ‘enable GitHub’.
6: Trying Out Netlify CMS
We tried testing the CMS system locally earlier in this guide and it’s virtually the same using it online, you just have to change the address to https://mysite.netlify.com/admin (change to the URL of your site and add /admin to the end) to access the CMS system and then log in with your GitHub account, since we’re using GitHub auth when working online.
In the screen shot below, you can see how it should look, after you log into the Netlify CMS part of our new demonstration page: 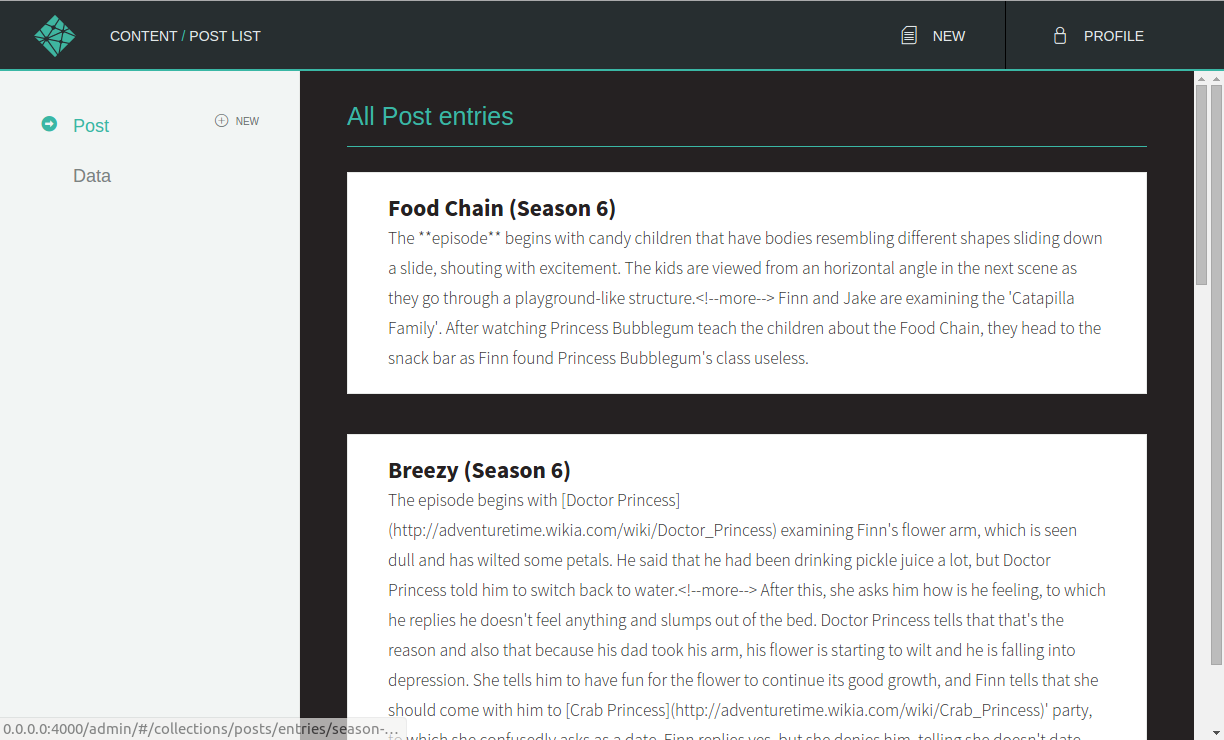
Hexo is a very pleasant static site generator and with Netlify CMS it’s easily accessible, once you’ve done a bit of tweaking and well worth half an hour of your time.
You can see our demo site here and the GitHub project for the tutorial site from this article here.


