Last week we announced Netlify Edge Functions, a full serverless runtime environment powered by Deno, running on Netlify’s network edge. But what does that mean exactly? Let’s unpack all of it.
Functions on the edge
When we launched Netlify Functions over four years ago, we pioneered a workflow in which developers could create backend logic that is built, deployed, and versioned alongside their frontend code.
With a serverless function, you can build a backend by dropping a JavaScript file into your project and pushing it to Git, without going anywhere near a server configuration, while leveraging features like atomic deploys, deploy previews, and instant rollbacks.
Edge Functions are another big step in that direction, with your code being deployed to more locations around the world and executed closest to your users, enabling powerful applications with unrivaled performance.
With an execution limit of 50 milliseconds, Edge Functions are typically better suited for shorter, performance-critical operations running at the very beginning of the request chain, with the power to modify any aspect of the request before it’s processed further, or the response before it’s delivered to the client. On the other hand, serverless functions can perform longer computations of up to 10 seconds (or even 15 minutes for Background Functions!), making them ideal to render entire applications or perform long-running asynchronous jobs.
Another consideration has to do with the type of logic you need to run. When talking to a database that sits in a specific region of the world, you might get better results with serverless functions since they share the same topology. If, on the other hand, your logic is less reliant on external services, or communicates with sources that are also globally distributed, you’ll likely see significantly better performance with edge functions.
What’s Deno?
If you’re not familiar with Deno, you might be worried that you’ll need to go and learn a whole new language, so let me put that to rest: edge functions are written in plain JavaScript or TypeScript, with Deno being the runtime where your code gets executed.
If you come from a frontend development background and you use Netlify Functions, you’re used to the idea of leveraging different primitives based on where your code is running: in Node, you have primitives for things like accessing the filesystem, and you lack others that are available in the browser, such as DOM manipulation functions.
The shift to Deno is very similar, in that it’s another environment capable of running JavaScript code — you have the exact same language with a slightly different vocabulary.
But why Deno?
First of all, speed is of the essence when running applications on the edge, and Deno is a highly-performant JavaScript runtime. We’re able to start the invocation of a fresh Deno application (often referred to as the cold start) much quicker than an equivalent application in Node.
But perhaps more importantly, the main takeaway from our first edge computing pilot launched over a year ago was that proprietary solutions are not the best way to drive innovation in the space. Developers prefer open-source solutions that follow web standards over walled gardens with a vendor lock-in.
Deno is an open-source runtime built around standard Web APIs, which means that everyone in the community — developers, web frameworks, deployment platforms — can work together on common solutions.
Creating an edge function
With introductions out of the way, let’s create our first edge function. You should create a Netlify site if you don’t have one already and install the latest version of the Netlify CLI:
$ npm install -g netlify-cliNext, create a netlify/edge-functions directory inside the project. This is where all edge functions will live.
Inside of it, create a file named hello-world.ts with the following contents:
import { Context } from "netlify:edge";
export default async (req: Request, { log }: Context) => {  log("Processing request for", req.url);
  return new Response("Hello world");};
What’s happening here? We start by importing some TypeScript types so that our code can be type-checked as we build. This is not necessary if you decide to author your edge functions in JavaScript.
We then export a function that will be responsible for handling requests. In its most basic form, this function receives a Request and returns a Response. These are both part of the web platform and they make up a “contract” to which all edge functions conform.
Edge functions receive an additional context object that is specific to Netlify. Using the context object is completely optional, as it provides convenience methods that you may wish to implement yourself, and access to Netlify features that you may decide not to use.
One of the methods exposed in the context object is log(), a thin wrapper on top of console.log(), which we’re using to log every request being processed.
Finally, we return a response with the text Hello world, which will be delivered to the client.
Configuring routing
Unlike serverless functions, edge functions aren’t assigned a URL automatically. This is because you can have an edge function running on different URL paths, as well as multiple edge functions running for a single request. We’ll cover this in a bit.
For now, the last step needed to get our edge function up and running is to assign it a URL path. To do this, open your netlify.toml configuration file (or create one, if you don’t have it) and add the following entry:
[[edge_functions]]function = "hello-world"path = "/hello"Each edge_functions entry assigns a path to an edge function. In this case, we’re saying that the edge function named hello-world should be invoked for all requests to the /hello path.
We’re all set!
Local development
Our edge function is looking good and we could deploy it to production straight away, but you’d typically want to see it working locally first. This allows you to iterate much quicker, as you can interact with your changes with a shorter feedback loop.
To do this, we can use Netlify Dev to spin up a local development experience that emulates the Netlify production environment:
$ netlify devOnce the server is up, navigate to http://localhost:8888/hello in your browser and rejoice with a welcoming message from our edge function! If you check your terminal, you’ll also see the log messages generated by the edge function.
If you make any changes to the function code or the routing configuration, you’ll see them reflected immediately once you refresh the page.
Configuring your editor
Your code editor may not be able to infer that your function’s files are meant to run on Deno instead of Node, which may lead to code completion and other IntelliSense capabilities not behaving as expected. Let’s fix that.
If you’re using VS Code, the Netlify CLI can handle this for you. When running netlify dev within the IDE’s integrated terminal, we’ll detect VS Code and offer to create a settings file for you, with all the settings needed for an optimal experience with Edge Functions.
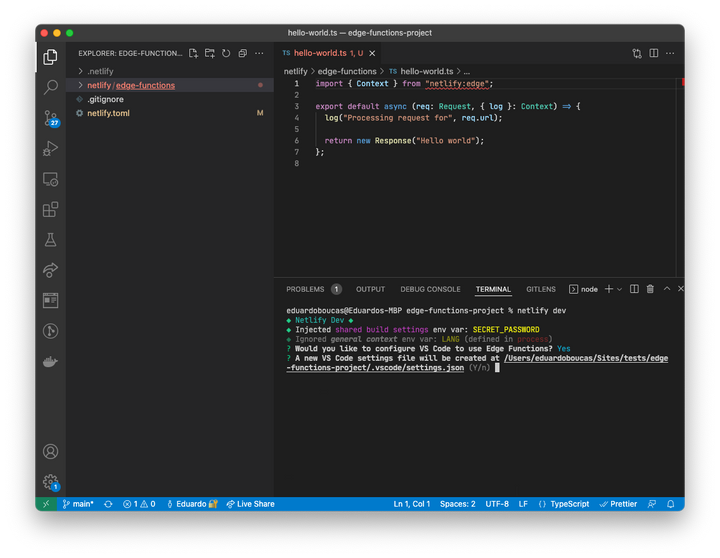
When not using the integrated terminal, or if you’d like to trigger this process manually, you can use the new recipes command:
$ netlify recipes vscodeYou can see a list of all the available recipes with netlify recipes:list, to which we’ll be adding more editors in the future. In the meantime, using another editor means a little bit of manual configuration.
Once you find a Deno extension compatible with you editor of choice, you need to configure it so that it uses .netlify/edge-functions-import-map.json as the location of the Deno import map file. This is where identifiers like netlify:edge are declared.
Deployment
Now that we’ve verified that everything is working locally, let’s deploy to production! Edge Functions integrate seamlessly with the Netlify workflow, so we can use any of the usual methods for deploying a site:
-
Using Netlify CLI
$ netlify deploy --build -
Using Netlify Build, by pushing your changes to your Git repository
Once the deploy is ready, we can access the same path in the live URL (for example, https://frabjous-unicorn-a26c03.netlify.app/hello).
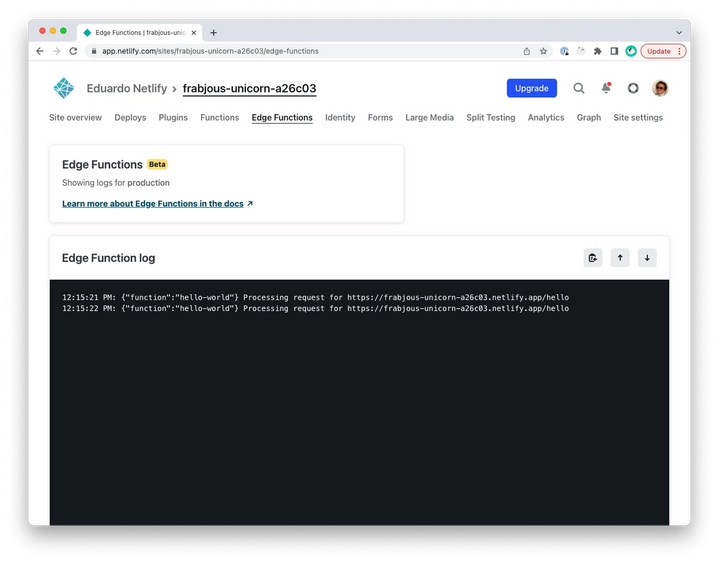
Oh, remember the log() call we added? If you open your site in the Netlify UI and navigate to the Edge Functions tab, you’ll be able to see a real-time log stream of all your edge functions.
With a successful edge functions deployment under your belt, let’s look at some more advanced concepts and use cases that you might want to incorporate into your workflow.
Chaining
When multiple edge functions are configured with the same path property, they will all run for a single request. The functions will run in sequence, respecting the declaration order.
# The edge function "auth" will run for every request,# since "/*" matches every URL path.[[edge_functions]]function = "auth"path = "/*"
# The edge function "hello-world" will run after "auth",# for the "/hello" URL path only.[[edge_functions]]function = "hello-world"path = "/hello"
You can leverage this to build functionality into smaller, composable functions that you can mix and match for different use cases and parts of your project.
Middleware and transformations
Another important distinction is that whereas serverless functions are expected to deliver a final response because there’s nothing running downstream from them, edge functions run much earlier in the request chain.
This means that you can use Edge Functions with a middleware pattern, where a function can decide, at runtime, whether it wants to intercept the request or bypass itself completely.
import { Context } from "netlify:edge";
export default async (req: Request, { geo }: Context) => {  // Bypassing if the request is not from Portugal.  if (geo.country.code !== "PT") {    return;  }
  return new Response("Hello Portugal!");};
Bypassing a function will invoke the next function, until there are no more functions in the chain. At that point, the request will follow its normal course and end in a static asset, a redirect, or a serverless function.
Now here’s where it gets really interesting: you can retrieve the response that would’ve been delivered to the client if the edge function wasn’t invoked. You can leverage this for incredibly powerful use cases, since you can grab the response, transform it in any way you like, and deliver the transformed version back to the client.
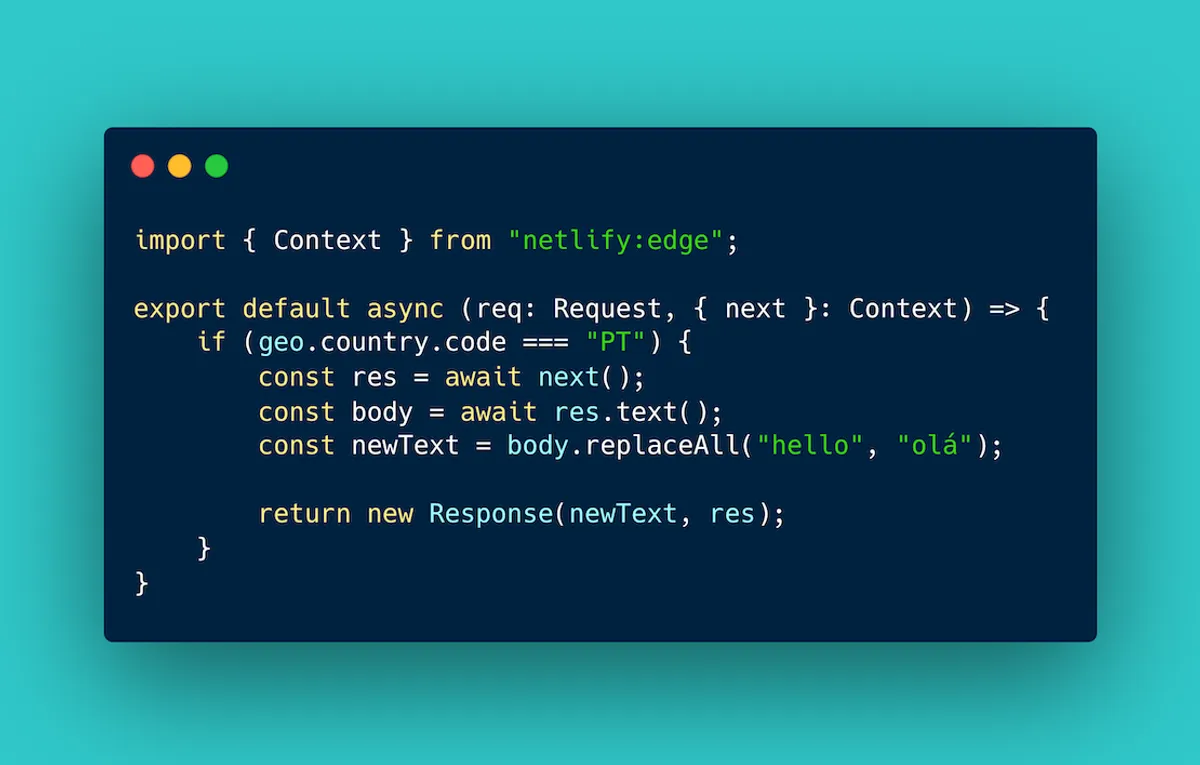
import { Context } from "netlify:edge";
export default async (req: Request, { geo, next }: Context) => {  // Bypassing if the request is not from Portugal.  if (geo.country.code !== "PT") {    return;  }
  // Retrieving the response.  const res = await next();  const body = await res.text();
  // Replacing all instances of "hello" with "olá"  // in the response body.  const newText = body.replaceAll("hello", "olá");
  // Returning a response with the transformed text,  // passing `res` as a second parameter so that any  // headers from the original response are kept.  return new Response(newText, res);};
Streaming data
In the example above, we’re loading the entire response into memory, transforming it, and finally delivering the new response back to the client as a whole. But with edge functions you can use the Streams API to break data into small chunks that you can process individually and deliver to the client incrementally.
Here’s how that would look:
import { Context } from "netlify:edge";
const translator = new TransformStream({  async transform(chunk, controller) {    controller.enqueue(chunk.replaceAll("hello", "olá"));  },});
export default async (req: Request, { geo, next }: Context) => {  if (geo.country.code !== "PT") {    return;  }
  const res = await next();  const stream = res.body    ?.pipeThrough(new TextDecoderStream())    .pipeThrough(translator)    .pipeThrough(new TextEncoderStream());
  res.headers.delete("content-length");
  return new Response(stream, res);};
The pattern of delivering to the client fragments of a page as they become available allows you to create snappy web experiences with a great First Contentful Paint score, like this Hackernews clone built with Next.js and Edge Functions.
Using third-party modules
If you’ve ever worked with Netlify Functions or any other type of Node environment, you’ve probably built your applications on top of third-party modules from npm. While most of those modules probably won’t work in Deno out of the box due to differences in the runtime APIs, you can import Deno modules using a similar approach.
Rather than keeping a list of your modules and their versions in a package.json file, you reference their location directly in the code, using a full URL that points to a JavaScript or TypeScript file.
import { v4 } from "https://deno.land/std@0.136.0/uuid/mod.ts";
export default async (req: Request) => {  // Generate a random UUID.  const myUUID = v4.generate();
  return new Response(myUUID);};
If you want to update the module to another version, you can change the 0.136.0 version directly in the code, without having to run any additional commands.
Accessing environment variables
Just like with serverless functions, edge functions can access your site’s environment variables at runtime, using the Deno.env API.
import { callAPI } from "./lib/api.ts";
export default async (req: Request) => {  const mySecret = Deno.env.get("SUPER_SECRET");  const data = await callAPI(mySecret);
  return new Response(data);};
Oh, and your environment variables are automatically pulled in when you run your site with Netlify Dev, so you can test your end-to-end flow locally without any additional configuration.
Wrapping up
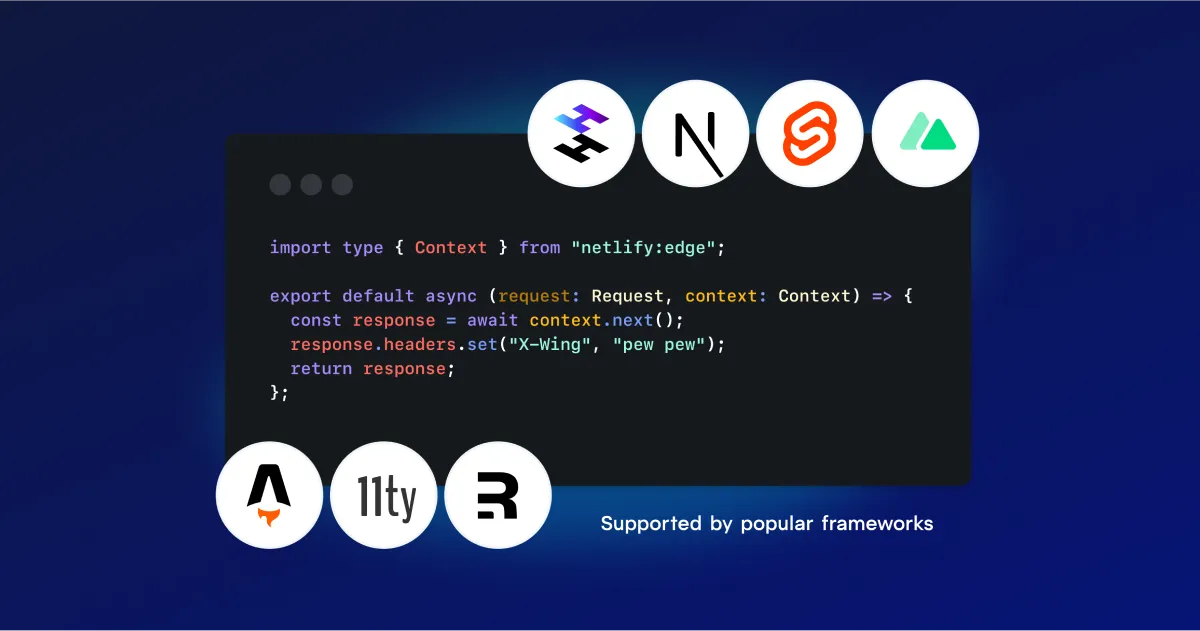
We’ve explored the origins, the motivations, the anatomy and even the engine that runs Edge Functions. As mentioned in the opening paragraphs, we’ve built this product from scratch with openness at its core, which is why we’re beyond excited to see open-source frameworks like Eleventy, Hydrogen, Next.js, Nuxt, Remix and SvelteKit with integrations from day one.
We’ll use the public beta period to learn from them — and from you! — how to make Edge Functions better, and we can’t wait to see you using them to build things we haven’t even thought were possible!