“Personalization” is right now one of the hottest buzzwords in the development world. Marketers, developers, and content creators evaluate the possibilities and alternatives to handle custom scenarios while offering powerful experiences to the users. Let’s talk about personalization, the benefits, the challenges, and how we can manage and offer personalized web experiences.
We define personalization as the ability to offer exclusive online experiences to people based on existing data. As we will focus on websites, we will talk about “web personalization”, which is the ability to deliver content granularly and offer exclusive web experiences to different personas.
Benefits of web personalization
- Enhance the user experience
- Get better-qualified leads
- Create optimized landing pages and call-to-actions (CTAs)
- Obtain greater brand affinity
Personalize a Next.js e-commerce website
Let’s see a demo of how we can manage customized experiences and the content related to them.
For this example, we will use Storyblok, a headless CMS that provides a real-time visual editor that helps the users to have a preview of how the content will look at the moment of publishing it.
We will implement the frontend of our website using Next.js 13, the latest version of the popular React-based framework.
The headless nature of Storyblok will allow us to connect the CMS to a project created with any framework or technology. So, with tools and tutorials that will make our work easier, integrating Storyblok into our Next.js project will be a pretty simple task.
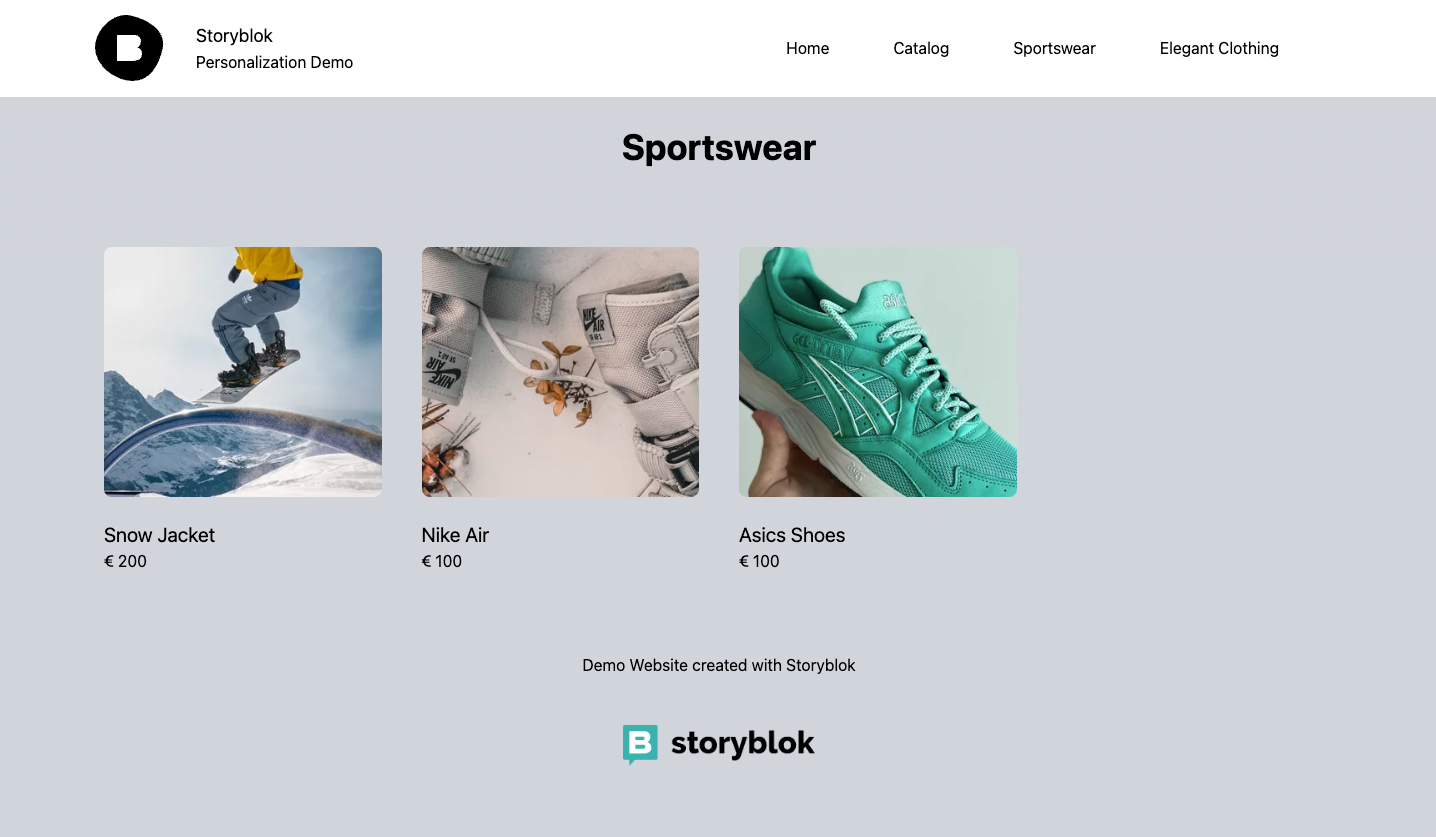
We will create a website that has two main sections: A home page and a product catalog. The catalog can be filtered by product categories, to see only the products marked with that category.
We will collect basic data: the category the visitors are interested in. To do that in this simple project, we will consider the first-ever category catalog visited by the user as their favorite. After the first visit, the home page will start showing exclusive content related to that category.
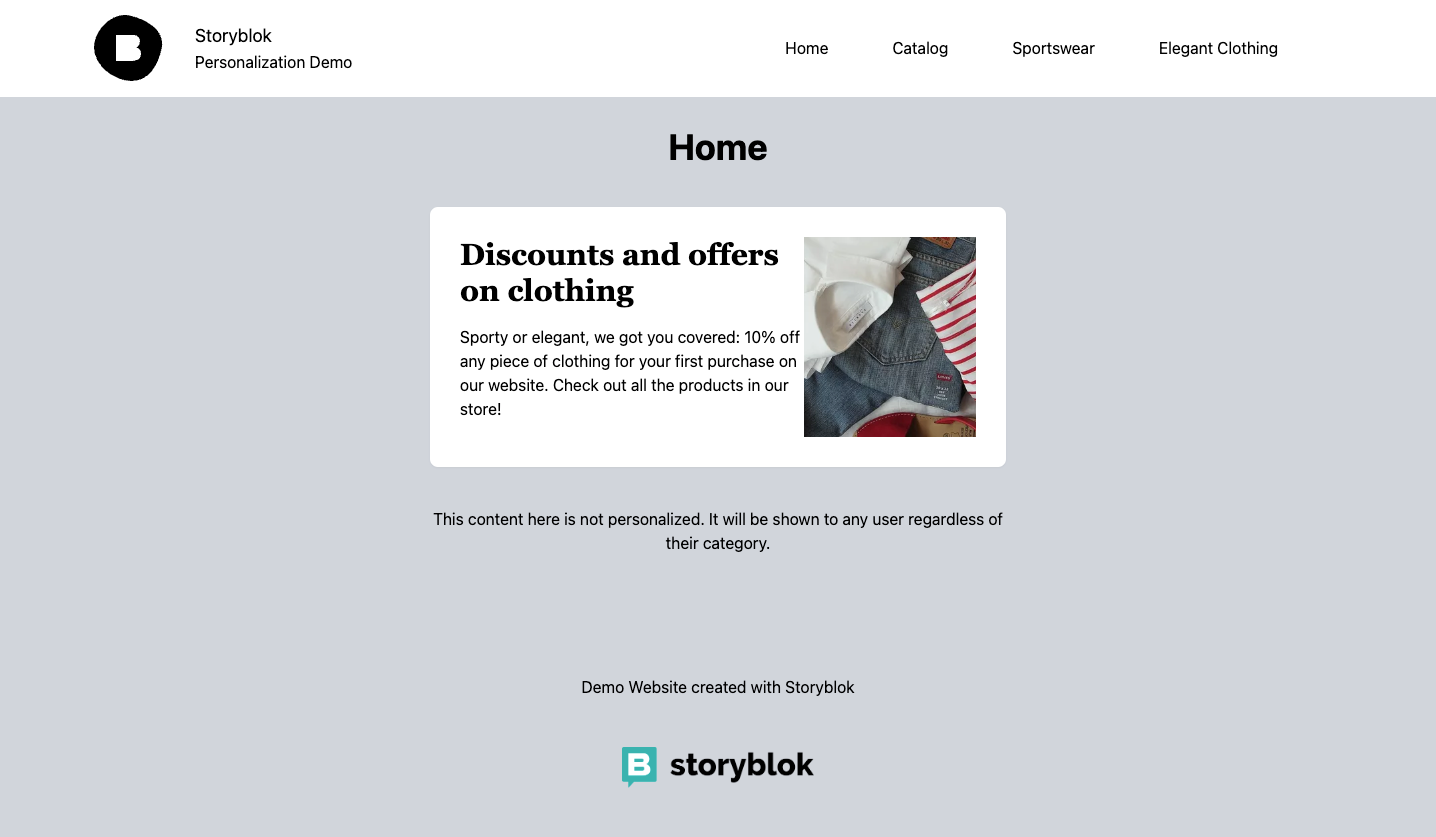
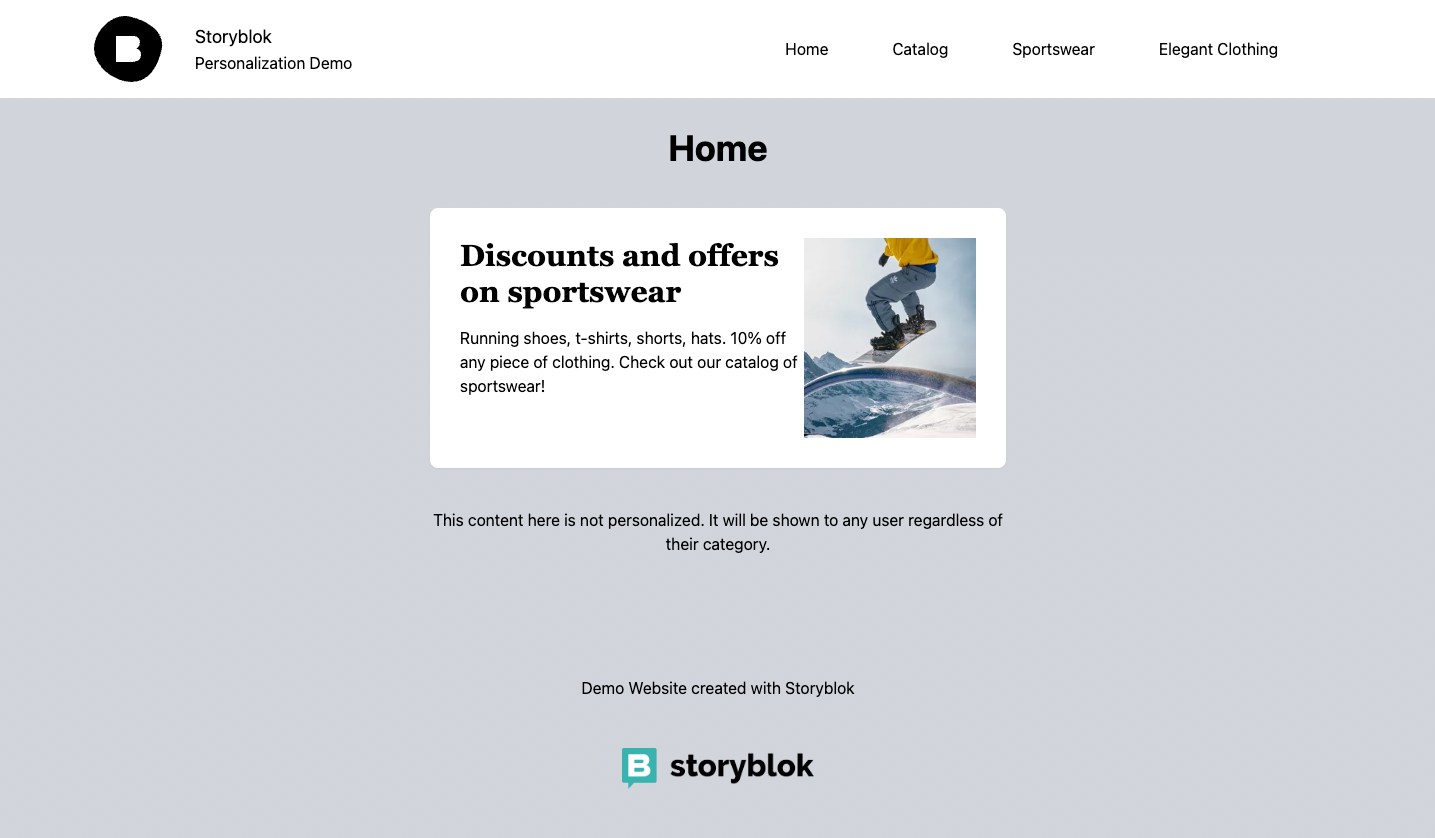
We’ll have a banner at the top of our landing page. That banner has an initial state, displaying generic content. The user can visit the general catalog, or pick one of the categories: Sportswear or Elegant Clothing. So, we can say we will have two “personas” on our website: the sportswear fans and the elegant clothing shoppers.
Speaking about goals, what we’ll want is to sell more sportswear products. To do that, we will try a campaign that consists in showing discounts and offers to the sportswear fans, to tempt them to purchase more items. When a user visits the Sportswear catalog on their first visit, we will consider that as their favorite category. So, next time the user comes to our website, we will show tailored offers in the banner at the top of the home page.
How do we create the project? Let’s debrief.
Identify users
To identify our target personas (sportswear fans), we will need to set a flag whenever a user visits the sportswear catalog as their first choice. To do that, in this simple project, we will create a cookie called user_type on the visitor’s device, and set the favorite category as the value. If the visitor doesn’t have a user_type cookie, or its value is empty, we will show them the generic banner. If the user_type is “sportswear” or “elegant”, we will show the proper banner.
Frontend
Depending on the technology used to create the website and the features offered by each one of the frameworks, there are multiple ways to achieve our goal. For this example, we will use Next.js and the new approach introduced in version 13 of the framework: the App Router.
With the rendering capabilities of Next.js and the usage of React Server Components, we will be able to render the proper content for each request, based on the value of the user_type cookie that we’ll create. If the user is visiting a category catalog and the cookie value was not set, we will create the cookie before delivering the Catalog page.
To make it easier to follow, we will clone an example repository for the shop website. Run the following command on your terminal:
git clone https://github.com/fgiuliani/storyblok-next-personalization.git
We will go through the main parts of the project later in this article.
Create and organize personalized content
How do we create and organize personalized content? With Storyblok, we can create templates called Content Types for the different types of landing pages that we will handle on our project, but also for other content entities that we will manage (in this case, the products).
Click on the following link to duplicate an example space that contains the necessary content structure already set up for the project:
https://app.storyblok.com/#!/build/136706
Let’s inspect the content structures of our project:
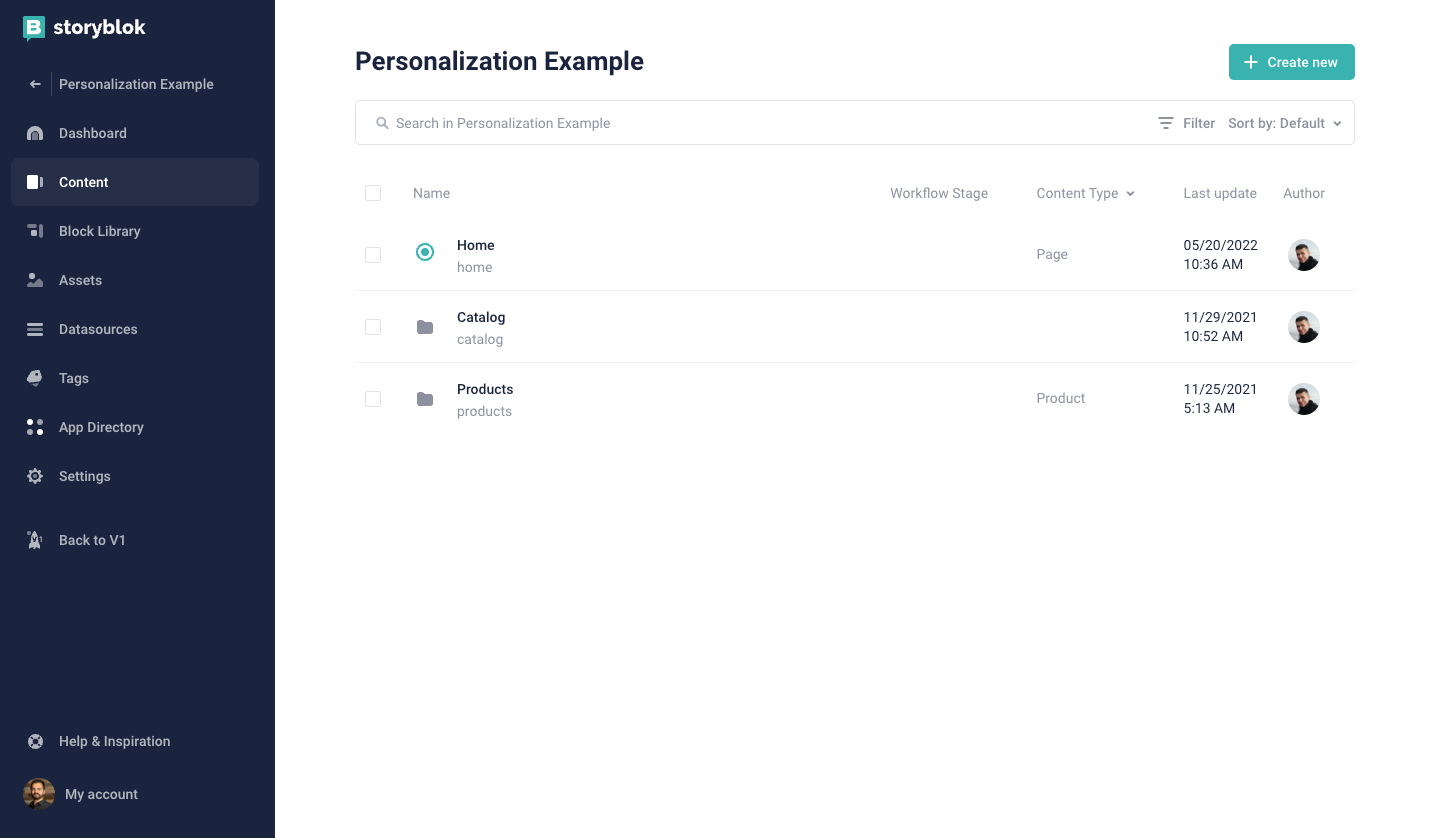
The “Catalog” folder contains three different Catalog pages we will have: General Catalog, Sportswear, and Elegant Clothing. Programmatically, we will retrieve the products and the details depending on the selected category.
The “Products” folder contains the list of entities that represent the products we offer on our website. We will use the details of each one of them on the different Catalog pages.
To enable the real-time preview of the content inside Storyblok’s Visual Editor, we need to set up a “Preview Url”. Once you have duplicated the space, go to the Settings menu, and under the Visual Editor section set https://localhost:3010/ as the Location (default environment). Keep in mind that you need to start an HTTPS server in your localhost, and it should listen to the “3010” port.
Now, go to the “Settings” menu of the Storyblok space and retrieve the “Preview” token from the API Keys section. In the code base of the project, go to the app/layout.js file and replace the accessToken with the preview token you just retrieved.
We can now start the development server by running npm run dev, and see how our website works.
Let’s dive into the main parts of the project to understand how the personalization process is implemented. Click on the Home item:
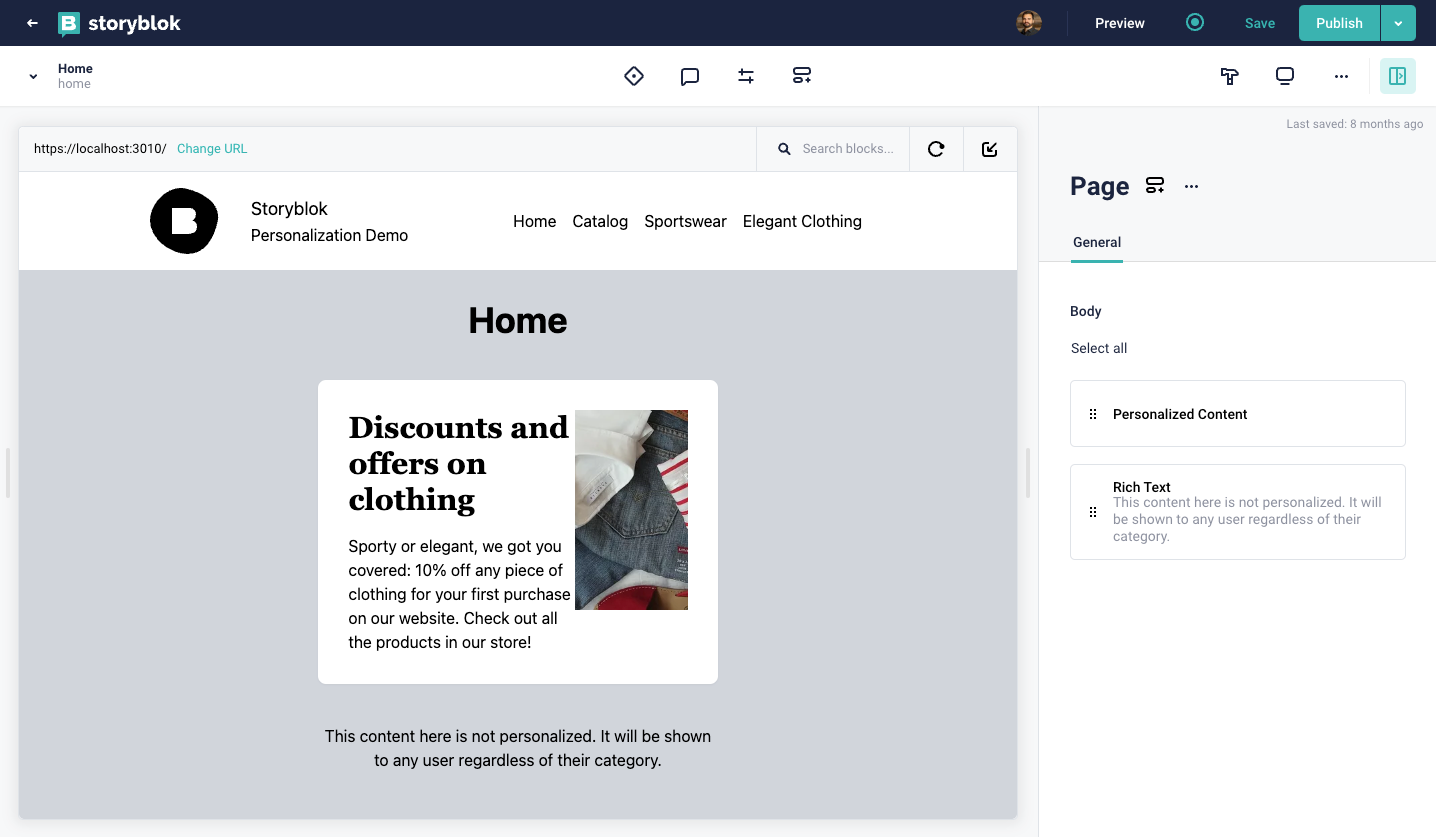
If we open the home page inside the Visual Editor, we’ll see that our page has a “Personalized Content” block that contains the variants for each one of the scenarios we want to handle in our personalized web experience.
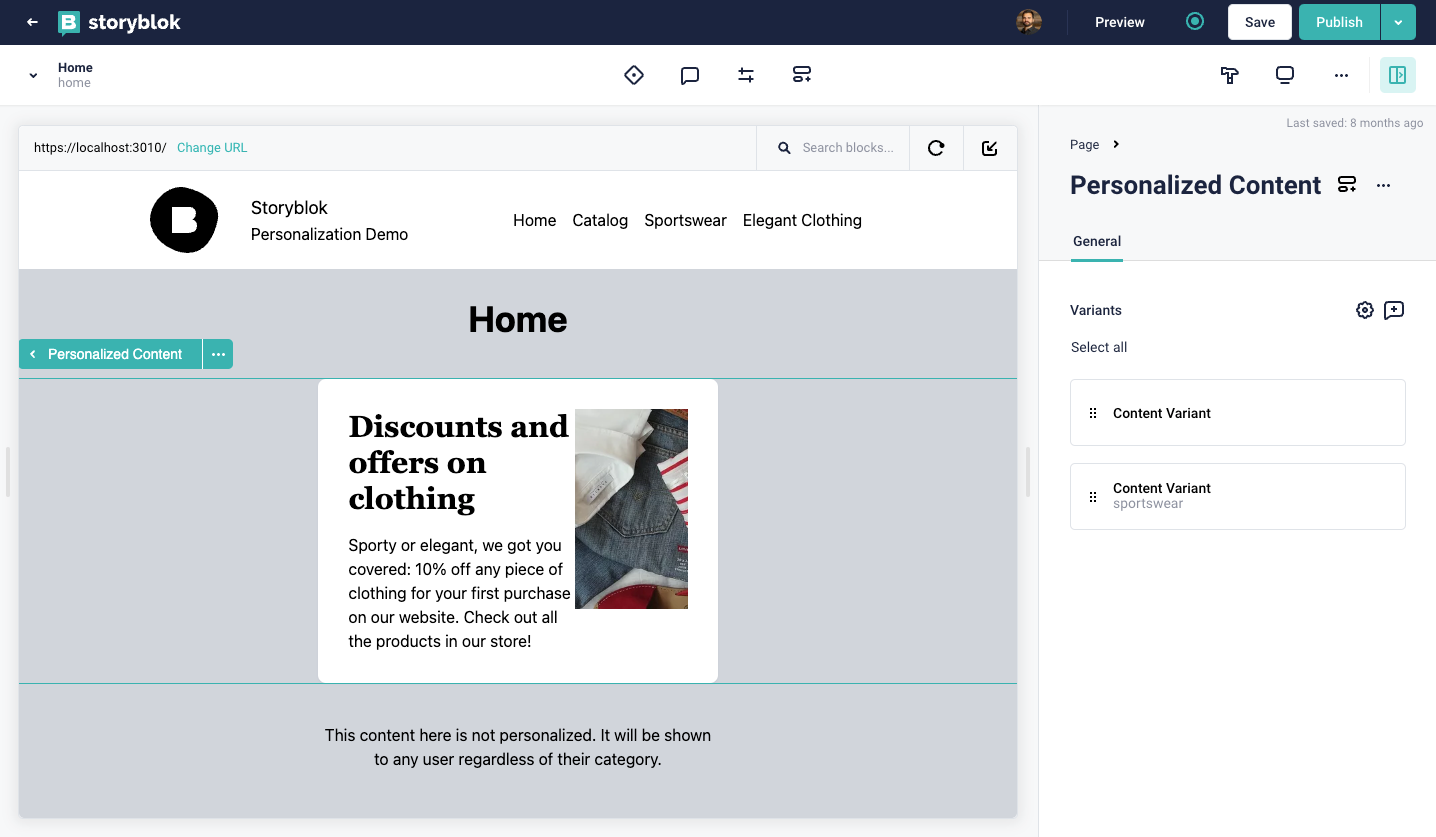
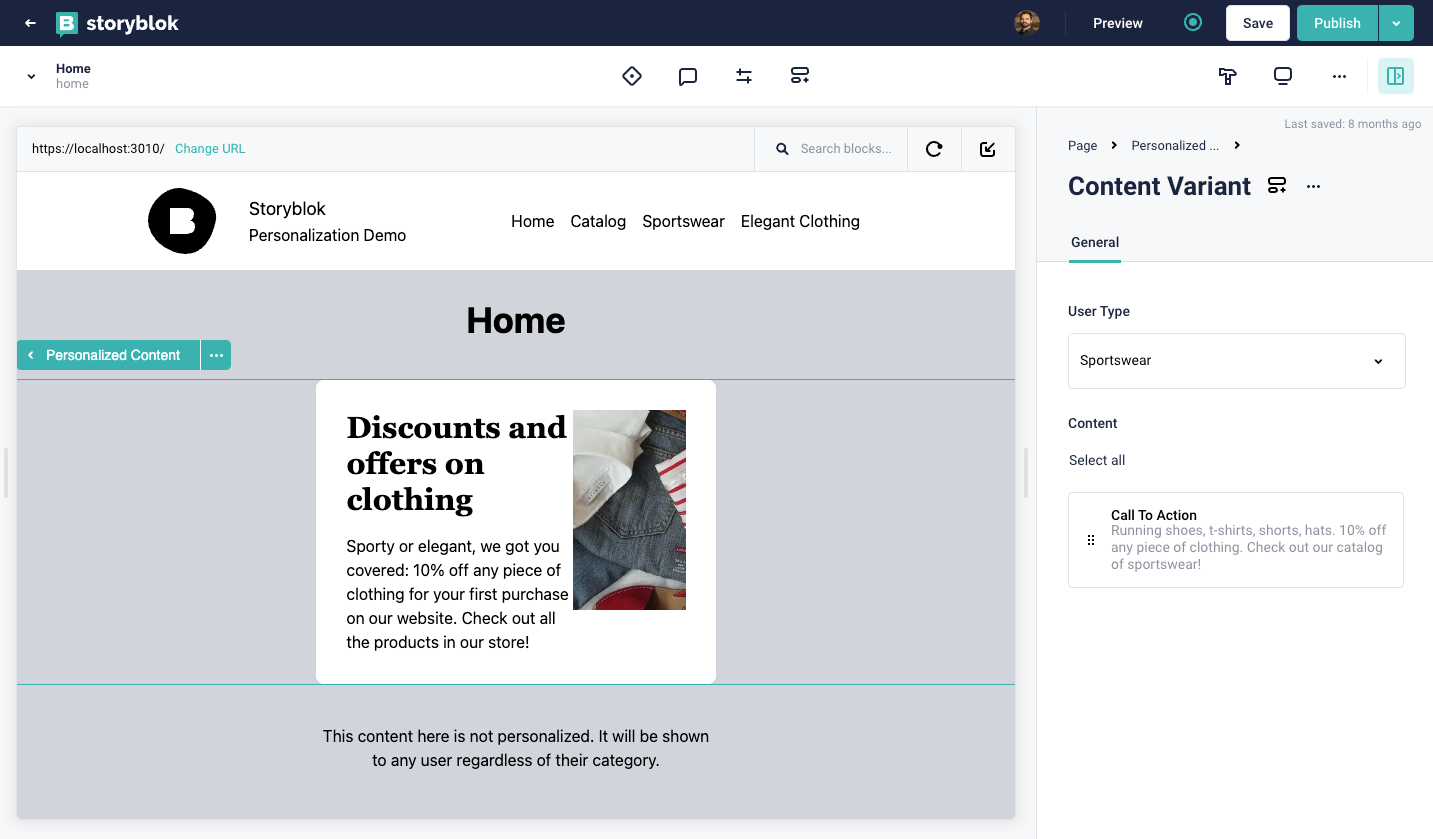
Clicking on the “Personalized Content” block (on the right-hand side panel, or in the visual preview) we’ll see that we have two “Content Variant” components, with a “User Type” property that defines the type of user that will see the content that is added in the “Content” property. If the “User Type” value is empty, we will show the generic banner.
Now, we can link each one of the “Content Variant” blocks to each scenario that we’ll handle in our strategy.
We saw the different components and content structures of our project. Now, let’s inspect the main parts of the frontend code.
Implementation
As we mentioned before, we will use Next.js 13 for the project. We won’t deep dive into the file structure of it, as it follows the usual approach of any Next.js project created with create-next-app.
import { storyblokInit, apiPlugin } from "@storyblok/react/rsc";
import StoryblokProvider from "../components/StoryblokProvider";
import Navigation from "../components/core/Navigation";
import Footer from "../components/core/Footer";

storyblokInit({
  accessToken: "YOUR_ACCESS_TOKEN",
  use: [apiPlugin],
});

...

export default function RootLayout({ children }) {
  return (
    <StoryblokProvider>
      <html lang="en">
        <body>
          <div className="bg-gray-300">
            <Navigation />
            {children}
            <Footer />
          </div>
        </body>
      </html>
    </StoryblokProvider>
  );
}
And the code of components/StoryblokProvider.js, where we defined the connection from the client-side:
"use client";
import { storyblokInit, apiPlugin } from "@storyblok/react/rsc";
import CallToAction from "../components/blocks/CallToAction";
import Catalog from "../components/blocks/Catalog";
import Page from "../components/content-types/Page";
import PersonalizedContent from "../components/blocks/PersonalizedContent";
import RichText from "../components/blocks/RichText";

const components = {
  call_to_action: CallToAction,
  catalog: Catalog,
  page: Page,
  personalized_content: PersonalizedContent,
  rich_text: RichText,
};

storyblokInit({
  accessToken: "YOUR_ACCESS_TOKEN",
  use: [apiPlugin],
  components,
});

export default function StoryblokProvider({ children }) {
  return children;
}
Now, let’s go to app/page.js and see how simple is the code that we need to render our home page:
import { getStoryblokApi } from "@storyblok/react/rsc";
import StoryblokStory from "@storyblok/react/story";

export default async function Home() {
  const { data } = await fetchData();
  return <StoryblokStory story={data.story} />;
}

export async function fetchData() {
  let sbParams = { version: "draft", resolve_links: "url" };
  const storyblokApi = getStoryblokApi();
  return storyblokApi.get(`cdn/stories/home`, sbParams);
}
After we fetched the data corresponding to the Home story from Storyblok (using the Storyblok API Client), we render all the components of the landing page using the StoryblokStory React component provided by the Storyblok SDK. This wildcard component uses the component list we defined on our StoryblokProvider to render the proper HTML content based on the type of component coming from the Storyblok API.
One of the components we will render on the Home page is the “Personalized Content” block, which depends on the type of user visiting the website. Let’s see the code of components/blocks/PersonalizedContent.js to see how that is handled:
"use client";
import { storyblokEditable, StoryblokComponent } from "@storyblok/react/rsc";
import { getCookie } from "cookies-next";

const PersonalizedContent = ({ blok }) => {
  const user_type = getCookie("user_type") || "";
  const variant = blok.variants.find((v) => v.user_type === user_type);
  return (
    <div {...storyblokEditable(blok)}>
      {variant &&
        variant.content.map((nestedBlok) => (
          <StoryblokComponent blok={nestedBlok} key={nestedBlok._uid} />
        ))}
    </div>
  );
};

export default PersonalizedContent;
As we mentioned, we check for the user_type cookie (using the cookies-next library) and, based on its value, we render the proper content variant.
Let’s inspect our Catalog, where we will set the value for the user_type cookie. First, let’s see app/catalog/[[...id]]/page.js
import { getStoryblokApi } from "@storyblok/react/rsc";
import Catalog from "../../../components/blocks/Catalog";

export default async function CatalogPage({ params }) {
  const category = params.id ? params.id.join("/") : "";
  const products = await fetchData(category);

  return (
    <main>
      <h1 className="text-4xl mt-[30px] font-bold text-center">{category}</h1>
      <div>
        <Catalog products={products} category={category} />
      </div>
    </main>
  );
}

export async function fetchData(category) {
  let filter_query = {
    component: {
      in: "product",
    },
  };

  if (category) {
    filter_query.category = {
      in: category,
    };
  }

  let sbParams = {
    version: "draft",
    resolve_links: "url",
    filter_query: filter_query,
  };

  const storyblokApi = getStoryblokApi();
  return await storyblokApi.getAll("cdn/stories", sbParams);
}
Using the Storyblok API client we retrieve all the products of the catalog visited by the user. In order to identify the category, we look for its id, defined on the URL in the params object.
Now, let’s see the code of components/blocks/Catalog.js:
"use client";
import Image from "next/image";
import { getCookie, setCookie } from "cookies-next";
const Catalog = ({ products, category }) => {
if (!getCookie("user_type") && category) {
setCookie("user_type", category);
}
return (
<div className="container mx-auto px-[25px] mt-20">
<div className="grid md:grid-cols-4 sm:grid-cols-1 gap-10">
{products.map((product) => (
<div key={product.uuid} className="flex flex-col">
<Image
src={`${product.content.image.filename}/m/500x300/smart/`}
width={500}
height={300}
alt={product.name}
className="h-[250px] w-full object-cover object-top rounded-lg"
/>
<h3 className="mt-6 text-xl">{product.name}</h3>
<span>€ {product.content.price}</span>
</div>
))}
</div>
</div>
);
};
export default Catalog;
As you can see, here is the place where we check if the user already has a favorite category and, if not, we create the user_type cookie to set it.
And that’s it! We have a website with personalized pages created using Storyblok and Next.js.
Deploy to Netlify
Now that our website is ready, let’s go live. We’ll host our website on Netlify, to make it easy to deploy, maintain and have our site available for visitors.
There are multiple ways of deploying a project to Netlify. For this project, we created a “Deploy to Netlify” button.
Click on the Deploy to Netlify button below to deploy a copy of the final version of this project, and have it up and running right for you on your Netlify account.

Wrapping up
In this article, we presented the concept of web personalization and its benefits. We tried to clarify some concepts by showing a small example website created with Next.js and Storyblok. We went through the main steps we should follow to manage customized experiences for the users visiting a website.
Using the ideas from this article as a starting point, we can improve the experience for people who visit our websites.
- Example Project Code: https://github.com/fgiuliani/storyblok-next-personalization
- Example Storyblok Space: https://app.storyblok.com/#!/build/136706
- Storyblok’s Next.js Tech Hub
- Storyblok React SDK
- Next.js App Router


